Essential Sewing Notions : A Guide to Zippers and Their Uses

Sewing is a timeless craft, cherished for its ability to transform fabric into wearable art, home decor, and more. If you’re a beginner, understanding the essential sewing notions and their uses can significantly enhance your sewing projects. From buttons to zippers, each notion has a unique role that can be both functional and decorative. Today, we will explore zippers, its parts and different techniques to use a zipper.
Zippers: What is a Zipper?
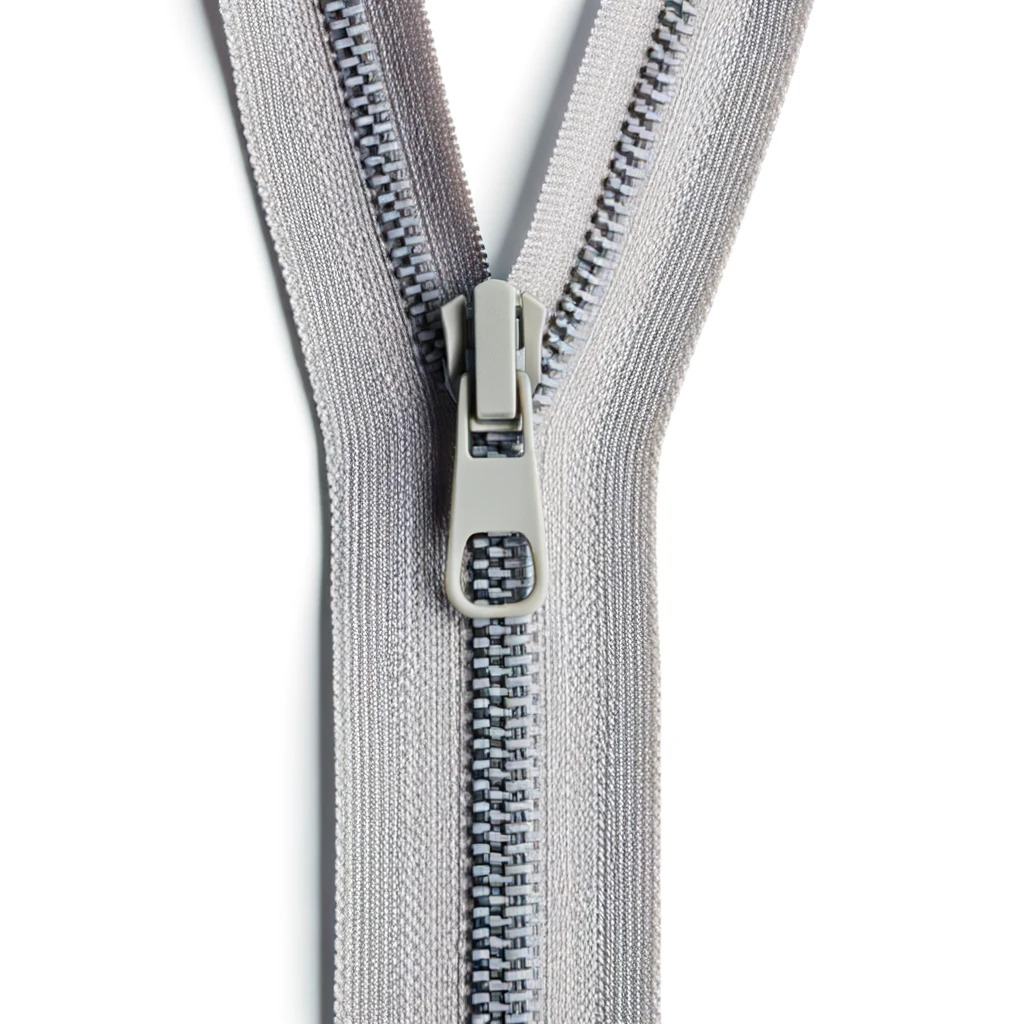
A zipper functions as a fastener, allowing for a full closure by interlocking teeth or coils. It plays a significant role in the garment industry, facilitating both permanent and temporary connections between garment parts that can be easily opened and closed. While primarily practical, zippers can also serve as decorative elements in clothing design. They come in various lengths, colors, and materials, each suited for different types of garments and projects.
Parts of a Zipper
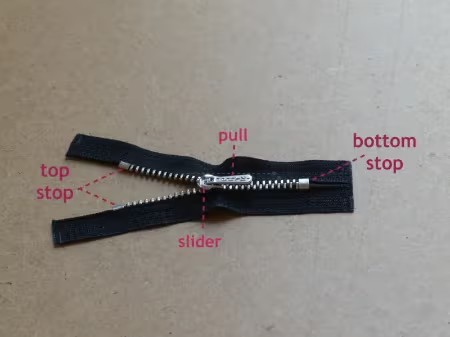
1. Top Stop: It keeps the slider from coming off the top end of the zipper when closed.
2. Bottom Stop: Prevents the slider from sliding off the bottom end when fully open.
3. Pull: The tab you use to open or close the zipper.
4. Slider: The mechanism that moves along the zipper chain to open or close it.

How to Shorten a Zipper?
At times, you might be working on a sewing project or following a pattern that requires a zipper, only to discover that the zipper you have is too lengthy. In such situations, you’ll need to trim the zipper to the appropriate length. A shortened zipper is advisable for sewing various items, such as bags, pouches, pillow covers, etc.
Note: A shortened zipper can be utilized in various sewing projects or patterns, except when the project specifically requires a “separating zipper” or a “metal zipper.”
Simply follow the steps below to shorten the zipper’s length as needed, and then sew it into your project just like you would with any zipper.
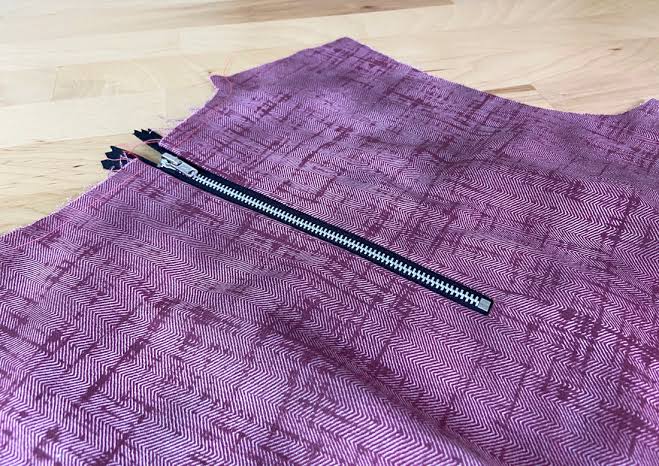
1. Begin by measuring the zipper correctly, starting from the top of the “Top Stop” down to the “Bottom Stop” on the zipper tape. Use a fabric marker to indicate the measurement.
2. Then, stitch across the marked area on the zipper teeth to create a stop. Insert your needle with thread on one side of the teeth and bring it down on the other side.
3. Finally, trim the bottom of the zipper about 1/2″ from the newly created “Zipper Bottom Stop” using scissors.
How to Mark Zipper Placement?
To ensure precise positioning of a zipper within a seam, it’s crucial to mark the seam allowances where the zipper will be inserted. Additionally, marking the upper seam allowance at the top of the zipper is necessary to ensure the zipper pull aligns just below the stitching line.
1. Stitch the seam, leaving an opening for the zipper.
2. Securely finish the stitching end.
3. Place a row of tacks along the stitching line through the opening.
4. Similarly, place a row of tacks along the upper seam allowance.Different Techniques to Sew a Zipper
How you install a zipper can vary based on your project, its function, or a specific aesthetic. Here are seven common methods for installing a zipper:
Lapped method of sewing a zipper
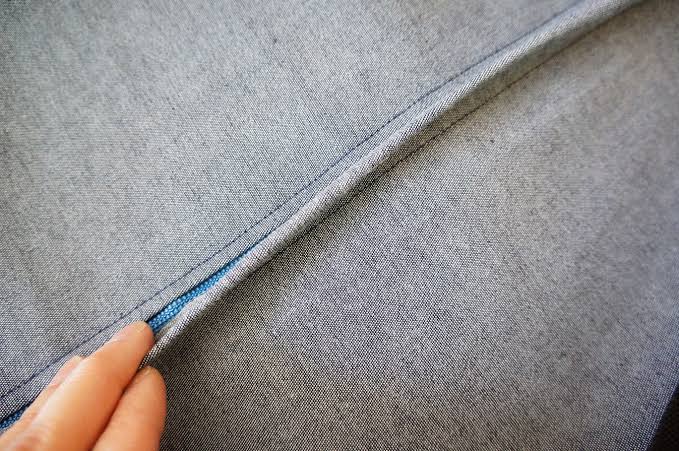
A lapped zipper involves the fabric fold on the left side covering the zipper, sometimes called a placket. This feature is commonly seen on garments, particularly along the side, front, or back seams. In sewing skirts or dresses, a zipper is typically inserted using either a lapped technique or a centered zipper technique (see next technique), both of which necessitate the use of a zipper foot on the sewing machine.
1. Begin by stitching the seam, leaving enough space open to accommodate the zipper.
2. Securely finish the end of the stitching.
3. Insert the right-hand side of the zipper first. Fold back the right-hand seam allowance by 1/2 inch (1.3 cm) and press, ensuring the folded edge is not in line with the seam.
4. Place the folded edge against the zipper teeth and baste in place.
5. Utilizing the zipper foot, stitch along the basting line to secure the zipper tape to the fabric, starting from the bottom of the zipper and stitching up to the top.
6. Fold back the left-hand seam allowance by 5/8 inch (1.5 cm) and press. Then, place the folded edge over the machine line of the other side, pin, and hand-baste along the fold line.
7. Starting at the bottom of the zipper, stitch across from the center seamline and continue up the side of the zipper. Ensure that the finished zipper has its teeth covered by the fabric.
Centered method of sewing a zipper
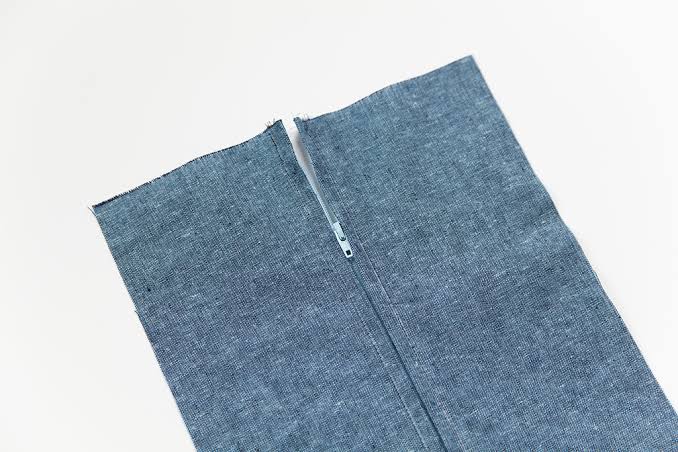
In this technique, you end up with an equal amount of fabric on each side of the zipper. A centered zipper is usually sewn on the center back or center front seam. It’s commonly used for blouses, skirts, and dresses in a center-back seam, but it can also be used on a side seam. For a centered zipper, the two folded edges of the seam allowances meet over the center of the zipper teeth, concealing the zipper completely.
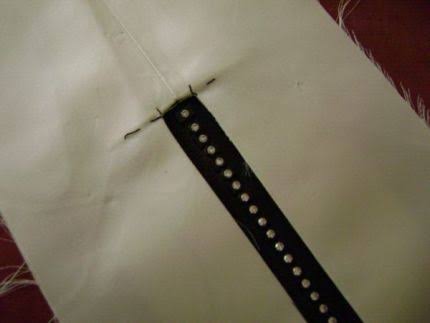
1. Stitch the seam, leaving an opening for the zipper.
2. Baste the remaining seam allowance.
3. Lightly press the seam open.
4. Position the zipper centrally behind the tacked part of the seam. Pin and then baste along both sides.
5. On the wrong side, lift the seam allowance and the zipper tape away from the main fabric and pin.
6. Machine stitch the zipper tape to the seam allowance, ensuring both sides of the zipper tape are securely attached. Stitch through to the end of the zipper tape.
7. From the right side, stitch down one side of the zipper, across the bottom, and up the other side.
8. Remove the tacks and press.
Fly-Front method of sewing a zipper

For both classic pants and jeans, a fly front is the most common method for inserting a zipper. This type of zipper is sewn into the fly of trousers for both men and women. In women’s trousers, the fly placket goes right over left, while in men’s trousers, it goes left over right. Typically, a facing is placed behind the zipper to prevent the teeth from catching. The zipper is attached underneath, so only the curved topstitching is visible on the outside. A fly front requires a heavier zipper with metal teeth, designed to endure the frequent use common in jeans and other pants.
1. Sew the seam, but leave a space for the zipper.
2. Use tailor’s tacks to mark the center front lines.
3. Baste along the fold lines.
4. Cut the left side of the opening straight, 5/8 inch (1.5 cm) from the center line.
5. Tidy up the edges on both sides.
6. Fold the left front along the fold line and press it.
7. Place the fold next to the zipper teeth and pin it. If the zipper is too long, it will stick out past the top of the fabric.
8. Sew along the fold line with a zipper foot, extending the stitching past the seam line.
9. Fold the right front along the fold line, place it over the zipper, and pin it to the stitching on the left side.
10. Inside, pin the zipper tape to the fabric extension.
11. Sew the zipper tape to the fabric along the middle of the tape.
12. On the outside, top-stitch around the zipper, starting at the center front. Make a smooth curve.
13. Tidy up all the edges of the fly-front facing, but leave the top edge raw.
14. On the inside, pin the facing to the left seam allowance, ensuring it fully covers the zipper.
15. Sew the facing to the left seam allowance.
16. Attach the waistband over the zipper and the facings, then trim the facing and zipper.
17. Secure the bottom edge of the facing on the right side to the right seam allowance.
18. The waistband goes over the zipper and acts as a stop. Attach a hook and eye for the pants.
Concealed or Invisible method of sewing a zipper
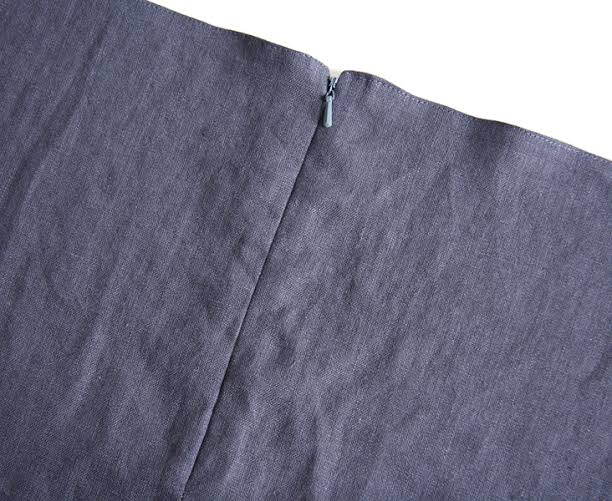
An invisible zipper is concealed within the seam, creating a seamless look that’s only achievable with this type of zipper. It’s commonly used on blouses and dresses. This type of zipper looks distinct because its teeth are on the reverse, leaving only the pull visible on the front. It’s inserted before sewing the seam and requires a special invisible zipper foot.
1. Begin by marking the seam allowance with basting stitches.
2. Align the center of the zipper over the basting line, ensuring the right side of the zipper matches the right side of the fabric. Pin it securely in place.
3. Open the zipper and, using the invisible zipper foot, stitch from the top of the zipper down, being cautious not to sew too close to the teeth. The machine will automatically stop when the foot reaches the zipper pull.
4. Close the zipper and position the other piece of fabric to it, matching along the upper edge. Pin the other side of the zipper tape in place.
5. Open the zipper again and, using the invisible zipper foot, stitch down the other side of the zipper to attach it to the second piece of fabric. Remove any basting stitches.
6. Ensure that on the wrong side, at the bottom of the zipper, the two rows of stitching holding the zipper in place finish at the same point.
7. Sew the seam below the zipper using the regular machine foot, leaving a gap of about 1/8 inch (3 mm) between the stitching lines for the zipper and the seam.
8. Stitch the last 1 1/4 inches (3 cm) of the zipper tape to just the seam allowances to prevent the zipper from coming loose.
9. On the right side, the zipper should be completely invisible, with only the pull visible at the top. Apply a waistband or facing, and press to finish.
Separating or Open-Ended method of sewing a zipper
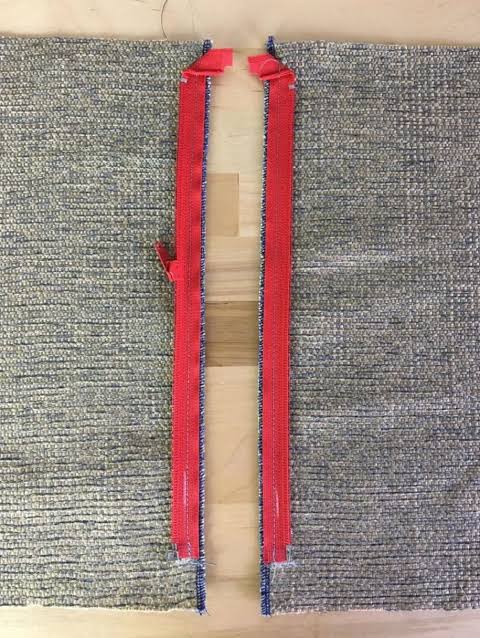
Separating or open-ended zippers fully separate when opened, allowing the two sides of the zip to separate from each other. They’re commonly used on jackets or cardigans, enabling you to open them entirely. The open-ended zipper is commonly used in garments like cardigans or jackets, where both halves need to be fully opened to put the garment on.
1. Turn under the seam allowance at the center front of both fabric pieces and baste. Neaten the edges as desired.
2. Turn up the hem allowance and baste it in place.
3. Position the folded edge of the center front about 1/8 inch (3 mm) from the zipper teeth to allow for the zipper pull to move smoothly up and down. Pin it in place.
4. Align the bottom of the zipper with the hem edge.
5. Use the zipper foot to machine the zipper in place. Start with the zipper open. Stitch 2 inches (5 cm), then pause with the machine needle in the work, raise the zipper foot, and close the zipper.
6. Stitch to the end of the zipper tape and secure.
7. Pin the other side of the zipper in place on the other piece of fabric, ensuring that the fabric lines up properly both at the top and bottom.
8. Undo the zipper, and using the zipper foot, machine it in place on the other side as you did on the first side.
9. Once the zipper is sewn in place, double-check that the hems line up. If they don’t, you’ll need to unpick and start again.
10. Ensure the zipper opens completely.
Closed-Ended method of sewing a zipper
Closed-ended zippers feature a stopper on the end to prevent the zip pull from opening fully. They’re often used on dresses where only a partial opening is needed. You can easily convert an open-end zipper to a closed-end zipper following these steps:
1. Measure the desired length of the closed-end zipper from the top of the top stop to the bottom of the bottom stop.
2. Install the bottom stop at the marked length by pushing it over the teeth and folding the ends over the back of the zipper using pliers.
3. Cut off the excess material approximately half an inch to an inch below the bottom stop, including the pin and box components at the bottom of the separating zipper.
4. Remove the zipper teeth individually underneath the newly installed bottom stop, ensuring you retain the necessary fabric for sewing.
https://youtu.be/RX8Nc-UH8yk?si=cNXWyYmXXTaeCZMM
Decorative method of sewing a zipper
Decorative zippers are designed to be visible, featuring crystals in the teeth or decorative colored teeth.
1. Position a piece of silk organza on the right side of the fabric where the zipper will be placed.
2. Mark a rectangle on the organza matching the length and width of the zipper.
3. Stitch around the rectangle.
4. Cut centrally down between the stitching lines.
5. Trim into the corners.
6. Pull the organza through to the wrong side and press.
7. Position the zipper behind the opening and pin it in place along one side.
8. Pin it in place along the other side as well.
9. Use the zipper foot to stitch it in place, ensuring sharp corners.
10. On the right side, the zipper is visible and exposed, showcasing its design.
https://youtu.be/vdUHs7TjQC4?si=khGP4FOfY1stcXXg
Summary: Zippers and its functions
As part of the Essential Sewing Notions series, I hope you enjoyed our content about zippers. Stay hooked for more posts on sewing notions (e.g., elastics) and let me know if there’s something you’d like me to write about. Till then, enjoy the best sewing patterns from Winslet’s

If you are a sewist, have a look at our recommended sewing machines: beginner sewing machines, sewing tools and notions, coverstitch sergers and overlock machines, embroidery machines and quilting sewing machines, sewing practice sheets and sewing project planner.
If you are looking for sewing patterns, here are some great options: Activewear Sewing Patterns, Plus Size Sewing Patterns, Outerwear Sewing Patterns, Jumpsuit Sewing Patterns, Coord Set Sewing Patterns, Pants Sewing Patterns, Shorts Sewing Patterns, Skirts Sewing Patterns, Dress Sewing Patterns, Top Sewing Patterns, Bodycon Sewing Patterns, Evening Dresses Sewing Patterns, Loungewear Sewing Patterns, Cottagecore Sewing Patterns, Free Sewing Pattern.
Happy Stitching.