How to Use Straight and Zigzag Stitches for Every Sewing Project
When it comes to sewing, two stitches form the foundation of almost every project: the straight stitch and the zigzag stitch. Whether you’re hemming a dress, reinforcing a seam, or adding stretch to knit fabrics, these two stitches are essential to creating strong, well-finished garments.
Understanding how and when to use them can dramatically improve your sewing skills, helping you achieve clean lines, durable seams, and professional-looking results. In this guide, we’ll explore the differences between straight and zigzag stitches, their best uses, and practical tips to ensure your stitches are always on point.
The Straight Stitch
The straight stitch is the foundation of sewing, used in almost every sewing project for joining fabric pieces or sewing seams. It’s straightforward yet versatile, making it essential to learn its nuances.
This is how a straight stitch looks:

(Source)
- Stitch Length
For most fabrics, a straight stitch having a stitch length of 2-3 is suitable. However, you may need to adjust this length based on the fabric’s weight. Lightweight fabrics like silk require shorter stitches to prevent puckering. In contrast, heavyweight fabrics, such as denim benefit from longer stitches to create stronger, more durable seams that can withstand heavy use. For medium-weight fabrics like cotton, a moderate stitch length strikes a balance, providing sufficient strength while maintaining flexibility.
- Stitch Width
Unlike other stitches, the straight stitch is sewn with a stitch width set to 0.
- Sewing your first Straight Stitch
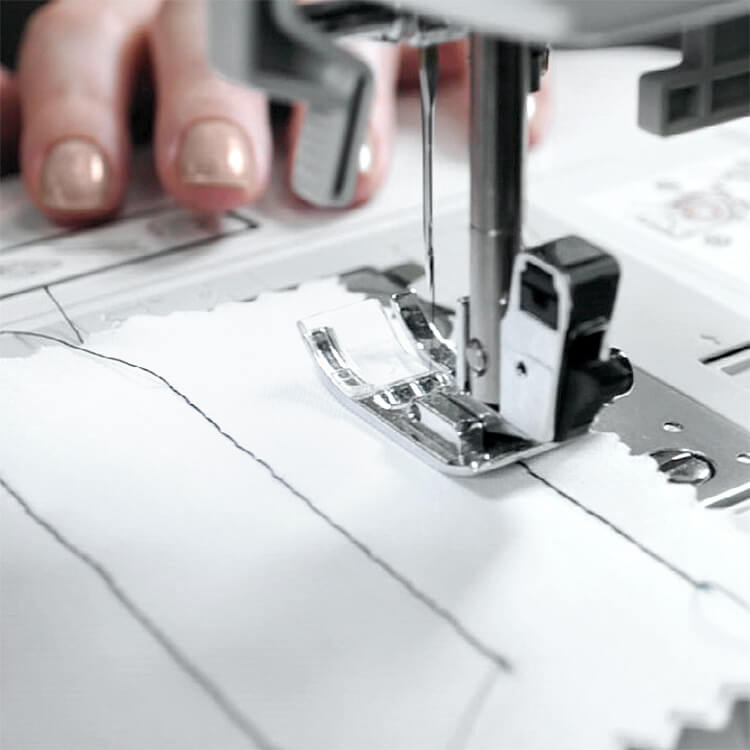
(Source)
Prepare by selecting a size 90/14 needle and opting for a cotton fabric, ideal for beginners due to its ease of handling. Position your fabric beneath the presser foot, ensuring most of it rests to the left of the needle.
To begin, gently lower the needle into the fabric using the handwheel, ensuring it penetrates about half an inch from the seam’s starting point. This initial step prevents the fabric from shifting when sewing starts.
Once set, commence sewing by guiding the fabric smoothly under the needle. Remember to draw both the needle and bobbin threads to the back before lowering the presser foot to secure the stitch’s starting point.
As you sew, consider sewing a few stitches in reverse at the beginning and end of the seam to firmly anchor the threads. When nearing your desired stopping point, repeat this process in reverse to ensure the seam remains secure.
Remember not to sew beyond the fabric’s edge, and use scissors to trim thread ends after each stitching session. While some machines offer automatic thread cutters, it’s advisable you manage thread trimming manually for better control.
Feel free to experiment with different speed settings on your machine to find what suits your comfort level best. To enhance your results, gently guide the fabric in front of the needle, allowing it to feed naturally without tugging or pulling. After sewing, you may also press the fabric with an iron to ensure the stitches lie flat and smooth.
Tip: Inspect your work closely on both sides of the fabric. Ideally, the needle thread should appear on top, with the bobbin thread on the underside. This balanced stitching indicates proper tension and ensures the fabric remains free from any unwanted puckering or pulling.
You can refer to this video for a better understanding:
The Zig-Zag Stitch
The zig-zag stitch serves multiple purposes in sewing. This stitch is exceptionally durable, making it difficult to tear apart and ideal for reinforcing seams or attaching appliques with a dense zigzag pattern.
This is how a zigzag stitch looks:
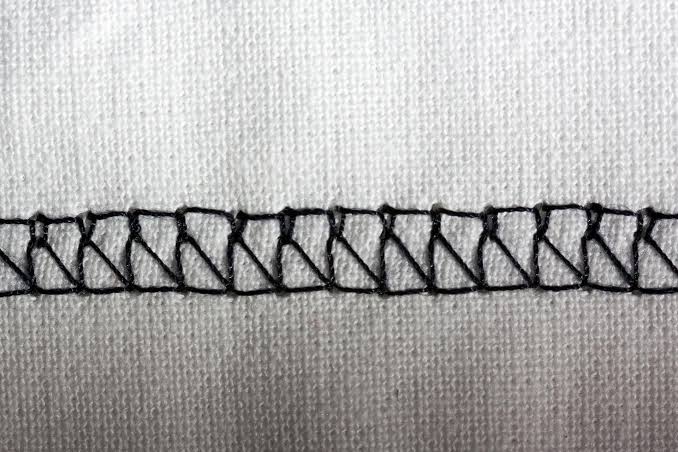
(Source)
- It’s commonly used to prevent fraying and finish the raw edges of fabric seams neatly. This is especially useful for fabrics that tend to unravel, like woven materials.
- When working with elastic or knit fabrics that require flexibility, the zig-zag stitch accommodates stretching without breaking the thread. It provides a secure seam that moves with the fabric.
- Beyond its practical uses, the zig-zag stitch can be used decoratively. Its distinct pattern can be used to embellish garments.
- One of its functional applications is in creating buttonholes. The zig-zag stitch can be adjusted to the desired length and width to form a sturdy and neatly finished buttonhole.
- Stitch Length
Choosing the right stitch length for a zig-zag stitch depends on the specific purpose of your sewing project. For creating buttonholes, a “shorter stitch length” is preferred. When using a zig-zag stitch for applique work, where you’re sewing one piece of fabric onto another, a “longer stitch length” is typically used.
To sum it up, a “shorter stitch length” will compress the zig-zag pattern, making it more compact and dense. This is suitable for tasks requiring strong reinforcement, such as securing edges or stitching around delicate areas. Conversely, a “longer stitch length” spreads out the zig-zag, which can be advantageous for decorative purposes or when sewing thicker fabrics where you need more space between stitches to accommodate the material.
- Stitch Width
The width of the zig-zag stitch affects how far the needle moves from left to right while sewing. For tasks like securing edges or stitching over seams, a “narrower zig-zag width” is often preferred. When using the zig-zag stitch for decorative purposes, such as embellishing garments or creating patterns, a “wider stitch width” is typically chosen.
For sewing stretchy fabrics like knits or elastic, adjusting the stitch width can accommodate the fabric’s stretch. A narrower zig-zag width helps maintain elasticity by allowing the stitches to stretch with the fabric, while a wider width may restrict the fabric’s natural stretch.
- Sewing your first Zigzag Stitch
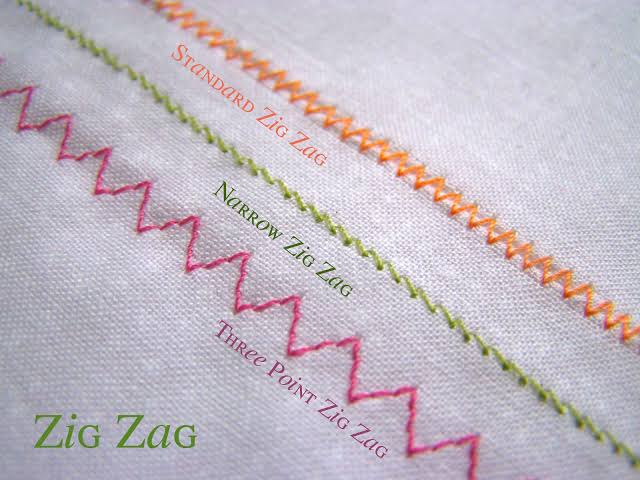
(Source)
To get started, refer to your sewing machine manual to set up for zigzag stitching. Experiment with adjusting both the zigzag stitch length and width settings.
Altering the zigzag stitch length changes how closely spaced the up-and-down movements of the needle are. A shorter stitch length results in more frequent needle movements, creating a compact zigzag pattern suitable for securing edges.
Adjusting the zigzag stitch width controls the distance the needle moves from side to side. A narrower width keeps the needle closer to the centerline, useful for neat edge finishes and sewing delicate fabrics. Conversely, a wider width allows the needle to cover a broader area, beneficial for decorative stitching and attaching appliques.
You can refer to this video for a better understanding:
Real-Life Examples: When to Use Straight and Zigzag Stitches
Understanding the difference between a straight stitch and a zigzag stitch is one thing—but knowing when to use them in real sewing projects can make all the difference. Here are some real-life examples of when each stitch works best.
Straight Stitch in Action
🔹 Sewing Seams for Woven Fabrics
- Example: Stitching the side seams of a cotton dress or linen blouse.
- Why? The straight stitch provides a strong, non-stretch seam perfect for structured garments.
🔹 Topstitching for a Professional Finish
- Example: Adding a visible seam detail on a denim jacket or a tote bag.
- Why? Topstitching with a slightly longer straight stitch (3.0–3.5 mm) reinforces seams and adds a decorative touch.
🔹 Creating Darts for Shaping Garments
- Example: Sewing bust darts on a fitted bodice or contouring a skirt waistband.
- Why? A straight stitch allows for precise control when shaping fabric.
🔹 Basting Stitches for Temporary Holds
- Example: Holding pleats in place before final stitching on a gathered skirt.
- Why? A long straight stitch (4.0–5.0 mm) is easy to remove after the permanent stitch is in place.
Zigzag Stitch in Action
🔹 Finishing Raw Edges to Prevent Fraying
- Example: Sewing a lightweight chiffon blouse without a serger.
- Why? A medium-width zigzag stitch secures raw edges, preventing unraveling in delicate fabrics.
🔹 Sewing Stretch Fabrics Like Jersey or Spandex
- Example: Making a T-shirt or leggings from knit fabric.
- Why? The zigzag stitch flexes with the fabric, preventing popped seams when stretched.
🔹 Securing Elastic to Fabric
- Example: Attaching an elastic waistband to a gathered skirt.
- Why? The zigzag stitch moves with the elastic and ensures a firm hold.
🔹 Creating Decorative Stitching
- Example: Embellishing a pillowcase or appliqueing a design onto a tote bag.
- Why? A wide zigzag stitch adds a beautiful decorative touch while securing fabric layers.
Combining Both Stitches in a Single Project
Many sewing projects require both stitches! Here’s an example:
✨ Sewing a Knit Dress:
- Use a zigzag stitch to sew the side seams (so the fabric stretches without breaking the stitch).
- Use a straight stitch to topstitch the neckline and hem (for a crisp, professional finish).
✨ Making a Pair of Jeans:
- Use a straight stitch to sew the seams together for durability.
- Use a zigzag stitch on the raw edges inside the seams to prevent fraying.
Troubleshooting Common Stitch Issues (Straight & Zigzag Stitches)
Even the most experienced sewists run into stitch problems from time to time. If your straight stitch or zigzag stitch isn’t turning out as expected, here’s a troubleshooting guide to help you fix common issues.
1. Straight Stitch Troubleshooting
| Issue | Possible Cause | Solution |
|---|---|---|
| Skipped stitches | Wrong needle, dull needle, or incorrect threading | Use a new, sharp needle appropriate for your fabric (e.g., universal for woven fabrics, ballpoint for knits). Rethread both top thread and bobbin. |
| Fabric is puckering | Tension too high, stitch length too short, or fabric too delicate | Reduce thread tension slightly, increase stitch length, or use a stabilizer for thin fabrics. |
| Thread is looping on the back | Bobbin not wound correctly, incorrect threading, or tension issue | Check that the bobbin is wound evenly and inserted properly. Rethread the machine and test different tension settings. |
| Fabric isn’t moving forward | Feed dogs are lowered, presser foot pressure too low | Make sure feed dogs are raised and presser foot is pressing the fabric adequately. Increase stitch length slightly. |
2. Zigzag Stitch Troubleshooting
| Issue | Possible Cause | Solution |
|---|---|---|
| Skipped or uneven zigzag stitches | Incorrect presser foot, tension issues, or dull needle | Use a zigzag/standard presser foot (not a straight stitch foot). Adjust tension and replace the needle if needed. |
| Fabric tunnels between the zigzags | Stitch width too narrow, tension too high | Increase the stitch width slightly and loosen thread tension. Using a stabilizer may also help. |
| Zigzag stitch is not forming properly | Bobbin incorrectly inserted or machine incorrectly threaded | Remove the bobbin, rewind it evenly, and reinsert it correctly. Rethread the top thread. |
| Fabric is stretching or distorting | Using the wrong presser foot, feeding too quickly | Use a walking foot for knits or stretch fabrics. Let the machine feed the fabric naturally without pulling. |
Pro Tips to Prevent Stitch Issues
✔ Always test your stitches on scrap fabric before sewing your final piece.
✔ Use the right needle—ballpoint for knits, sharp for woven, heavy-duty for thick fabrics.
✔ Clean your machine regularly to prevent lint buildup, which can cause tension problems.
✔ Use quality thread—cheap or old thread can cause breakage and inconsistent stitches.
Straight Stitch vs ZigZag Stitch: Summary
The Straight Stitch:
- The most commonly used stitch in sewing.
- Best for joining fabric pieces, topstitching, and creating precise seams.
- Can be adjusted in length for basting, reinforcement, or decorative effects.
The Zigzag Stitch:
- Ideal for sewing stretch fabrics and finishing raw edges to prevent fraying.
- Adjustable in width and length to customize flexibility and strength.
- Used for appliqué, decorative stitching, and reinforcing stress points.
When to Use Each Stitch:
- Straight Stitch: Perfect for woven fabrics and structured garments.
- Zigzag Stitch: Works well on stretchy fabrics, raw edges, and special finishes.
Pro Tips for Better Stitches:
- Adjust tension and stitch length based on fabric type.
- Use the right needle and thread to prevent skipped stitches.
- Test your stitches on scrap fabric before starting your main project.
If you are a sewist, have a look at our recommended sewing machines: beginner sewing machines, sewing tools and notions, coverstitch sergers and overlock machines, embroidery machines and quilting sewing machines, sewing practice sheets and sewing project planner.
If you are looking for sewing patterns, here are some great options: Activewear Sewing Patterns, Plus Size Sewing Patterns, Outerwear Sewing Patterns, Jumpsuit Sewing Patterns, Coord Set Sewing Patterns, Pants Sewing Patterns, Shorts Sewing Patterns, Skirts Sewing Patterns, Dress Sewing Patterns, Top Sewing Patterns, Bodycon Sewing Patterns, Evening Dresses Sewing Patterns, Loungewear Sewing Patterns, Cottagecore Sewing Patterns, Free Sewing Pattern.
Happy Stitching.