
Mastering Collars: A Beginner’s Guide to Different Styles and How to Sew Them
A collar can completely transform the look of a garment, from a sharp, professional shirt collar to a delicate Peter Pan collar. Whether you’re making a classic button-down, a stylish dress, or an elegant coat, choosing the right collar adds personality and structure to your design. For beginners, understanding different collar types and how they’re constructed can seem overwhelming. In this guide, we’ll explore the most common collar styles, their real-life applications, and troubleshooting tips to ensure your collars look crisp and professional.
Types of Collars
Understanding different types of collars is essential for any sewing enthusiast. Collars can dramatically alter the look and style of a garment. Here’s an overview of the various collar types you might encounter:
1. Flat Collars
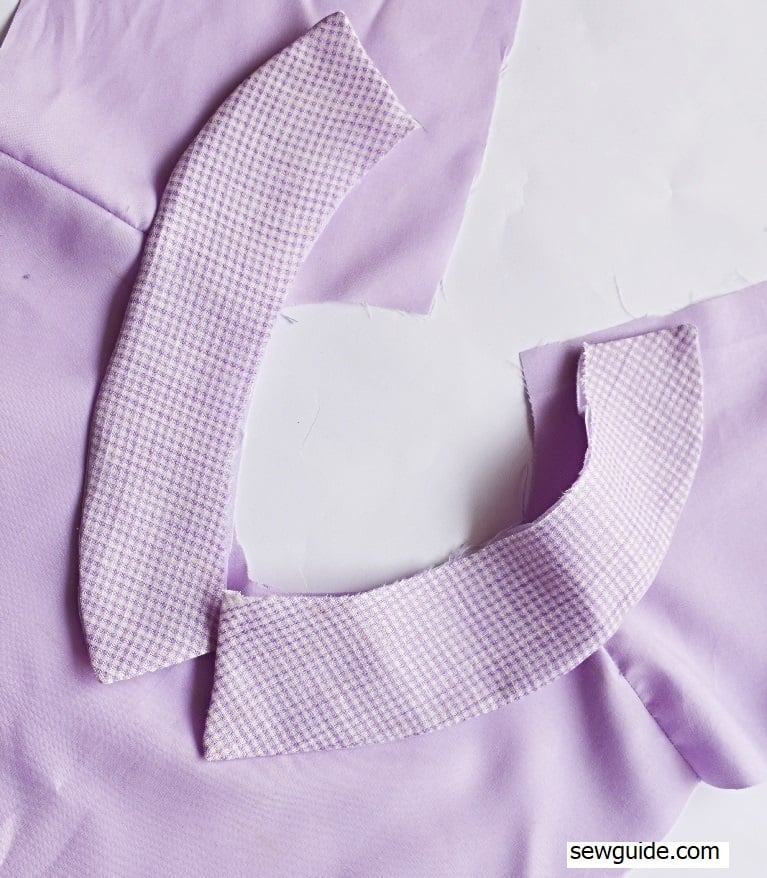
Source: sewguide.com

Flat collars lie flat against the garment and are often cut from a single piece of fabric. They are easy to construct and commonly found on children’s clothing and casual wear.
- Peter Pan Collar: Characterized by its soft, rounded edges, the Peter Pan collar adds a charming, vintage look to blouses and dresses.
- Bertha Collar: This large, rounded collar extends over the shoulders and is often made from lace or decorated fabric. It’s typically seen on formal or period-style clothing.
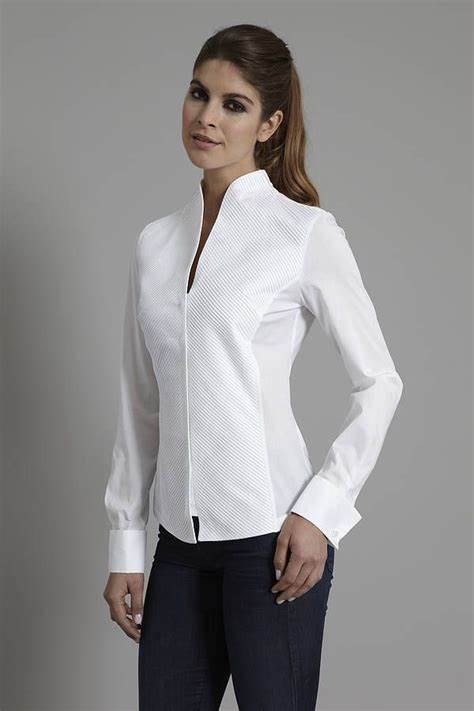
2. Stand Collars
Source: https://th.bing.com/th/id/OIP.5ELYUVBb5QcLLDEq3E_NHwAAAA?rs=1&pid=ImgDetMain
Stand collars stand up around the neck and do not have a fold-over section. They are usually stiffened with interfacing to maintain their shape.
- Mandarin Collar: A short, unfolded stand collar often seen on shirts and jackets. It provides a clean, modern look and can be embellished with buttons or embroidery.
- Nehru Collar: Similar to the Mandarin collar but usually features a button closure at the front. Named after Jawaharlal Nehru, the first Prime Minister of India, who popularized this style.
3. Roll Collars
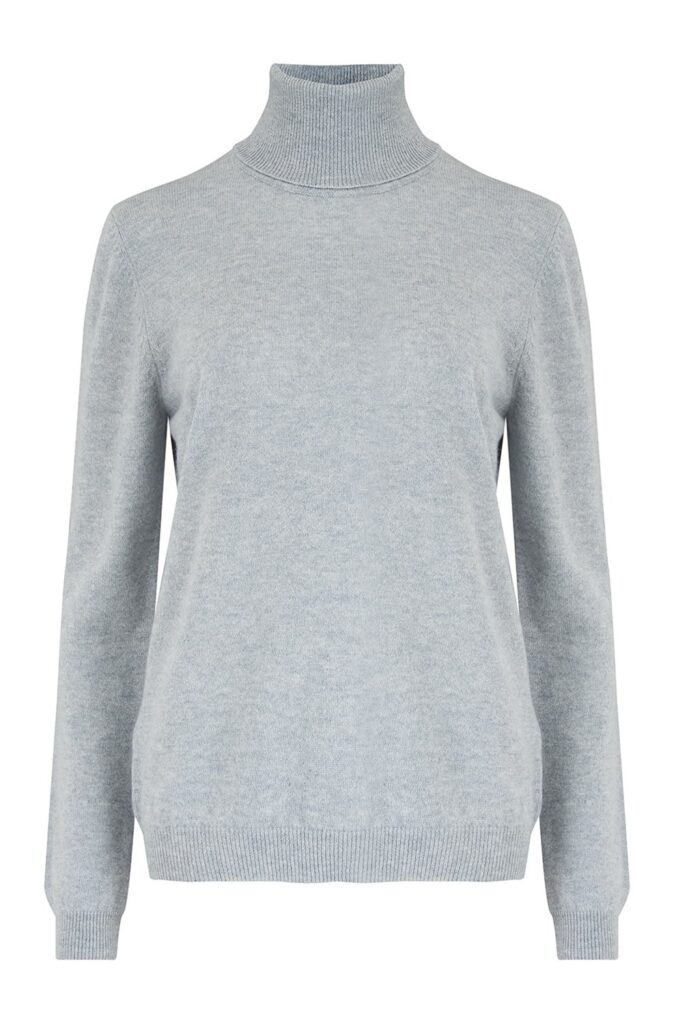
Source: https://www.trilogystores.co.uk/content/images/cmsfiles/product/3009/10107-zoom.jpg
Roll collars roll over themselves and create a soft, rounded edge that frames the face. They are suitable for both casual and formal garments.
- Shirt Collar: Found on most dress shirts, this collar features a stand and a rolled section that can be buttoned down or left open. Variations include the classic, spread, and button-down collars.
- Convertible Collar: Often used in casual shirts and dresses, this collar can be worn open or closed and typically has a notch where the collar meets the lapel.
4. Shawl Collars

Shawl collars have a continuous curve that joins the lapels, creating a smooth, rounded look. They are typically found on formal wear such as tuxedos and dressing gowns.
- Tuxedo Collar: A formal collar with a luxurious feel, often made from satin or a similar material. It’s a staple on tuxedos and evening jackets.
- Cardigan Collar: A softer, more casual version of the shawl collar found on sweaters and cardigans, providing comfort and a relaxed look.
How to Attach a Collar: Steps and Techniques
Step 1: Join the Shoulder Seams
Align the shoulder seams of your garment and sew them together. Press the seams open to ensure they lie flat.
Step 2: Apply Interfacing to the Collar
Cut interfacing to match the collar pieces and fuse it to the wrong side. This step adds structure and stability to the collar.
Step 3: Sew the Collar Pieces
Place the collar pieces right sides together and sew along the outer edges. Trim the seam allowance to reduce bulk and clip the corners for a sharp finish when turned.
Step 4: Turn and Press the Collar
Turn the collar right side out and press it flat. Use a point turner to ensure the corners are neat.
Step 5: Attach the Collar to the Neckline
Pin the collar to the neckline, matching the notches and center back. Sew the collar to the garment, keeping the seam allowance consistent.
Step 6: Finish the Neckline Seam
Use a facing or bias binding to neatly finish the inside of the neckline, concealing the collar seam and giving the garment a professional finish.
Constructing a Flat Collar
- Cut out the fabric for the collar accurately, ensuring the two halves match perfectly.
- Cut a fusible interfacing on the same grain as the collar and apply it to the upper collar. This adds structure and stability to the collar.
- Insert tailor’s tacks at the center front point of the collar as indicated by a dot on the pattern piece. This helps in aligning the collar during construction.
- Pin the upper collar and under collar together, right side to right side. Align any notches and ensure the cut edges match.
- Machine stitch 5/8 inch (1.5 cm) along the raw outer curved edge to the lower edge of the collar. At the center front, ensure the stitching goes through the tailor’s tack. If stitching a curve is challenging, mark the fabric first with chalk.
- Trim the under collar seam allowance to half of its width to reduce bulk.
- Trim around the curve with pinking shears, reducing both layers to allow the fabric to turn smoothly.
- Clip the curve on the collar using small cuts at 90 degrees to the stitching line, clipping through the pinked seam.
- Press the seam allowance of the upper collar onto the collar to ensure a flat and neat finish.
- While the collar is still warm from the steam iron, turn it to the right side, ensuring all edges are neat and sharp.
- Working from the inside of the collar, push all the seam allowance toward the under collar and machine stitch it to the under collar. This is called understitching and helps hold the collar in shape. Understitch as far through the curve as possible.
- Press the curved edge flat, making sure the seam is pushed out completely on the right side, resulting in a professional-looking collar.
Constructing a Mandarin Collar
A mandarin collar is a short, stand-up collar style often found in traditional East Asian clothing. This type of collar encircles the neck and is not folded down. It’s typically used for shirts, dresses, and jackets, giving a neat and elegant appearance.
- Cut two strips of fabric on the bias for the collar. The length should match the neckline measurement plus seam allowances. Interface one strip to add firmness.
- Place the interfaced strip and the other strip right sides together and stitch along the top edge.
- Turn the collar right side out and press.
- Pin the collar to the neckline, matching the raw edges. Stitch, ensuring the interfaced side is on the outside.
- Fold the inside edge of the collar under and slip stitch to the neckline seam. Press the collar again for a crisp finish.
Constructing a Stand Collar
The stand collar, similar to the mandarin collar, stands up around the neck but can be taller and more structured. This collar type is often seen in uniform shirts and formal wear.
- Cut the collar pieces, ensuring one is interfaced for structure.
- Stitch the pieces together along the top edge, right sides facing.
- Turn right side out and press.
- Sew the collar to the neckline, ensuring it’s evenly distributed.
- Slip stitch the inside edge down and press well.
Constructing a Peter Pan Collar
A Peter Pan collar is a flat, round-edged collar often seen on children’s clothing and vintage-style garments. It’s known for its playful and sweet appearance.
- Draft the collar pattern to fit the neckline. Cut two pieces of fabric and interface one for structure.
- Stitch the two pieces together along the outer edge, right sides facing.
- Turn the collar right side out and press.
- Pin the collar to the neckline and stitch in place.
- Fold the inside edge under and slip stitch to the garment. Press the collar for a neat finish.
Constructing a Blouse Collar with Revers
Revers are folded back parts of the collar, often found on jackets and tailored garments.
- Cut the collar pieces and interfacing according to your pattern. You’ll need two fabric pieces and one interfacing piece for each collar section.
- Fuse the interfacing to the wrong side of one of the collar pieces. This provides stiffness and shape to the collar.
- Place the two collar pieces right sides together and sew around the edges, leaving the neckline edge open.
- Trim the seam allowances and clip the curves to reduce bulk.
- Turn the collar right side out and press it flat.
- Pin the collar to the neckline of the garment, matching notches and center points. Sew the collar to the neckline. Ensure the stitches are even and secure.
- Mark the fold line for the revers on the garment. This is where the collar will fold back. Fold and press the revers in place. Topstitch or understitch along the fold line to keep the revers neatly in place.
- Finish the raw edges of the collar and neckline with bias binding or a facing for a clean look.
Real-Life Applications of Different Collar Types
👔 Office & Formal Wear: Classic shirt collars, stand collars, and notched collars give a polished, professional look.
👗 Casual & Vintage-Inspired Outfits: Peter Pan collars, sailor collars, and soft roll collars add charm and nostalgia.
🎭 Statement & High-Fashion Pieces: Dramatic shawl collars or exaggerated turtlenecks create bold, eye-catching silhouettes.
🧥 Outerwear & Jackets: Shawl collars, stand collars, and convertible collars provide structure and warmth.
Troubleshooting Common Collar Sewing Issues
❌ Collar isn’t lying flat
✔ Check grainline placement and consider using interfacing for stability.
❌ Uneven collar points
✔ Trim and grade seams carefully before turning the collar right side out.
❌ Collar stand doesn’t sit neatly
✔ Make sure the collar stand and neckline match perfectly before stitching.
❌ Bulky seams making the collar look messy
✔ Trim excess seam allowance and press thoroughly for a crisp finish.
Final Tips for Choosing and Sewing Collars Successfully
✨ Use interfacing for a professional finish, especially for structured collars.
✨ Choose the right fabric—stiff fabrics work well for sharp collars, while softer fabrics create gentle curves.
✨ Practice with scrap fabric before sewing collars onto your main project.
✨ Press as you go to ensure sharp edges and smooth seams.
Summary : Different types of collars for sewing
1. Common Collar Types and Their Features
✅ Flat Collars
- Example: Peter Pan collar
- Lies flat against the garment, giving a soft, vintage-inspired look.
✅ Stand Collars
- Example: Mandarin collar
- Stands up around the neckline without folding, ideal for modern or minimalist designs.
✅ Roll Collars
- Example: Classic shirt collar
- Features a structured stand and a folded-over section, commonly seen in formal wear.
✅ Convertible Collars
- Example: Notched collar
- Can be worn open or closed, giving versatility to garments like jackets and blouses.
✅ Shawl Collars
- Example: Found on blazers and coats
- Smoothly curves around the neckline, adding an elegant touch to outerwear.
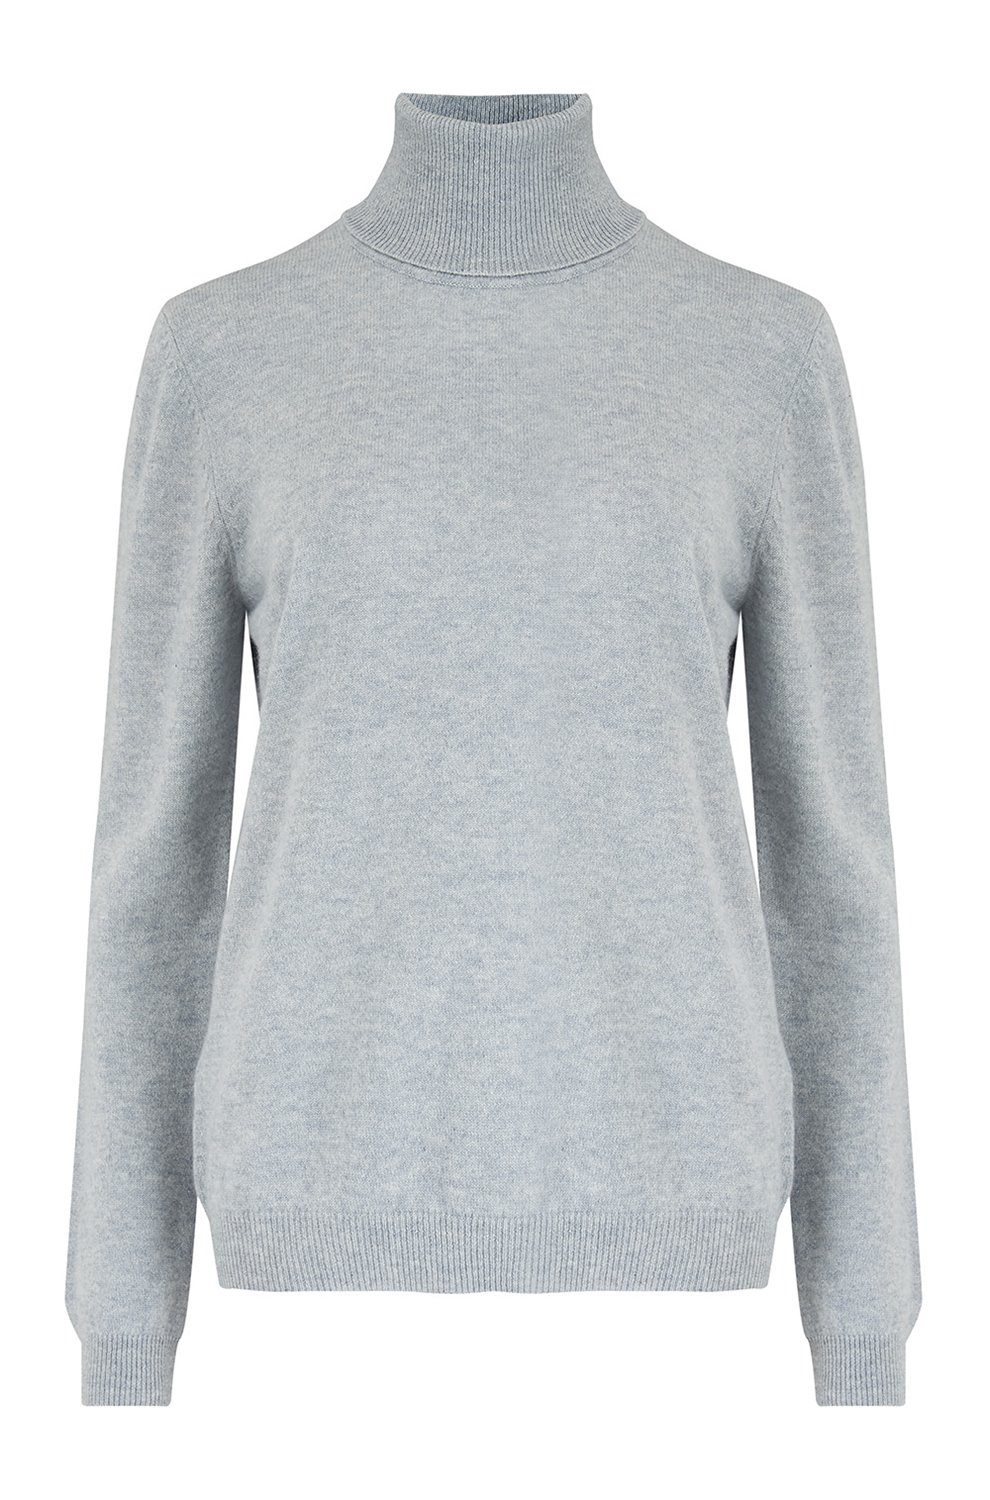
✅ Turtlenecks & Mock Necks
Provides warmth and a sleek, modern silhouette.
Example: High-neck sweaters and tops
If you are a sewist, have a look at our recommended sewing machines: beginner sewing machines, sewing tools and notions, coverstitch sergers and overlock machines, embroidery machines and quilting sewing machines, sewing practice sheets and sewing project planner.
If you are looking for sewing patterns, here are some great options: Activewear Sewing Patterns, Plus Size Sewing Patterns, Outerwear Sewing Patterns, Jumpsuit Sewing Patterns, Coord Set Sewing Patterns, Pants Sewing Patterns, Shorts Sewing Patterns, Skirts Sewing Patterns, Dress Sewing Patterns, Top Sewing Patterns, Bodycon Sewing Patterns, Evening Dresses Sewing Patterns, Loungewear Sewing Patterns, Cottagecore Sewing Patterns, Free Sewing Pattern.
Happy Stitching.