Understanding Interfacings: A Beginner’s Guide
Interfacings quietly provide the support and structure that garments need to shine. Whether you’re crafting a crisp collar or adding shape to a flowing skirt, understanding the ins and outs of interfacings can take your sewing game to the next level.
Let’s delve into the fascinating world of interfacings and learn how to wield their power.
What Are Interfacings?

(Source)
Interfacings provide extra stability to your fabric, essential for ensuring the optimal functionality of the product. They enhance the fabric’s stiffness and prevent sagging. Interfacings shouldn’t be visible in the final product, so always apply it to the back of the fabric before you begin stitching.
Fusible vs. Non-Fusible Interfacings
One of the key distinctions among interfacings is whether they’re fusible or non-fusible. Fusible interfacings, also known as iron-on interfacings, can be bonded to the fabric using heat, making them a convenient choice for home sewers.
On the other hand, non-fusible interfacings, also known as sew-in interfacings, require a bit of stitching to attach them to the fabric, but they offer flexibility in terms of placement and adjustment.
Types of Fusible Interfacings
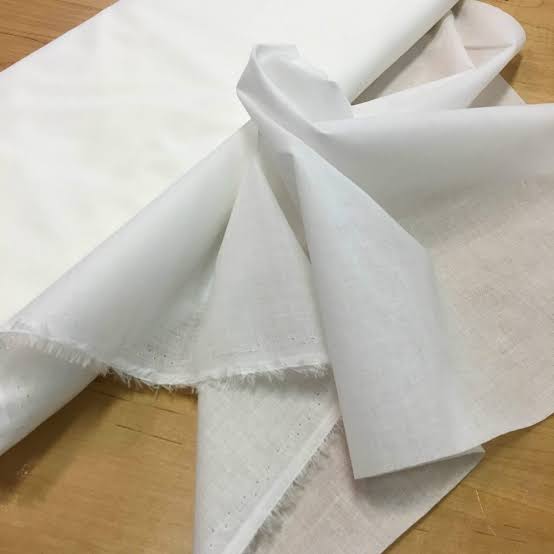
(Source)
Now, let’s take a closer look at the different types of fusible interfacings and their ideal applications:
- Woven Fusibles: Perfect for woven fabrics, these interfacings play well with their woven counterparts, offering support and structure for more tailored garments and crafts.
- Knitted Fusibles: Designed to stretch along with knit fabrics, these interfacings ensure a harmonious blend of comfort and stability, making them a top choice for stretchy fabrics.
- Non-Woven Fusibles: Available in various weights, non-woven interfacings provide lightweight support for collars, cuffs, and facings, enhancing the overall structure of your garments.
- Lightweight Woven Fusibles: This almost sheer, light-weight woven interfacing is a gem for light to medium-weight fabrics. While it can be a bit tricky to cut due to its tendency to stick to scissors, its subtle support adds a touch of elegance to your sewing projects.
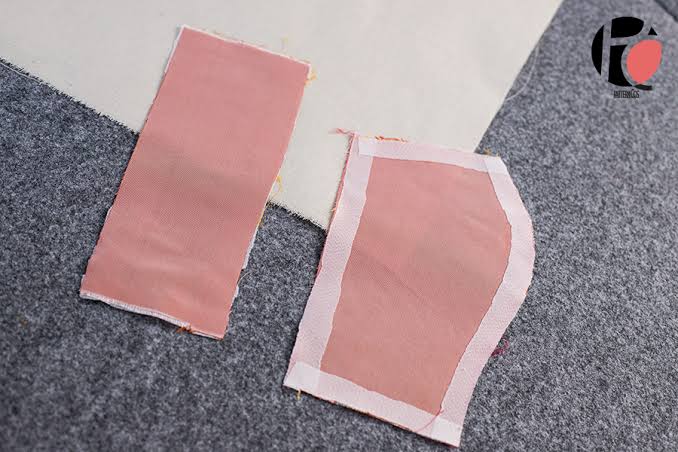
Applying Fusible Interfacings: A Step-by-Step Guide
Now that you’ve chosen the perfect interfacing for your project, it’s time to put it to work.
Follow these steps to apply a fusible interfacing like a seasoned pro:
- Prepare Your Workspace: Lay your fabric flat on a pressing surface, ensuring it’s smooth and free of wrinkles.
- Position the Interfacing: Place the fusible interfacing with the sticky side facing down onto the wrong side of your fabric.
- Cover and Press: Cover the interfacing with a dry pressing cloth and lightly mist it with water. Use a steam iron on a steam setting to press the interfacing onto the fabric, applying steady pressure for at least 10 seconds.
- Check and Repeat: After pressing, check to ensure the interfacing has fused evenly to the fabric. If needed, repeat the pressing process until it’s securely attached.
- Cool Down and Proceed: Allow the fabric to cool completely before removing the pressing cloth. Once cooled, you’re ready to pin your pattern onto the fabric and transfer any necessary markings.
Discover how to apply fusible interfacing effectively in this instructional video:
Understanding Non-Fusible Interfacings
Unlike their fusible counterparts, non-fusible interfacings eschew the heat-bonding process in favor of a more traditional approach. These interfacings require a gentle touch and a steady hand, as they are sewn onto the fabric rather than fused. They’re particularly prized for their suitability with sheer or fine fabrics, where the adhesive from fusible interfacings might betray its presence.
Types of Non-Fusible Interfacings
(Source)
Let’s take a closer look at the diverse array of non-fusible interfacings and their remarkable applications:
- Alpaca: Crafted from a blend of wool and alpaca, this tailorings canvas possesses a unique ability to mold and shape difficult fabrics like velvet with ease.
- Collar Canvas: A stalwart companion for shirt collars and boned bodices, this firm cotton canvas lends structure and stability to garments, as well as adding a touch of resilience to craft projects.
- Muslin: A timeless favorite, cotton muslin interfacing finds its place in summer dresses and special-occasion wear, offering gentle support and a whisper of elegance.
- Organza: Pure silk organza emerges as a beacon of light in the world of sheer fabrics, providing the support and structure needed for bridal skirts and ethereal creations.
- Non-Woven Sew-In Interfacing: Versatile and adaptable, this non-woven material proves its worth in crafts and small garment areas, stepping in where woven or fusible alternatives fall short.
Applying Non-Fusible Interfacings: A Step-by-Step Guide
To harness the magic of non-fusible interfacings, follow these simple steps:
- Placement: Align the interfacing with the wrong side of the fabric, ensuring that the cut edges match up perfectly.
- Securing: Pin the interfacing in place, creating a stable foundation for your stitching endeavors.
- Basting: With a basting stitch set at 3⁄8 inch (1 cm) within the seam allowance, sew the interfacing to the fabric, forming a seamless bond that withstands the test of time.
Learn the process of applying non-fusible interfacings with this informative video tutorial:
What weight of interfacing should I opt for?
Interfacings vary in weight, spanning from light-weight to mid- and heavy-weight. As a general guideline, it’s advisable to select interfacing that is slightly lighter than your fabric for optimal balance.
If you’re looking for the best interfacing? SewingInsight has a post that can help you.
Summary
Adding interfacing to your sewing project is an excellent way to enhance fabric stiffness, stability, or reinforce specific areas, while also imparting shape and structure to your project.
For beginners tackling straightforward sewing projects, fusible interfacing is often sufficient and easy to use. This type of interfacing provides the project with a pleasing level of body and structure.
Now equipped with knowledge about interfacing in sewing, its various types, and how to apply them, you’re ready to dive into your project. Happy sewing!