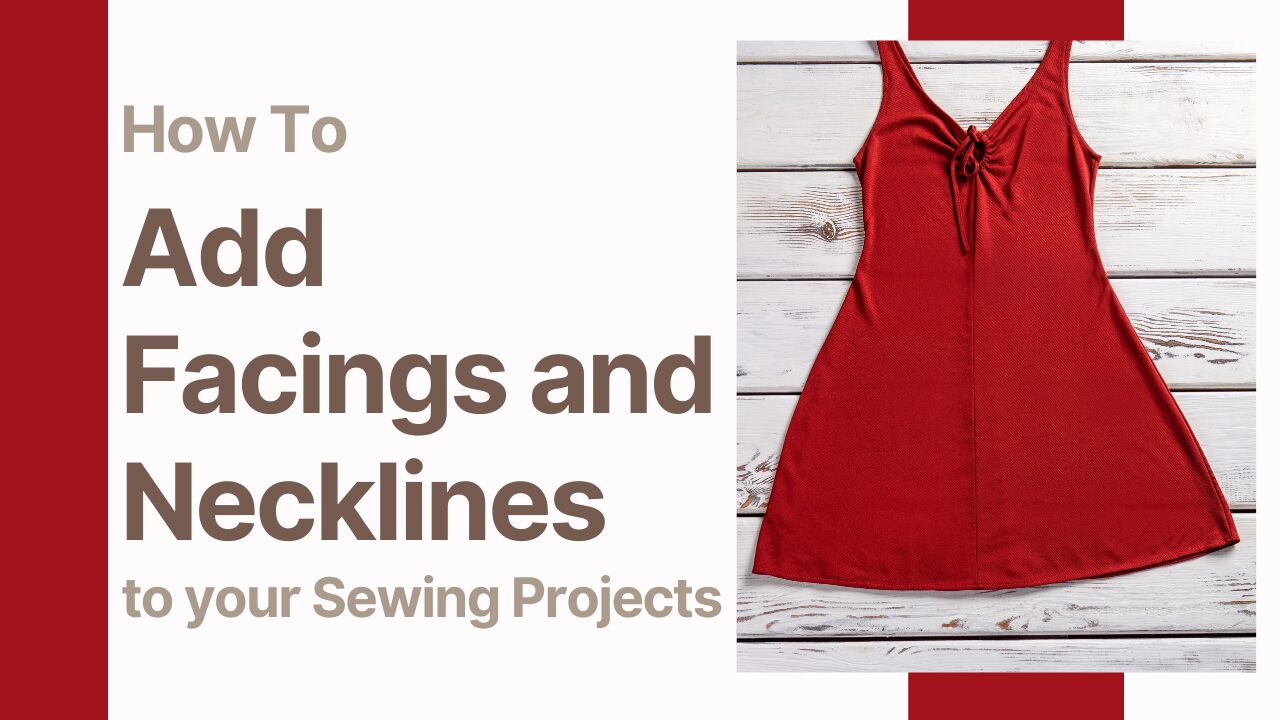
Facings & Necklines Made Easy: A Step-by-Step Sewing Guide
Mastering facings and necklines is a game-changer in sewing. Whether you’re working on a delicate blouse, a structured dress, or a casual t-shirt, properly finished facings ensure durability and a professional appearance. But facings can be tricky—if not done right, they may flip outward, create bulk, or lose shape over time. In this guide, we’ll walk you through the different types of facings, essential techniques, and how to achieve perfect necklines with ease.
What Are Facings?
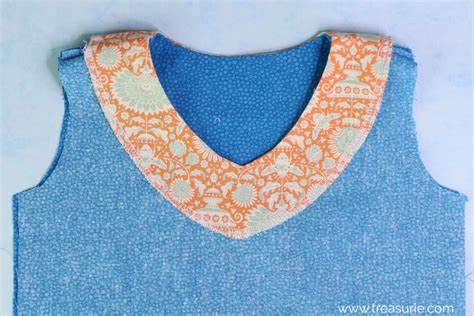
Source: facings in sewing
Facings are fabric pieces that are sewn onto the inside edge of a garment to finish raw edges like necklines, armholes, or even hemlines. They help to reinforce these areas, ensuring that the fabric doesn’t stretch out or fray over time. Facings are typically cut from the same fabric as the garment for a seamless look, or from a lighter fabric to reduce bulk.
Facings are essential for maintaining the shape of necklines and other edges, providing structure while keeping the garment clean and professional on the outside.
Types of Facings
Facings come in a few different forms depending on the type of garment you’re working on:

- Shaped Facings: These are cut to match the shape of the garment’s neckline or armhole. They provide a snug fit along the edge and are often sewn right at the seam. Shaped facings are great for more fitted garments and provide a smooth finish.
- Bias Facings: Bias facings are strips of fabric cut on the bias (at a 45-degree angle to the grainline). They’re a bit stretchier and more flexible than shaped facings, making them ideal for curved necklines or areas that need more flexibility. Bias facings can be sewn to the edge and turned under for a clean look.
- All-in-One Facings: Sometimes you’ll find facings that combine the neckline and armholes in one continuous facing piece. These are common in sleeveless tops or dresses and provide a sleek, all-in-one solution to finishing the garment’s edges.
How to Sew Facings
Sewing facings is a technique used to finish raw edges of a garment, such as necklines, armholes, or waistlines, to create a clean and polished look. Here’s a step-by-step guide:
Materials Needed
- Fabric (same or complementary to your garment)
- Fusible interfacing (optional, for extra structure)
- Sewing machine
- Iron
- Pins, scissors, and other basic sewing tools
Steps
1. Cut the Facing Pieces:
- Most patterns will include facing pieces. If not, you can create your own by tracing the edge of the area you want to finish (like the neckline) and adding a 1–2 inch wide strip that matches the curve.
- Cut the facing pieces out of fabric and fusible interfacing (if using).
2. Apply Interfacing:
- If using fusible interfacing, press it to the wrong side of the facing pieces using an iron. This gives the facing more structure.
3. Finish the Raw Edges of the Facing:
- To prevent fraying, finish the outer raw edge of the facing (the side that won’t be attached to the garment) using a serger, zigzag stitch, or by folding under the edge and stitching it down.
4. Sew the Facing Pieces Together:
- If the facing pieces are in multiple parts (like for a neckline), sew the shoulder seams (or side seams for waist facings) of the facing together, right sides facing. Press the seams open.
5. Attach the Facing to the Garment:
- With right sides together, pin the facing to the edge of the garment (e.g., neckline or armhole). Match seams and notches, and pin in place.
- Sew along the edge using the seam allowance specified in your pattern.
6. Clip Curves:
- Clip notches into the seam allowance (without cutting through the stitching) around curves. This allows the facing to lay flat when turned.
7. Understitch the Facing:
- Press the facing and seam allowance toward the facing. On the facing side, sew close to the seam (within 1/8 inch) to secure the seam allowance to the facing. This step helps prevent the facing from rolling outwards.
8. Turn and Press:
- Turn the facing to the inside of the garment. Press the seam edge so it lies flat and smooth.
9. Tack or Topstitch (Optional):
- You can tack the facing down at the shoulder seams or side seams to keep it in place. Alternatively, you can topstitch close to the edge for a decorative finish.
10. Final Press:
- Give the garment and facing a final press for a crisp finish.
Common Neckline Shapes and How to Approach Them
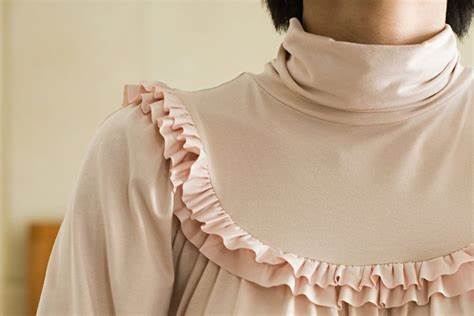
Source: Neckline
Now that we understand facings, let’s talk about necklines. The shape of a neckline can significantly impact the style and fit of a garment, and choosing the right one for your project is key. Below are some popular neckline shapes and tips on how to apply facings to them:
- Round Neckline:
- This is one of the easiest necklines to finish with facings. Whether you’re using a shaped or bias facing, round necklines have a simple, continuous edge that is easy to follow.
- Pro Tip: Understitch the facing to keep it in place and ensure that it doesn’t roll out of the neckline.
- V-Neckline:
- A V-neck requires a bit more precision, as the point of the “V” needs to be sharp and clean.
- Pro Tip: When sewing the facing to the neckline, sew right up to the point of the V and pivot carefully to get a crisp corner. Clip into the seam allowance at the V to allow the fabric to lay flat.
- Boat Neckline:
- The boat neckline is wider and can sometimes gape if not properly stabilized. A shaped facing works best here to match the curves.
- Pro Tip: Make sure to use interfacing in the facing pieces to keep the neckline structured and smooth.
- Scoop Neckline:
- This is a deeper round neckline that can be beautifully finished with either a shaped or bias facing.
- Pro Tip: For a perfectly smooth finish, clip into the seam allowance at regular intervals to help the fabric turn smoothly.
- Square Neckline:
- Square necklines can be trickier due to their corners. A shaped facing is recommended for a snug, precise finish.
- Pro Tip: Clip into the corners, but be careful not to clip too far. Reinforce the corners with a small stitch to ensure they maintain their shape.
How to Sew Neckline
Sewing a neckline can vary depending on the style of the garment (e.g., round, V-neck, square), but here’s a general guide on how to sew a basic neckline:
Materials Needed
- Fabric
- Matching thread
- Pins
- Sewing machine
- Measuring tape
- Scissors
- Iron
Steps
- Prepare the Neckline:
- Stay-stitch around the neckline to prevent stretching. This is a row of straight stitching (done at about 1/4 inch from the edge) around the neckline curve. Do this for both the front and back necklines.
- Cut a Facing (or Use Bias Tape):
- Facing: Cut a fabric piece that matches the neckline shape but is about 2-3 inches wide. This will finish the raw edge.
- Bias Tape: If you’re using bias tape instead of a facing, choose a tape that complements your fabric.
- Sew the Shoulder Seams:
- Join the front and back pieces of your garment at the shoulder seams, making sure to match any notches. Press the seams open with an iron.
- Attach the Facing or Bias Tape:
- Facing: Pin the facing to the neckline, right sides together. Stitch around the neckline, keeping a consistent seam allowance (usually 1/4 inch).
- Bias Tape: Open one side of the bias tape and pin it to the neckline, matching the raw edges. Stitch along the crease of the bias tape.
- Clip the Curves:
- After stitching, clip small notches around the curve of the neckline to help the fabric lie flat. Be careful not to cut through your stitches.
- Understitch:
- For a facing, understitch the seam allowance to the facing (sewing close to the seam on the facing side) to keep it from flipping outwards.
- For bias tape, fold the tape to the inside of the garment and press it flat.
- Press and Finish:
- Press the neckline with an iron to flatten everything out.
- For the facing, either topstitch around the neckline or hand stitch the facing down at the shoulder seams.
- If using bias tape, stitch the folded bias tape to the inside of the neckline.
- Final Pressing:
- Give the neckline one last press to ensure it lies smooth and flat.
Common Facing Mistakes & How to Avoid Them
Even experienced sewists encounter challenges with facings. Here are some common pitfalls and how to fix them:
- Facing won’t stay in place? Understitching is your best friend—it helps keep the facing tucked inside the garment.
- Too much bulk? Trim and grade your seam allowances to reduce thickness.
- Facings are flipping outward? Secure them with a few hidden stitches at the shoulder or side seams.
- Neckline facings feel stiff? Choose a lightweight facing fabric or use softer interfacing for better drape.
When to Use Facings vs. Other Finishing Techniques
Facings are not the only way to finish edges—sometimes, bias binding or linings may be better alternatives. Consider the following:
- Use facings for structured garments where you need extra support and a clean, hidden finish.
- Use bias binding for lightweight, unstructured fabrics that require a softer, more flexible edge.
- Use linings when the inside of the garment needs full coverage and a polished interior.
Key Takeaways for Perfect Facings & Necklines
- Choose the right type of facing based on your garment design (shaped, extended, or bias).
- Understitching is crucial to keep facings in place and prevent them from rolling outward.
- Trim and press your facings well to ensure a clean, professional-looking finish.
- Experiment with bias binding or linings as alternatives when facings aren’t the best option.
- Practice makes perfect! Small adjustments can make a big difference in achieving flawless results.
With the right techniques, you can create beautifully finished necklines and edges that elevate your sewing projects. Want to dive deeper? Check out Winslet’s Patterns Blog for more expert sewing tips and tutorials!
Happy sewing!

If you are a sewist, have a look at our recommended sewing machines: beginner sewing machines, sewing tools and notions, coverstitch sergers and overlock machines, embroidery machines and quilting sewing machines, sewing practice sheets and sewing project planner.
If you are looking for sewing patterns, here are some great options: Activewear Sewing Patterns, Plus Size Sewing Patterns, Outerwear Sewing Patterns, Jumpsuit Sewing Patterns, Coord Set Sewing Patterns, Pants Sewing Patterns, Shorts Sewing Patterns, Skirts Sewing Patterns, Dress Sewing Patterns, Top Sewing Patterns, Bodycon Sewing Patterns, Evening Dresses Sewing Patterns, Loungewear Sewing Patterns, Cottagecore Sewing Patterns, Free Sewing Pattern.
Happy Stitching.
