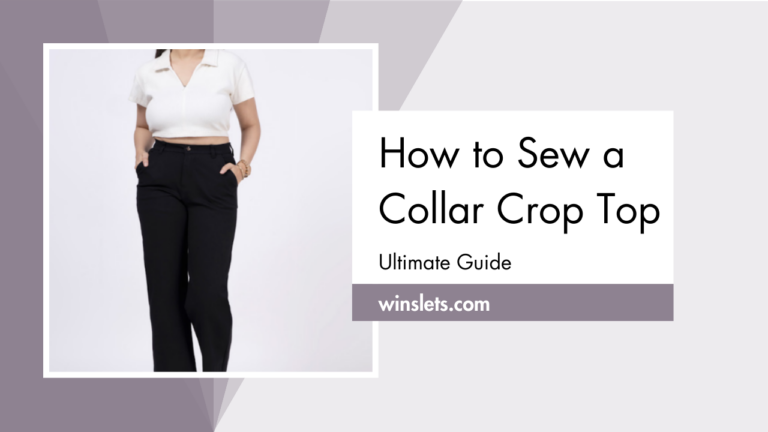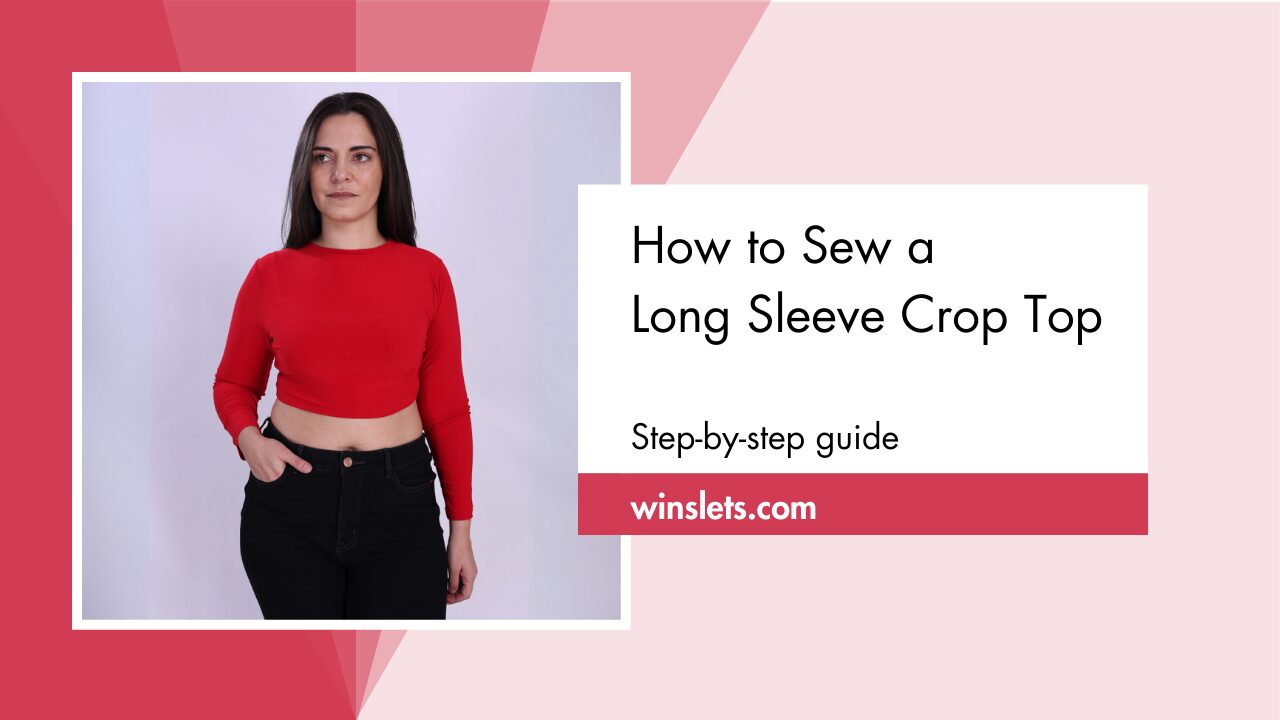
How to Sew a Long Sleeve Crop Top?
Have you wondered how to sew a long sleeve crop top?
Want to look great in a long sleeve crop top that’s in style but not too expensive? Look no further, as I’m going to demonstrate how to create a long sleeve crop top at home right from scratch using the Winslet’s STELLA Long Sleeve Crop Top Pattern.
Let’s go ahead and begin right now!
What sewing supplies do you need to sew a long sleeve crop top?
The basic supplies you need to sew a long sleeve crop top are Sewing Pattern (I used Winslet’s STELLA Long Sleeve Crop Top Pattern in this example), Sewing Machine, Tape Measure, Chalk, Shears, Pins, Iron, Needles, Thread (preferably 3-ply polyester), and a Thread Cutter.
Fabric Recommendation
For crafting a long sleeve crop top, opt for light to medium weight knit fabrics like cotton blends, jersey, lycra, stretch velour, or stretch velvet.
These are renowned for their breathable comfort, elasticity and flexibility, plush softness with stretch, and luxurious texture.

Katie is our model in the picture above and flaunts a long sleeve top made from poly-nylon elastane fabric with the Winslet’s STELLA Long Sleeve Crop Top Pattern. The poly-nylon elastane fabric is celebrated for its smooth, soft, and lightweight feel. This fabric resists bagging and sagging, is scratch-resistant, and outshines rubber in strength and durability—all while maintaining a feather-light weight.
Size Charts
Choose the size (XS, S, M, L, XL, 2XL, or 3XL) that most closely matches your body measurements using the size charts below.
For the breast and hips, measure at the largest region of the body; for the waist, measure at the narrowest part of the body, which is just above the belly button.
It is important to note that you might wish to order a size higher if the table below does not contain your exact measurements.
Both inches and centimeters are used to measure the sizes in the table below.
Body Measurements
| XS (inches) | XS (cm) | S (inches) | S (cm) | M (inches) | M (cm) | L (inches) | L (cm) | XL (inches) | XL (cm) | 2XL (inches) | 2XL (cm) | 3XL (inches) | 3XL (cm) | |
| Bust | 32 | 81.3 | 34 | 86.4 | 36 | 91.4 | 38 | 96.5 | 40 | 101.6 | 42 | 106.7 | 44 | 111.8 |
| Waist | 26 | 66.0 | 28 | 71.1 | 30 | 76.2 | 32 | 81.3 | 34 | 86.4 | 36 | 91.4 | 38 | 96.5 |
Final Garment Measurements
| XS (inches) | XS (cm) | S (inches) | S (cm) | M (inches) | M (cm) | L (inches) | L (cm) | XL (inches) | XL (cm) | 2XL (inches) | 2XL (cm) | 3XL (inches) | 3XL (cm) | |
| Bust | 15.3 | 38.90 | 16.25 | 41.30 | 17.25 | 43.80 | 18.25 | 46.40 | 19.25 | 48.90 | 20.25 | 51.40 | 21.25 | 54.00 |
| Full Length | 14 | 35.60 | 14.5 | 36.80 | 14.7 | 37.30 | 15 | 38.10 | 15.25 | 38.70 | 15.5 | 39.40 | 15.75 | 40.00 |
| Sleee Length | 20.7 | 52.60 | 21.21 | 53.90 | 21.5 | 54.60 | 22 | 55.90 | 22.3 | 56.60 | 22.7 | 57.70 | 23 | 58.40 |
Fabric Yield
| Width of the Fabric | XS (yards) | XS (meters) | S (yards) | S (meters) | M (yards) | M (meters) | L (yards) | L (meters) | XL (yards) | XL (meters) | 2XL (yards) | 2XL (meters) | 3XL (yards) | 3XL (meters) |
| 45” | 0.75 | 0.68 | 0.88 | 0.80 | 1.03 | 0.94 | 1.19 | 1.09 | 1.36 | 1.25 | 1.57 | 1.44 | 1.81 | 1.65 |
| 60” | 0.68 | 0.62 | 0.80 | 0.73 | 0.94 | 0.86 | 1.08 | 0.99 | 1.24 | 1.13 | 1.43 | 1.30 | 1.64 | 1.50 |
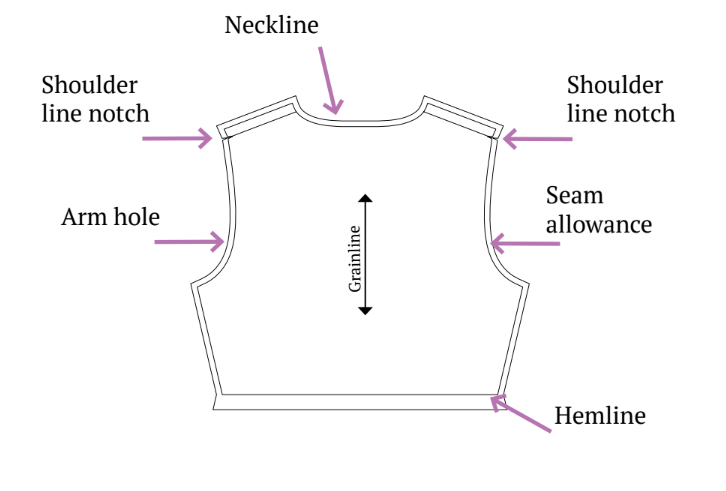
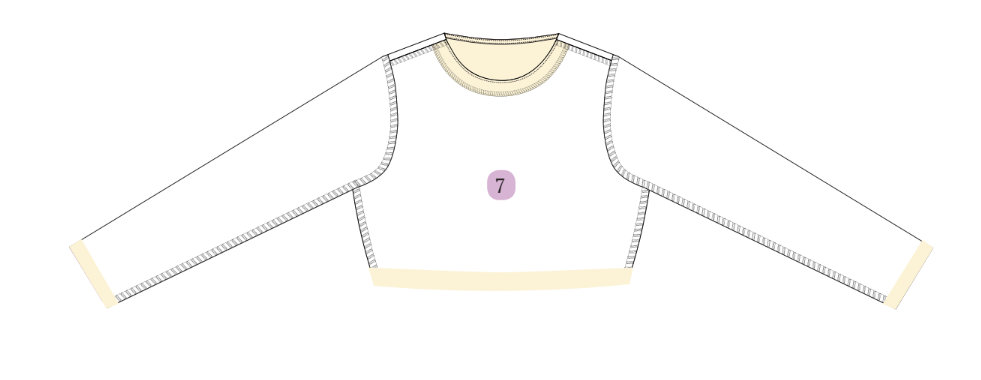
Understanding Your Patterns: Assembly and Marking of the Long Sleeve Crop Top Pattern
Assemble the long sleeve crop top pattern by aligning and attaching pieces meticulously. Mark crucial points for precise construction, enabling customization for a stylish and comfortable garment suitable for diverse occasions and preferences.
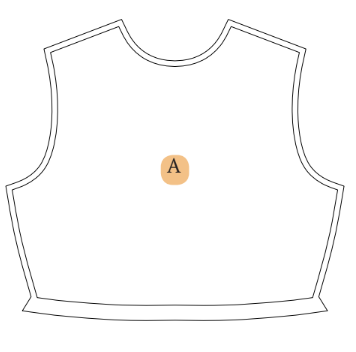
A. Front Bodice: cut x1 fabric
- Lay out knit fabric with the right side up.
- Pin the front bodice pattern.
- Trace pattern onto fabric.
- Cut along traced lines.
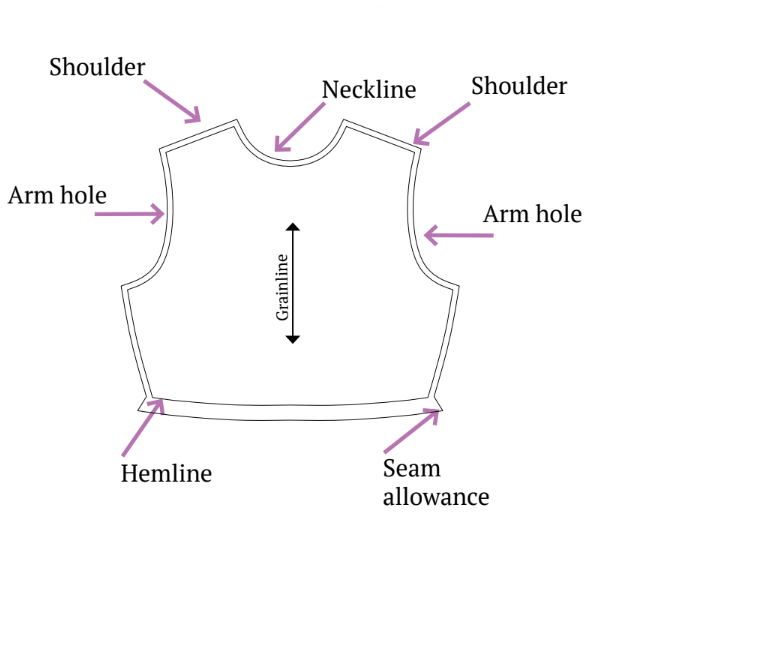
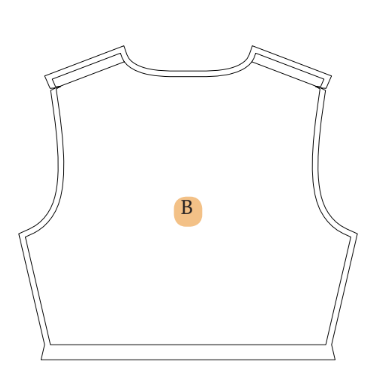
B. Back Bodice: cut x1 fabric
- Follow the same steps as for the front bodice, using the back bodice pattern.
- Trace and cut the back bodice piece.
C. Sleeve: cut x2 fabric
- Pin sleeve pattern onto fabric.
- Trace pattern onto fabric.
- Cut along traced lines.
- Repeat for the second sleeve.


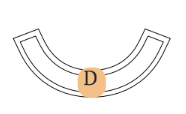
D. Interfacing: cut x1 fabric
- Pin interfacing pattern onto interfacing material.
- Trace pattern onto interfacing.
- Cut along traced lines.
To minimize fabric waste, consult the cutting layout provided in the next section before cutting.
If printing at home, utilize the A4 Pattern, and for print at a copy shop, opt for the A0 Pattern for convenience.
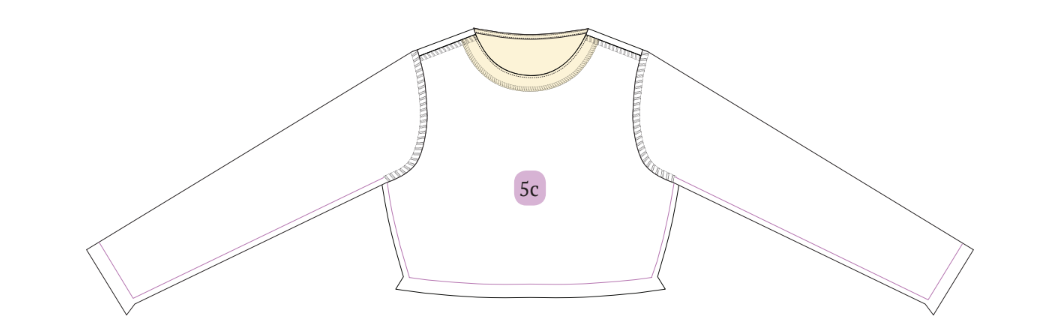
Steps To Follow For Sewing a Long Sleeve Crop Top
Embark on a stylish sewing adventure as I guide you through the steps to create your own long sleeve crop top:
Allow me to simplify things for you! Opt for the overlock stitch in most sewing situations, although the zigzag stitch is also a good choice. If you want a tidy hem, choose the flatlock stitch. If your sewing machine permits, reduce the pressure on the presser foot, especially when dealing with stretchy fabric. And here’s a clever tip: practice your stitching before tackling the actual project.

Step 1: Cutting Layout
Ensure your garment is cut on-grain by following the provided pattern layout. While the layout is non-directional, extra fabric length is necessary for materials with nap or prints.
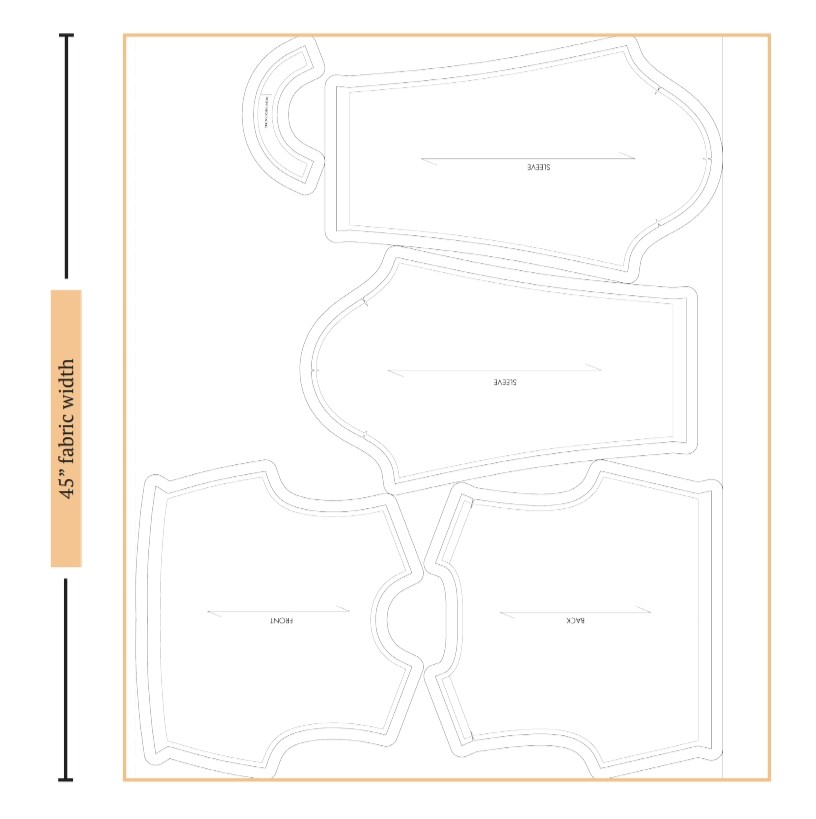
Step 2: Lay Out Your Pattern Pieces
Arrange your pattern pieces according to the cutting layout diagrams. Start by placing pieces meant for the fold and ensure the grainline arrow runs parallel to the selvage.
Step 3: Cut Your Fabric
If you’re using a rotary cutter, cut out the pattern pieces directly. If using fabric shears, trace the pattern pieces and then cut them out, ensuring you remove any pen, pencil, or chalk lines. Don’t forget to cut out any notches for proper alignment during assembly.
Step 4: Transfer Pattern Markings
Use a marking pen, pencil, or chalk to transfer essential markings (circles, buttonholes, fold lines) to the wrong side of the fabric. Mark the center front of pieces cut on the fold to aid in accurate alignment.
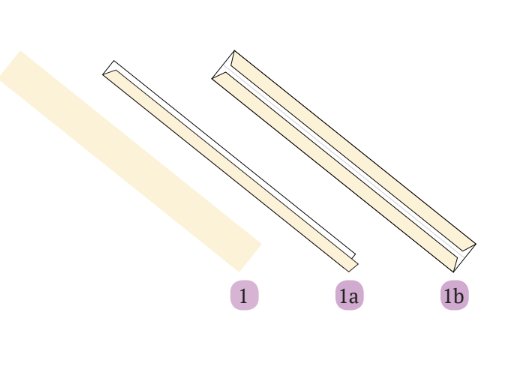
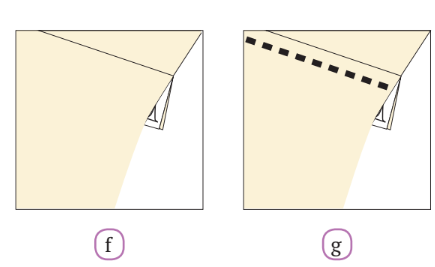
Step 5: Cutting Bias Strip
Begin by cutting a bias strip, approximately 1 1⁄2 inches wide, at a 45° degree angle from the selvage. Ensure to add an extra 3 inches to the neckline for both shaping and securing the binding.
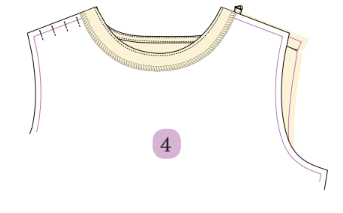
Step 6: Attaching Bias Strip to Back Neckline
Position the bias strip on the back neckline with right sides facing each other. Seam them together along the seamline.
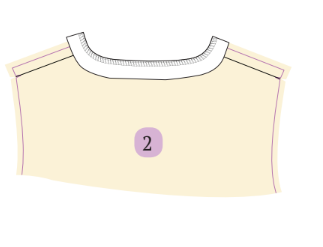
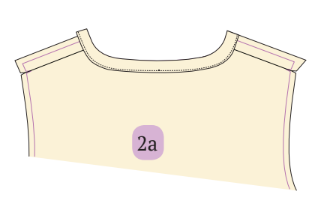
Understitch the seam allowance, combining the bias strip and seam allowances along the edge (See Picture 2a).
Create a rectangular box by folding the edge inward and sew along the edge to securely bind everything together.

Close up look of a bias strip attachment to back neckline:
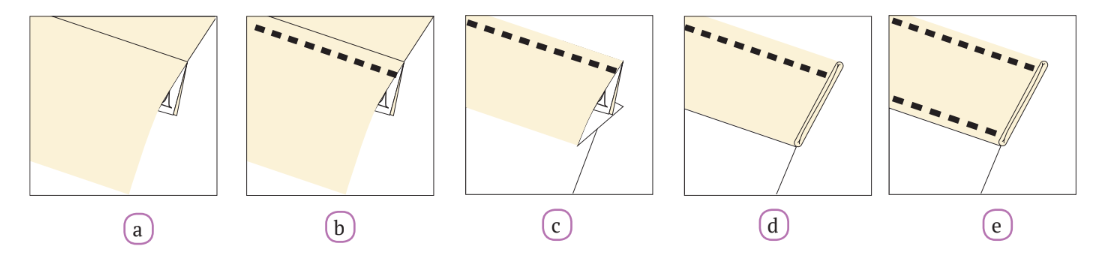
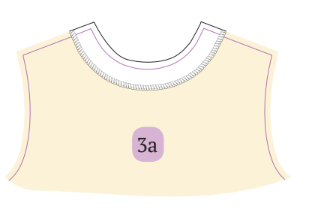
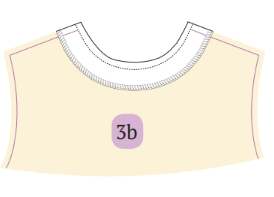
Step 7: Applying Interfacing to Front Neckline
Place interfacing fabric on the front neckline, ensuring it faces right-on-right.
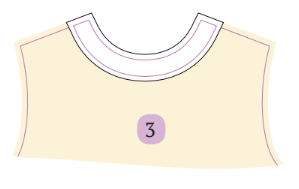
Use an overlock stitch to serge the interfacing edge (See Picture 3a).
Sew them together (See Picture 3b), then turn the interfacing to the backside and understitch for a polished finish (See Picture 3c and Picture 3d).
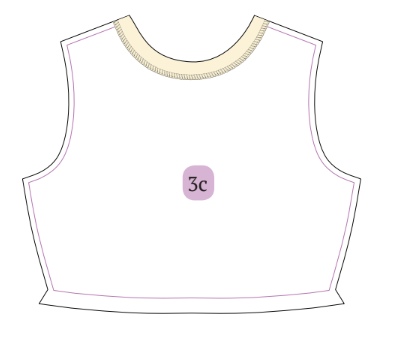
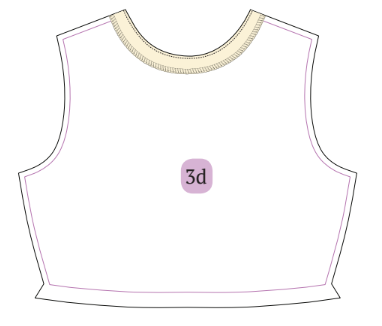
Close up look of an understitch:
Step 8: Shoulder Seams
Bring the front and back bodices together with right sides facing.
Pin them for stability and proceed to sew both shoulder seams.

Step 9: Attaching Sleeves
Align the sleeve and bodice armhole seam, ensuring a right-on-right orientation.

Accurately match the mid-notch and shoulder lines before pinning them together.
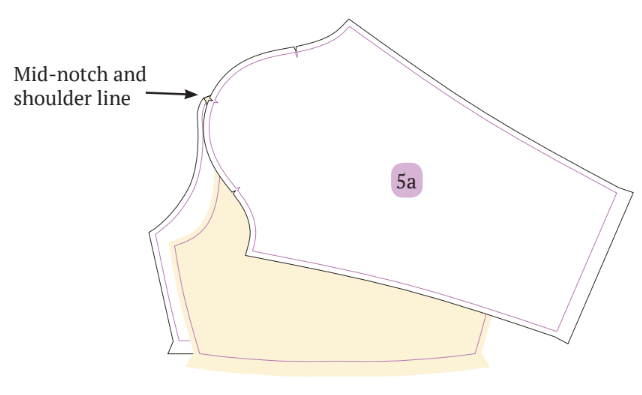
Close up look of pinning the arm-holes:
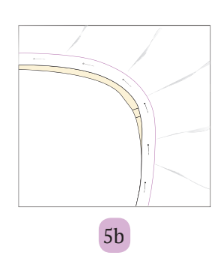
Sew the pieces, repeating the process for the other sleeve (See Picture 5c).
Step 10: Side Seams
Connect the front and back bodices with right sides facing. Sew the side seams from the sleeve end to the hemline.
Step 11: Hemming
For the hemline and both sleeves, fold them inside out (facing wrong-on-wrong). Commence sewing from one seam line intersection and return to it. Opt for a flatlock stitch for a clean and polished finish.
Tip: To enhance your sewing experience, it is recommended to iron the pattern pieces after completing each step.
Summary: How to sew a long sleeve crop top
Congratulations on successfully crafting your own long sleeve crop top!
Designing your own long sleeve crop top is a creative journey worth taking. Start by choosing soft, quality fabric in a color and pattern you love. Measure and cut the fabric to your desired length and fit. Utilize straightforward sewing techniques to craft the body, opting for trendy stitch patterns for added flair. Pay attention to details like cuffs and neckline, ensuring a comfy fit. With patience and a touch of your unique style, you’ll soon have a fabulous long sleeve crop top that’s all your own.
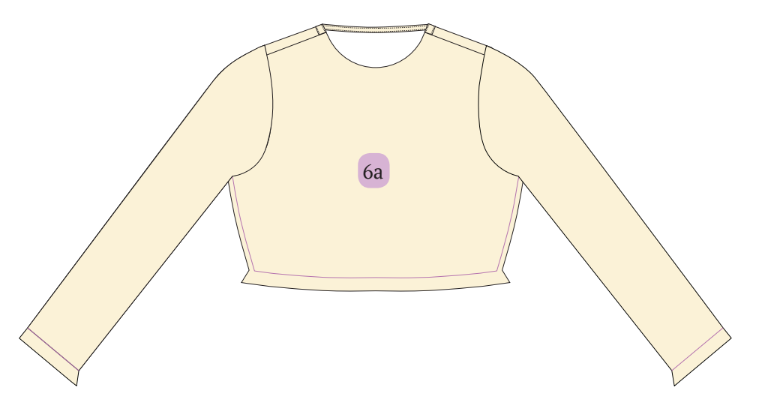
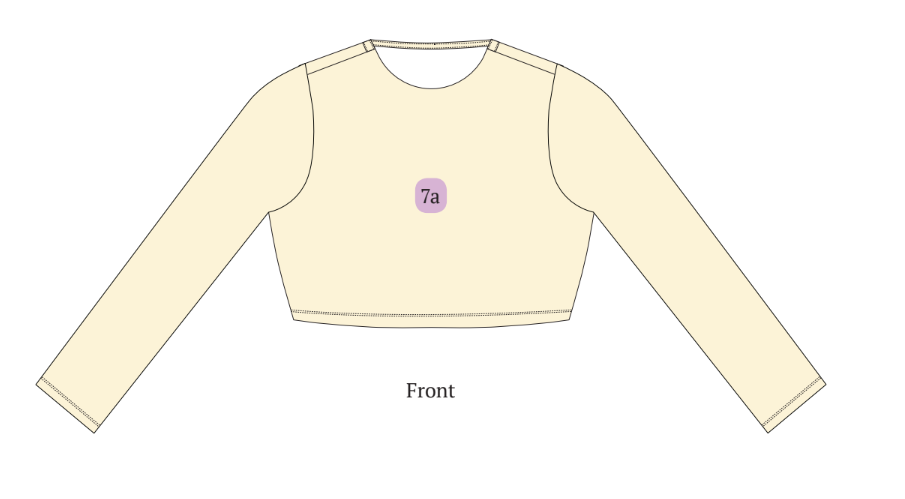
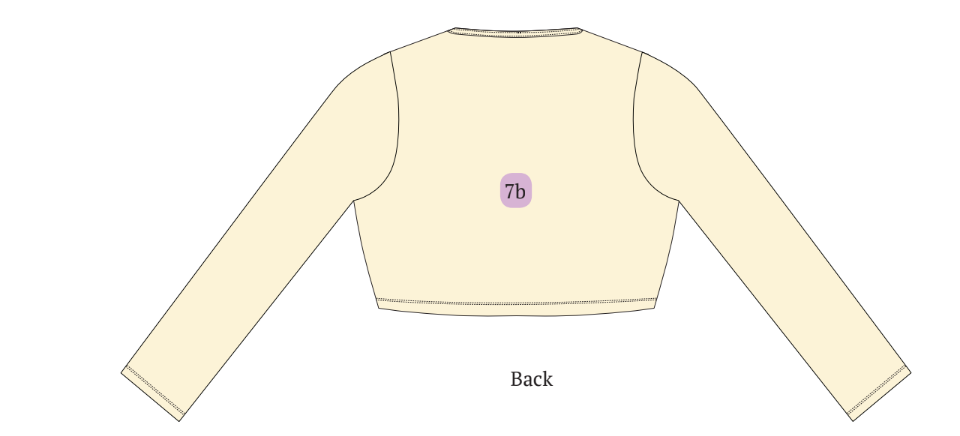
Check out some final images of this adorable top created with the Winslet’s STELLA Long Sleeve Crop Top Pattern:

Share your photos with us if you’ve used the Winslet’s STELLA Long Sleeve Crop Top Pattern and let us know how it went.
Join the Winslet sewing community by sharing your masterpiece with the hashtag #madewithwinslets!