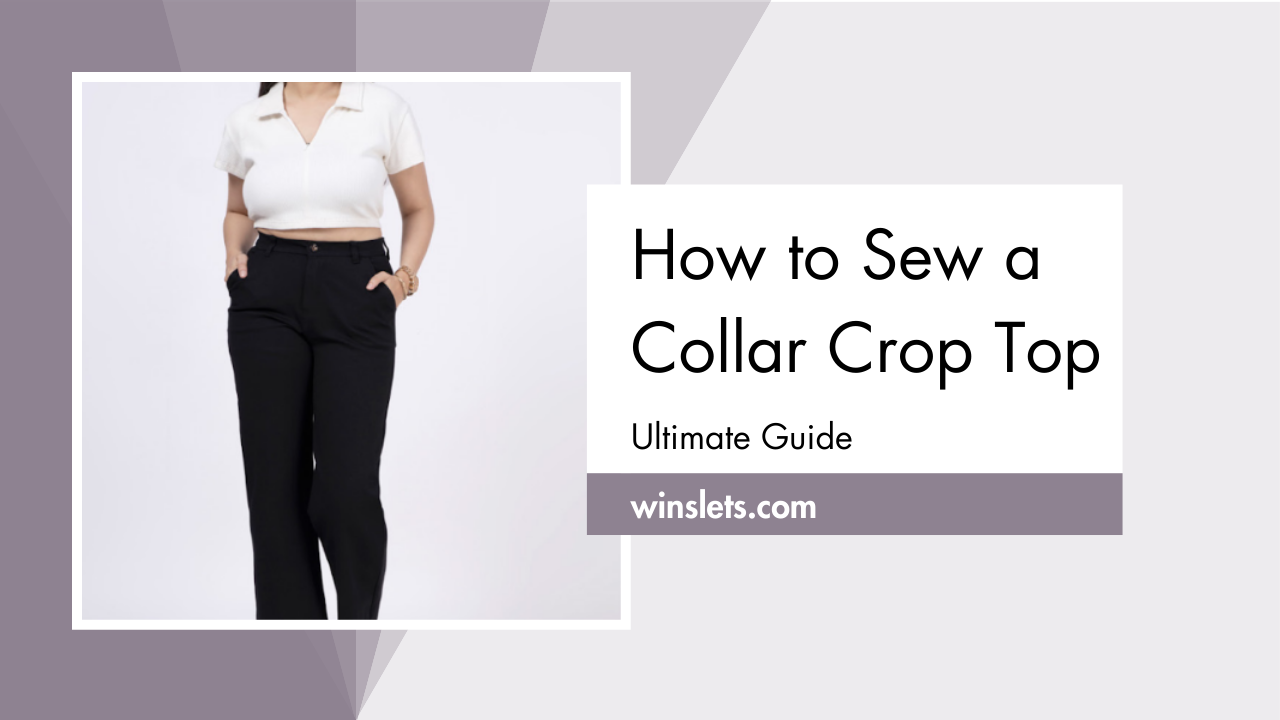
How to Sew a Collar Crop Top?
From its humble beginnings on the tennis courts to becoming a staple in women’s fashion, the crop polo top has undergone a remarkable transformation. Initially designed for sportswear, it quickly gained popularity in the fashion world for its comfort and versatility. Today, the collar crop top stands as a symbol of chic, casual elegance, effortlessly blending sporty vibes with a touch of sophistication. Excited to stitch up your own version of this iconic piece?
In this tutorial, I’ll guide you through crafting a collar crop top from the ground up. And if you’re on the lookout for a beginner-friendly pattern, you can use Winslet’s Crop Polo Shirt Pattern. This pattern offers a trendy 1/4 zip bodycon top complete with a stylish collar. Perfect for those seeking a mix of simplicity and style in their sewing projects. Don’t miss out on this delightful pattern!
What sewing supplies do you need to sew a collar crop top?
The basic supplies you need to sew a collar crop top are Sewing Pattern (I used Winslet’s ECHO Crop Polo Shirt Pattern for my project), Sewing Machine, Tape Measure, Chalk, Shears, Pins, Iron, Needles, Thread (preferably 3-ply polyester), Thread Cutter, Zipper, and Fusible Interfacing.
Fabric Recommendation
I usually find that light-medium weight knits, such as cotton knits and blends, jersey knits, lycra, stretch velour, and stretch velvet, work well for collar crop tops. Trust me, these light-to-medium weight knits work great with crop tops!
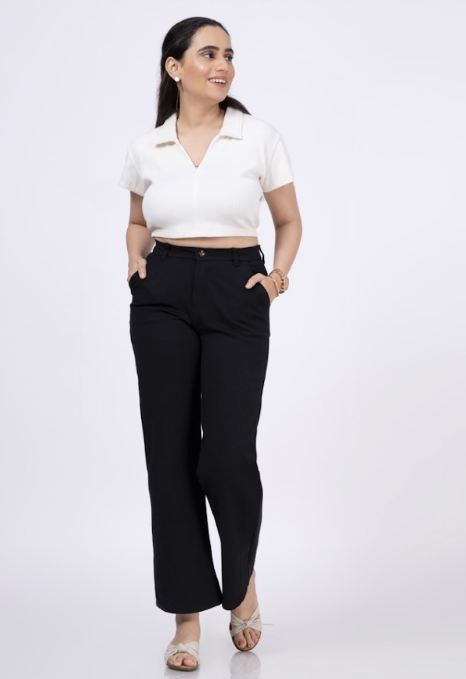
The model above features a collar crop top made with the Winslet’s ECHO Crop Polo Shirt Pattern. The fabric used is 4×1 viscose rib-knit cotton. Some of the properties of viscose rib-knit include its exceptional softness, stretchability, light weight, and ease of drape. These attributes are unmatched!
Size Charts
The collar crop top sewing pattern measurements for sizes (XS, S, M, L, XL, 2XL, or 3XL) are detailed below. Choose a size that corresponds most closely to your body measurements.
Measure the largest areas for the chest and hips, and for the waist, measure at its narrowest part just above the belly button.
It’s worth noting that if your exact measurements are not listed in the table, you may want to consider ordering a size larger.
The size chart includes measurements in both inches and centimeters for your reference.
Body Measurements
| XS (inches) | XS (cm) | S (inches) | S (cm) | M (inches) | M (cm) | L (inches) | L (cm) | XL (inches) | XL (cm) | 2XL (inches) | 2XL (cm) | 3XL (inches) | 3XL (cm) | |
| Bust | 32 | 81.3 | 34 | 86.4 | 36 | 91.4 | 38 | 96.5 | 40 | 101.6 | 42 | 106.7 | 44 | 111.8 |
| Waist | 26 | 66.0 | 28 | 71.1 | 30 | 76.2 | 32 | 81.3 | 34 | 86.4 | 36 | 91.4 | 38 | 96.5 |
Final Garment Measurements
| XS (inches) | XS (cm) | S (inches) | S (cm) | M (inches) | M (cm) | L (inches) | L (cm) | XL (inches) | XL (cm) | 2XL (inches) | 2XL (cm) | 3XL (inches) | 3XL (cm) | |
| Chest | 24.7 | 62.74 | 26.7 | 67.82 | 28.7 | 72.9 | 30.7 | 77.98 | 32.7 | 83.06 | 34.7 | 88.14 | 36.7 | 93.22 |
| Sleeve Length | 4.5 | 11.43 | 4.75 | 12.07 | 5 | 12.7 | 5.25 | 13.34 | 5.5 | 13.97 | 5.75 | 14.61 | 6 | 15.24 |
| Full Length | 15.75 | 40.01 | 16 | 40.64 | 16.25 | 41.28 | 16.5 | 41.91 | 16.75 | 42.55 | 17 | 43.18 | 17.25 | 43.82 |
Yield Chart
| Width of the Fabric | XS (yards) | XS (meters) | S (yards) | S (meters) | M (yards) | M (meters) | L (yards) | L (meters) | XL (yards) | XL (meters) | 2XL (yards) | 2XL (meters) | 3XL (yards) | 3XL (meters) |
| 45” | 0.63 | 0.58 | 0.75 | 0.68 | 0.88 | 0.80 | 1.01 | 0.92 | 1.16 | 1.06 | 1.34 | 1.22 | 1.54 | 1.40 |
| 60” | 0.45 | 0.41 | 0.53 | 0.48 | 0.62 | 0.57 | 0.71 | 0.65 | 0.82 | 0.75 | 0.94 | 0.86 | 1.08 | 0.99 |
Steps To Follow For Sewing a Collar Crop Top
Let’s begin sewing the collar crop top together AKA the fun part:
Pattern Marking and Inventory
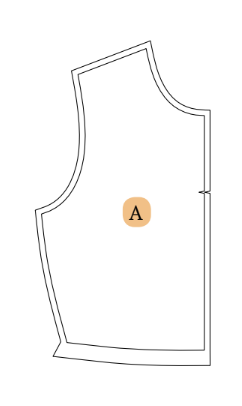
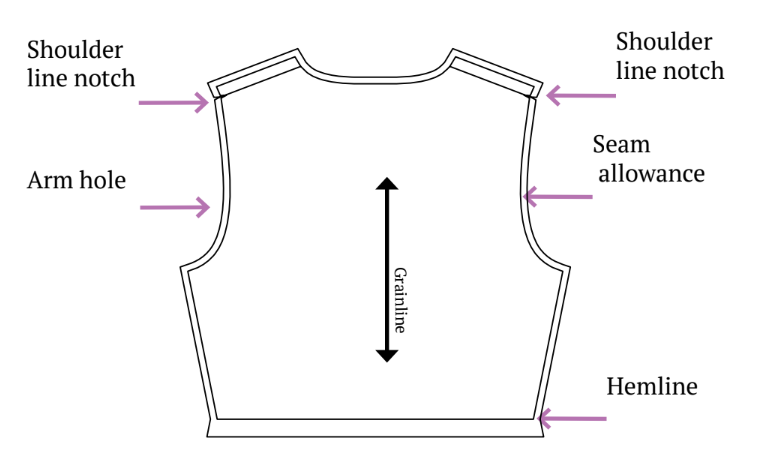
Before you start sewing, cut out all the pattern pieces as listed in the pattern instructions. You should have all the pieces as listed below:
A. Cut 2 fabric piece for the Front Bodice

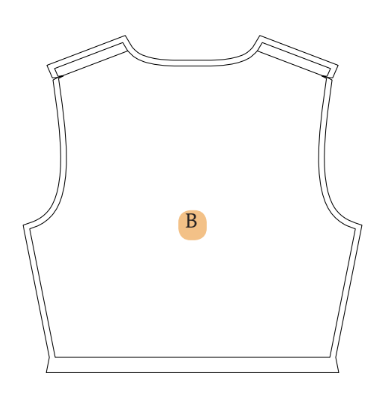
B. Cut 1 fabric piece for the Back Bodice
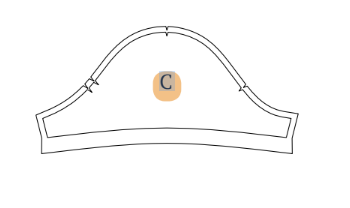
C. Cut 2 fabric pieces for the Sleeve
D. Cut 2 fabric pieces for the Collar
E. Cut 1 fabric piece for the Collar Interfacing
Cutting Layout
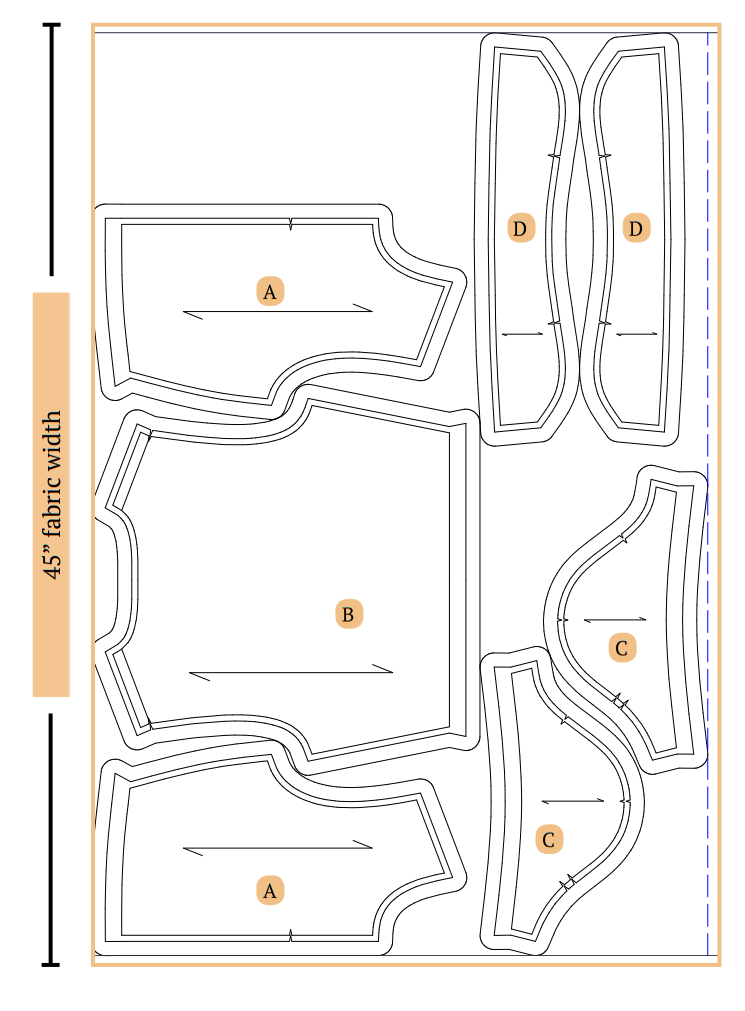
- Lay out your fabric according to the pattern to ensure it’s on-grain.
- Pin the pattern pieces for accurate cutting.
- If using fabric with nap or prints, buy extra length.
Sewing Steps
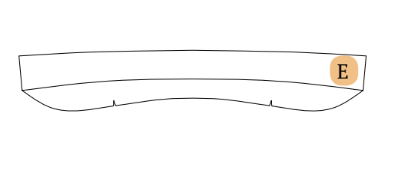
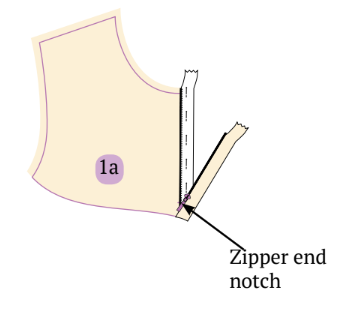
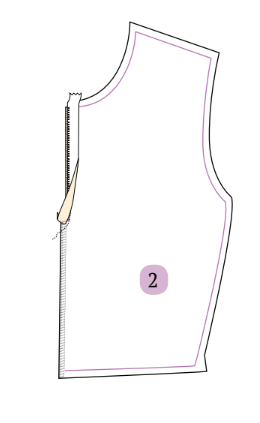
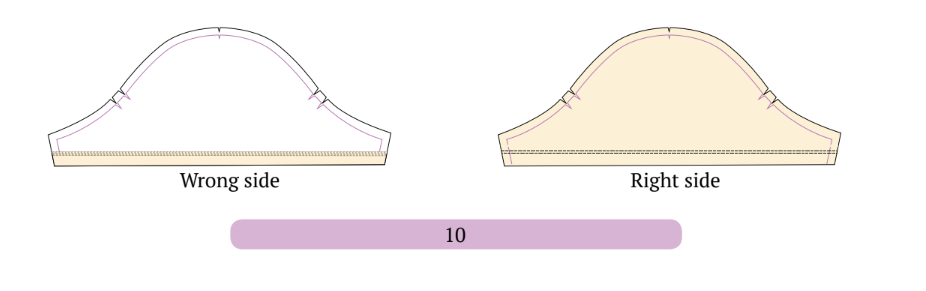
Step 1: Zipper Attachment
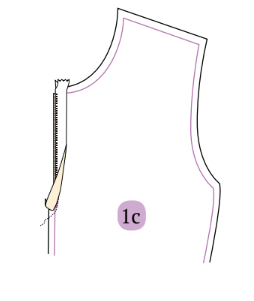
Open the zipper and align the right-facing zipper along the seamline of the front right-side bodice. Pin the pieces together and stitch until reaching the specified notch on the edge of the zipper teeth.
Follow the same procedure for the other zipper tape on the opposite front bodice piece.
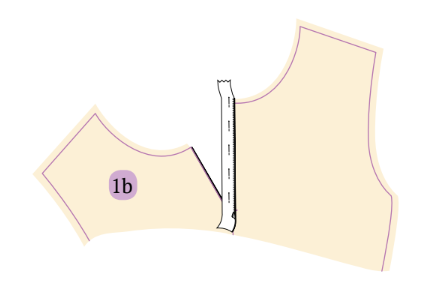
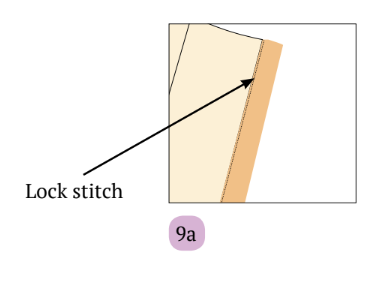
Lock both zipper tapes at the designated notch using a backstitch and lock stitch. Trim the excess zipper.
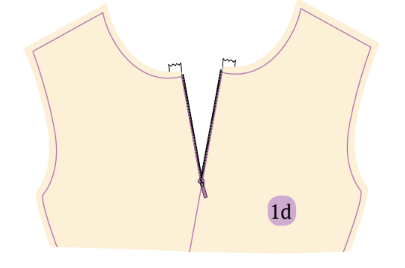
Refer to Figure 1d for a visual representation of the right side after attaching the zipper.
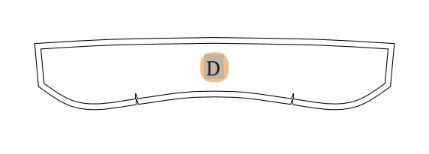
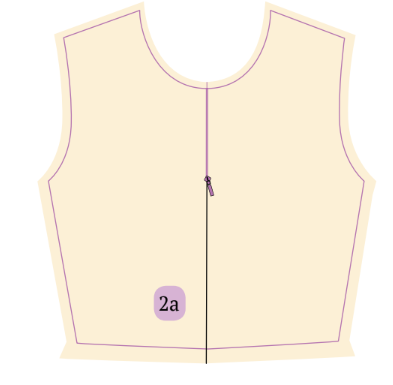
Step 2: Joining Bodice Sides and Stitching the Center Back Seamline
Place the right and left sides of the bodices with the right sides facing each other. Commence stitching from the zipper notch to the end of the center back seamline.
Refer to Figure 2a for a visual representation of the right side look of the back bodice.
Step 3: Assembling Front and Back Bodices and Sewing Shoulders
Place the front and back bodice with their right sides facing each other. Sew the shoulders together using the overlock stitch.
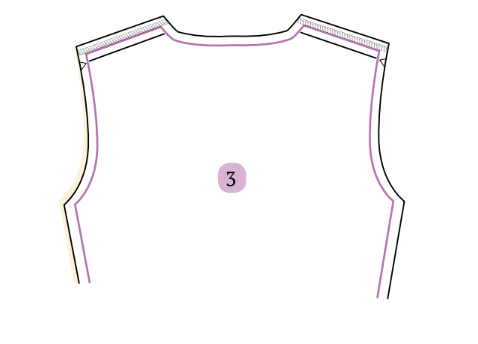
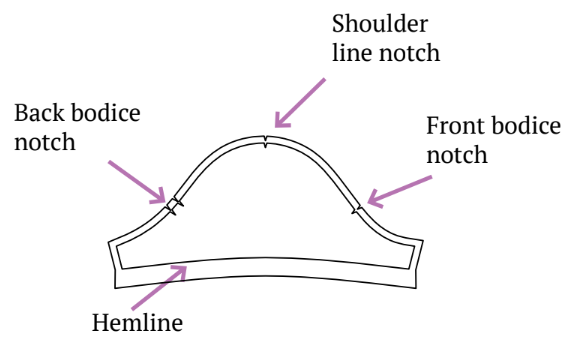
Note: The notch on the back pattern piece signifies the extended shoulder, which will be visible on the front when the garment is worn. This is commonly referred to as a drop shoulder.
Step 4: Applying Fusible Interfacing to the Collar
Iron the fusible interfacing onto the wrong side of the collar piece fabric, ensuring a secure bond between the interfacing and the fabric.
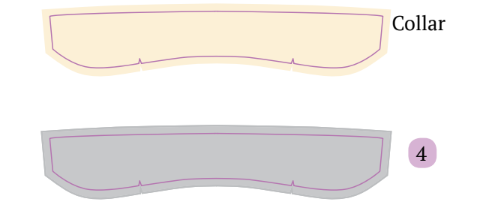
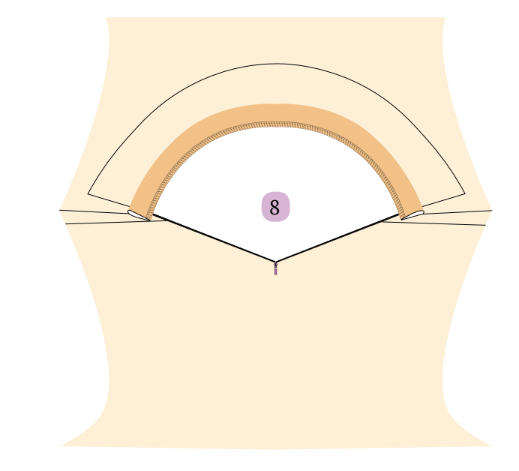
Step 5: Stitching Collar Pieces Together
Place both collar pieces with their right sides facing each other. Commence stitching from one corner to the other, excluding the neckline seam allowance.
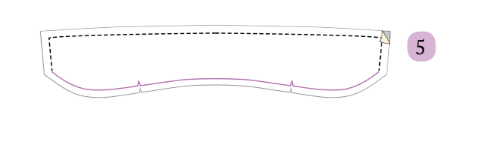
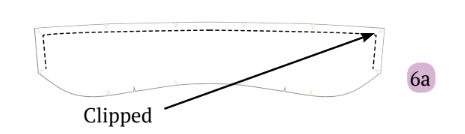
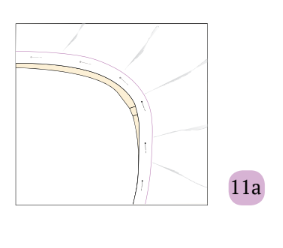
Step 6: Shaping the Collar Seam
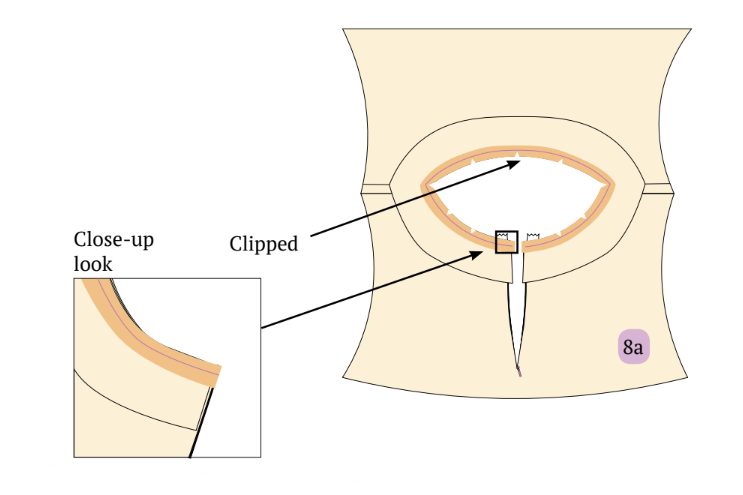
Turn the fabric so that it is facing wrong sides together.
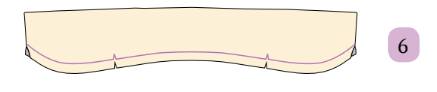
For an enhanced collar shape, clip the seam allowance, particularly at the edges of the collar. This step ensures a more refined collar appearance when the fabric is turned wrong-on-wrong.
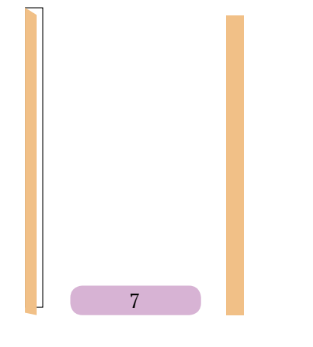
Step 7: Creating a Bias Neckline Strip
From the remaining fabric, cut a rectangular shape fabric piece which is bias (45°) to the grainline of three times of the width of the neck seam allowance and the length of the neckline known as neckline strip.

Fold the strip with wrong sides inside and iron it thoroughly.
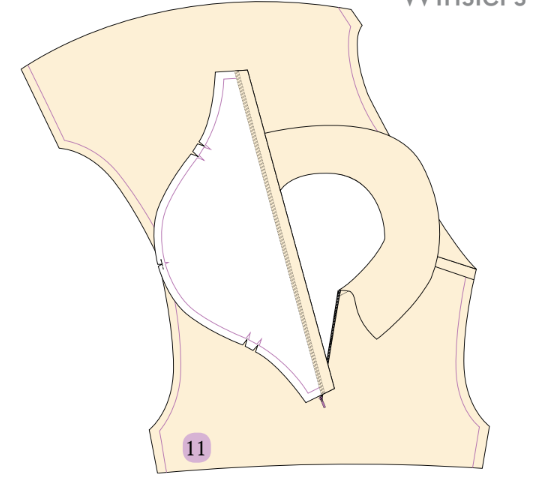
Step 8: Attaching Neckline Strip, Collar, and Front Bodice
Place the folded neckline strip, collar, and front bodice together, ensuring the right sides are facing each other. Clip and pin them neatly.
Proceed to sew them together.
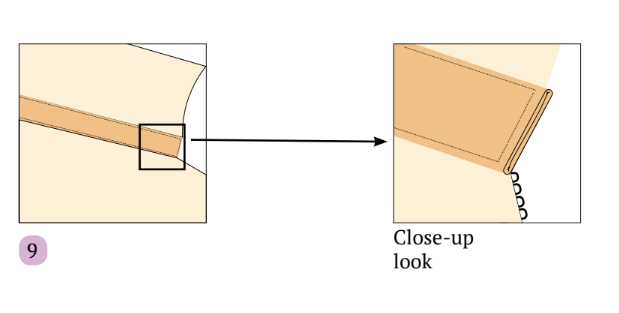
Step 9: Stitching the Neckline Strip to Enclose the Collar
Spread open the seamline of the neckline strip and begin stitching at the edge of the seam allowance.
Place the strip on the bodice and sew them together, ensuring the neckline strip is enclosed with a lock stitch.
Step 10: Hemming Sleeves with Flatlock Stitch
Fold the hem of both sleeves and use a flatlock stitch to sew from the right side of the fabric.
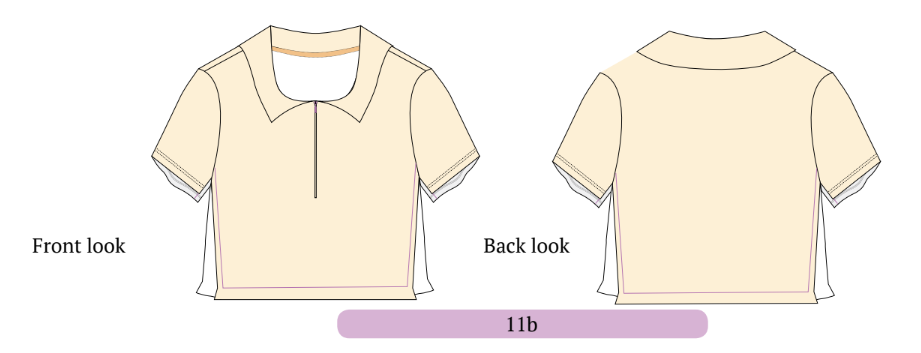
Step 11: Attaching Sleeves to Armholes
Pin the armhole and sleeve’s armhole seam allowance, ensuring the right sides are facing each other. Clip if necessary.
Sew them together.
Repeat the same process for the other side.
Refer to Figure 11b for a visual representation of the front and back look of the bodice after the sleeves have been attached.
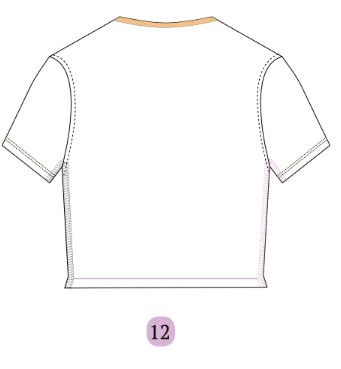
Step 12: Joining Front and Back Bodices
Place the front and back bodices with their right sides facing each other.
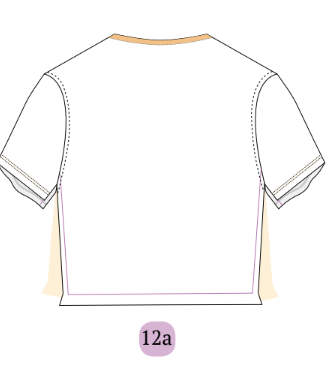
Sew one side seam together.
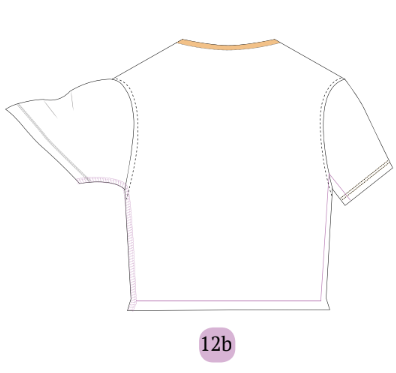
Repeat the same process for the other side seam.
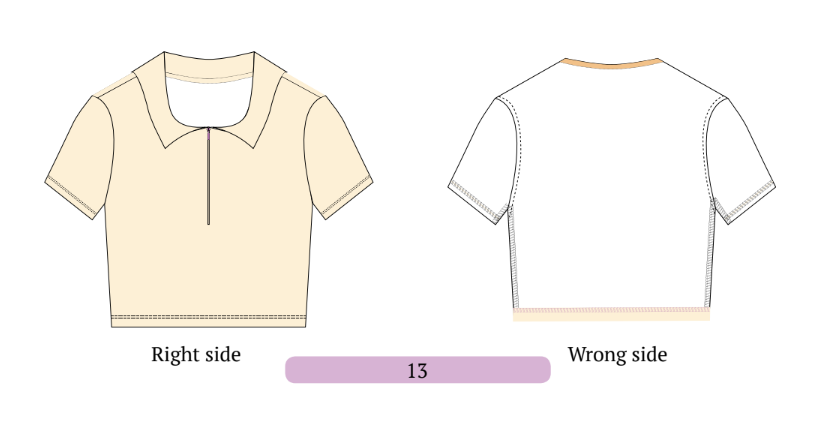
Step 13: Hemming the Collar Top
Fold the hem of the collar top and sew all around it, starting from the side seam and returning back to it.
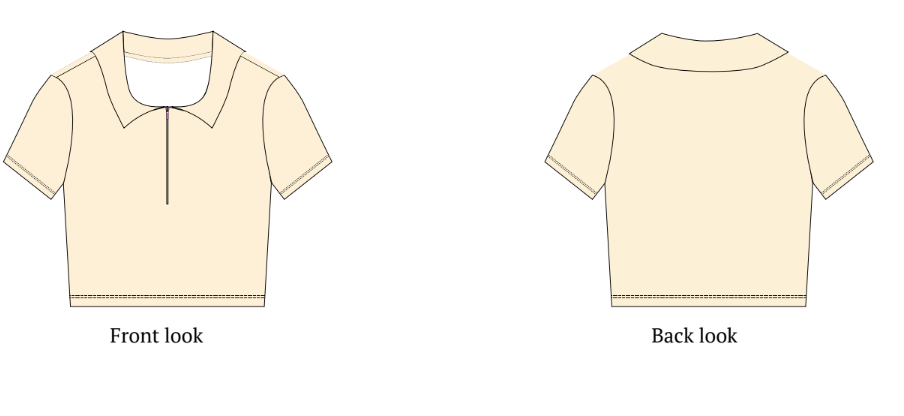
Summary
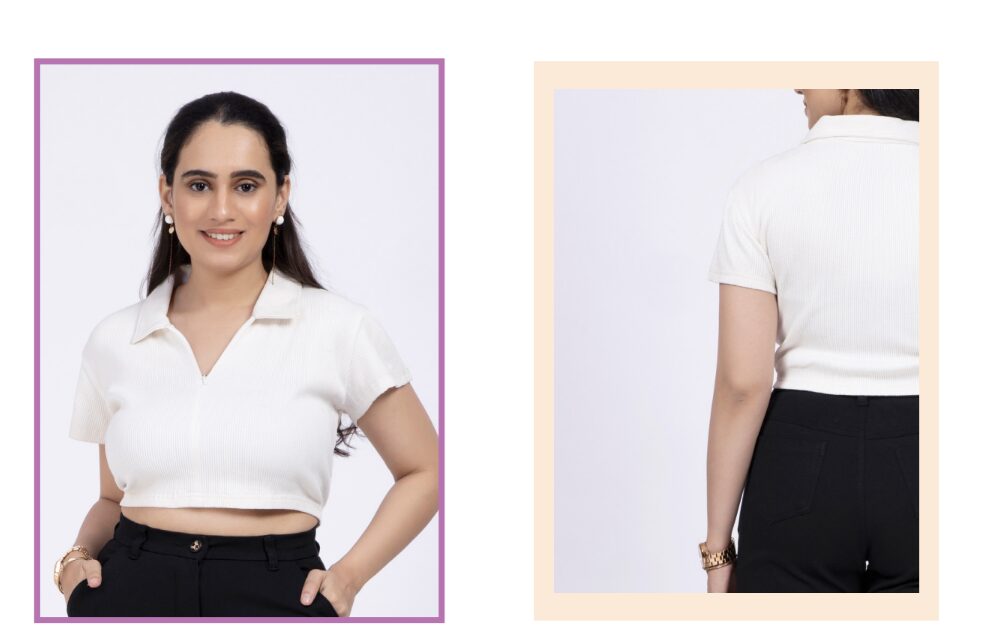
And voila, you have made an adorable DIY collar crop top! The front and back of the top should look like as shown below:
This would look great with any of your skinny jeans or high-waisted skirts. You could always pair it with a cute cropped jacket when it gets chilly!
Check out some final images of this adorable top created with the Winslet’s ECHO Crop Polo Shirt Pattern:

Drop a comment below if you tried this pattern or have any questions. Or you can try more sewing projects.
Share your photos with us, and let us know how it went.
Join the Winslet sewing community by sharing your masterpiece with the hashtag #madewithwinslets!


