How to Sew a Tie-Front Crop Top?
Have you ever wondered how to sew a tie-front crop top?
Today’s project is exactly that – a homemade cropped tie-front top that looks great with shorts, jeans, and even as swimwear! Because of how easy this sewing project is, even if you are a beginner, you can definitely handle it.
I used the Winslet’s ROXY Tie-Front Crop Top Pattern for this project and you can use it to if you need a good sewing pattern with detailed instructions.
What sewing supplies do you need to sew a tie-front crop top?
The basic supplies you need to sew a tie-front crop top are Sewing Pattern (I used the Winslet’s ROXY Tie-Front Crop Top Pattern in this example), Sewing Machine, Tape Measure, Chalk, Shears, Pins, Iron, Needles, Thread (preferably 3-ply polyester), and a Thread Cutter.
Fabric Recommendation
For a fashionable tie-front crop top, opt for fabrics, such as poly-satin, rayon satin, silk blend, acrylic, or nylon, each offering its unique charm.
These fabrics are known for their smooth shine, luxurious breathability, and delicate luster.

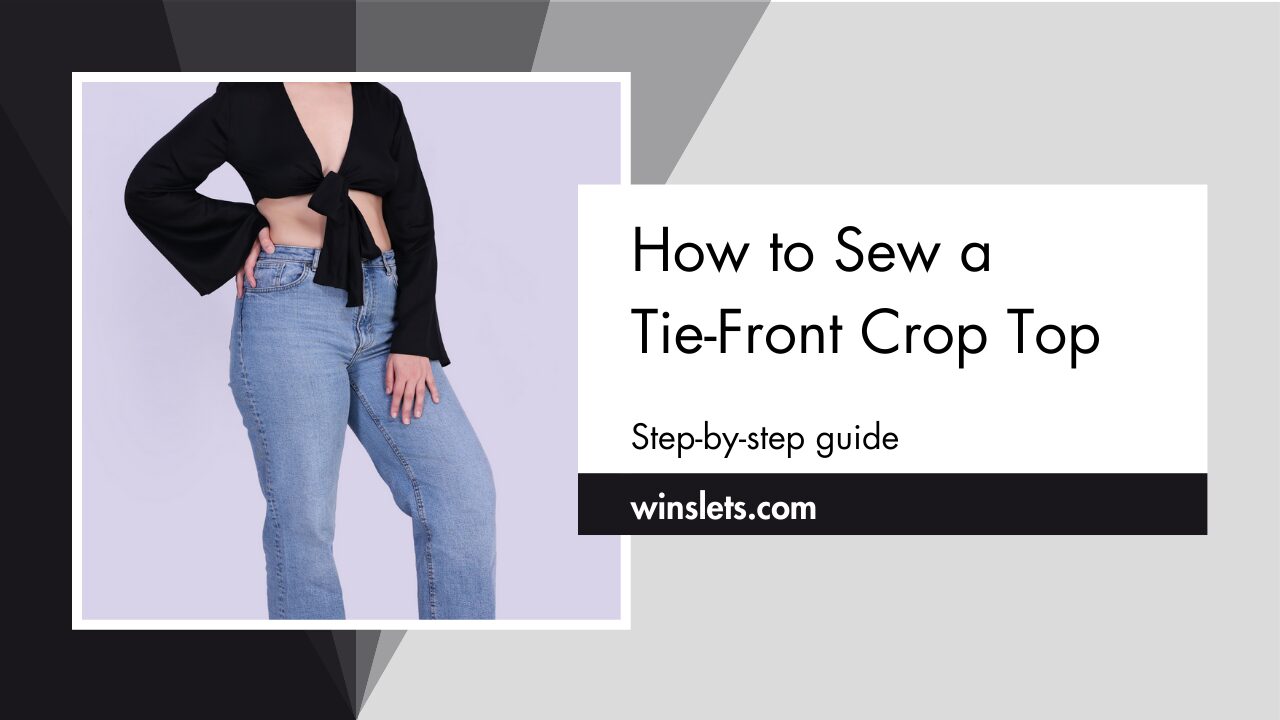
In the above picture, Katie dons a tie-front top made from poly-satin fabric and with the Winslet’s ROXY Tie-Front Crop Top Pattern. The polyester satin fabric is recognized for its luxurious and glossy appearance. It boasts a dual-sided texture—shiny and dull. Its merits include a soft and tactile feel, resistance to wrinkles and creases, excellent shape retention, minimal shrinkage during washing, quick drying, and colorfastness under sunlight, maintaining vibrant hues for an extended period.
Size Charts
Choose the size (XS, S, M, L, XL, 2XL, or 3XL) that corresponds most closely to your body measurements using the size charts provided.
Measure the largest areas for the chest and hips, and for the waist, measure at its narrowest part just above the belly button.
It’s worth noting that if your exact measurements are not listed in the table, you may want to consider ordering a size larger.
The size chart includes measurements in both inches and centimeters for your reference.
Body Measurements
| XS (inches) | XS (cm) | S (inches) | S (cm) | M (inches) | M (cm) | L (inches) | L (cm) | XL (inches) | XL (cm) | 2XL (inches) | 2XL (cm) | 3XL (inches) | 3XL (cm) | |
| Bust | 32 | 81.3 | 34 | 86.4 | 36 | 91.4 | 38 | 96.5 | 40 | 101.6 | 42 | 106.7 | 44 | 111.8 |
| Waist | 26 | 66.0 | 28 | 71.1 | 30 | 76.2 | 32 | 81.3 | 34 | 86.4 | 36 | 91.4 | 38 | 96.5 |
Final Garment Measurements
| XS (inches) | XS (cm) | S (inches) | S (cm) | M (inches) | M (cm) | L (inches) | L (cm) | XL (inches) | XL (cm) | 2XL (inches) | 2XL (cm) | 3XL (inches) | 3XL (cm) | |
| Full Length (from shoulder to tie end) | 35.87 | 91.1 | 36.21 | 91.97 | 36.63 | 93.04 | 36.93 | 93.8 | 37.24 | 94.58 | 37.33 | 94.81 | 37.95 | 96.39 |
| Back Length | 16.93 | 43 | 18.01 | 45.74 | 19.06 | 48.41 | 19.91 | 50.57 | 21.06 | 53.49 | 21.91 | 55.65 | 22.97 | 58.34 |
| Sleeve Length | 21.56 | 54.76 | 21.9 | 55.62 | 22.25 | 56.51 | 22.53 | 57.22 | 23.03 | 58.49 | 23.4 | 59.43 | 23.91 | 60.73 |
Fabric Yield
| Width of the Fabric | XS (yards) | XS (meters) | S (yards) | S (meters) | M (yards) | M (meters) | L (yards) | L (meters) | XL (yards) | XL (meters) | 2XL (yards) | 2XL (meters) | 3XL (yards) | 3XL (meters) |
| 45” | 1.42 | 1.30 | 1.67 | 1.53 | 1.97 | 1.80 | 2.26 | 2.07 | 2.60 | 2.38 | 2.99 | 2.74 | 3.44 | 3.15 |
| 60” | 1.08 | 0.99 | 1.27 | 1.16 | 1.49 | 1.36 | 1.72 | 1.57 | 1.97 | 1.81 | 2.27 | 2.08 | 2.61 | 2.39 |
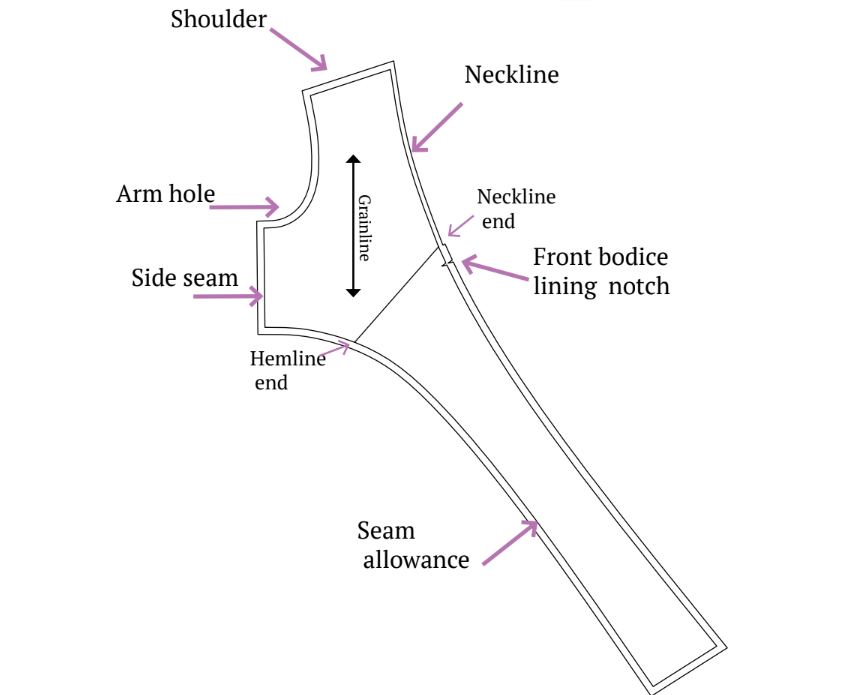
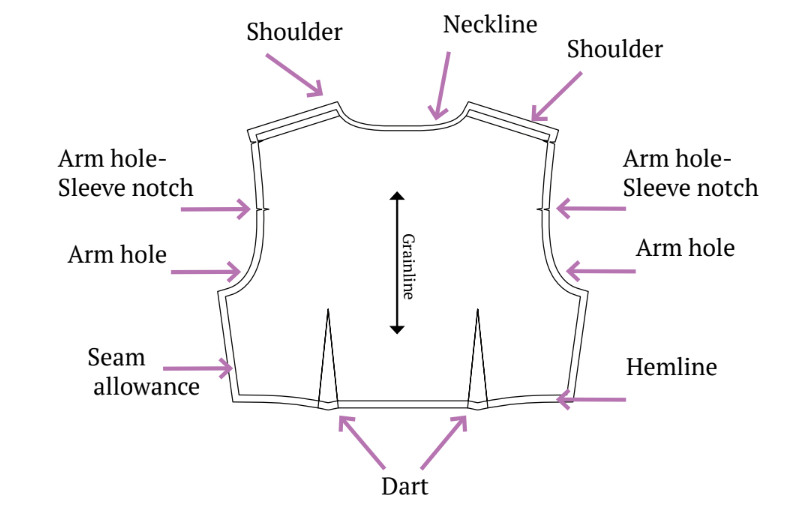
Understanding Your Patterns: Assembly and Marking of the Tie-Front Crop Top Pattern
For the tie-front crop top pattern assembly, meticulously align and secure pieces, emphasizing seam precision. Mark crucial points for accurate construction, facilitating customization and ensuring a stylish and uniquely crafted garment.
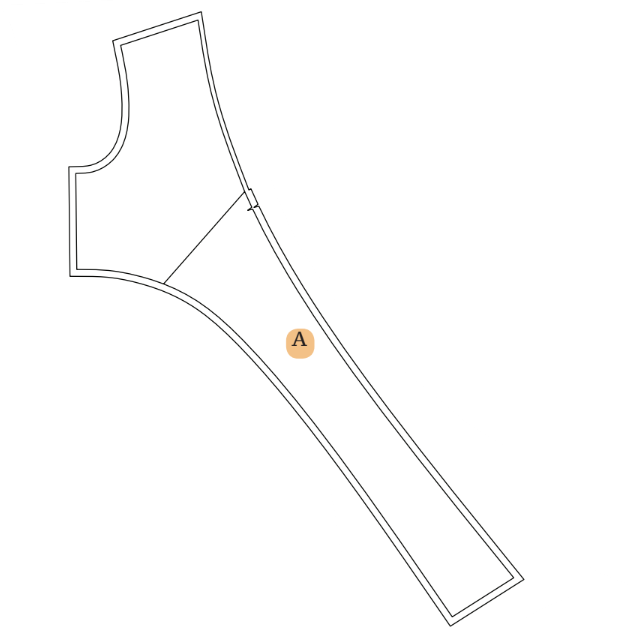
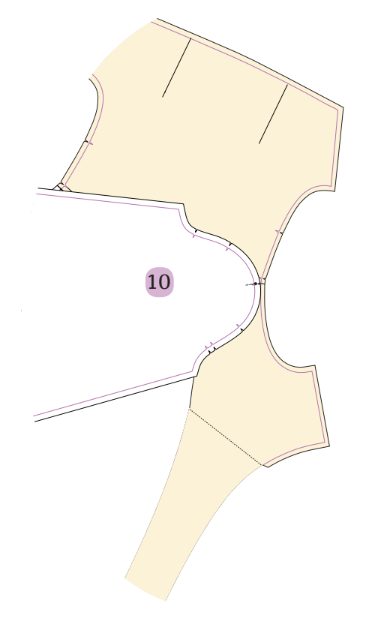
A. Front Bodice: cut x2 fabric
- Lay out fabric with the right side up.
- Pin the front bodice pattern.
- Trace pattern onto fabric.
- Cut along traced lines for two front bodice pieces.
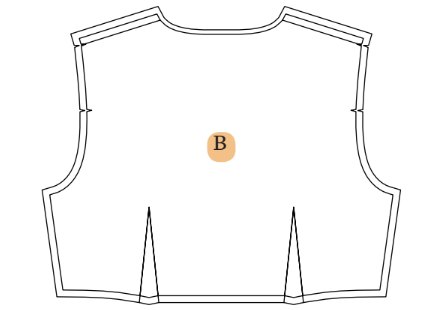
B. Back Bodice: cut x1 fabric
- Pin the back bodice pattern onto fabric.
- Trace pattern onto fabric.
- Cut along traced lines for one back bodice piece.
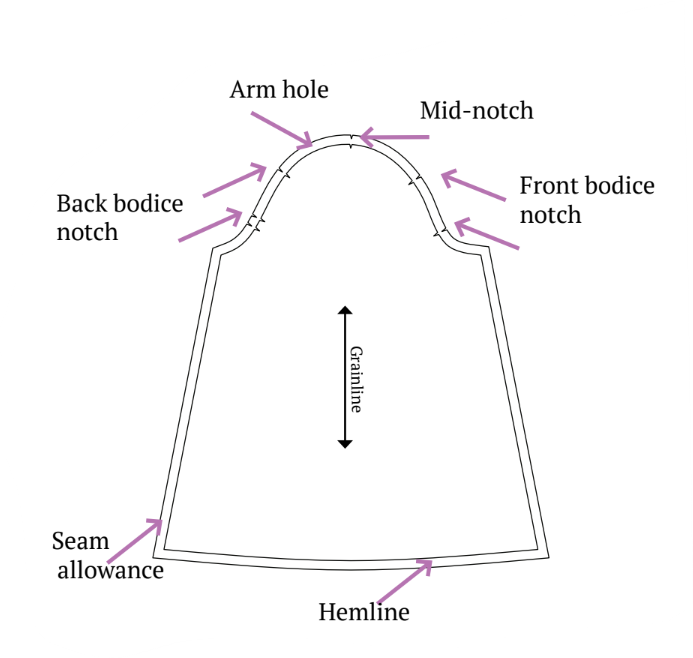
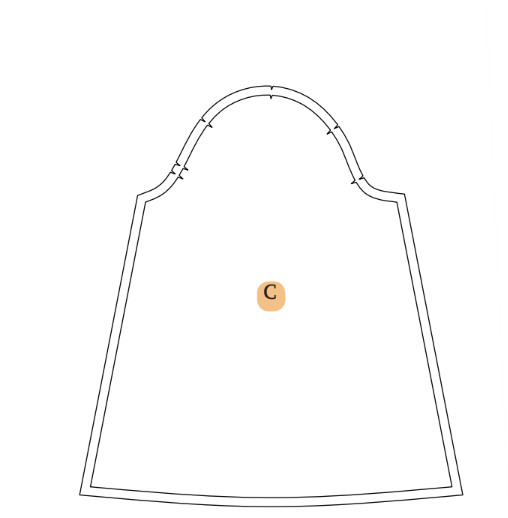
C. Sleeve: cut x2 fabric
- Pin sleeve pattern onto fabric.
- Trace pattern onto fabric.
- Cut along traced lines for two sleeve pieces.
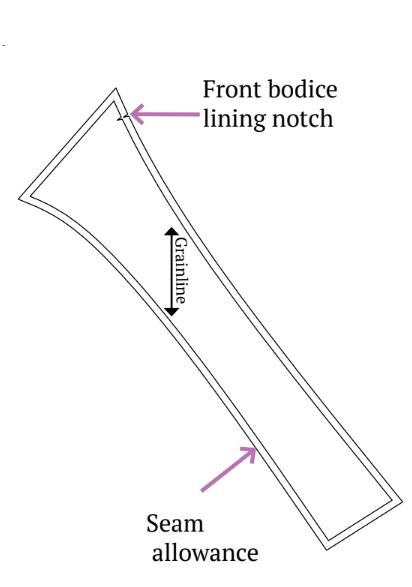
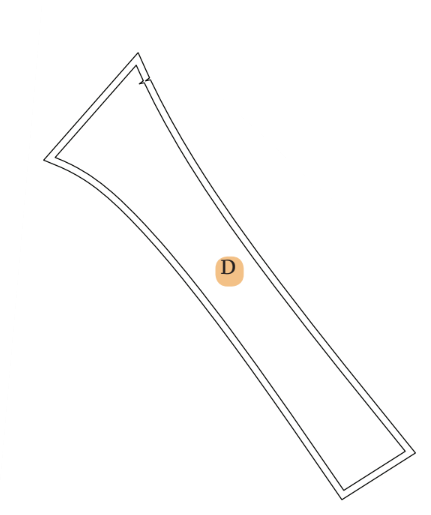
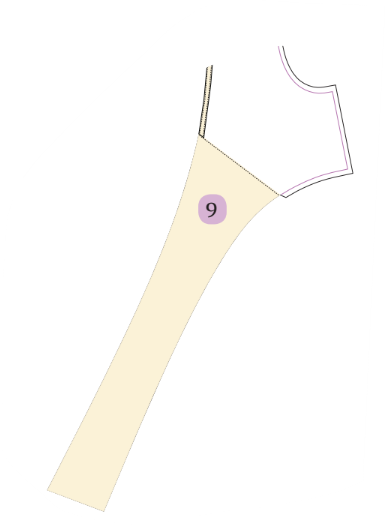
D. Tie Lining: cut x2 fabric
- Pin tie lining pattern onto fabric.
- Trace pattern onto fabric.
- Cut along traced lines for two tie lining pieces.
E. Neck Binding: cut x1 fabric
- Pin neck binding pattern onto fabric.
- Trace pattern onto fabric.
- Cut along traced lines for one neck binding piece.

To minimize fabric wastage, consult the cutting layout provided in the next section before cutting.
If printing at home, utilize the A4 Pattern, and for print at a copy shop, opt for the A0 Pattern for convenience.
Steps To Follow For Sewing a Tie-Front Crop Top
Let’s dive into the steps for sewing your very own unique tie-front crop top:
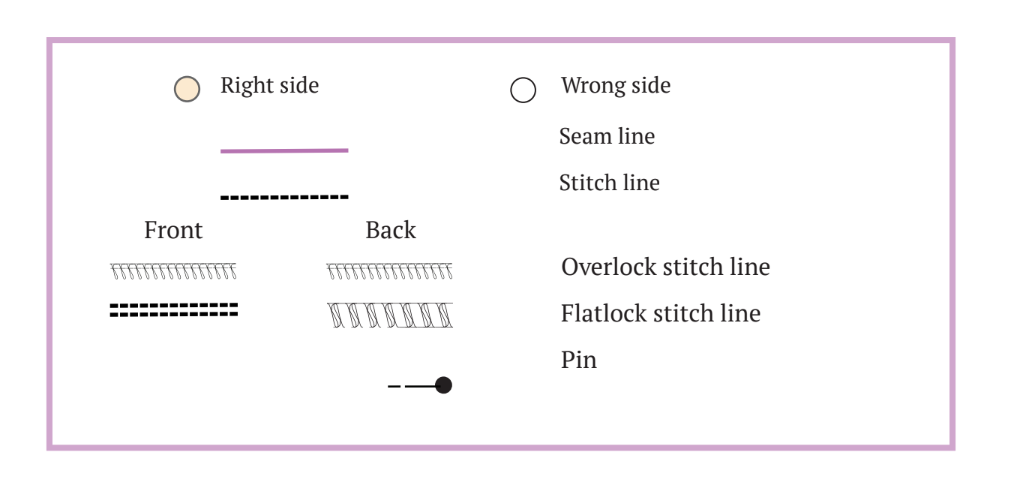
Allow me to simplify things for you! Opt for the overlock stitch in most sewing situations, although the zigzag stitch is also a good choice. If you want a tidy hem, choose the flatlock stitch. If your sewing machine permits, reduce the pressure on the presser foot, especially when dealing with stretchy fabric. And here’s a clever tip: practice your stitching before tackling the actual project.
Step 1: Cutting Layout
Ensure your garment is cut on-grain by following the provided pattern layout. While the layout is non-directional, extra fabric length is necessary for materials with nap or prints.
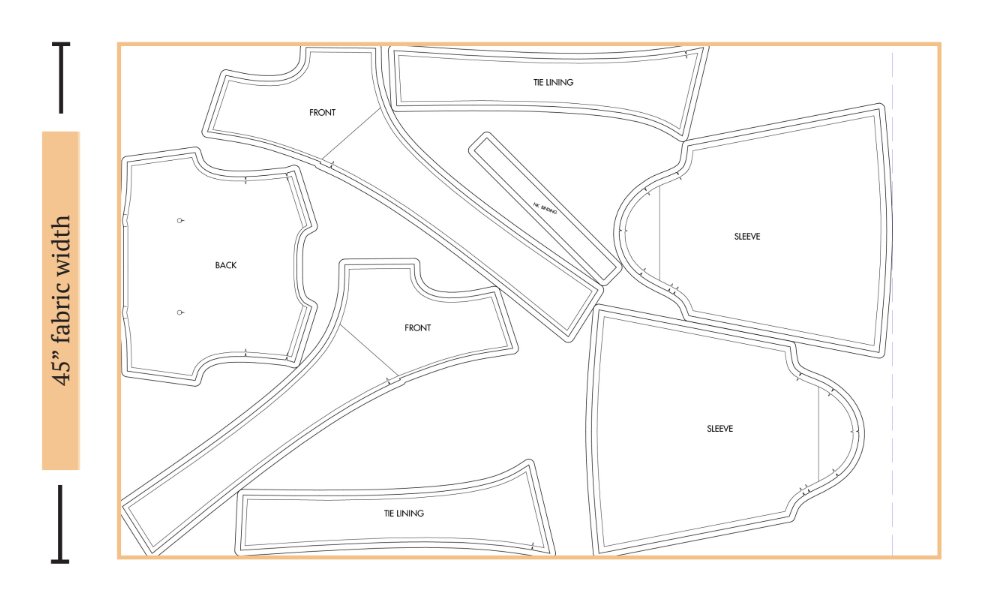
Step 2: Lay Out Your Pattern Pieces
Arrange your pattern pieces according to the cutting layout diagrams. Start by placing pieces meant for the fold and ensure the grainline arrow runs parallel to the selvage.
Step 3: Cut Your Fabric
If you’re using a rotary cutter, cut out the pattern pieces directly. If using fabric shears, trace the pattern pieces and then cut them out, ensuring you remove any pen, pencil, or chalk lines. Don’t forget to cut out any notches for proper alignment during assembly.
Step 4: Transfer Pattern Markings
Use a marking pen, pencil, or chalk to transfer essential markings (circles, buttonholes, fold lines) to the wrong side of the fabric. Mark the center front of pieces cut on the fold to aid in accurate alignment.
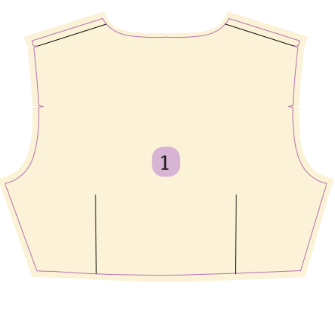
Step 5: Sewing Darts
Carefully fold the corners of the darts and press them for a polished appearance. Proceed to sew along the marked lines to secure the darts (See Picture 1a and 1b).
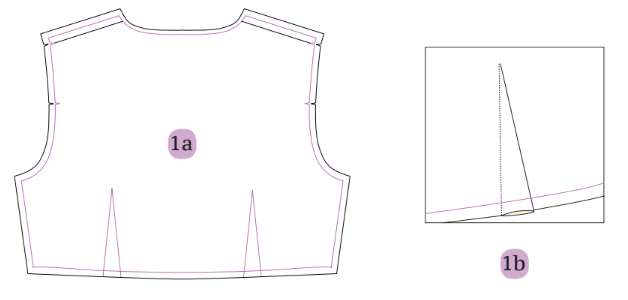
Picture 1 represents both darts of back bodice stitched together.
Step 6: Joining Front and Back Bodices
Align the front and back bodices with the right sides facing each other.
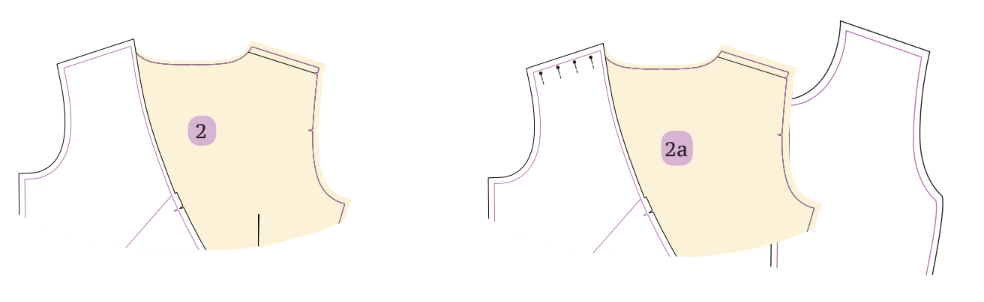
Secure them with pins.
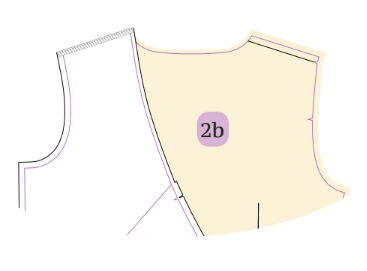
Sew the shoulder seam line, connecting both front and back sections (See Picture 2c).

Step 7: Binding the Neckline
Tip: In case you run out of binding strips, cut additional ones from the provided pattern for the armholes.
Fold the binding strip in half with the right side inward and press it.
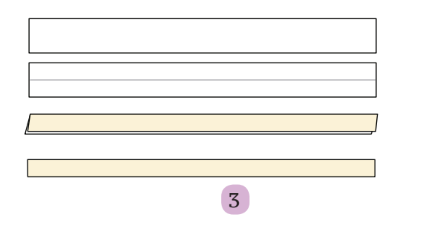
Pin the binding strip to the neckline of the bodice, ensuring it aligns with the notches. Clip the neckline to facilitate the stitching process.
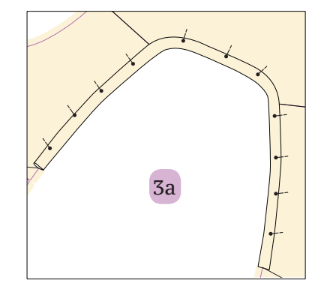
Stitch the binding strip to the neckline, ensuring a secure attachment.
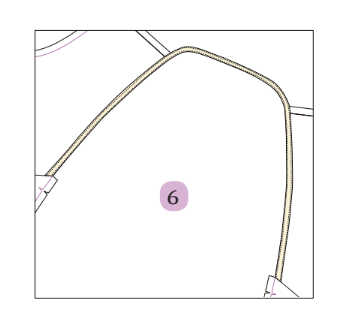
Step 8: Understitching the Binding
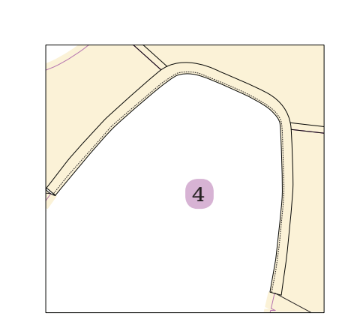
Flatten the bodice and binding strip, placing the binding strip on top of the seam allowance. Start sewing along the edge of the binding strip and seam allowance, a technique known as understitching.
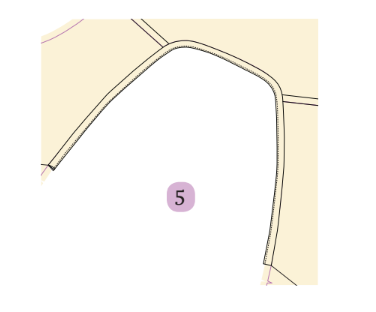
Flip the binding to the inside (wrong side) of the fabric, press it, and sew down along the fold for a clean and professional look.
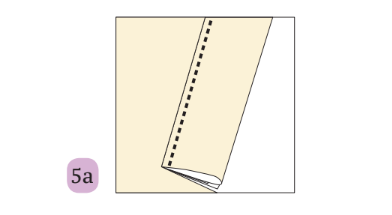
Step 9: Attaching Lining
Match the lining with the front bodice, ensuring the right sides are facing each other. Pin and clip the top of the lining, leaving it for hemming at a later stage.
Sew them together, leaving one seam line open at the top of the front bodice. With this, the front seams are completed.
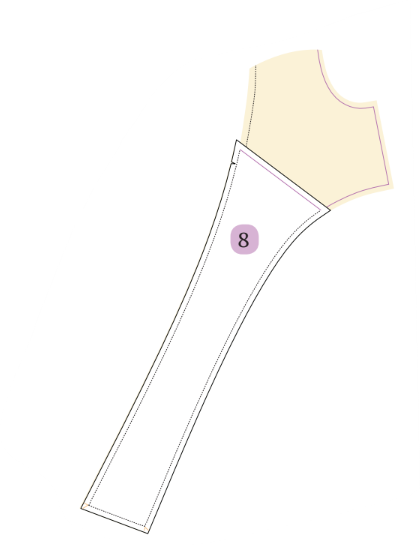
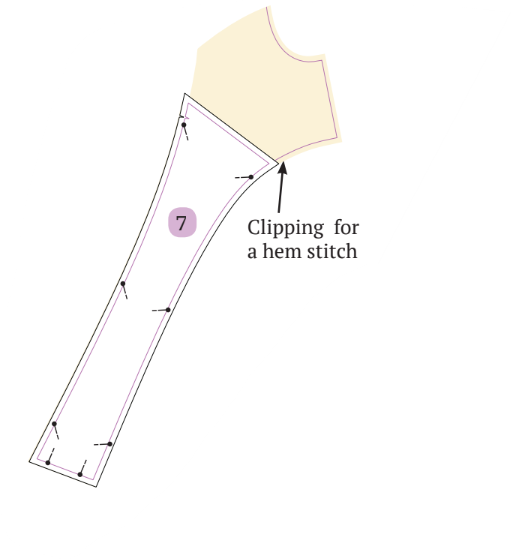
Clip the corners of the seam allowance, turn the lining inside, facing wrong-on-wrong.

Fold the open seam allowance of the lining inward and sew along its edge, securing and closing the facing. Repeat the process on the other side of the front bodice.
Step 10: Attaching Sleeves
Align the notches of the sleeves and bodices, placing them right-on-right.
Pin and clip them together on both sides of the bodice to prevent fabric slippage.
Sew the armholes of both sleeves to complete their attachment.

Step 11: Sewing Side Seams
With the sleeves and bodices facing right-on-right, pin them together. Proceed to sew the sleeves and side seam together to create a unified garment.

Step 12: Hemming
Start stitching from one side seam of the hem, continuing until you reach the starting point to complete the hemming.
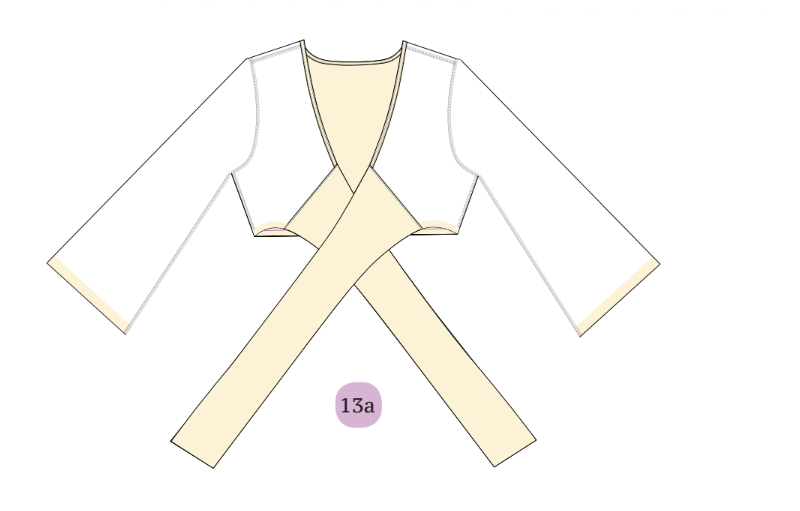
Take care not to miss any edges, especially since the sewing is done from the right side of the garment (See picture 14).
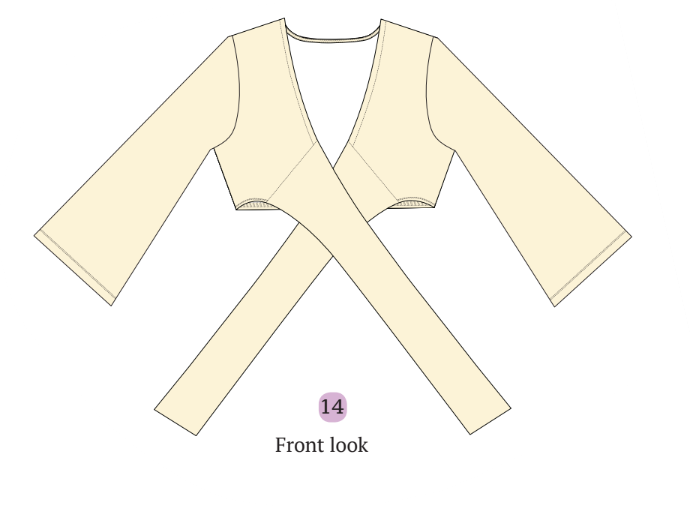
Utilize a flatlock stitch for a preferred and polished finishing touch.
Summary: How to sew a tie-front crop top?
Congratulations on mastering the art of crafting your own tie-front crop top! May this be the first of many stylish creations to come!
Crafting a tie-front crop top is a delightful DIY adventure. To summarize, begin by selecting a good sewing pattern, fabric that suits your style and comfort. Measure and cut it into a flattering shape, ensuring the right length and fit. Integrate simple sewing techniques to create the body, adding a tie-front feature for a stylish touch. Pay attention to detail, like neat finishes and secure knots. With each step, you’re on your way to a fashion-forward tie-front crop top that perfectly complements your unique taste.
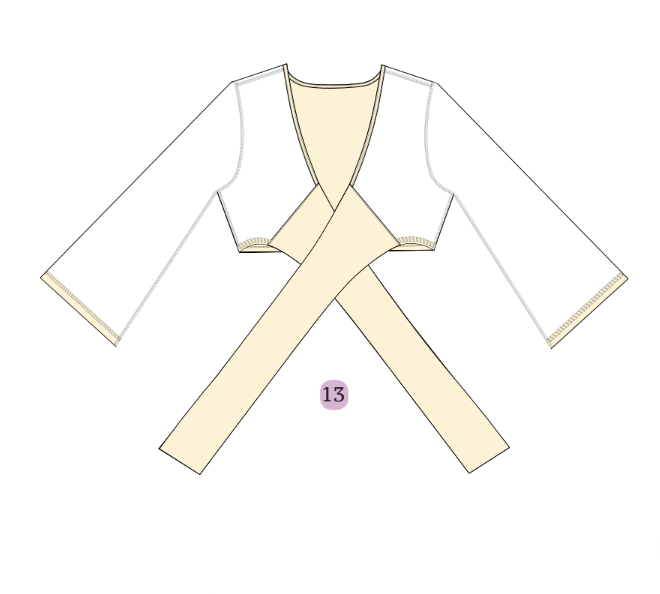
Check out some final images of this adorable top created with the Winslet’s ROXY Tie-Front Crop Top Pattern:
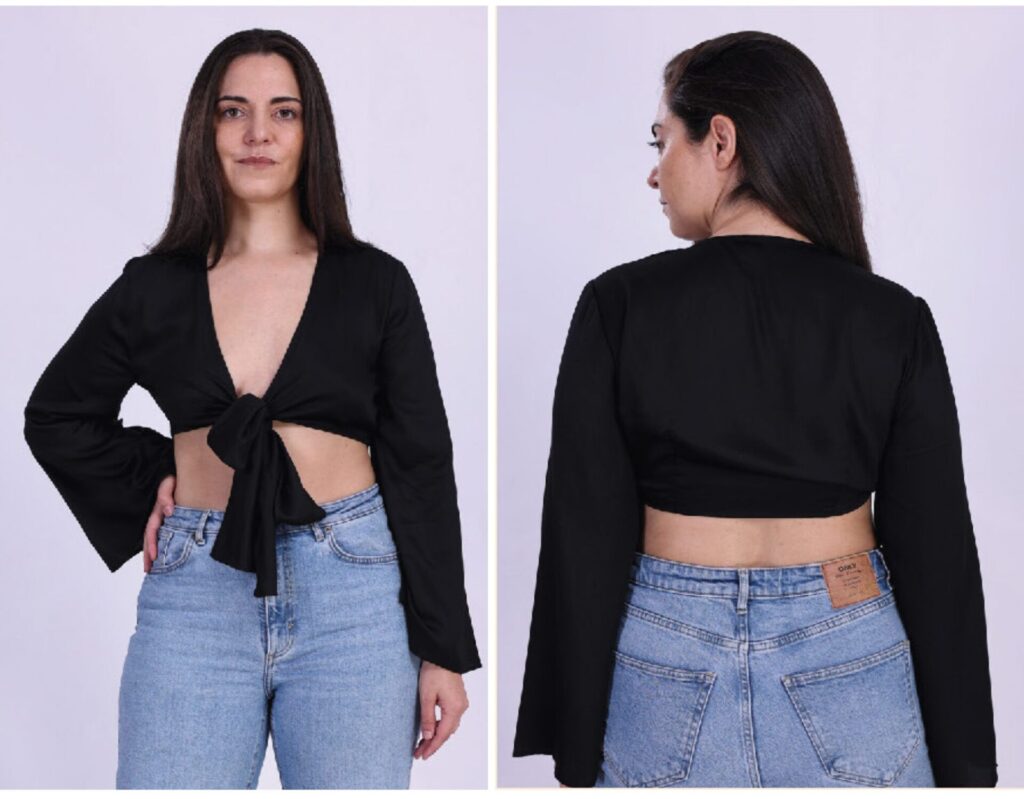
Join the Winslet’s sewing community by sharing your masterpiece with the hashtag #madewithwinslets!