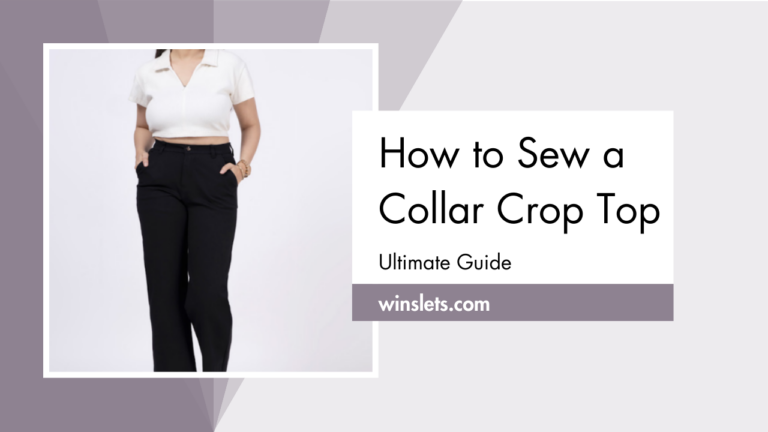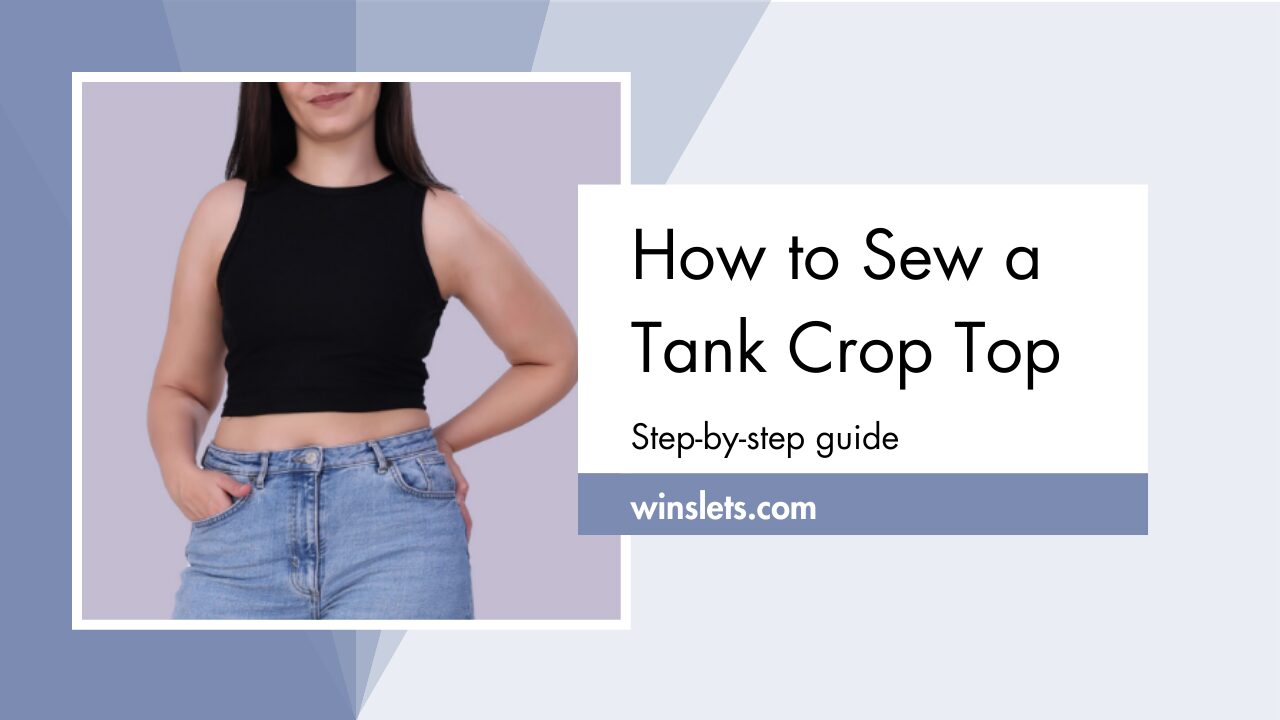
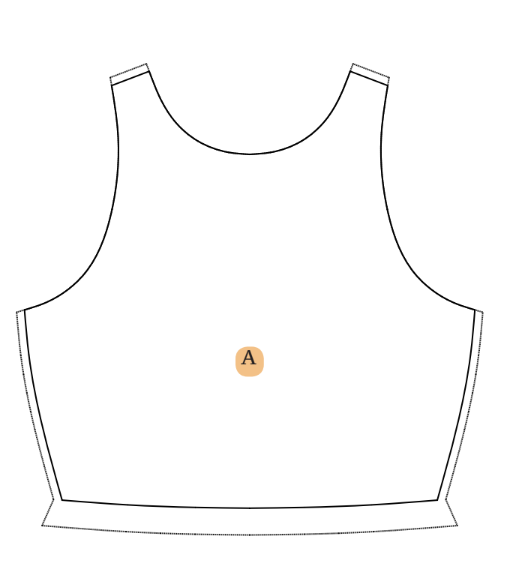
How to Sew a Tank Crop Top?
Have you always wondered how to sew a tank crop top?
Dive into the world of summer fashion with a project that’s as breezy as a seaside getaway—the Tank Crop Top. This charming sleeveless knit crop top is your ticket to a stylish, handcrafted addition to your wardrobe, blending the ease of beginner-friendly sewing with the allure of contemporary chic. In just one hour, transform simple fabric into a fashion statement that’s as versatile as it is enchanting, perfect for sunny days and balmy evenings alike.
Follow this tutorial’s illustrated step-by-step sewing directions with the right fabric recommendation.
What sewing supplies do you need to sew a sleeveless tank crop top?
Creating a sleeveless knit tank crop top is an exciting sewing project that requires the right sewing supplies. Here’s a guide on the essential sewing supplies you’ll need:
Sewing Pattern: A sewing pattern for the tank top. I used Winslet’s Breeze Tank Crop Top Pattern. This pattern is simple and an excellent choice for beginners. With easy-to-follow instructions, you’ll be able to complete the entire sewing process efficiently. The added convenience of A0 and A4 sizes allows for hassle-free printing at home or a local copy shop.
- Sewing Machine: A reliable sewing machine with a stretch or ballpoint needle is essential for working with knit fabrics. If you’re looking to buy a new machine or upgrade your current one, this post recommends Best Sewing Machines.
- Shears: High-quality fabric shears are essential for cutting the knit fabric precisely. If you are looking to buy a new pair of scissors, this post recommends Best Sewing Scissors and Shears.
- Iron: Knit fabrics benefit from gentle pressing to eliminate wrinkles and create smooth seams without stretching the material. If you are looking to buy a sewing iron, read this post on the Best Cordless Iron for Sewing.
- Tape Measure: Ensure you measure your bust, waist, and hips accurately to determine the right size for your sleeveless knit crop top.
- Chalk: Tailor’s chalk is useful for marking pattern pieces and guidelines directly onto the fabric.
- Pins: Use ballpoint pins designed for knit fabrics to prevent snags and damage to the material.
- Needles: Use stretch or ballpoint needles designed for knit fabrics to prevent skipped stitches and fabric damage.
- Thread: Choose a high-quality 3-ply polyester thread in a color that complements your fabric. Polyester thread has some stretch, making it suitable for knit fabrics.
- Thread Cutter: Keep a thread cutter handy on your sewing table for quick and precise cutting.
- Binder Attachment: If your sleeveless knit crop top design includes bindings, a binder attachment for your sewing machine can be a handy tool.
Fabric Recommendation
For a trendy sleeveless knit tank crop top, opt for light-medium weight knit fabrics like cotton blends, jersey, lycra & swimwear fabrics, spandex, stretch velour, or stretch velvet. Consider a 100 percent cotton rib or a blend with spandex for shape retention.
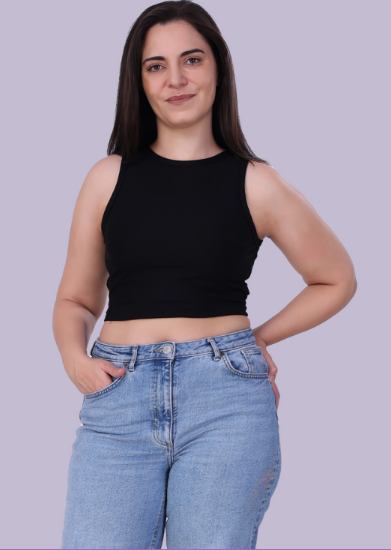
The recommended 2×1 rib-knit cotton fabric, as seen on the cover model wearing a crop top made with the Winslet’s Breeze Tank Crop Top Pattern boasts anti-curl edges, minimal wrinkles, and a denser texture than jersey. Its remarkable stretchiness, especially the 1×1 rib pattern, ensures a snug fit.
Size Charts
Select the size (XS, S, M, L, XL, 2XL, or 3XL) that aligns best with your body measurements by referring to the provided size charts.
Measure the largest areas for the chest and hips while measuring the waist at its narrowest point, just above the belly button.
Keep in mind that if your precise measurements are not found in the table, you may want to consider selecting a size up.
The sizes in the table below are indicated in both inches and centimeters.
Body Measurements
| XS (inches) | XS (cm) | S (inches) | S (cm) | M (inches) | M (cm) | L (inches) | L (cm) | XL (inches) | XL (cm) | 2XL (inches) | 2XL (cm) | 3XL (inches) | 3XL (cm) | |
| Bust | 32 | 81.3 | 34 | 86.4 | 36 | 91.4 | 38 | 96.5 | 40 | 101.6 | 42 | 106.7 | 44 | 111.8 |
| Waist | 26 | 66.0 | 28 | 71.1 | 30 | 76.2 | 32 | 81.3 | 34 | 86.4 | 36 | 91.4 | 38 | 96.5 |
Final Garment Measurements
| XS (inches) | XS (cm) | S (inches) | S (cm) | M (inches) | M (cm) | L (inches) | L (cm) | XL (inches) | XL (cm) | 2XL (inches) | 2XL (cm) | 3XL (inches) | 3XL (cm) | |
| Chest | 30 | 76.2 | 32 | 81.3 | 34 | 86.4 | 36 | 91.4 | 38 | 96.5 | 40 | 101.6 | 42 | 106.7 |
| Full Length | 14.25 | 36.2 | 14.5 | 36.8 | 14.75 | 37.5 | 15 | 38.1 | 15.25 | 38.7 | 15.5 | 39.4 | 15.75 | 40.0 |
| Shoulder Width | 1.225 | 3.1 | 1.275 | 3.2 | 1.345 | 3.4 | 1.415 | 3.6 | 1.48 | 3.8 | 1.54 | 3.9 | 1.61 | 4.1 |
Fabric Yield (How much fabric do you need?)
| Width of the Fabric | XS (yards) | XS (meters) | S (yards) | S (meters) | M (yards) | M (meters) | L (yards) | L (meters) | XL (yards) | XL (meters) | 2XL (yards) | 2XL (meters) | 3XL (yards) | 3XL (meters) |
| 45” | 0.55 | 0.50 | 0.56 | 0.51 | 0.57 | 0.52 | 0.57 | 0.52 | 0.58 | 0.53 | 0.59 | 0.54 | 0.60 | 0.55 |
| 60” | 0.55 | 0.50 | 0.56 | 0.51 | 0.57 | 0.52 | 0.57 | 0.52 | 0.58 | 0.53 | 0.59 | 0.54 | 0.60 | 0.55 |
Understanding Your Patterns: Assembly and Marking of the Sleeveless Tank Crop Top Pattern
In assembling the sleeveless knit tank crop top pattern, carefully align and secure pattern pieces that you have downloaded, ensuring accurate placement. Mark critical points for precise construction, laying the foundation for a well-fitted and stylish garment.
A. Front Bodice: cut x1 fabric
- Lay out knit fabric with the right side up.
- Pin front bodice pattern.
- Trace pattern onto fabric.
- Cut along traced lines.
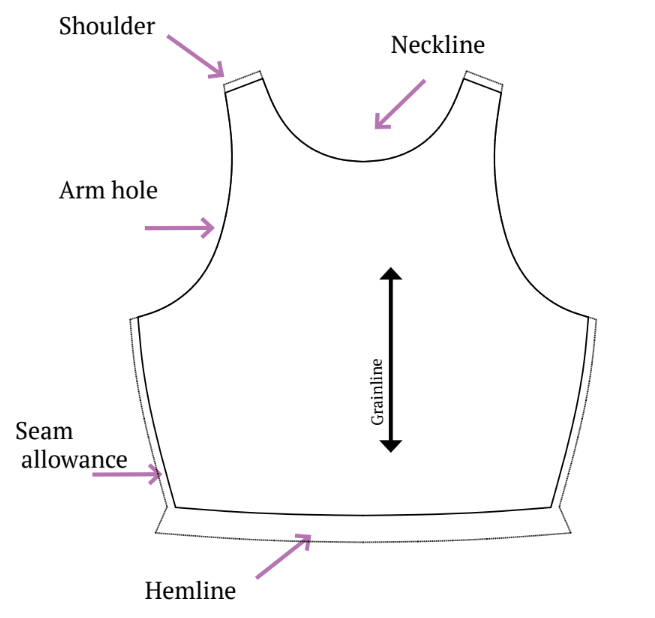
B. Back Bodice: cut x1 fabric
- Follow the same steps as for the front bodice, using the back bodice pattern.
- Trace and cut the back bodice piece.


C. Binding: cut x1 fabric
- Pin binding pattern onto fabric.
- Trace pattern onto fabric, marking any notches.
- Cut along traced lines.

To minimize fabric waste, consult the cutting layout provided in the next section before cutting.
If printing at home, utilize the A4 Pattern or US letter size, and for print at a copy shop, opt for the A0 Pattern for convenience.
Steps To Follow For Sewing a Sleeveless Knit Tank Crop Top
Get ready to stitch up some style as I’ll walk you through the steps to effortlessly sew your own sleeveless knit tank crop top, making every stitch a step closer to fashion-forward perfection:
Let me make a few things simpler for you! Use the overlock stitch for most sewing, but the zigzag stitch works too. For a neat hem, go with the flatlock stitch. If your sewing machine allows, lighten the presser foot pressure, especially with stretchy fabric. And here’s a smart idea: practice your stitching before jumping into the final project.
Step 1: Cutting Layout
Ensure your garment is cut on-grain by following the provided pattern layout. While the layout is non-directional, extra fabric length is necessary for materials with nap or prints.

Step 2: Lay Out Your Pattern Pieces
Arrange your pattern pieces according to the cutting layout diagrams. Start by placing pieces meant for the fold and ensure the grainline arrow runs parallel to the selvage.
Step 3: Cut Your Fabric
If you’re using a rotary cutter, cut out the pattern pieces directly. If using fabric shears, trace the pattern pieces and then cut them out, ensuring you remove any pen, pencil, or chalk lines. Don’t forget to cut out any notches for proper alignment during assembly.
Step 4: Transfer Pattern Markings
Use a marking pen, pencil, or chalk to transfer essential markings (circles, buttonholes, and fold lines) to the wrong side of the fabric. Mark the center front of pieces cut on the fold to aid in accurate alignment.
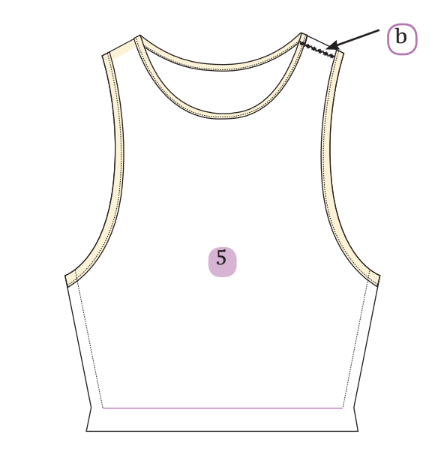
Step 5: Shoulder Seams
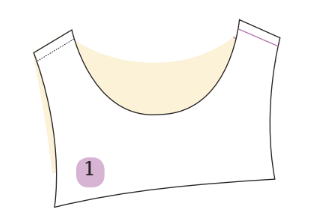
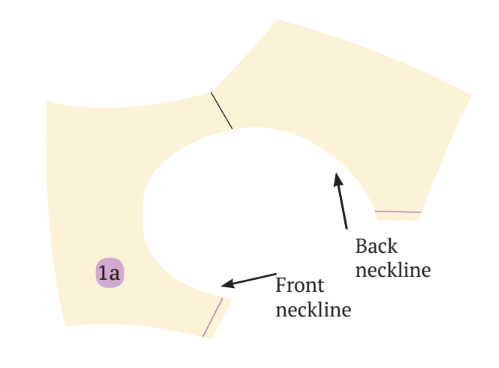
Place the front and back shoulder pieces right sides together and sew one shoulder seam. Picture 1a is the right side of the fabric.
If not overlocked, flat-open the shoulder seam. See picture a.

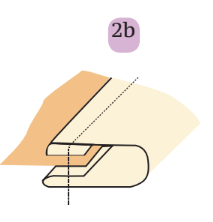
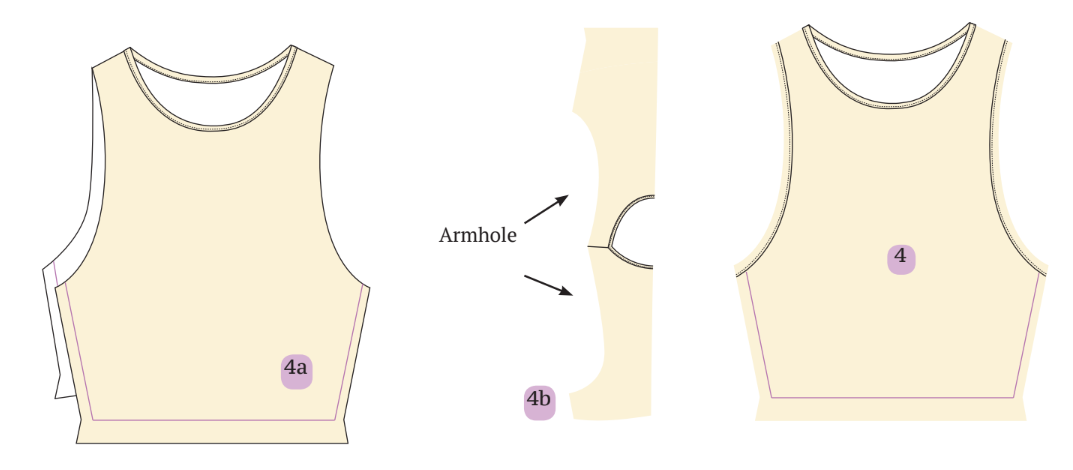
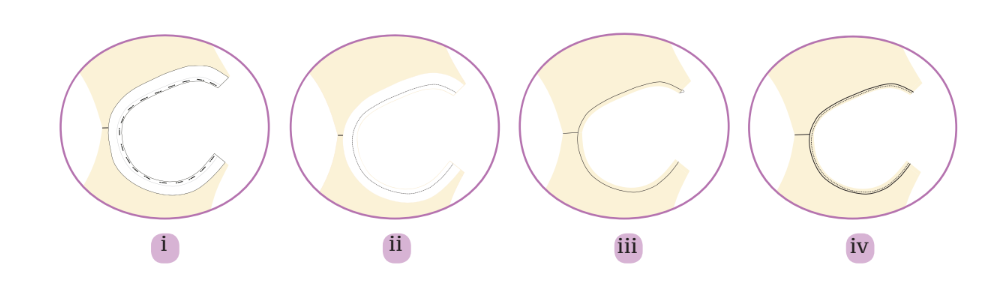
Step 6: Neckline Binding
Insert the binding strip inside the binder, stitching about 1 inch (See Picture 2a).
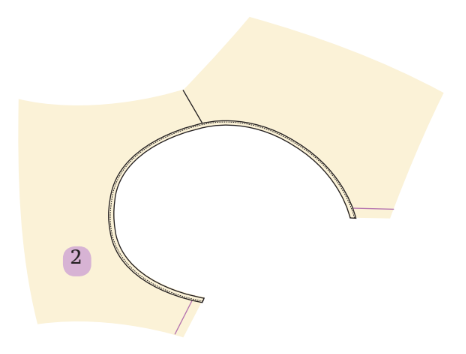
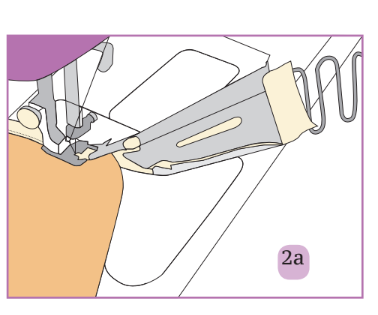
Insert the neck seam allowance inside the bind (See Picture 2a) and start sewing the neckline from one end to the other. Trim the excess strip for armholes.
Picture 2b represents how the bind strip gets stitched.
Step 7: Second Shoulder Seam
Sew the other shoulder seam, ensuring it is right side together.
Step 8: Armhole Binding
Use the binding strip to bind both armholes.
Step 9: Side Seams
Align the front and back pieces right sides together and sew the side seams.
The inclusion of “b” in the aforementioned image is optional, suggesting the utilization of a zigzag stitch to neatly complete raw edges. This step is not obligatory if opting for an overlock stitch.
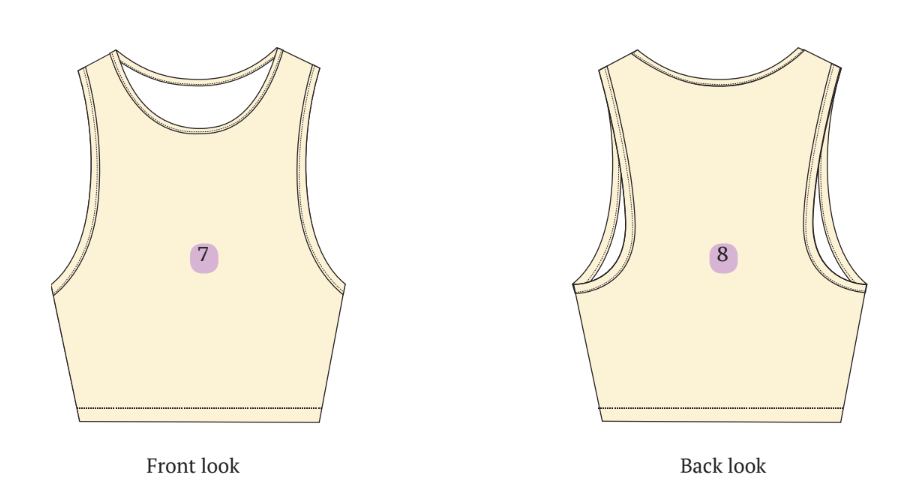
Step 10: Hemming
Fold the seam allowance of the hem inside and iron it properly. Stitch on the right side of the fabric for a polished hem look.
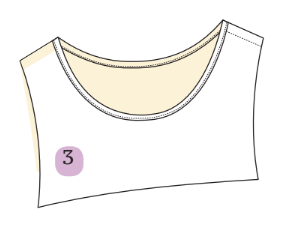
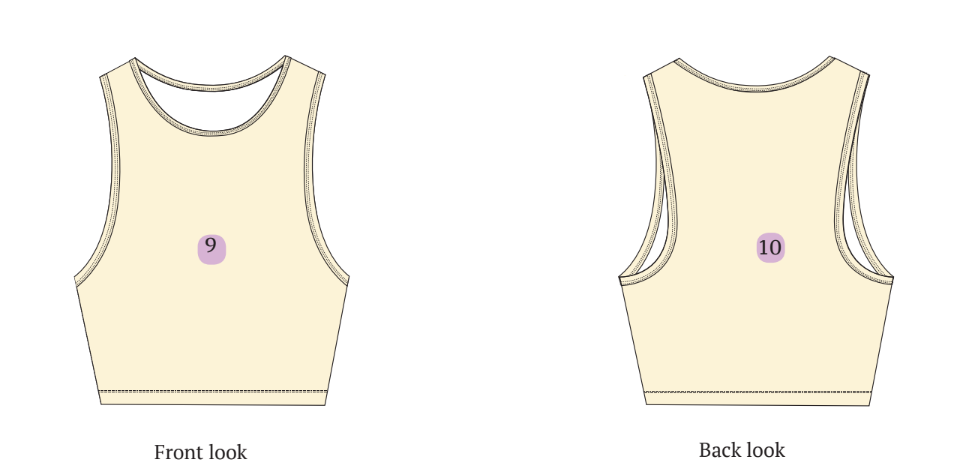
Picture 7 and 8 are the front and back look of the garment.
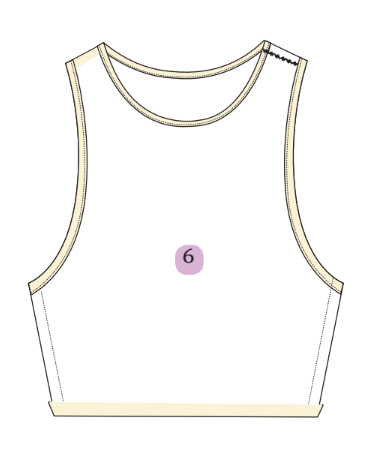
Step 11: Optional: Flatlock Stitch
Consider using a flatlock stitch for added detailing on armholes, neckline, and hem.
Pictures 9 and 10 represent a flatlock stitch on the garment.
Step 12: Binding Without a Binder
If a binder is unavailable, utilize bias tape for added stability in binding. Pin the strip to the neckline right sides together and sew on the seam line. Wrap the neckline edge to the backside, concealing the strip edge inside. Stitch from the right side, ensuring the backside gets stitched. Stitch on top of the binding for a neat finish.
Tip: In the absence of a binder, bias tape can provide stability in binding. Pin the strip to the neckline right sides together, sew on the seam line, wrap the neckline edge to the backside, conceal the strip edge inside, and stitch from the right side. Top-stitch the binding for a polished look.
Summary: How to stitch a sleeveless tank crop top
That’s it! Congratulations on sewing your own sleeveless knit tank crop top! You have a fabulous garment to flaunt.
Making a cool sleeveless knit tank crop top is a fun fashion project. First, pick nice fabric in your favorite color. Measure and cut it to fit you just right. Then, use simple sewing techniques to create this stylish garment.
I’ve used the Winslet’s Breeze Tank Crop Top Pattern but you can use any pattern that you have.
Check out some final images of this adorable top created with the Winslet’s Breeze Tank Crop Top Pattern:

Share your photos with using the hashtag #madewithwinslets and if you have any questions, reach out to support@winslets.com .