How to Sew a Bustier Crop Top?
Have you ever wondered how to sew a bustier crop top?
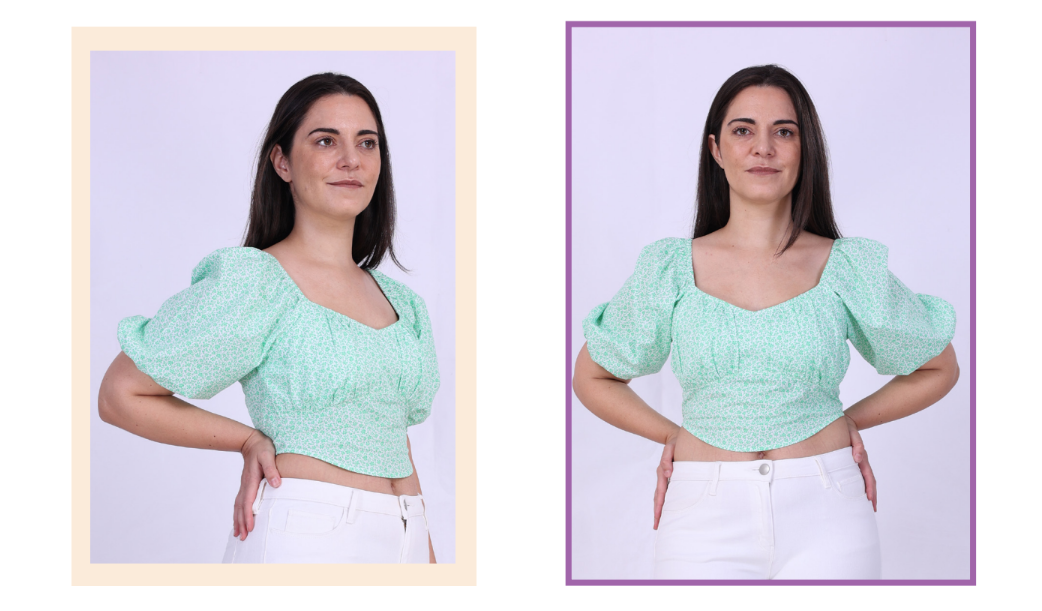
I recently sewed one using the Winslet’s Blossom Bustier Crop Top Pattern. This crop top features a shirred back for a snug fit and balloon sleeves for a trendy look.
What sewing supplies do you need to sew a bustier crop top?
The basic supplies you need to sew a bustier crop top are Sewing Pattern (I used Winslet’s Blossom Bustier Crop Top Pattern for my project), Sewing Machine, Tape Measure, Chalk, Shears, Pins, Iron, Needles, Thread (preferably 3-ply polyester), Thread Cutter, Elastic Band, and Elastic Thread.
The Bustier Crop Top Pattern I used
Fabric Recommendation
This is a quick and easy crop top, which doesn’t require a lot of fabric. That makes it a great sewing project for fabric scraps. You can use cotton blend, modal satin, satin, or light weight denim.
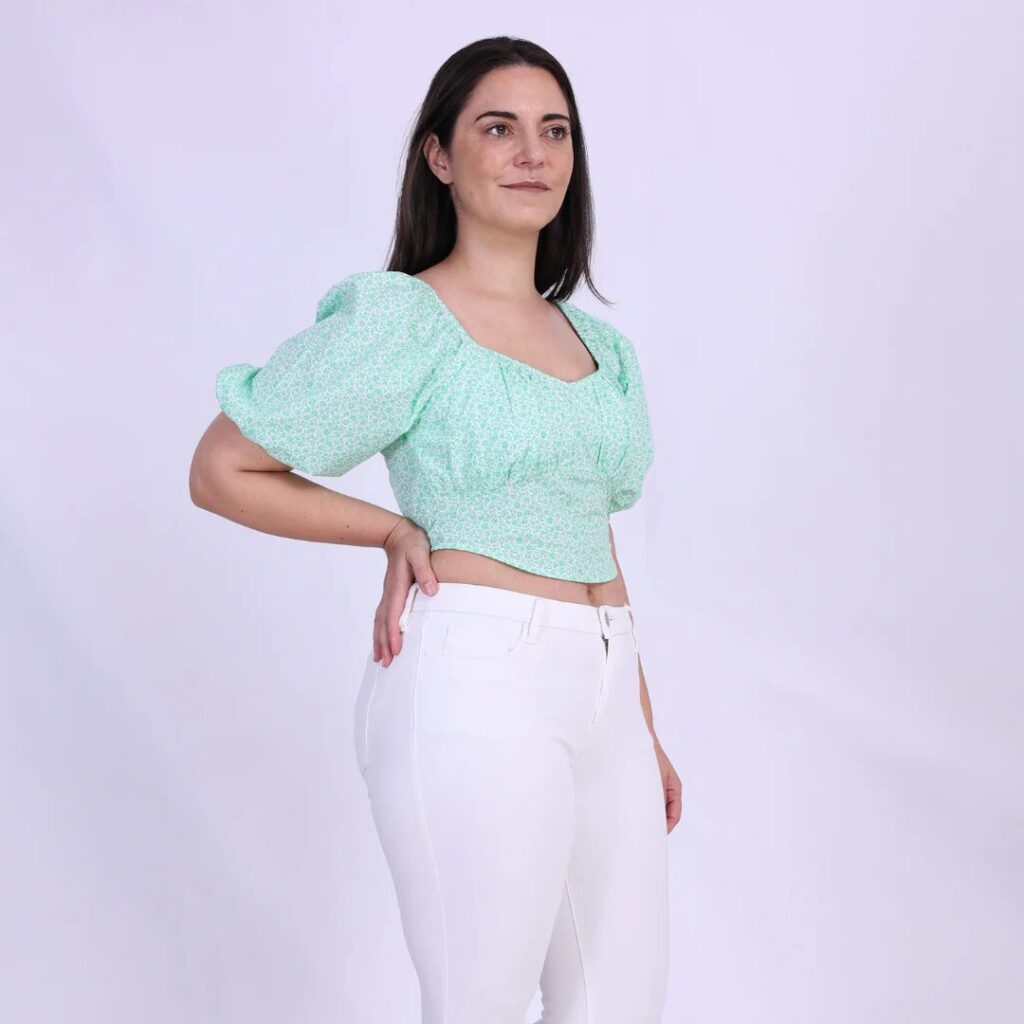
Katie is wearing a bustier top made with the Winslet’s Blossom Bustier Crop Top Pattern. The fabric used in the above picture is everyone’s go-to choice, cotton printed fabric, as it boasts high water retention, a soft, comfortable texture, and exceptional breathability for cool summer wear.
Size Charts
The bustier crop top sewing pattern measurements for sizes (XS, S, M, L, XL, 2XL, or 3XL) are detailed below. Choose a size that corresponds most closely to your body measurements.
Measure the largest areas for the chest and hips, and for the waist, measure at its narrowest part just above the belly button.
It’s worth noting that if your exact measurements are not listed in the table, you may want to consider ordering a size larger.
The size chart includes measurements in both inches and centimeters for your reference.
Body Measurements
| XS (inches) | XS (cm) | S (inches) | S (cm) | M (inches) | M (cm) | L (inches) | L (cm) | XL (inches) | XL (cm) | 2XL (inches) | 2XL (cm) | 3XL (inches) | 3XL (cm) | |
| Bust | 32 | 81.3 | 34 | 86.4 | 36 | 91.4 | 38 | 96.5 | 40 | 101.6 | 42 | 106.7 | 44 | 111.8 |
| Waist | 26 | 66.0 | 28 | 71.1 | 30 | 76.2 | 32 | 81.3 | 34 | 86.4 | 36 | 91.4 | 38 | 96.5 |
Final Garment Measurements
| XS (inches) | XS (cm) | S (inches) | S (cm) | M (inches) | M (cm) | L (inches) | L (cm) | XL (inches) | XL (cm) | 2XL (inches) | 2XL (cm) | 3XL (inches) | 3XL (cm) | |
| Chest Round | 28 | 71.12 | 30 | 76.2 | 32 | 81.28 | 34 | 86.36 | 36 | 91.44 | 38 | 96.52 | 39 | 99.06 |
| Hem Round | 25 | 63.5 | 27.5 | 69.85 | 29 | 73.66 | 31.5 | 80.01 | 33 | 83.82 | 35.5 | 90.17 | 37 | 93.98 |
| Sleeve Length | 14.5 | 36.83 | 14.75 | 37.4 | 15 | 38.1 | 15.25 | 38.7 | 15.5 | 39.37 | 15.75 | 40 | 16 | 40.64 |
Fabric Yield
| Width of the Fabric | XS (yards) | XS (meters) | S (yards) | S (meters) | M (yards) | M (meters) | L (yards) | L (meters) | XL (yards) | XL (meters) | 2XL (yards) | 2XL (meters) | 3XL (yards) | 3XL (meters) |
| 45” | 1.36 | 1.25 | 1.60 | 1.46 | 1.88 | 1.72 | 2.17 | 1.98 | 2.49 | 2.28 | 2.87 | 2.62 | 3.30 | 3.01 |
| 60” | 0.94 | 0.86 | 1.10 | 1.01 | 1.29 | 1.18 | 1.49 | 1.36 | 1.71 | 1.57 | 1.97 | 1.80 | 2.26 | 2.07 |
Steps To Follow For Sewing a Bustier Crop Top
Let’s begin sewing the bustier crop top together AKA the fun part:
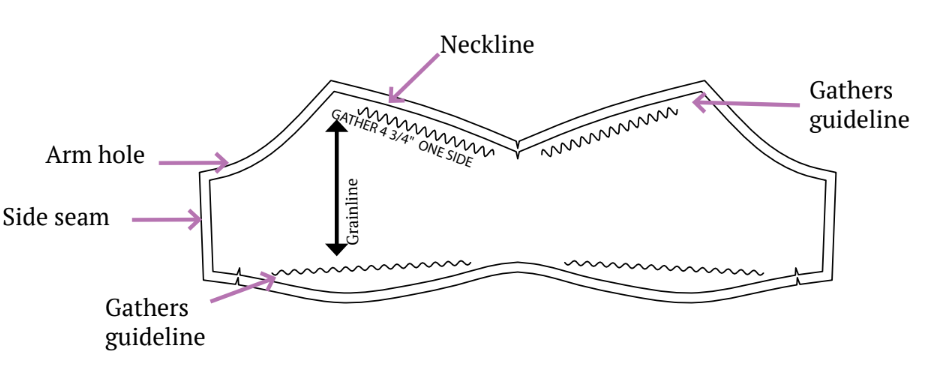
Pattern Marking and Inventory
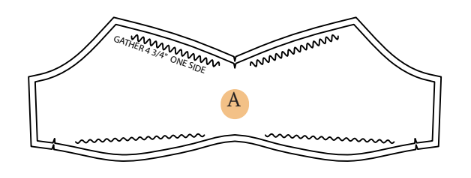
Before you start sewing, cut out all the pattern pieces as listed in the pattern instructions. You should have all the pieces as listed below:
A. Front Top Panel – cut x1 fabric
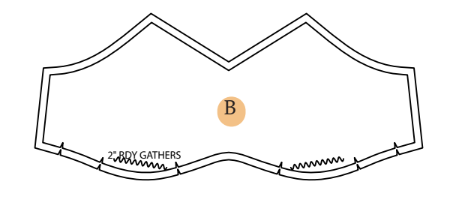
B. Front Lining Top Panel – cut x1 fabric

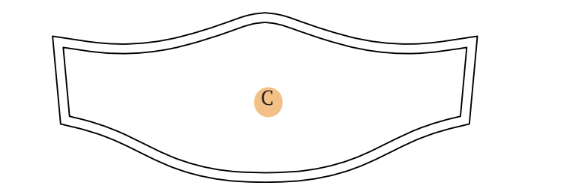
C. Front Bottom Panel – cut x2 fabric

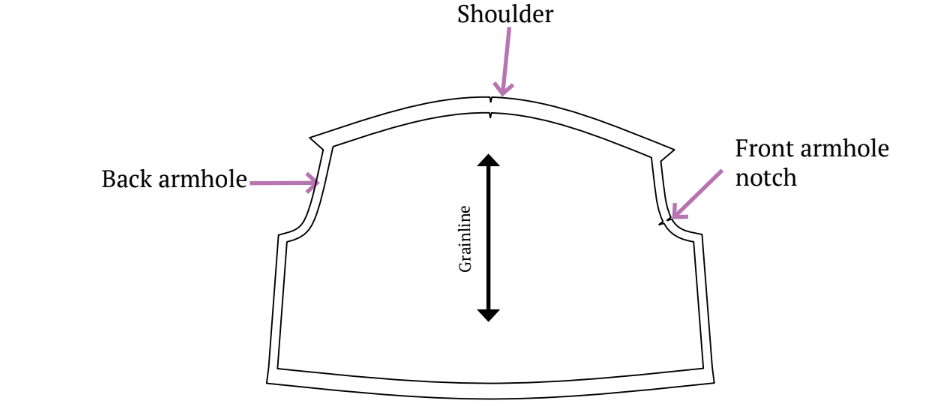
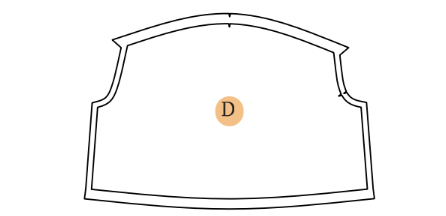
D. Sleeve – cut x2 fabric
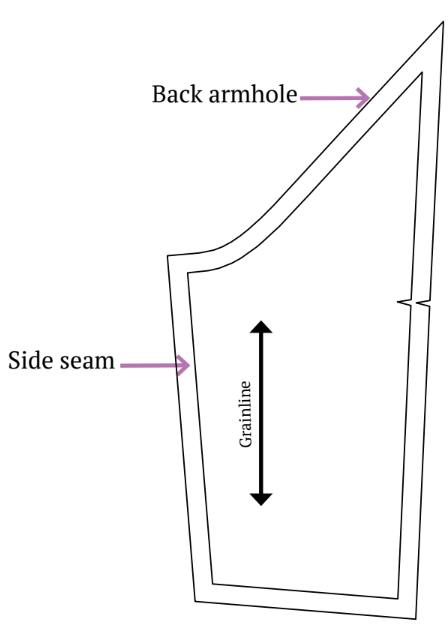
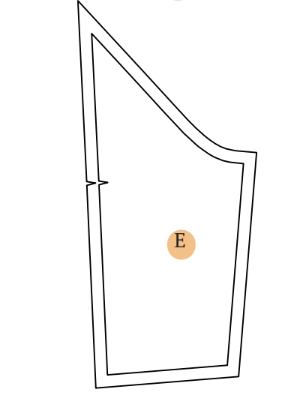
E. Back Side Panel – cut x2 fabric
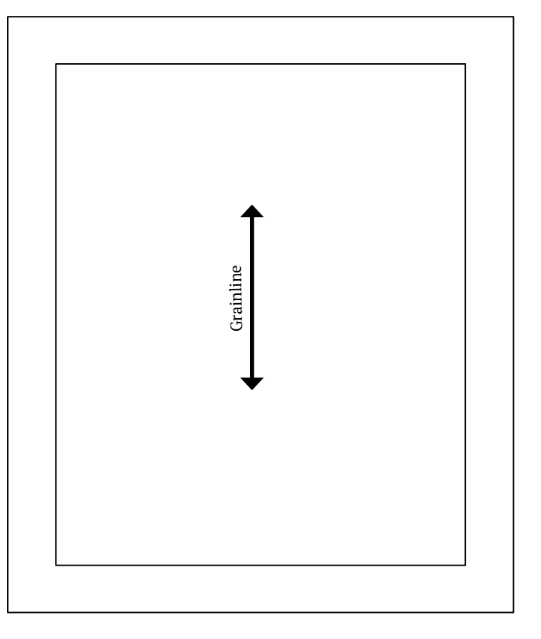
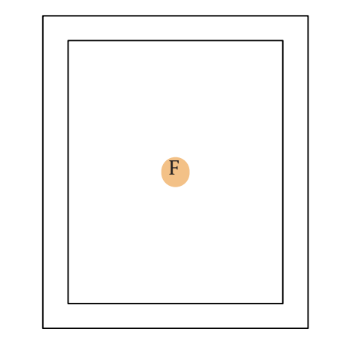
F. Back Shirring Panel – cut x1 fabric
Cutting Layout
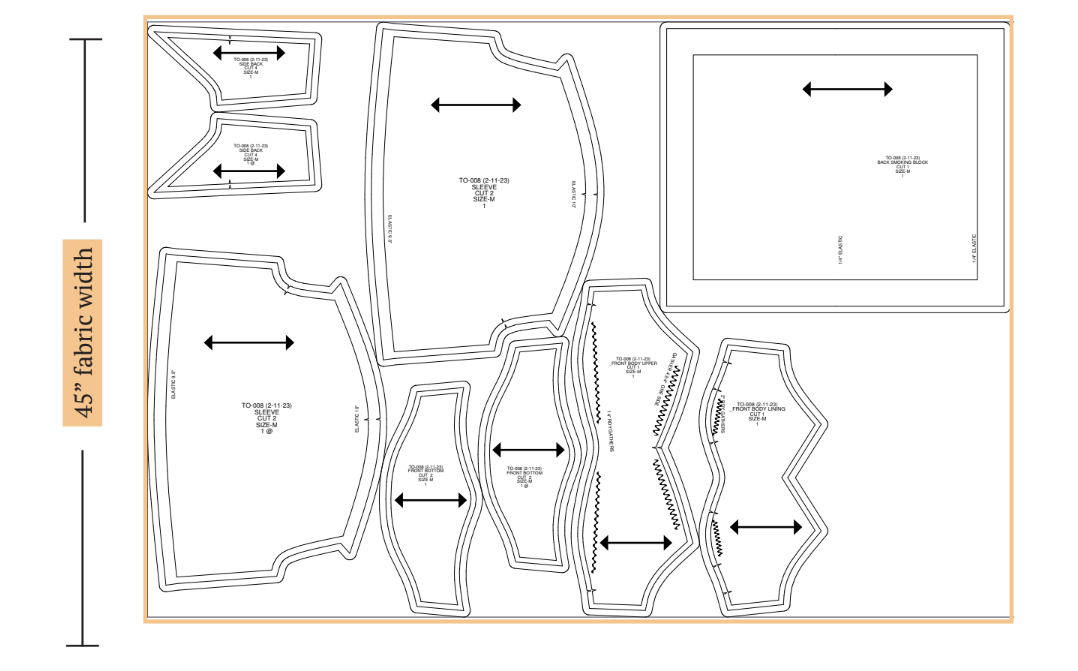
- Ensure your garment is cut on-grain for proper alignment.
- Pin fabric accurately for precise shapes.
- The provided pattern layouts are nondirectional; additional fabric may be needed for nap or prints.
Sewing Steps
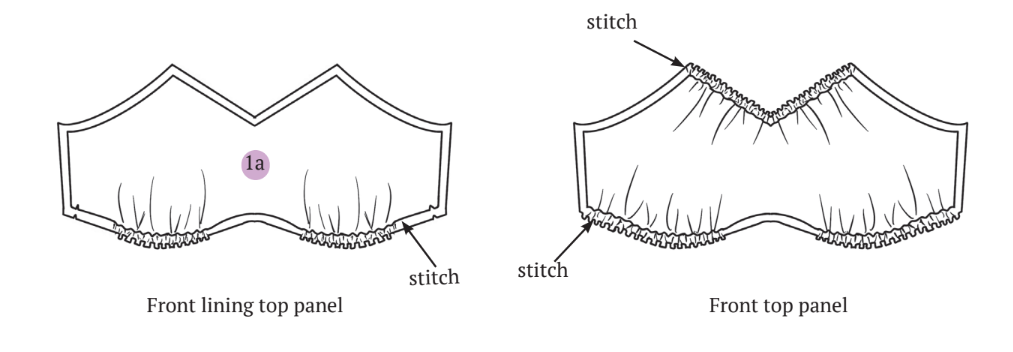
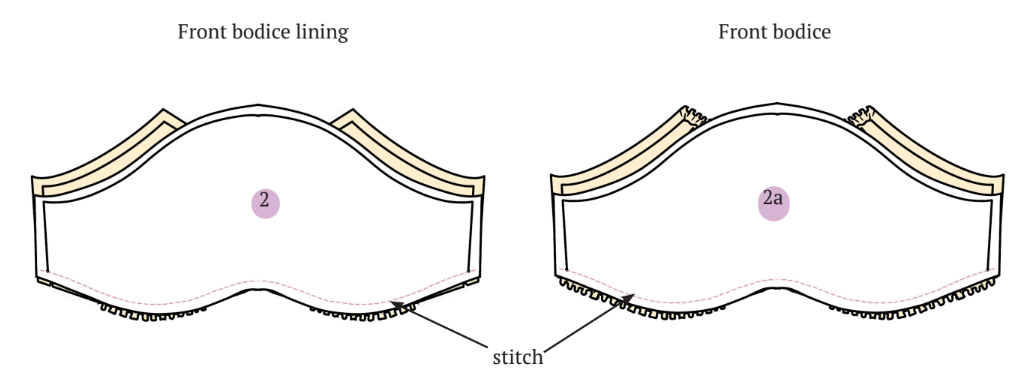
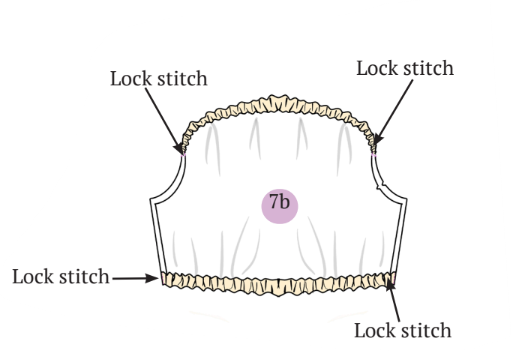
Step 1: Gather Front Bodice
Apply a bast stitch along the neckline and the lower edge of the front bodice top panel, as well as on the lower edge of the front lining top panel.
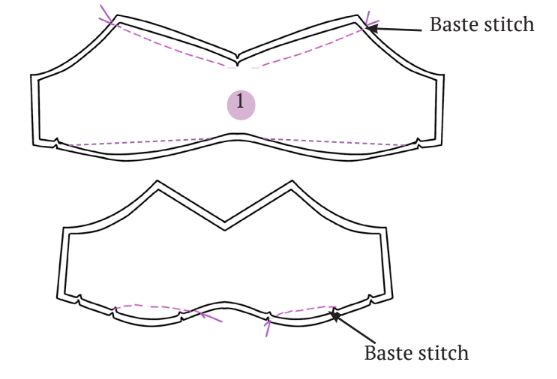
Pull strings for gathers, adjust to required length, and lock with a stitch.
Step 2: Attach Front Panels
Sew front top panel to bottom panel, right sides together.
Repeat for front bodice lining.
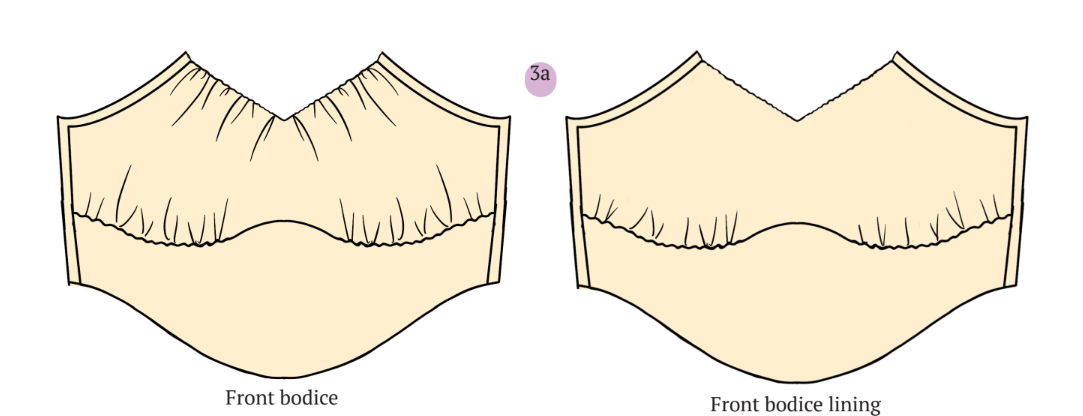
Step 3: Join Front Bodice and Front Bodice Lining
Align right sides together and stitch along the neckline and hemline.
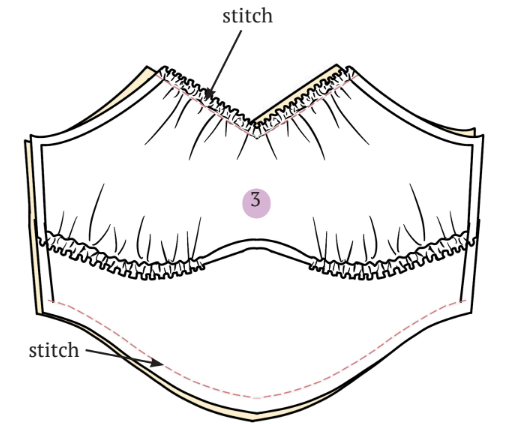
Turn the front bodice fabric right side out, iron neckline, and hemline for a clean finish.
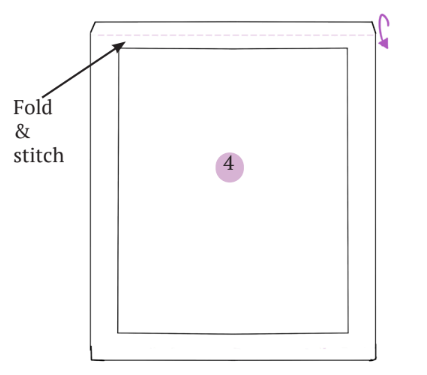
Step 4: Finish Back Panel
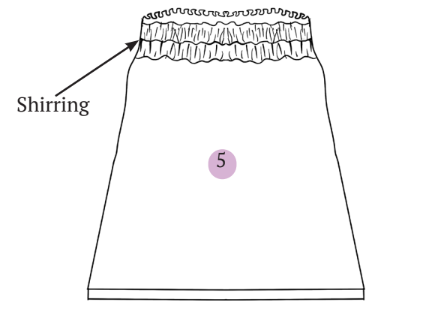
Complete the top edge of the back panel by initially folding the seam allowance inward, aligning the fold edge precisely with the seam line. Follow this by folding it over again, with the second fold originating from the seam line, ensuring that the raw edge is concealed within the initial fold.
Press fold for a sharp edge and topstitch close to folded edge.
Get the back panel ready for shirring by marking guidelines at intervals of 0.5 inches.

Step 5: Shirring Back Panel
Wrap the shirring elastic around the bobbin, ensuring appropriate tension without excessive stretching. Employ regular polyester thread for both the spool and needle.
Tip: Take into account the color of the shirring elastic you prefer. Typically, shirring elastic is available in black and white, although you may also find it in various other colors.
Adjust the machine’s tension dial to a long straight stitch, such as 4 or 5 (equivalent to 3 to 4 stitches per inch), and sew the shirring rows on the right side of the fabric.
Tip: Before moving on to your actual garment, practice shirring on a fabric scrap to fine-tune the sewing machine settings.
Ensure the elastic is securely anchored by sewing two stitches, back-tacking two stitches, and refrain from using the needle up/down button or automatic thread cutter.
Even out gathers, steam with an iron to settle the folds, and topstitch on sides of the back panel to secure the shirring.
Tip: Ensure that you do not tighten the elastic while pulling the fabric at the end of each row. Pull the elastic from the bobbin, not from your fabric.
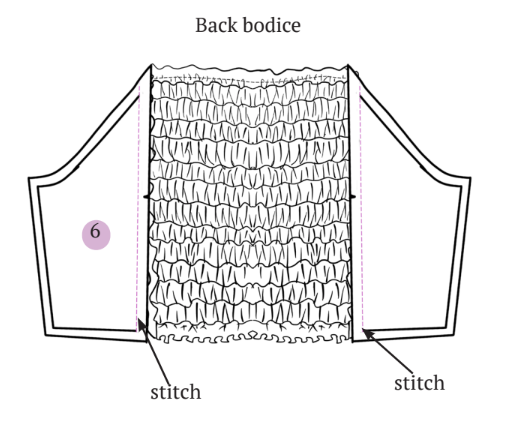
Step 6: Attach Shirred Panel to Back Side Panel
Stitch along the seam line.
Repeat for both sides.
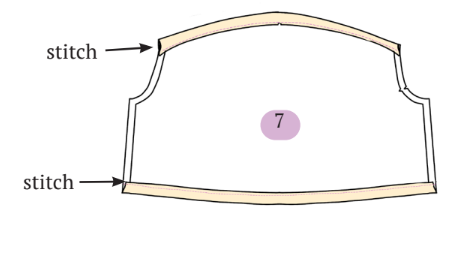
Step 7: Elastic Pockets on Sleeve
Fold the edges towards the wrong side and topstitch along the folded edges. This will form an elastic pocket on both the shoulder and bottom edges of the sleeve, leaving an opening to insert the elastic.
Insert a 10-inch elastic in the shoulder and a 9.5-inch elastic in the bottom portion using a safety pin. The elastic’s width should be 0.25 inches.

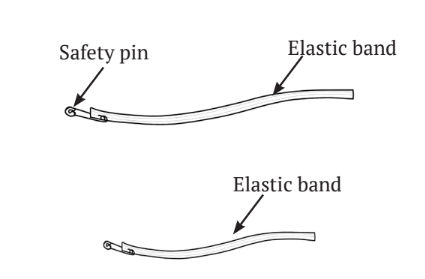
Smooth out the gathers and secure the elastic pockets by lock-stitching at the ends to ensure the elastic remains securely in place.
Step 8: Join Front and Back Bodice
Place the right sides together and stitch alongside the side seam seamline.

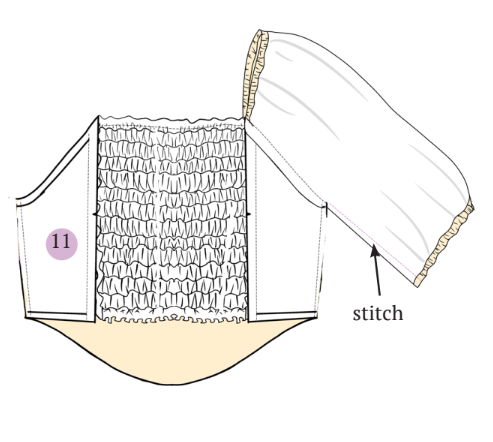
Step 9: Attach Sleeve to Bodice
Position the sleeve on the bodice with the right sides facing each other. Align the front of the sleeve’s armhole with the front bodice armhole, and then stitch along the armhole seamline.
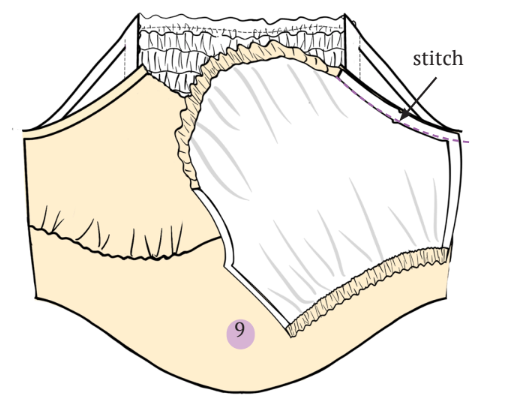
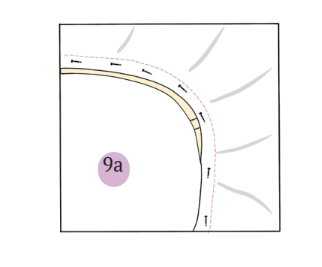
Turn the sleeve toward the back, align back armholes with the back bodice armhole, and stitch along the armhole seamline.
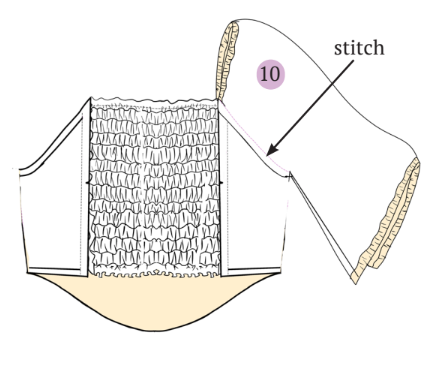
Step 10: Stitch Sleeve Side Seams
Align the side seams of the sleeve together and sew along the seamline, making sure to stitch on the wrong side of the fabric. Repeat the same process for the other sleeve.
Step 11: Finish Back Hem
Finish the back hem by folding the bottom edge of the fabric twice towards the wrong side and sewing along the folded hem.
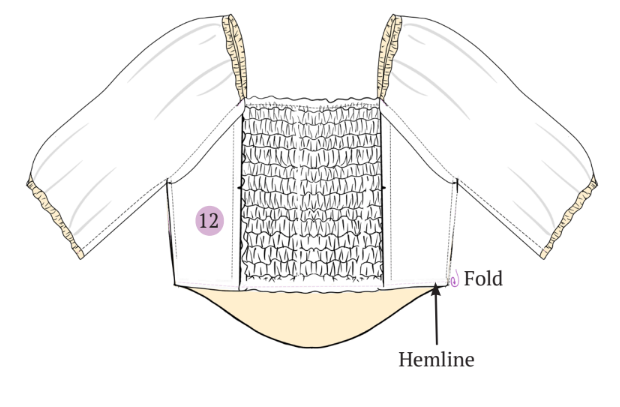
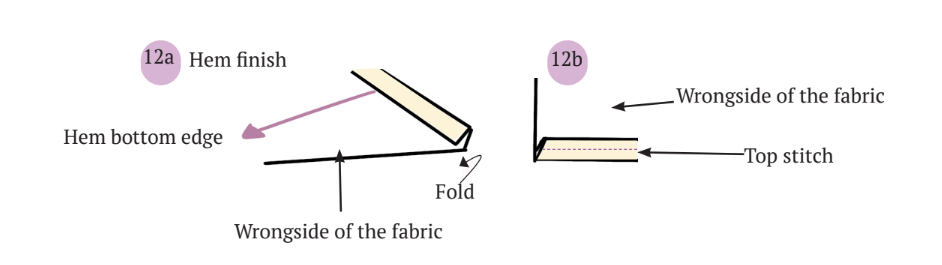
Complete the stitching with a backstitch to secure it in place.
Ensure to tuck the fabric’s edge inside to prevent fraying.
Summary: How to sew a bustier crop top?
The bustier crop top is super easy to sew and suitable for both beginners and advanced sewists.
Check out some final images of this adorable top created with the Winslet’s Blossom Bustier Crop Top Pattern:
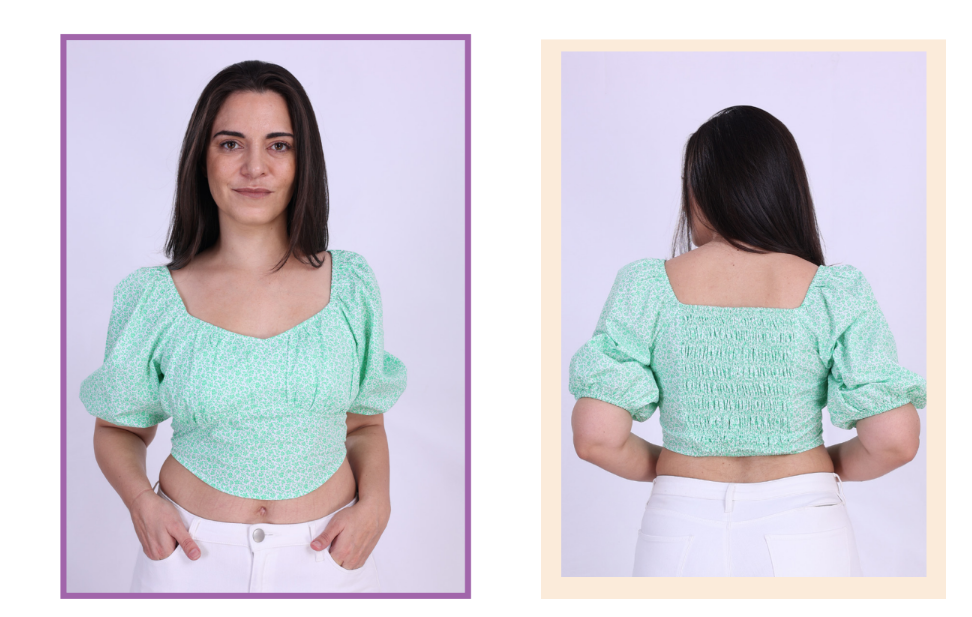
I really hope you enjoyed sewing with the Winslet’s Blossom Bustier Crop Top Pattern. If so, I’d love to see some pictures and to hear your feedback on it. Comment below!
For more wonderful ideas and sewing projects, make sure to read my other posts!
Join the Winslet sewing community by sharing your masterpiece with the hashtag #madewithwinslets!


