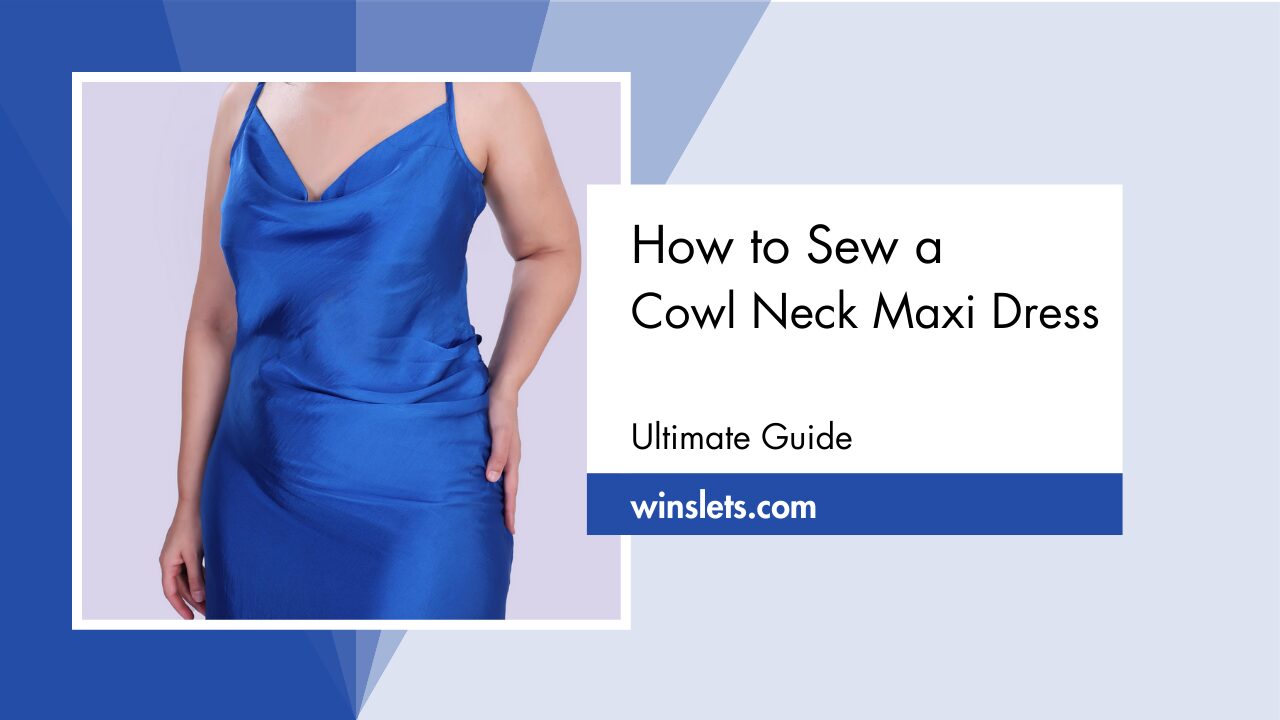
How to Sew a Cowl Neck Maxi Dress?
Have you wondered how to sew a cowl neck maxi dress?
Hi there, today I’m going to walk you through making your very own maxi dress with a cowl neck. I used the Winslet’s AURORA Cowl Neck Maxi Dress Pattern and it was quite easy! I hope this tutorial is easy to follow and you have fun sewing it! Let’s get started!
What sewing supplies do you need to sew a cowl neck maxi dress?
The basic supplies you need to sew a cowl neck maxi dress are Sewing Pattern (I used Winslet’s AURORA Cowl Neck Maxi Dress Pattern in this example), Sewing Machine, Tape Measure, Chalk, Shears, Pins, Iron, Needles, Thread (preferably 3-ply polyester), Thread Cutter, Loop, Adjustable Loop, and Bias Interfacing.
Fabric Recommendation
Maxi dresses are best made from rayon satin, silk blend fabric, acrylic fabric, and nylon fabric.

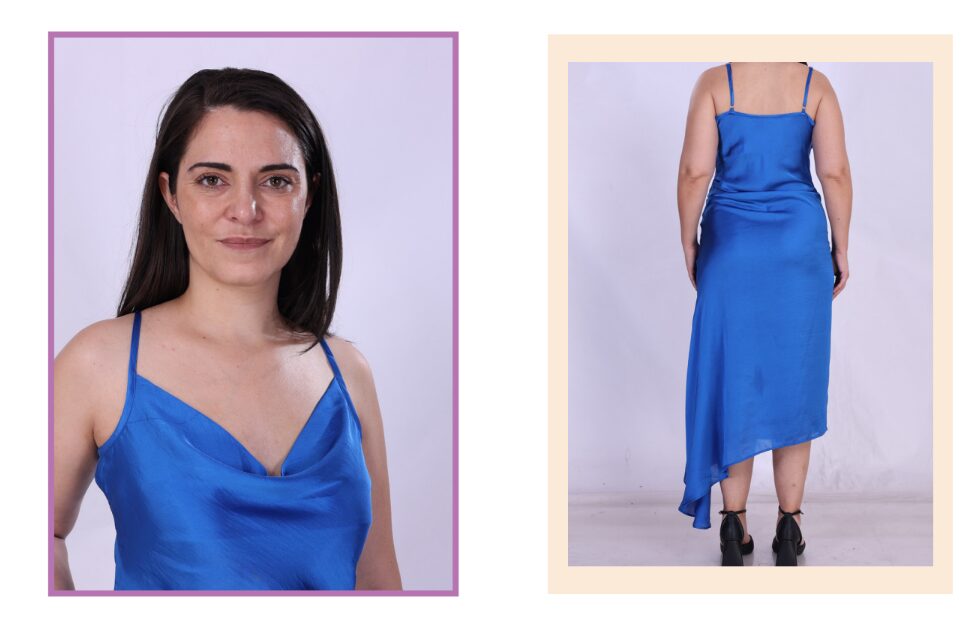
Katie, our inhouse model, is featured in a cowl neck maxi dress made with Winslet’s AURORA Cowl Neck Maxi Dress Pattern. The dress is made from poly-satin fabric, known for its soft touch, wrinkle resistance, shape retention, quick drying, and colorfastness, making it a practical and vibrant choice. In terms of cost, the poly-satin fabric is excellent.
Size Charts
The cowl neck maxi dress sewing pattern measurements for sizes (XS, S, M, L, XL, 2XL, or 3XL) are detailed below. Choose a size that is closest to your body measurements.
Measure the largest areas for the chest and hips, and for the waist, measure at its narrowest part just above the belly button.
It’s worth noting that if your exact measurements are not listed in the table, you may want to consider choosing one size up.
The size chart includes measurements in both inches and centimeters.
Body Measurements
| XS (inches) | XS (cm) | S (inches) | S (cm) | M (inches) | M (cm) | L (inches) | L (cm) | XL (inches) | XL (cm) | 2XL (inches) | 2XL (cm) | 3XL (inches) | 3XL (cm) | |
| Bust | 32 | 81.3 | 34 | 86.4 | 36 | 91.4 | 38 | 96.5 | 40 | 101.6 | 42 | 106.7 | 44 | 111.8 |
| Waist | 26 | 66.0 | 28 | 71.1 | 30 | 76.2 | 32 | 81.3 | 34 | 86.4 | 36 | 91.4 | 38 | 96.5 |
Final Garment Measurements
| XS (inches) | XS (cm) | S (inches) | S (cm) | M (inches) | M (cm) | L (inches) | L (cm) | XL (inches) | XL (cm) | 2XL (inches) | 2XL (cm) | 3XL (inches) | 3XL (cm) | |
| Full Length | 53.52 | 135.94 | 53.69 | 136.37 | 53.91 | 136.93 | 54.61 | 138.7 | 54.91 | 139.47 | 55.55 | 141.09 | 55.62 | 141.27 |
| Chest | 16.33 | 41.47 | 17.33 | 44.01 | 18.33 | 46.55 | 19.33 | 49.09 | 20.33 | 51.63 | 21.33 | 54.17 | 22.33 | 56.71 |
Fabric Yield
| Width of the Fabric | XS (yards) | XS (meters) | S (yards) | S (meters) | M (yards) | M (meters) | L (yards) | L (meters) | XL (yards) | XL (meters) | 2XL (yards) | 2XL (meters) | 3XL (yards) | 3XL (meters) |
| 60” | 1.47 | 1.35 | 1.73 | 1.58 | 2.04 | 1.86 | 2.34 | 2.14 | 2.69 | 2.46 | 3.10 | 2.83 | 3.56 | 3.26 |
Steps To Follow For Sewing an Asymmetrical Cowl Neck Maxi Dress
Let’s dive into the steps for sewing your very own unique cowl neck maxi dress:
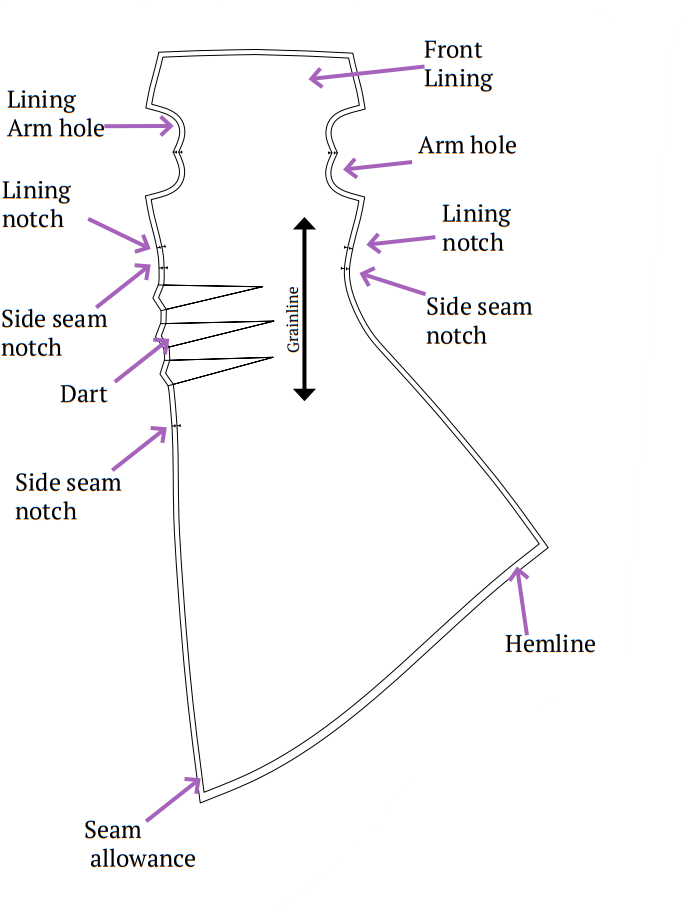
Pattern Marking and Inventory
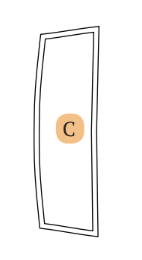
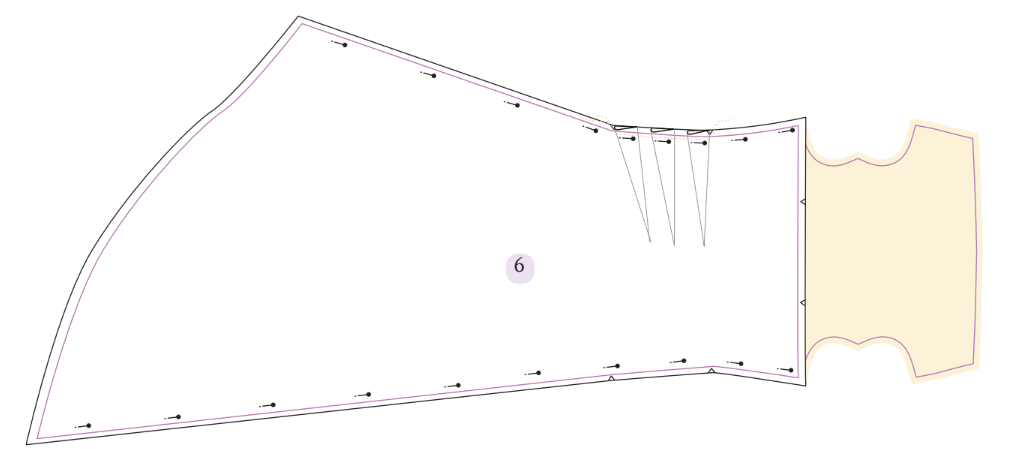
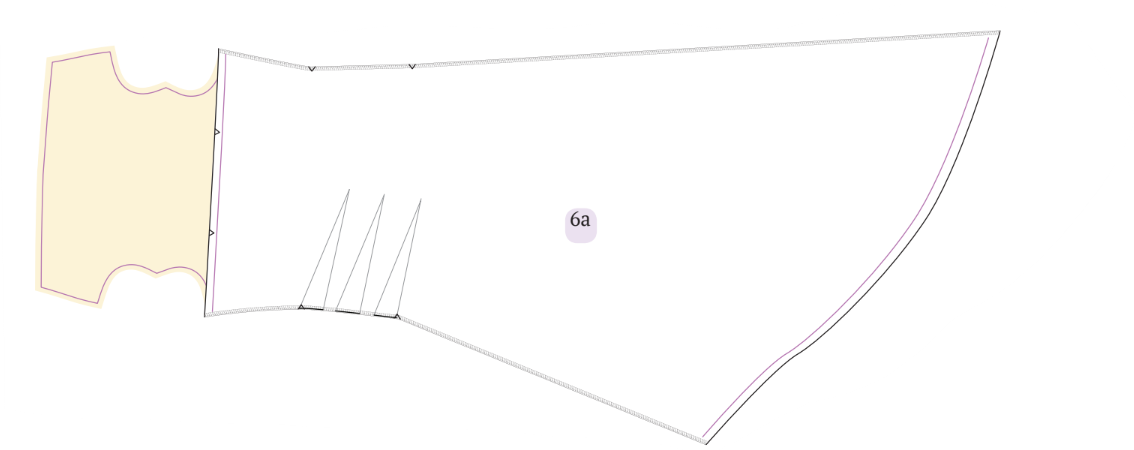
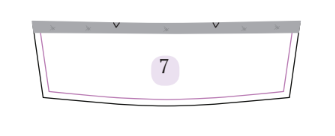
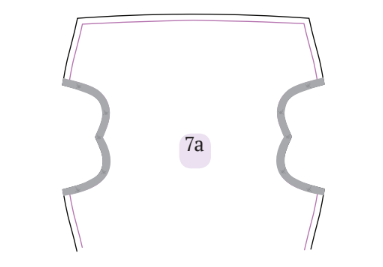
Once you have printed and assembled your pattern, you will cut:
A. Front – cut x1 fabric
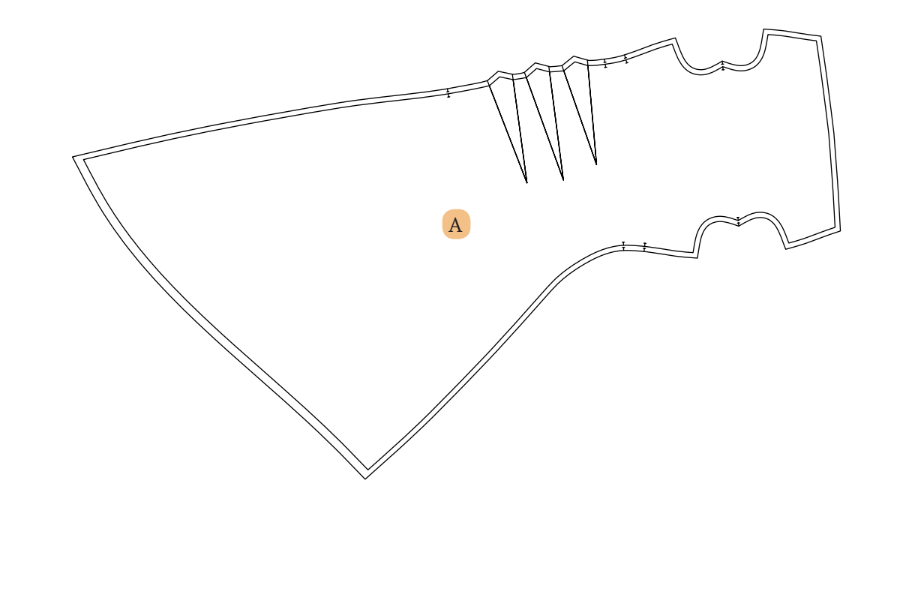
B. Back – cut x1 fabric
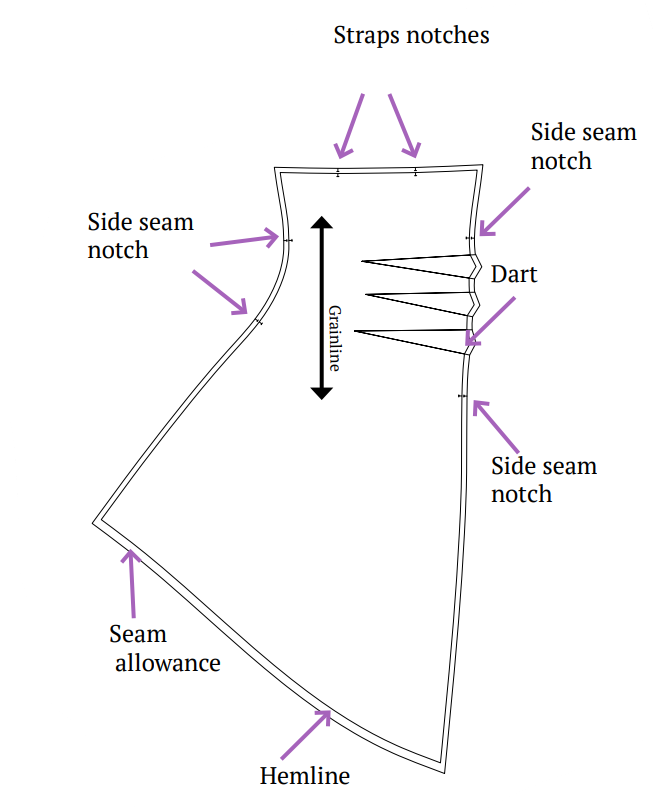
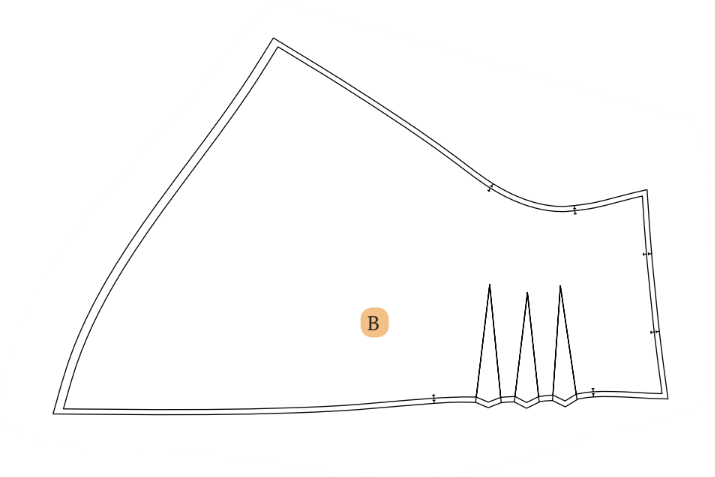
C. Back Lining – cut x1 fabric
Cutting Layout
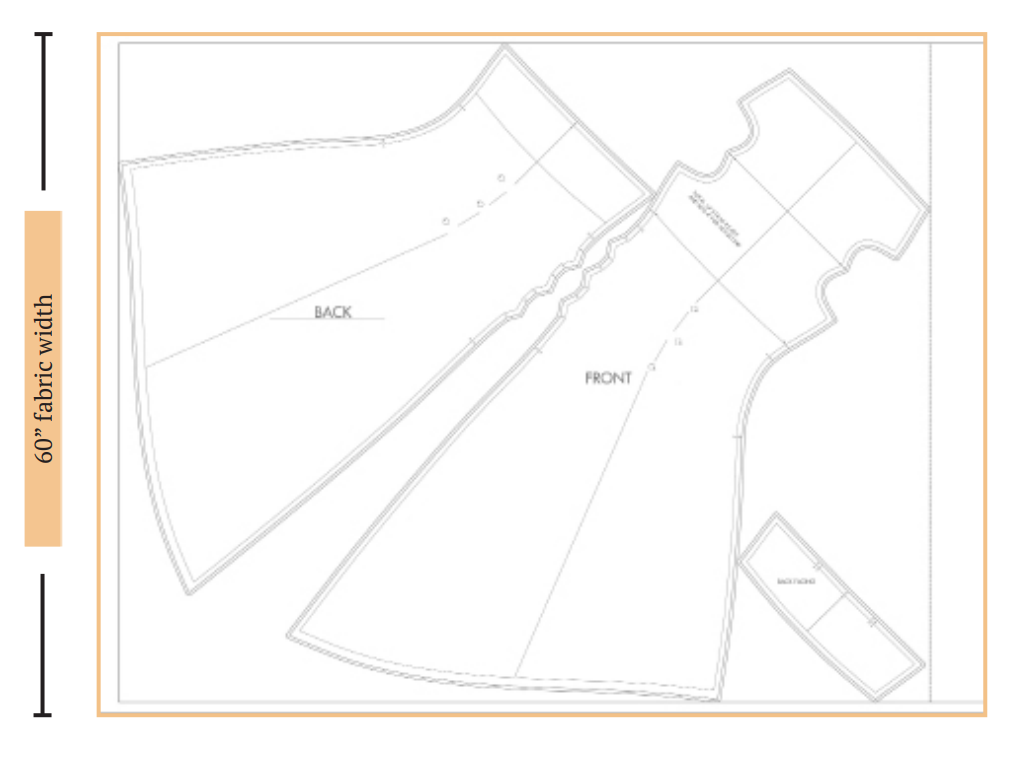
- Pin and cut the fabric according to the pattern layout, ensuring it’s on-grain.
- 45” width fabric isn’t recommended as the pattern will not fit on it.
- Medium size has been used for representation of this cutting layout.
- Consider extra fabric for nap or prints.
Sewing Steps
Step 1
1. Cut two strips of fabric, each measuring 1.8 inches in width and 18 inches in length, following the grain line. Fold each strip lengthwise with the right sides together, and use an iron to press them flat. Proceed to sew along the open side, ensuring a 0.4-inch seam allowance.
2. Reverse the fabric tubes to expose the right side by utilizing a darning needle.
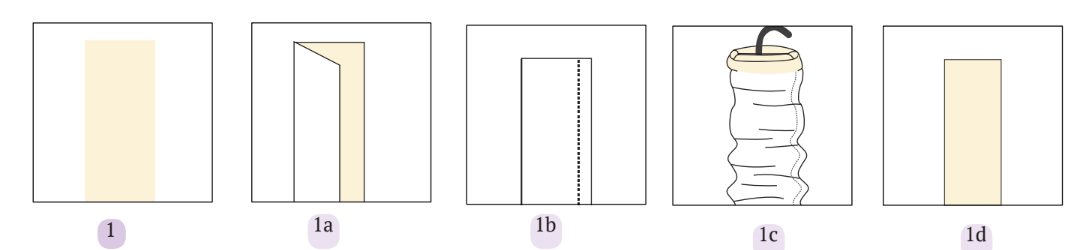
3. Separate each fabric tube into two sections: one measuring 11 inches and the other 5 inches. Eliminate any excess fabric, accounting for potential measurement errors.

Step 2
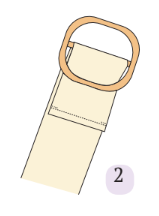
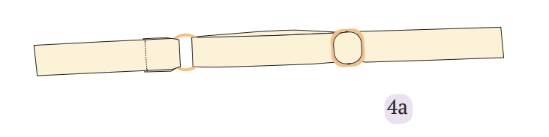
1. Thread one of the 11-inch straps through an adjustable slide buckle, folding approximately an inch of the strap’s end back onto itself.
2. Secure the buckle by stitching this folded section with strong lock and back stitches.
INSTRUCTIONS FOR CRAFTING 14-INCH STRAPS (PROCEDURES FROM STEP 3 TO STEP 7)
Step 3
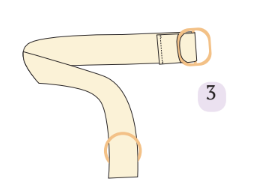
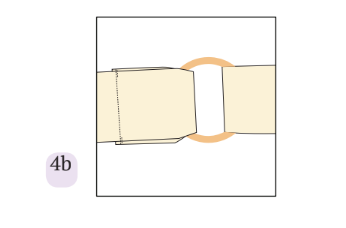
1. Pass the loose end of the 11-inch strap through a strap loop ring.
2. Thread it through the slide buckle by entering from one side and emerging from the other.
Step 4
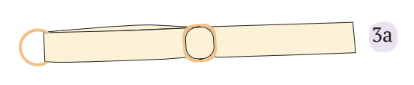
1. Grab a 5-inch strap and thread one end through the ring.

2. Secure this end by employing a sequence of lock stitches and back stitches to ensure a robust and lasting finish.
3. Duplicate the procedure with the remaining 11-inch and 5-inch strap segments to finalize the second strap for your dress.
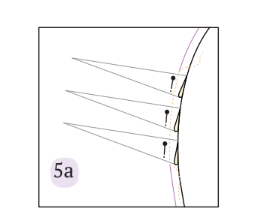
Step 5
1. Secure the darts by pinning them together and use basting stitches to keep them in position.
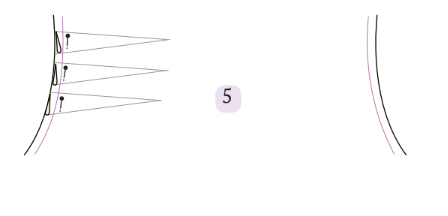
2. Repeat this procedure for both the front and back fabric pieces.
Step 6
1. Align the front and back fabric pieces with their right sides facing each other, matching the notches.
Tip: Given the slippery nature of satin, it is recommended to use pins to secure the fabric in the correct position before stitching.
2. Once everything is aligned, sew the side seams together, and then carefully remove the pins.
Step 7
1. Affix bias interfacing, approximately 1 cm in width, and press it onto the seam allowance using an iron.
2. Modify the width of the bias interfacing according to the seam allowance you have chosen to use.
Step 8
1. Position the front lining on top of the back lining with the wrong sides facing each other.
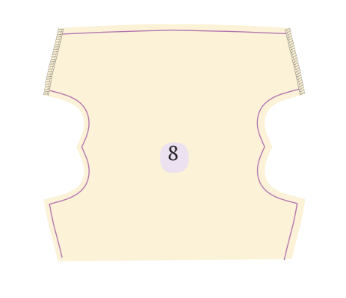
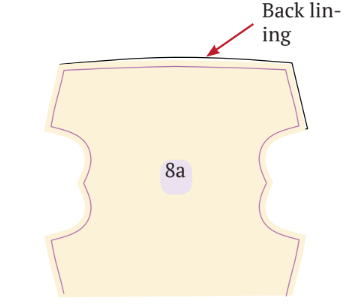
2. Proceed to sew the side seams.
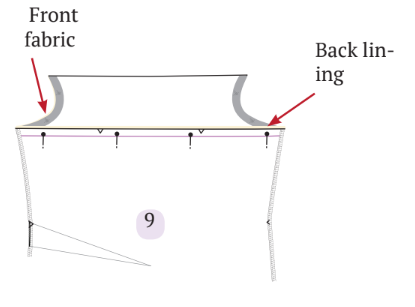
Step 9
1. Align the front lining with the front fabric and the back lining with the back fabric, ensuring that the right sides are facing each other.
2. Match the provided notches and carefully pin them in place.
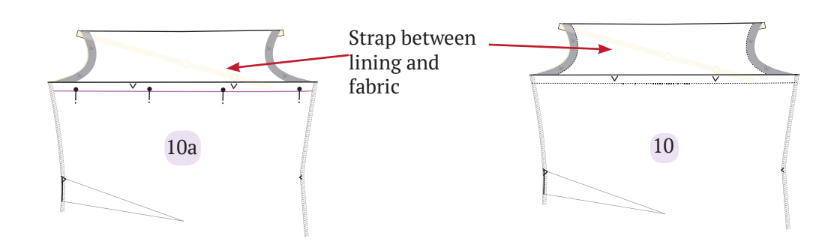
Step 10
1. Secure the strap ends between the corners of the front fabric and front lining by using pins.
2. Repeat this process for the other strap.
3. Proceed to sew them together, starting from the front and working towards the back.
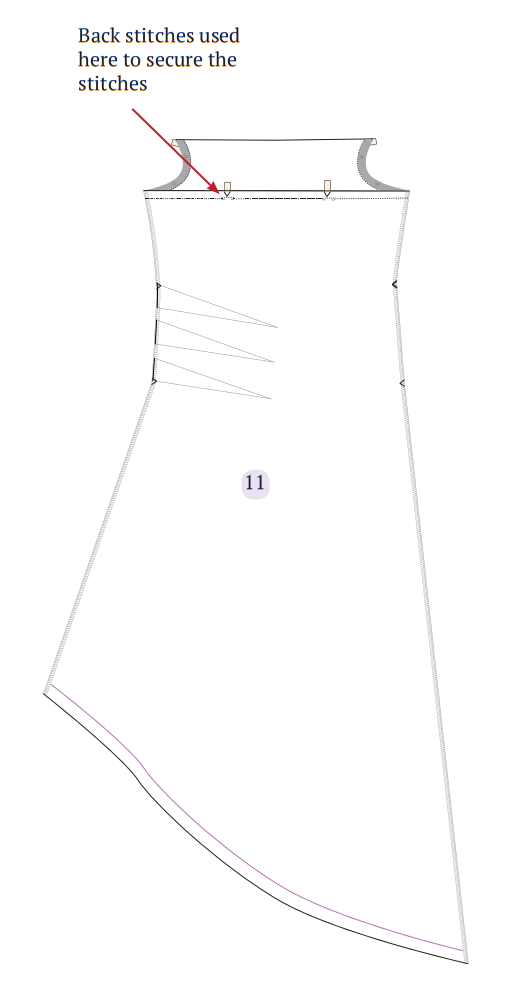
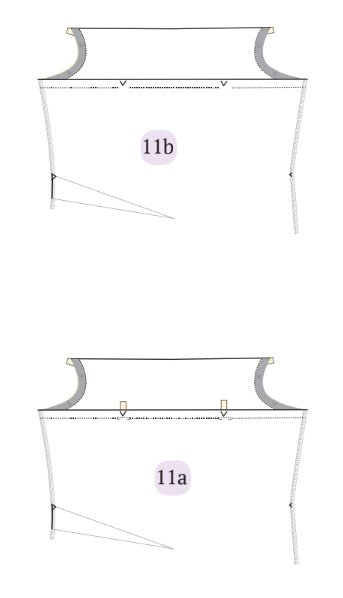
Step 11
1. Undo the stitches from the back lining at the two notches, utilizing a seam ripper if needed.
2. Insert the ends of the straps between the back fabric and back lining with the wrong sides facing each other.
3. Ensure a secure attachment by sewing these straps with back stitches, and then iron them for a polished finish.
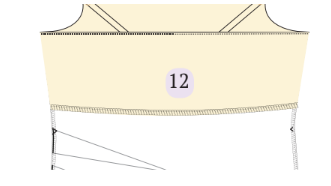
Step 12
Prevent fraying by employing overlock or zigzag stitches to secure the linings.
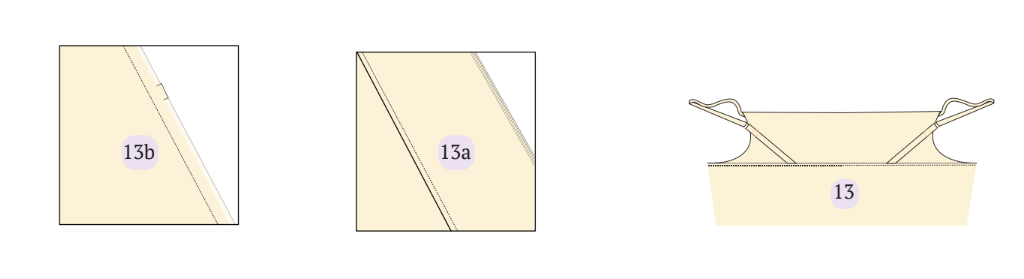
Step 13
Achieve a tidy and polished appearance by understitching the lining.
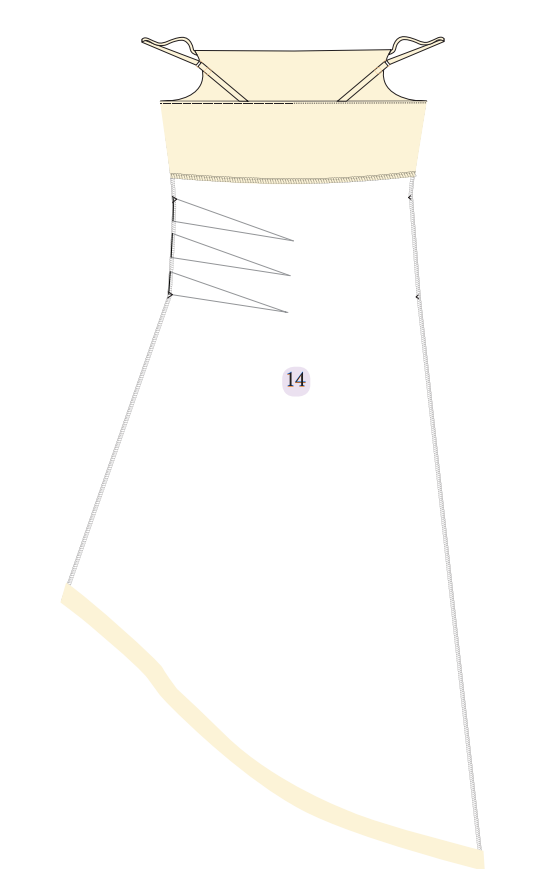
Step 14
1. Fold the hem and initiate stitching with a flat lock stitch on the right side of the fabric.
2. Take care not to overlook the edge of the side seam underneath during the sewing process.
Summary
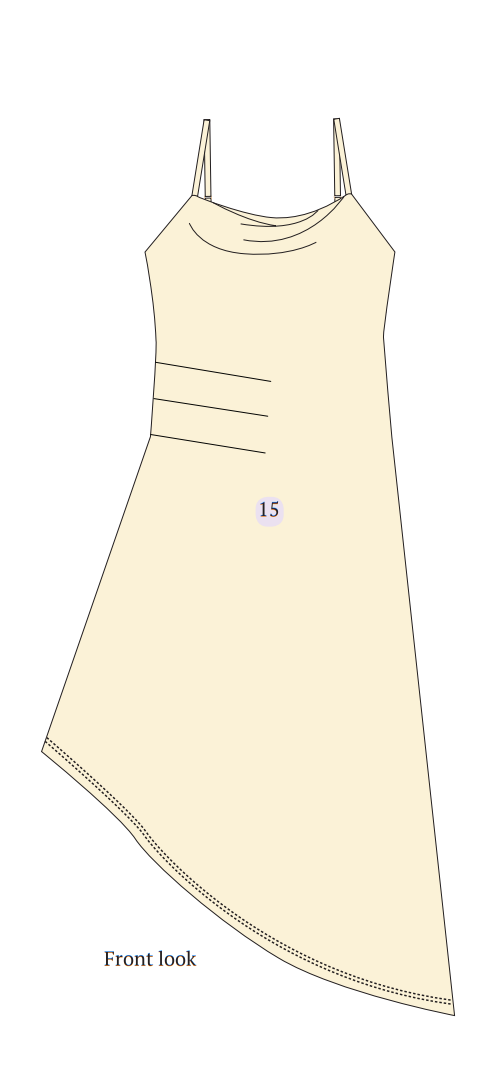
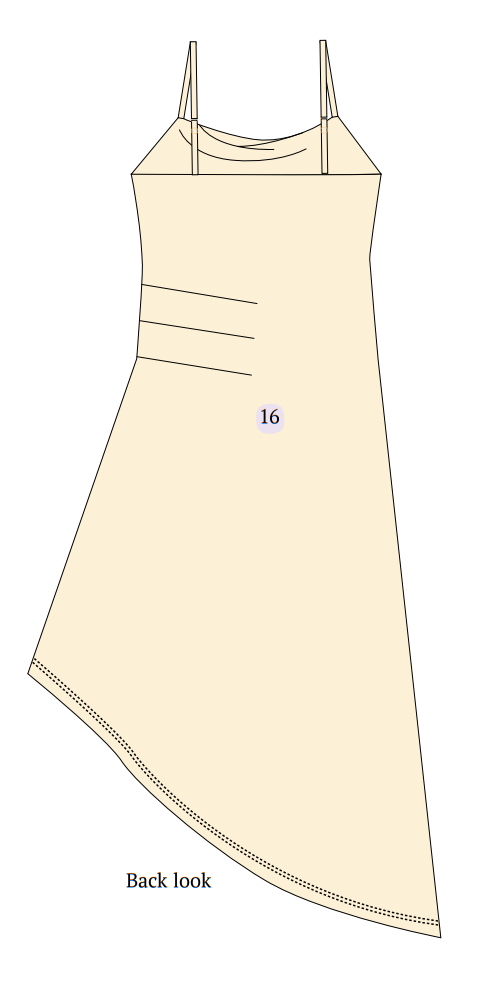
Congrats on making your asymmetrical cowl neck maxi dress! Now you’ve got a piece of fashion that’s uniquely yours. Rock it with pride and enjoy the vibe of your awesome creation. Happy sewing, and may your stitches always tell a cool story!
Check out some final images of this adorable dress created with the Winslet’s AURORA Cowl Neck Maxi Dress Pattern:
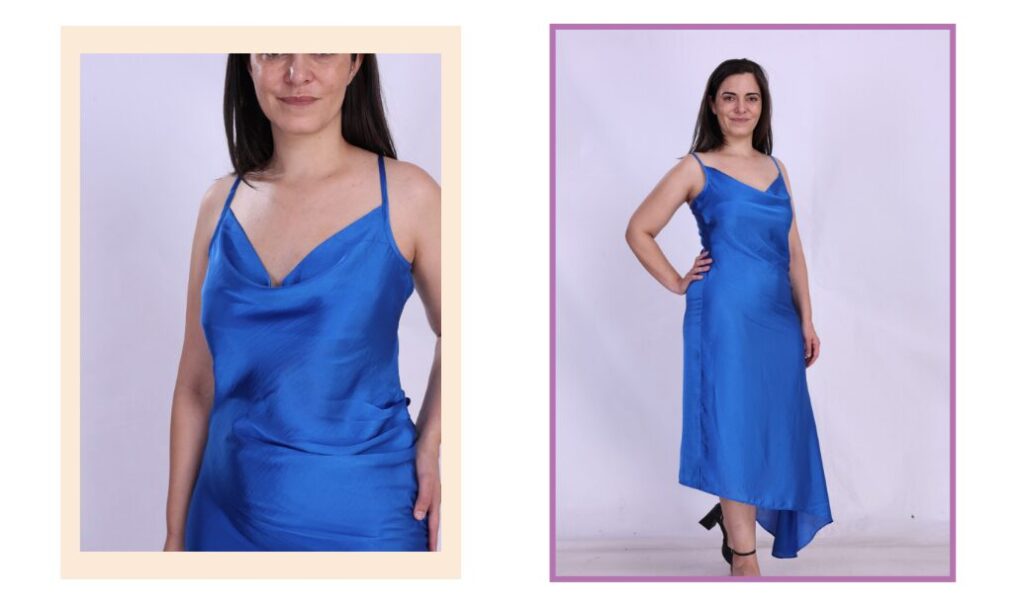
Share your photos with us, and let us know how it went. You can also check other sewing projects here.
Join the Winslet sewing community by sharing your masterpiece with the hashtag #madewithwinslets!


