How to Sew a Round Neck Sweatshirt?
Have you ever wondered if you can sew a round neck sweatshirt? Well, I did it recently and wanted to share the process. I used the Winslet’s SELENA Round Neck Sweatshirt Pattern. This particular pattern features a long sleeves drop shoulder design, making it an ideal choice for crafting a cozy sweatshirt perfect for colder seasons. This sewing project is especially suitable for those at the beginner and intermediate skill levels due to its simplicity.
What sewing supplies do you need to sew a round neck sweatshirt?
The basic supplies you need to sew a round neck sweatshirt are Sewing Pattern (I used Winslet’s SELENA Round Neck Sweatshirt Pattern in this example), Sewing Machine, Tape Measure, Chalk, Shears, Pins, Iron, Needles, Thread (preferably 3-ply polyester), and a Thread Cutter.
Fabric Recommendation
When making this sweatshirt, go for medium-weight ribbed fabric, jersey, or terry. Jersey offers a soft feel and good drape, making it ideal for a casual, relaxed fit. Rib fabric adds a touch of texture and elasticity, enhancing the garment’s durability and snug fit around cuffs and waistbands. Terry cloth, known for its looped pile, adds warmth and absorbency, making it an excellent choice for cozy sweatshirts, especially in cooler weather.
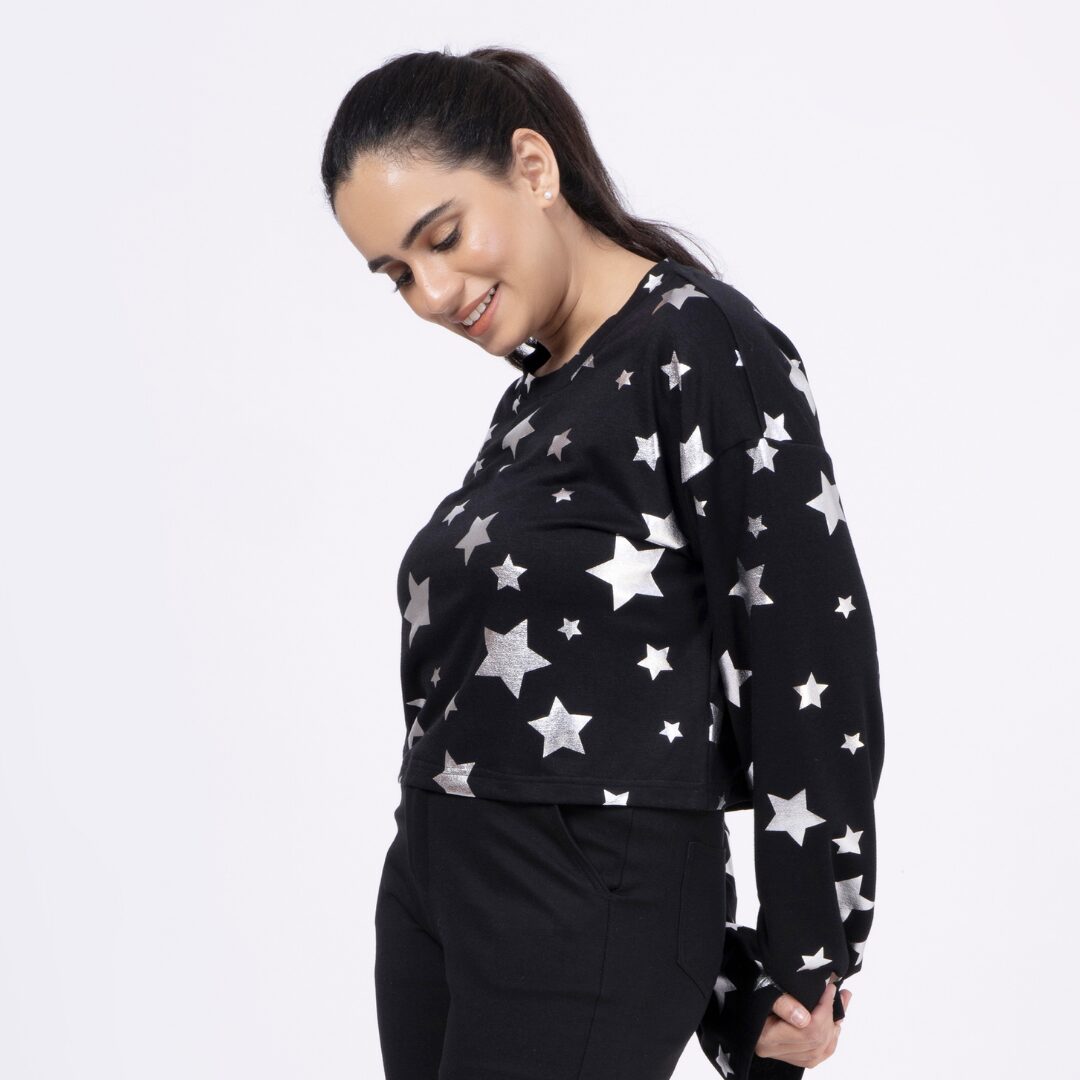
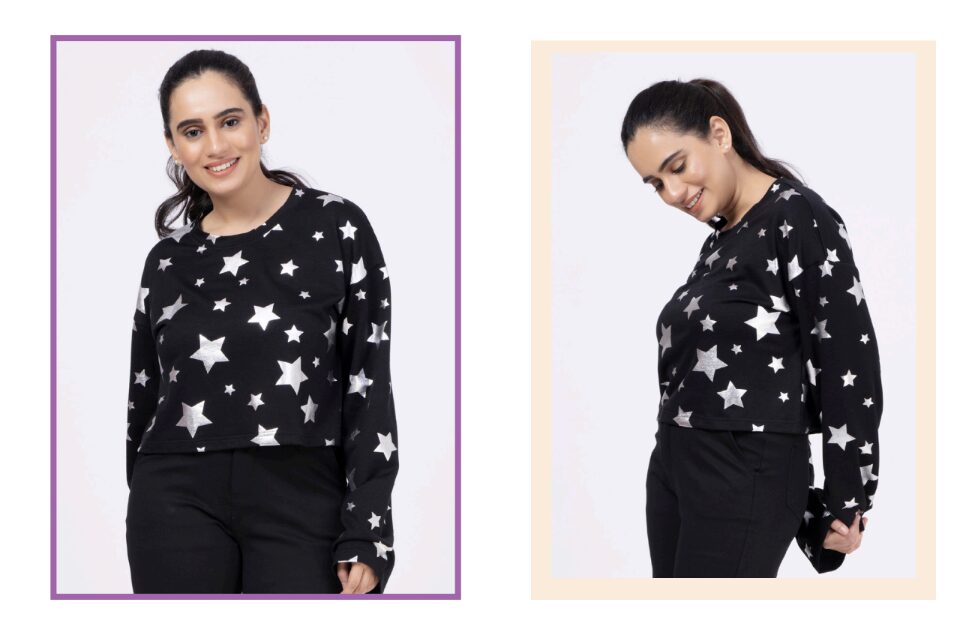
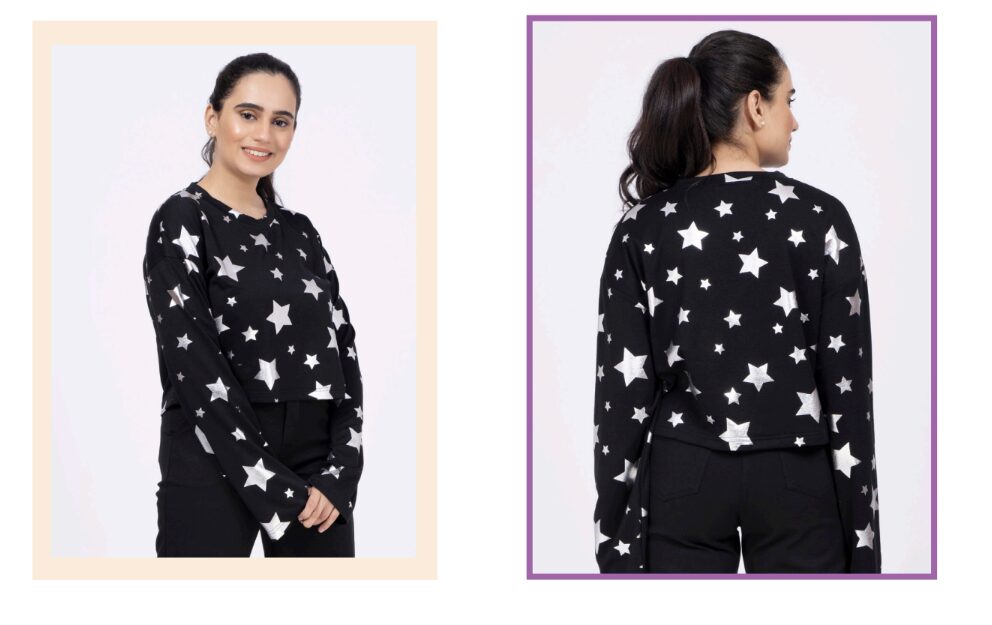
The model above features a sweatshirt made with the Winslet’s SELENA Round Neck Sweatshirt Pattern. The fabric used is terry fabric, which is ideal for winter with warmth, water resistance, and beginner-friendly sewing.
Size Charts
The round neck sweatshirt sewing pattern measurements for sizes (XS, S, M, L, XL, 2XL, or 3XL) are detailed below. Choose a size that corresponds most closely to your body measurements.
It’s worth noting that if your exact measurements are not listed in the table, you may want to consider ordering a size larger.
The size chart includes measurements in both inches and centimeters for your reference.
Body Measurements
| XS (inches) | XS (cm) | S (inches) | S (cm) | M (inches) | M (cm) | L (inches) | L (cm) | XL (inches) | XL (cm) | 2XL (inches) | 2XL (cm) | 3XL (inches) | 3XL (cm) | |
| Bust | 32 | 81.3 | 34 | 86.4 | 36 | 91.4 | 38 | 96.5 | 40 | 101.6 | 42 | 106.7 | 44 | 111.8 |
| Waist | 26 | 66.0 | 28 | 71.1 | 30 | 76.2 | 32 | 81.3 | 34 | 86.4 | 36 | 91.4 | 38 | 96.5 |
Final Garment Measurements
| XS (inches) | XS (cm) | S (inches) | S (cm) | M (inches) | M (cm) | L (inches) | L (cm) | XL (inches) | XL (cm) | 2XL (inches) | 2XL (cm) | 3XL (inches) | 3XL (cm) | |
| Chest Round | 37.5 | 95.2 | 38.5 | 97.79 | 39.5 | 100.3 | 40.5 | 102.8 | 41.5 | 105.4 | 42.5 | 107.9 | 43.5 | 110.4 |
| Full Length (From Shoulder) | 18.5 | 46.9 | 19 | 48.2 | 19.5 | 49.5 | 20 | 50.8 | 20.5 | 52 | 21.5 | 54.6 | 22 | 55.8 |
| Sleeve Length | 19.5 | 49.53 | 19.75 | 50.1 | 20 | 50.8 | 20.25 | 51.4 | 20.5 | 52 | 20.75 | 52.7 | 21 | 53.3 |
Yardage Chart
| Width of the Fabric | XS (yards) | XS (meters) | S (yards) | S (meters) | M (yards) | M (meters) | L (yards) | L (meters) | XL (yards) | XL (meters) | 2XL (yards) | 2XL (meters) | 3XL (yards) | 3XL (meters) |
| 45” | 0.92 | 0.84 | 1.08 | 0.99 | 1.27 | 1.16 | 1.46 | 1.34 | 1.68 | 1.54 | 1.94 | 1.77 | 2.23 | 2.04 |
| 60” | 1.20 | 1.10 | 1.42 | 1.30 | 1.67 | 1.52 | 1.92 | 1.75 | 2.20 | 2.02 | 2.53 | 2.32 | 2.92 | 2.67 |
Steps To Follow For Sewing a Round Neck Sweatshirt
Let’s dive into the steps for sewing your very own unique round neck sweatshirt:
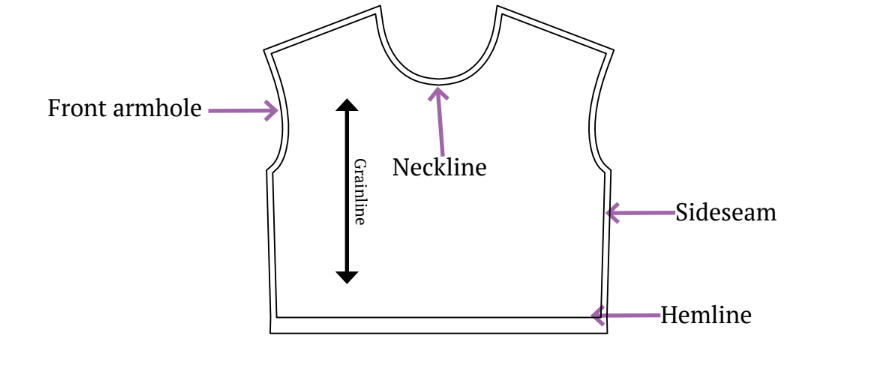
Pattern Marking and Inventory
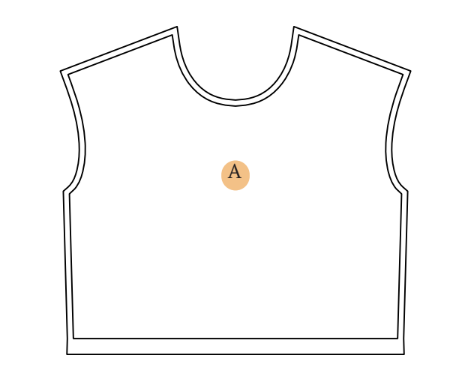
The fabric needs to be cut into following pieces:
A. Front Bodice – cut x1 fabric
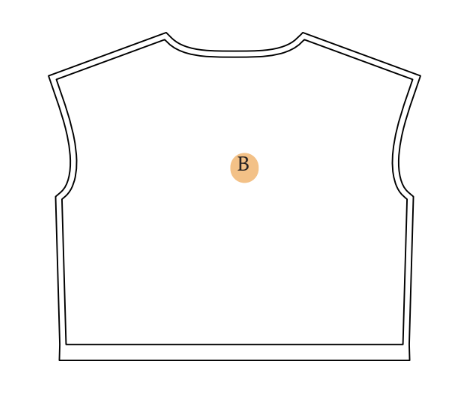
B. Back Bodice – cut x1 fabric
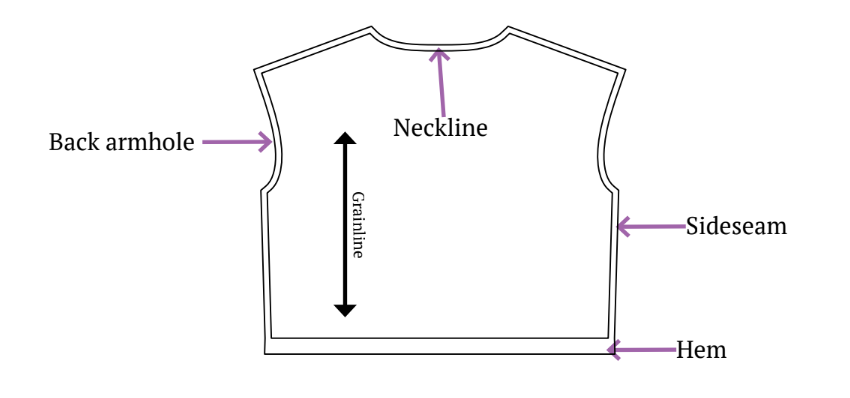
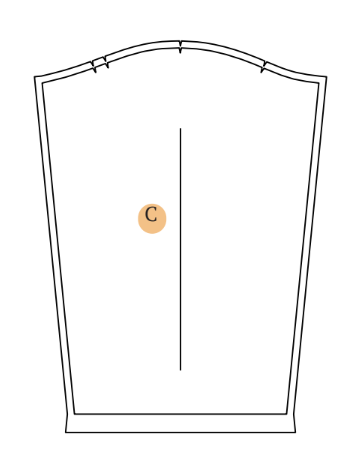
C. Sleeve – cut x2 fabric
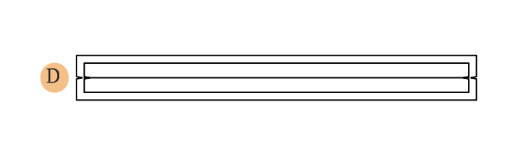
D. Neck Trim – cut x1 fabric
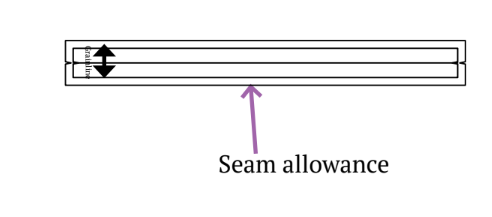
Be sure to indicate all notches and design elements like darts and pleats on your fabric using the pattern pieces. When stitching the garment, carefully align the notches to ensure a proper match.
Cutting Layout

- Ensure the pattern layout is on-grain for fabric alignment.
- Use pins to secure fabric, aiding accurate cutting.
- If using fabric with nap or prints, purchase additional length.
Sewing Steps
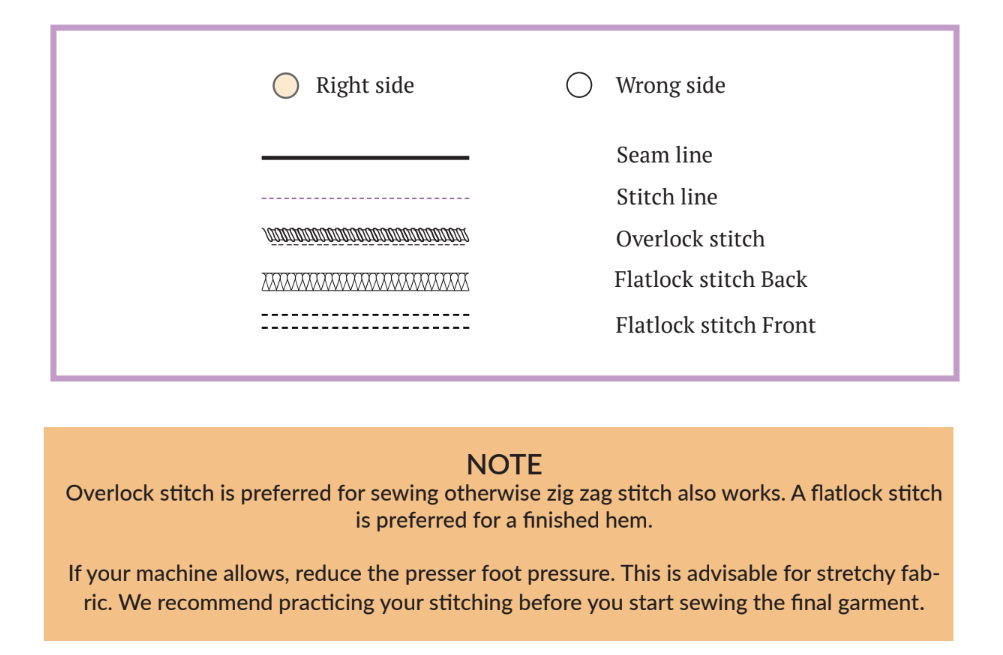
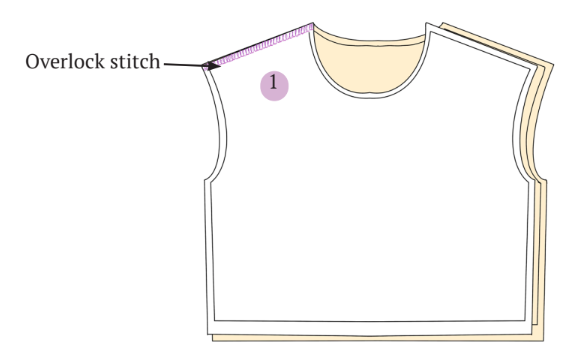
Step 1: Attaching Bodice Shoulders
To connect the bodice shoulders, put the front and back pieces together with the right sides facing each other. Use an overlock stitch along the shoulder seamline.
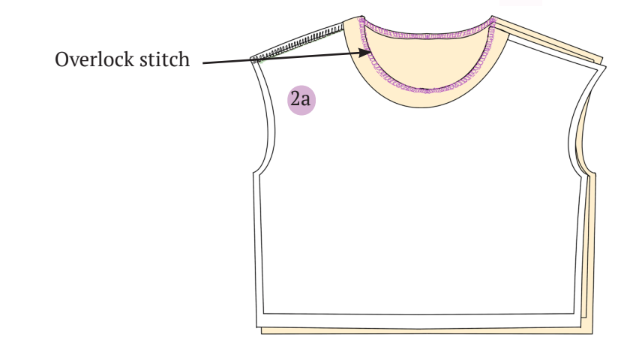
Step 2: Adding Neck Trim to Bodice
Fold the neck trim in half, making sure the wrong side is facing together. Connect the trim by overlocking the sides.
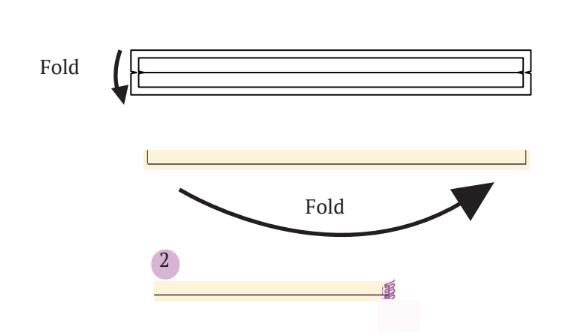
Place and match the neck trim onto the neckline seam of the bodice. Secure it by using an overlock stitch.
Step 3: Completing Shoulder Stitching
Stitch the remaining shoulder by putting the front and back bodice together with their right sides facing each other. Use an overlock stitch along the shoulder seamline.

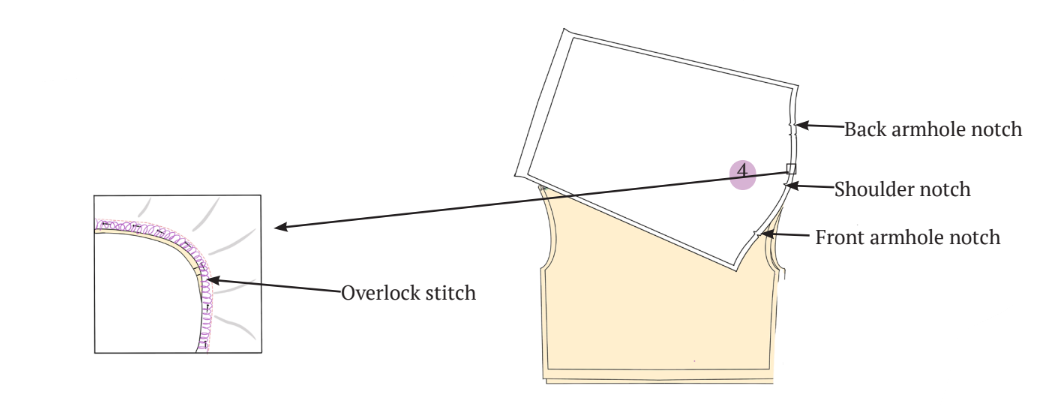
Step 4: Attaching Sleeve to Bodice
Attach the sleeve by putting it on the bodice with the right sides facing each other. Make sure to align the notches on the sleeve’s armhole with those on the bodice.
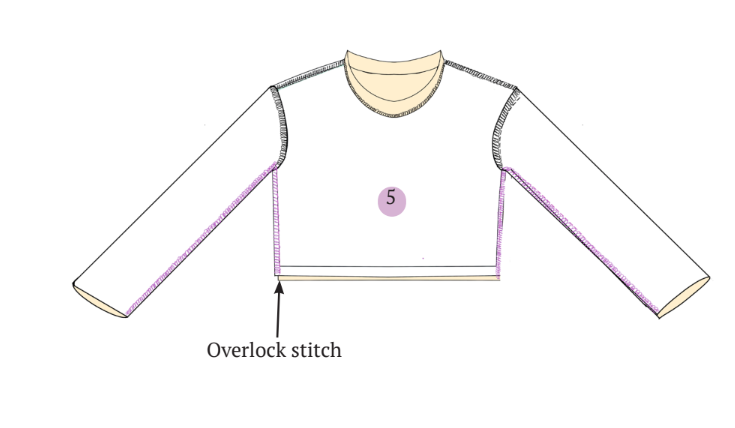
Step 5: Overlocking Bodice Side Seam
Overlock the side seam of the bodice by placing the right sides together, beginning from the sleeve and continuing down to the hem of the bodice.
Step 6: Hemming the Bodice and Sleeves
Finish the bodice and sleeve hems by folding them from the hemline towards the wrong side of the fabric. Secure the folded hem’s edge with a flat lock stitch, starting from one of the side seams to achieve a polished and neat appearance for the hem.

And that’s it! Your sweatshirt is done and ready to be worn!
Summary
Wearing a well-sewn sweatshirt feels like a warm embrace, providing comfort and a sense of coziness that wraps you in relaxation. The soft fabric against your skin and the perfect fit create a feeling of contentment, making it an ideal choice for casual and laid-back moments.
Check out some final images of this adorable sweatshirt created with the Winslet’s SELENA Round Neck Sweatshirt Pattern:
If this is your first time making sweatshirts, I hope you’ve enjoyed it. I’d love to see how your sweatshirt turned out, so share photos or tag us on social media.
If you have any questions while working on my projects, just drop a comment—I’m here to help! And if you want more sewing projects, we have them here
Join the Winslet sewing community by sharing your masterpiece with the hashtag #madewithwinslets!


