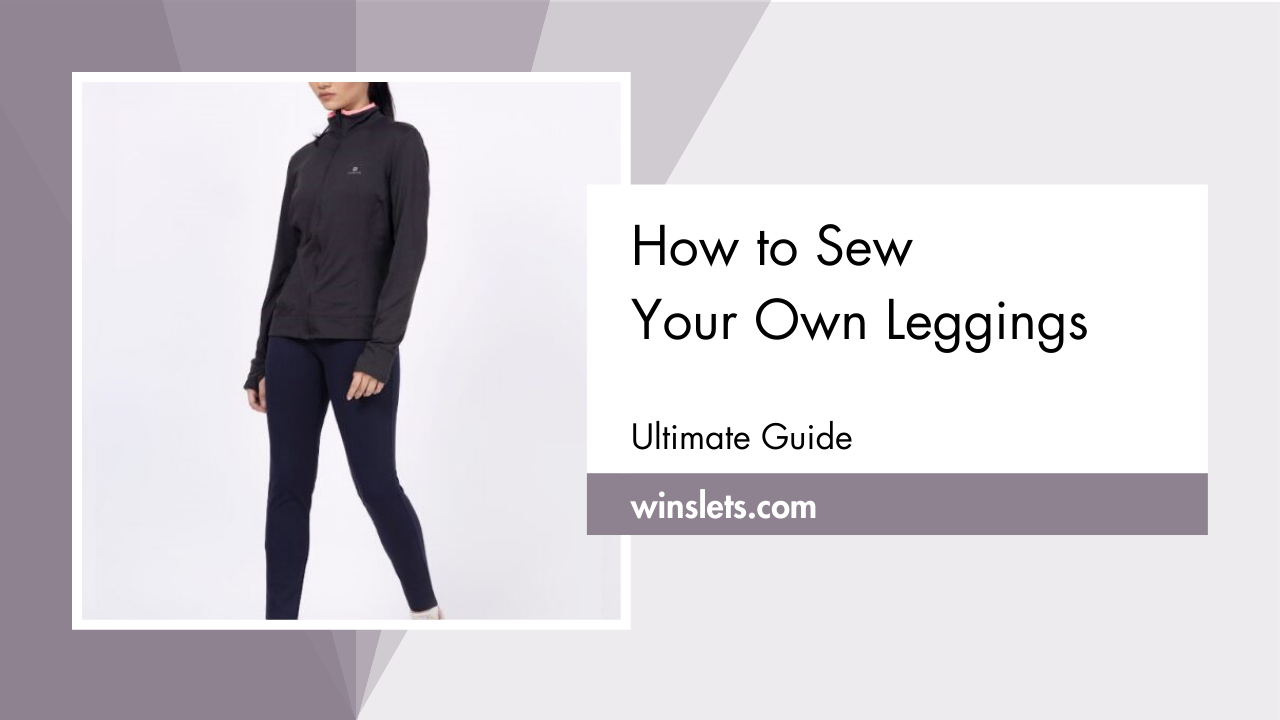
How to Sew Leggings?
Have you wondered how to sew leggings?
Leggings are a must for everyone’s closet all year round, and they’re good for people of all ages. You can buy them at any store, but making your own gives you a perfect fit and a special style.
If you’re new to sewing and want to make super easy leggings, try the Winslet’s NOVA Leggings Pattern. It’s a high-rise yoga leggings that has a wide waistband for potential tummy shaping. It comes in seven sizes, from XS to 3XL, so you can find the right one for you. Before you start, check your size with the SIZE GUIDE.
Let’s quickly dive into the creative journey of crafting fashionable and snug wide waistband leggings!
What sewing supplies do you need to sew leggings?
The basic supplies you need to sew wide waistband leggings are Sewing Pattern (I used Winslet’s NOVA Leggings Pattern for my project), Sewing Machine, Tape Measure, Chalk, Shears, Pins, Iron, Needles, Thread (preferably 3-ply polyester), and a Thread Cutter.
Fabric Recommendation
Wondering about the right fabric for this project? This design specifically calls for stretch fabric, so it’s crucial to exclusively use materials with stretch or the fit won’t be right. Consider using medium weight rib fabric, lycra, jersey, or polyester jersey, as these fabrics are most suitable for creating leggings.
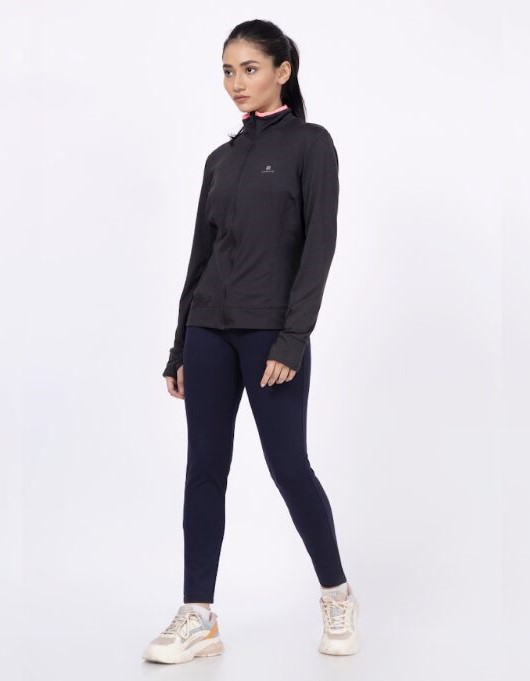
The model above features a leggings made with the Winslet’s NOVA Leggings Pattern. The fabric used is ponte roma (viscose lycra), which is recommended for its versatile features. With a symmetrical appearance on both sides, a soft finished look, and the ease of sewing making it perfect for beginners, this fabric also offers stretchiness that ensures a snug and comfortable fit to the body.
Size Charts
The wide waistband leggings sewing pattern measurements for sizes (XS, S, M, L, XL, 2XL, or 3XL) are detailed below. Choose a size that corresponds most closely to your body measurements.
It’s worth noting that if your exact measurements are not listed in the table, you may want to consider ordering a size larger.
The size chart includes measurements in both inches and centimeters for your reference.
Body Measurements
| XS (inches) | XS (cm) | S (inches) | S (cm) | M (inches) | M (cm) | L (inches) | L (cm) | XL (inches) | XL (cm) | 2XL (inches) | 2XL (cm) | 3XL (inches) | 3XL (cm) | |
| Bust | 32 | 81.3 | 34 | 86.4 | 36 | 91.4 | 38 | 96.5 | 40 | 101.6 | 42 | 106.7 | 44 | 111.8 |
| Waist | 26 | 66.0 | 28 | 71.1 | 30 | 76.2 | 32 | 81.3 | 34 | 86.4 | 36 | 91.4 | 38 | 96.5 |
Final Garment Measurements
| XS (inches) | XS (cm) | S (inches) | S (cm) | M (inches) | M (cm) | L (inches) | L (cm) | XL (inches) | XL (cm) | 2XL (inches) | 2XL (cm) | 3XL (inches) | 3XL (cm) | |
| Waist Round | 26 | 66 | 28 | 71.1 | 30 | 76 | 32 | 81.2 | 34 | 86.3 | 36 | 91.4 | 38 | 96.5 |
| Full Length | 38.25 | 97.1 | 38.5 | 97.7 | 38.75 | 98.4 | 39 | 99 | 39.25 | 99.6 | 39.5 | 100.3 | 39.75 | 100.9 |
Yardage Chart
| Width of the Fabric | XS (yards) | XS (meters) | S (yards) | S (meters) | M (yards) | M (meters) | L (yards) | L (meters) | XL (yards) | XL (meters) | 2XL (yards) | 2XL (meters) | 3XL (yards) | 3XL (meters) |
| 45” | 1.24 | 1.14 | 1.46 | 1.34 | 1.72 | 1.57 | 1.98 | 1.81 | 2.28 | 2.08 | 2.62 | 2.39 | 3.01 | 2.75 |
| 60” | 0.99 | 0.91 | 1.17 | 1.07 | 1.38 | 1.26 | 1.58 | 1.45 | 1.82 | 1.66 | 2.09 | 1.91 | 2.41 | 2.20 |
Steps To Follow For Sewing Wide Waistband Leggings
Let’s dive into the steps for sewing your very own unique wide waistband leggings:
Pattern Marking and Inventory
The fabric needs to be cut into following pieces:
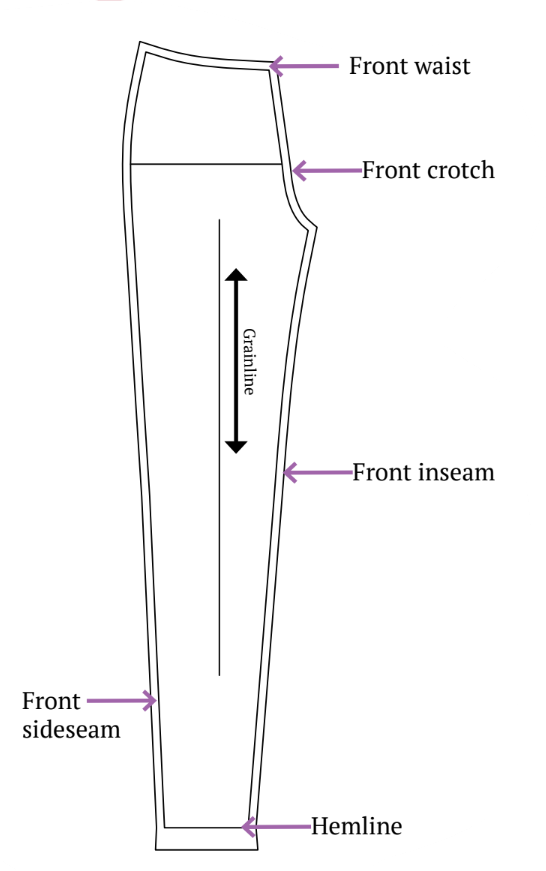
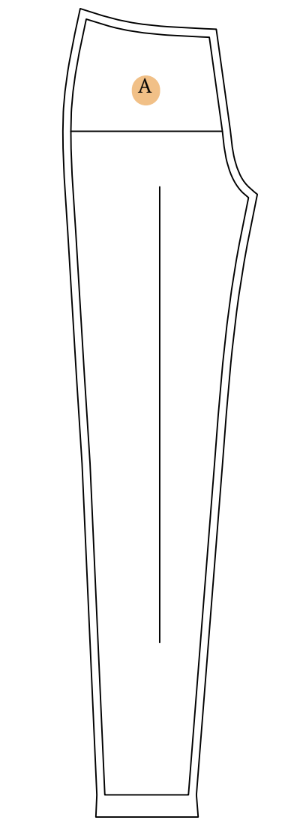
A. Front Leg – cut x2 fabric
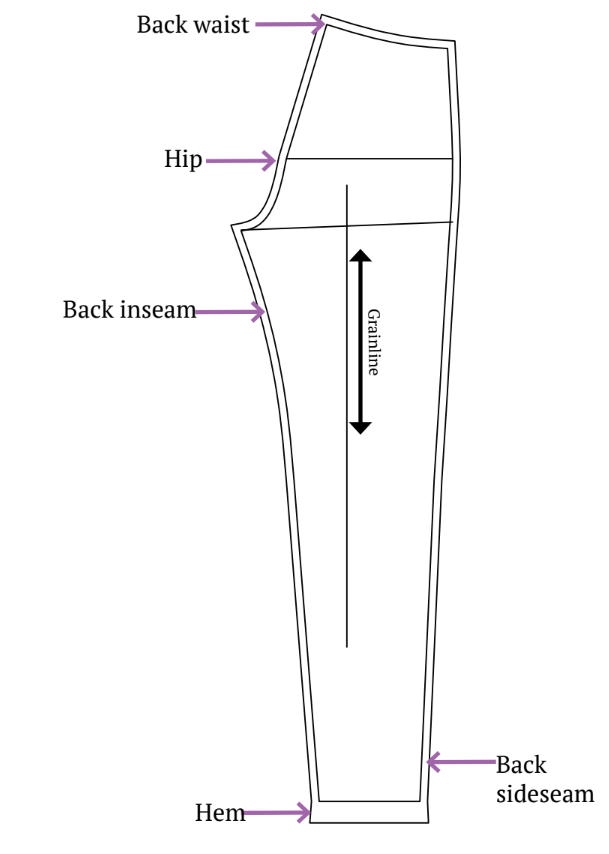
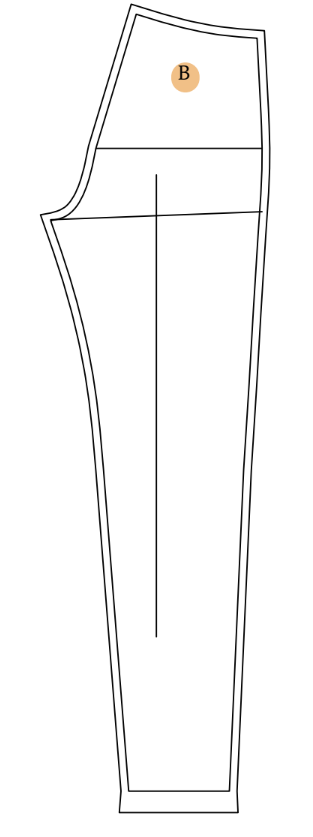
B. Back Leg – cut x2 fabric
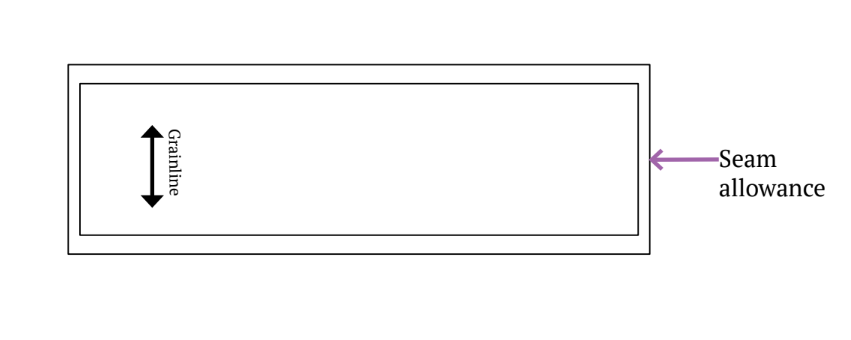
C. Waistband – cut x2 fabric

Be sure to indicate all notches and design elements like darts and pleats on your fabric using the pattern pieces. When stitching the garment, carefully align the notches to ensure a proper match.
Cutting Layout
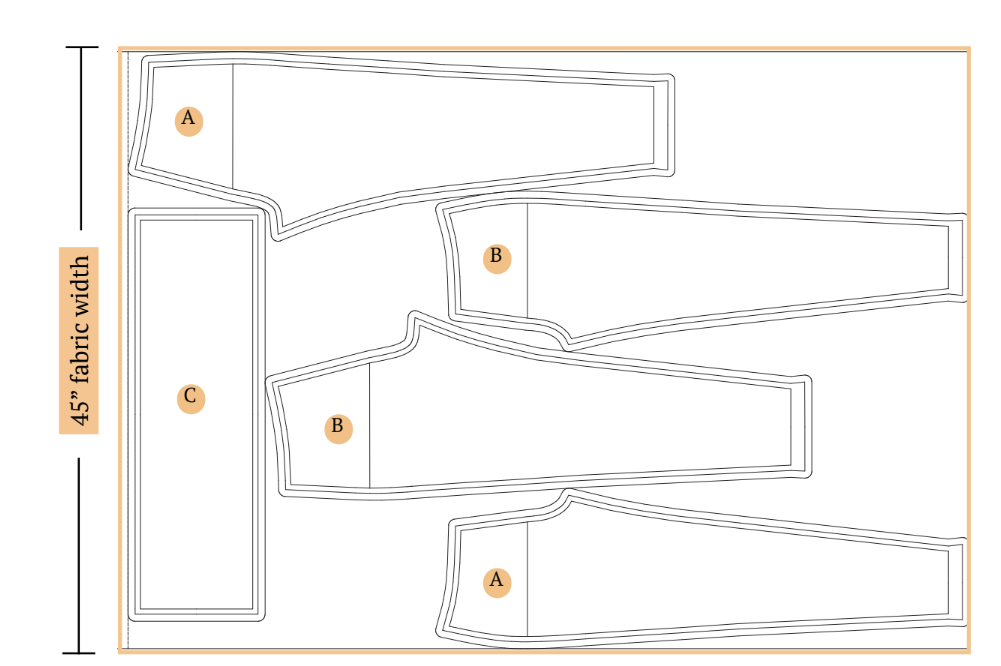
- Ensure the pattern layout is on-grain for fabric alignment.
- Use pins to secure fabric, aiding accurate cutting.
- If using fabric with nap or prints, purchase additional length.
Sewing Steps
Tip:
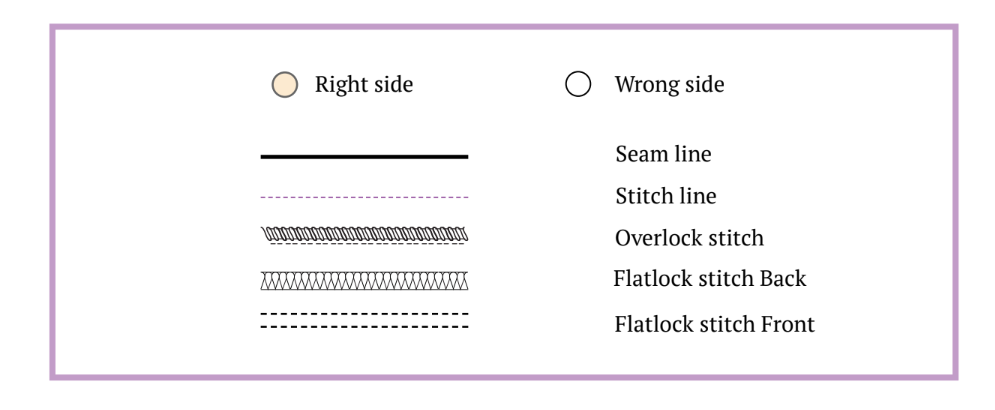
- Remember, it’s better to use an overlock stitch for sewing, but a zigzag stitch can also do the job. For a finished hem, go for a flatlock stitch.
- If your sewing machine allows it, lower the presser foot pressure, especially when working with stretchy fabric.
- It’s a good idea to practice your stitching before you sew the actual garment to get the hang of it.
Step 1: Assembling Leg Pieces
To put the front and back leg pattern parts together, match the right sides and sew the inseams using an overlock stitch. Do the same for the remaining leg pieces.

Step 2: Connecting Front and Back Legs
Stack the front leg pieces and the back leg pieces on top of each other, making sure the crotch areas align. Ensure the fabric’s right sides are facing each other. Overlock the hip seam, starting from the back waist, passing through the front crotch, and ending at the front waist. This process will unite the front and back leg pieces along the crotch area.

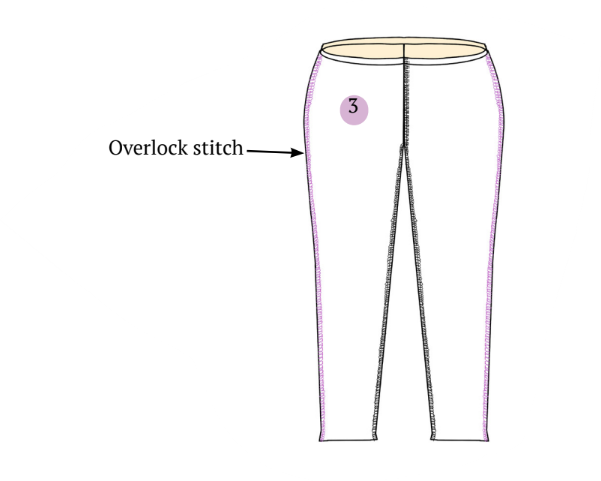
Step 3: Matching Leg Side Seams
Make sure the right sides of the fabric are together and align the side seams of the leg pieces. Overlock the front and back side seams to secure them in place.
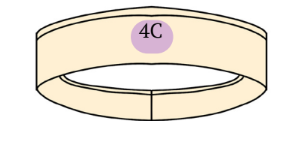
Step 4: Finishing the Waistband
Fold the waistband in half and overlock stitch the side seam.
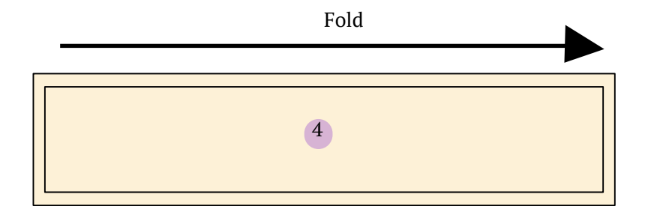
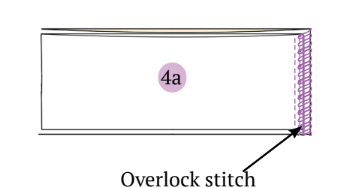
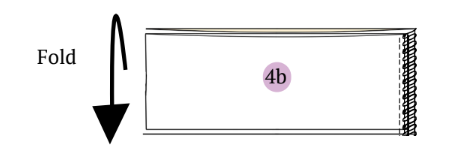
Open the sewn waistband, creating a tubular piece, and fold it in half from the top edge, ensuring the right sides are facing outward.
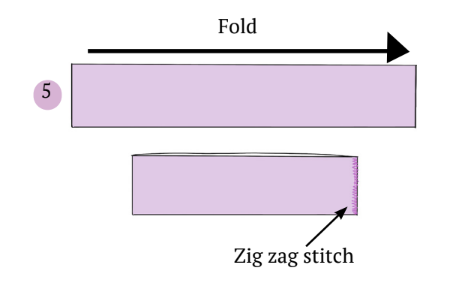
Step 5: Prepare the Elastic
Fold the elastic in half and secure the side seam with a zigzag stitch.
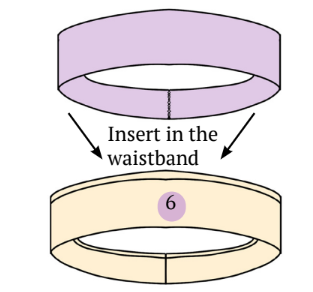
Step 6: Inserting Elastic into Waistband
Put the elastic inside the ready waistband and secure it in place with a pin.
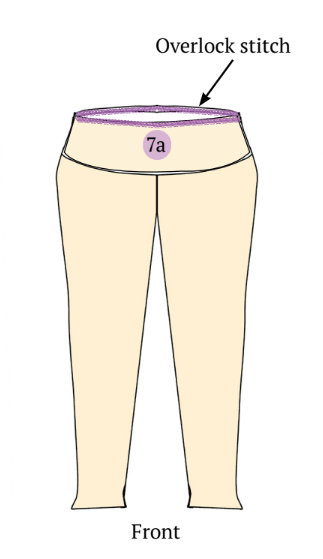
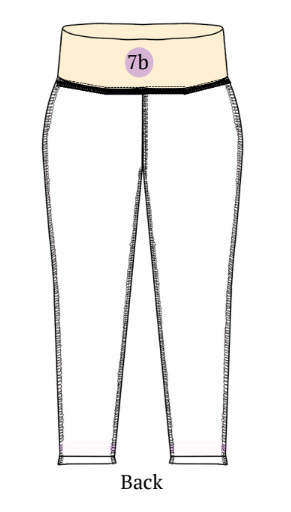
Step 7: Attaching Waistband to Pants
Align the pant waist seamline with the waistband seam.
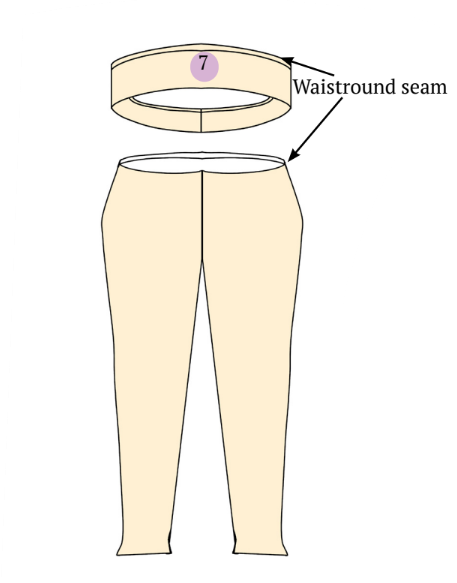
Match the waistband back seam with the pants back seam and use an overlock stitch to secure them together around the waist seamline.
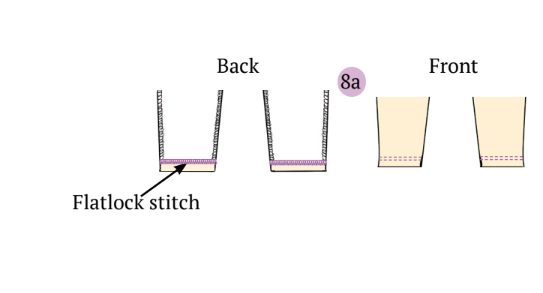
Step 8: Hemming
Fold the fabric from the hem line to the wrong side.
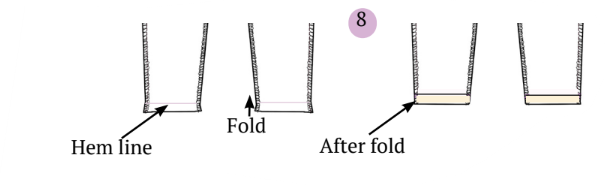
Use a flatlock stitch to secure it around the hem.
And that’s it! Your wide waistband leggings are done and ready to be worn!
Summary: How to sew leggings?
The leggings hugged my body in all the right places, providing a sense of support without being restrictive. As I moved, the leggings effortlessly stretched and adapted, allowing for a full range of motion. Whether I was running errands or hitting the gym, the leggings maintained their comfort and shape. Overall, it was a positive experience, and I found myself reaching for these leggings again and again.
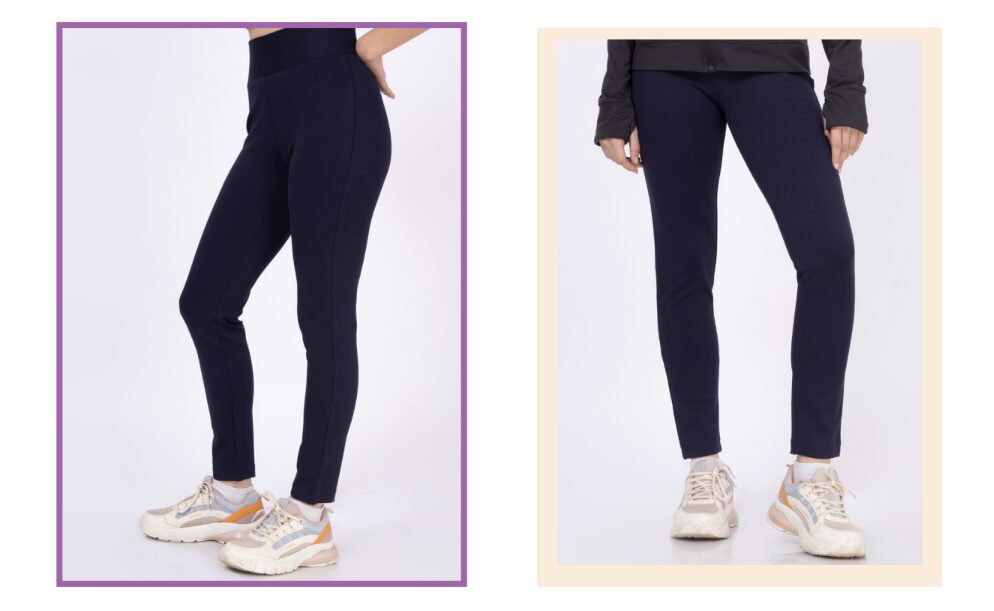
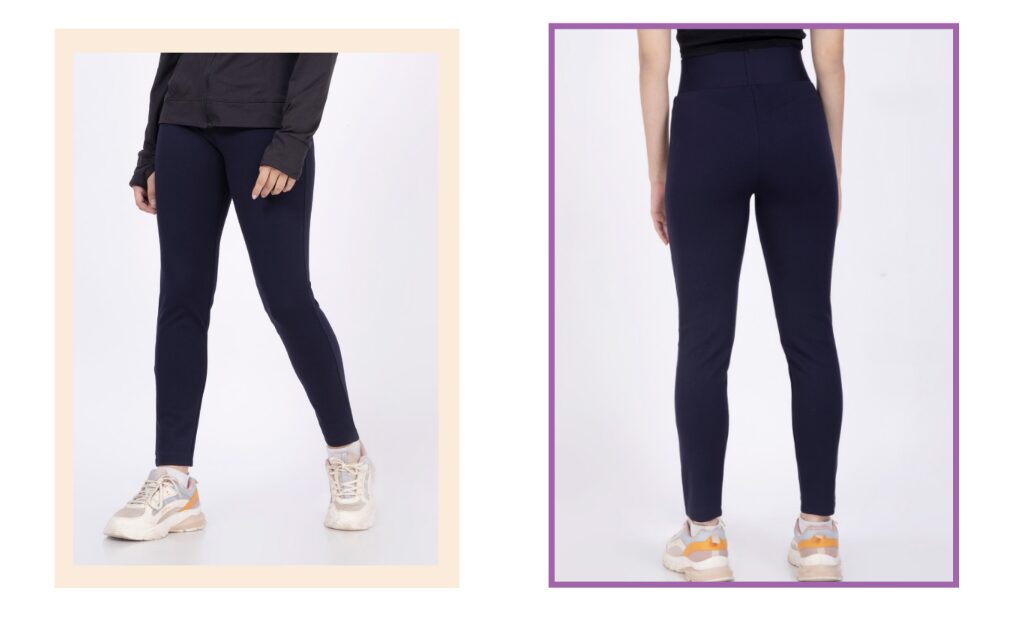
Check out some final images of this adorable leggings created with the Winslet’s NOVA Leggings Pattern:
If you liked learning how to make these wide waistband leggings with the Winslet’s NOVA Leggings Pattern, make sure to pin it to your favorite Pinterest board or share it with friends on social media. Also, make certain that you take a picture afterward and tag us on social media as I love seeing the lovely outcome sewn by my fellow readers! If you’re looking for more projects, check more posts here.
Join the Winslet sewing community by sharing your masterpiece with the hashtag #madewithwinslets!


