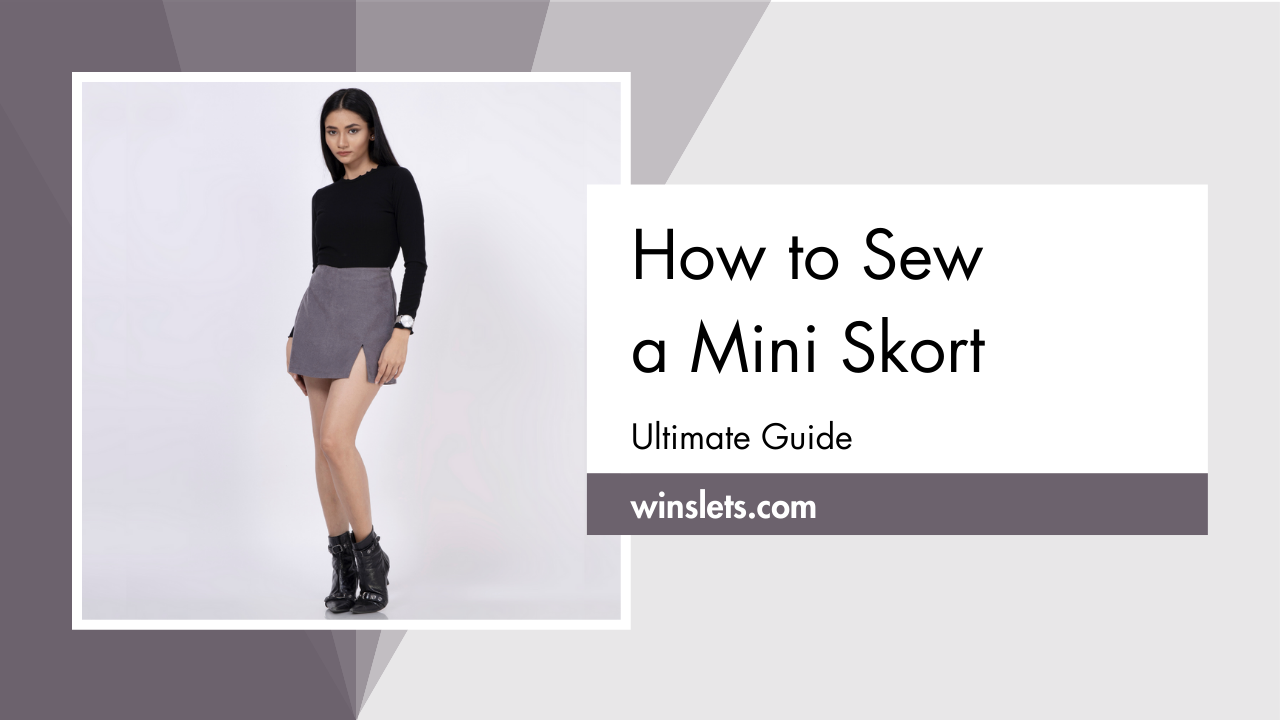
How to Sew a Mini Skort?
Sewing your own mini skort can be a fun project, allowing you to customize the fit, style, and fabric to your liking. With a skirt-like front and shorts underneath, skorts provide ease of movement, perfect for everything from running errands to outdoor adventures.
In this guide, I’ll walk you through the steps to create your own mini skort, from selecting the right fabric to finishing touches. I’m using Winslet’s JASMINE Mini Skort Pattern for my project. The short features a side slit, adding a stylish detail to the design. This skort pattern is versatile and can be tackled by a range of sewing enthusiasts.
What supplies do you need to sew a mini skort?
The basic supplies that you’ll need to sew a mini skort are a Sewing Pattern (I used Winslet’s JASMINE Mini Skort Pattern for this project), Sewing Machine, Tape Measure, Chalk, Shears, Pins, Iron, Needles, Thread (preferably 3-ply polyester), Thread Cutter, and a Zipper (8 inch).
Fabric Recommendation
Consider using lightweight fabric, such as 100% cotton, cotton blend, cotton twill, silk blend, and viscose for the mini skort. Lightweight fabrics are great for sewing skorts due to their breathability, graceful drape, soft texture, ease of sewing, and versatile options for achieving desired aesthetics.

The model above is wearing a mini skort made from Winslet’s JASMINE Mini Skort Pattern. The skort is made from plain suede, ideal for several reasons: its breathability, durability, lightweight feel, smooth texture, and resistance to creases.
Size Charts
The mini skort sewing pattern measurements for sizes (XS, S, M, L, XL, 2XL, or 3XL) are detailed below. Choose a size that corresponds most closely to your body measurements.
It’s worth noting that if your exact measurements are not listed in the table, you may want to consider ordering a size larger.
The size chart includes measurements in both inches and centimeters for your reference.
Body Measurements
| XS (inches) | XS (cm) | S (inches) | S (cm) | M (inches) | M (cm) | L (inches) | L (cm) | XL (inches) | XL (cm) | 2XL (inches) | 2XL (cm) | 3XL (inches) | 3XL (cm) | |
| Bust | 32 | 81.3 | 34 | 86.4 | 36 | 91.4 | 38 | 96.5 | 40 | 101.6 | 42 | 106.7 | 44 | 111.8 |
| Waist | 26 | 66.0 | 28 | 71.1 | 30 | 76.2 | 32 | 81.3 | 34 | 86.4 | 36 | 91.4 | 38 | 96.5 |
| Hip | 34 | 86.4 | 36 | 91.4 | 38 | 96.5 | 40 | 101.6 | 42 | 106.7 | 44 | 111.8 | 46 | 116.8 |
Final Garment Measurements
| XS (inches) | XS (cm) | S (inches) | S (cm) | M (inches) | M (cm) | L (inches) | L (cm) | XL (inches) | XL (cm) | 2XL (inches) | 2XL (cm) | 3XL (inches) | 3XL (cm) | |
| Waist Round | 26 | 66.04 | 28 | 71.12 | 30 | 76.2 | 32 | 81.28 | 34 | 86.36 | 36 | 91.44 | 38 | 96.52 |
| Full Length (with waistband) | 14.5 | 36.83 | 15 | 38.1 | 15.5 | 39.37 | 16 | 40.64 | 16.5 | 41.91 | 17 | 43.18 | 17.5 | 44.45 |
Yardage Chart
| Width of the Fabric | XS (yards) | XS (meters) | S (yards) | S (meters) | M (yards) | M (meters) | L (yards) | L (meters) | XL (yards) | XL (meters) | 2XL (yards) | 2XL (meters) | 3XL (yards) | 3XL (meters) |
| 45” | 1.15 | 1.05 | 1.36 | 1.24 | 1.56 | 1.43 | 1.79 | 1.64 | 2.06 | 1.88 | 2.37 | 2.17 | 2.73 | 2.49 |
| 60” | 0.88 | 0.80 | 1.03 | 0.95 | 1.19 | 1.09 | 1.37 | 1.25 | 1.57 | 1.44 | 1.81 | 1.65 | 2.08 | 1.90 |
Steps To Follow For Sewing a Mini Skort
The Winslet’s JASMINE Mini Skort Pattern is suitable for printing on both A4 and A0 size paper:
- Print at home: A4 Pattern
- Print at a copy shop: A0 Pattern
Let’s dive into the steps for sewing your very own unique mini skort:
Pattern Marking and Inventory
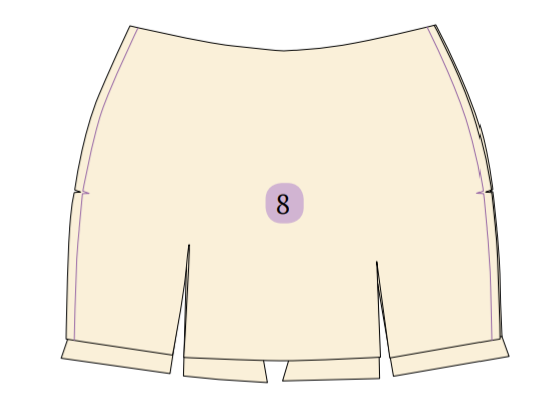
The fabric needs to be cut into following pieces:
A. Front Upper (Skirt) – cut x2 fabric
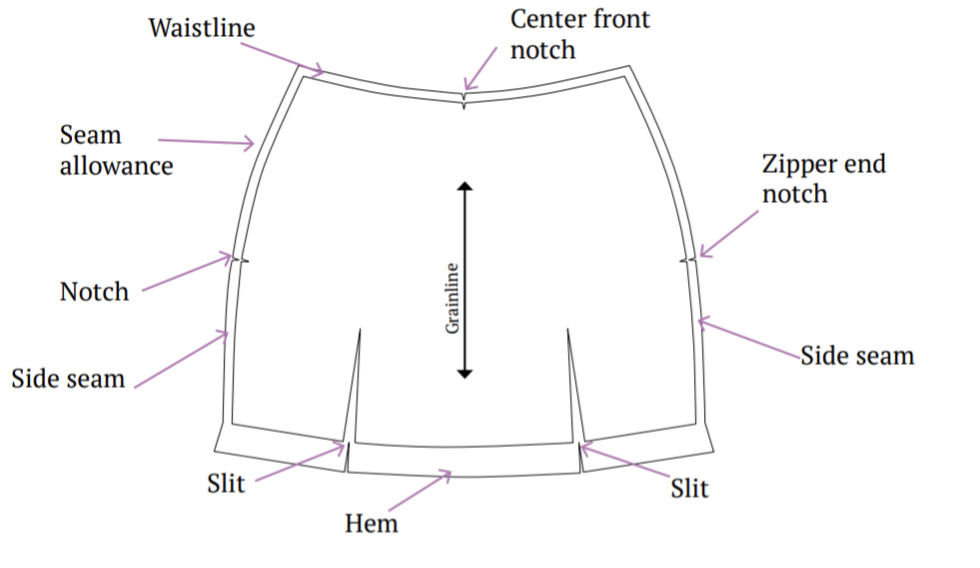
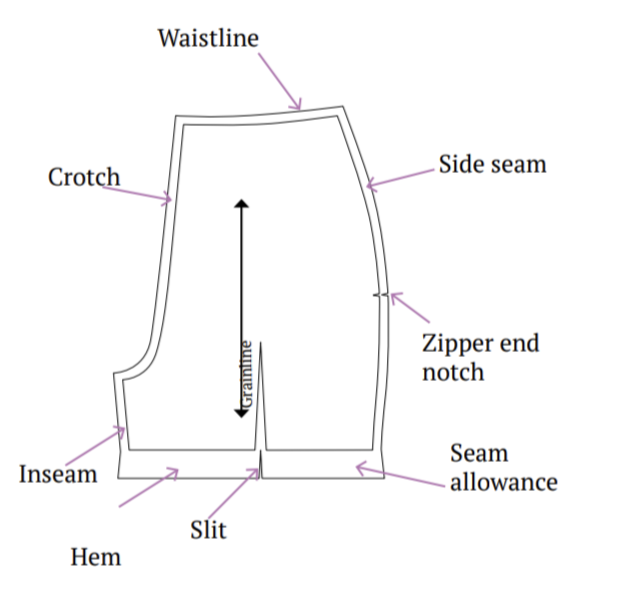
B. Front Inner (Short) – cut x2 fabric

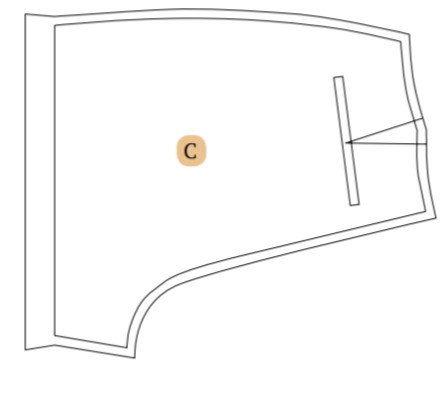
C. Back – cut x2 fabric
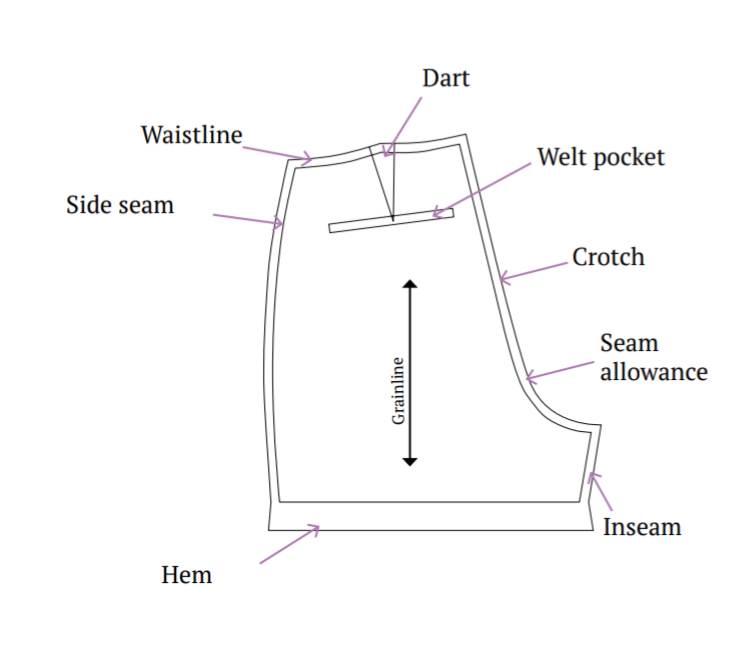
Note: An inseam refers to the measurement from your crotch down to your ankle bone, essentially representing the length of your inner leg.
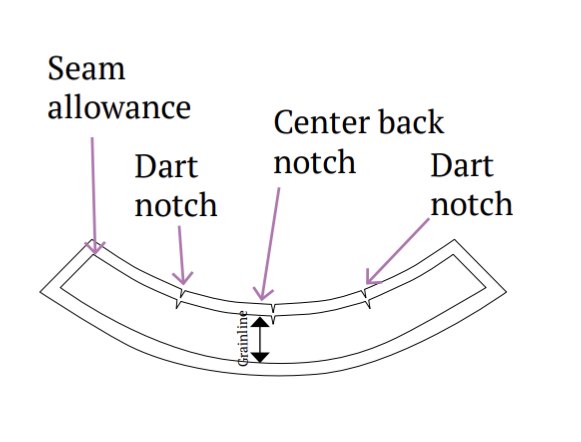
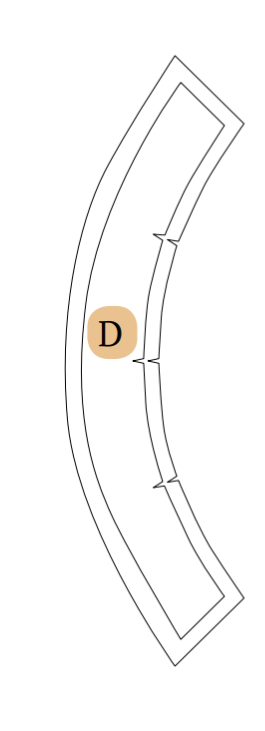
D. Back Waist Facing – cut x1 fabric
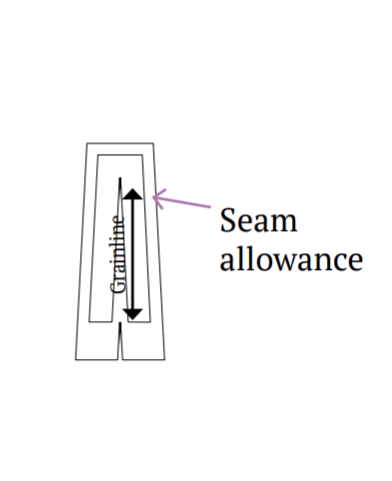
E. Back Welt Pocket – cut x2 fabric
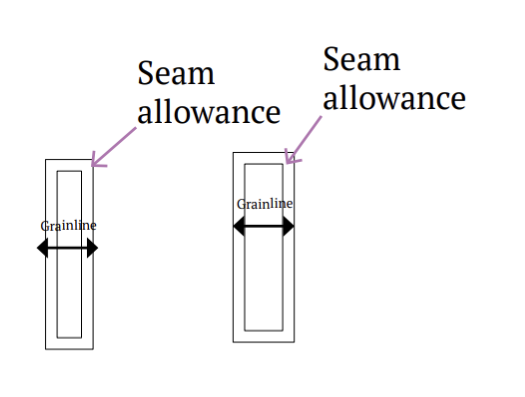

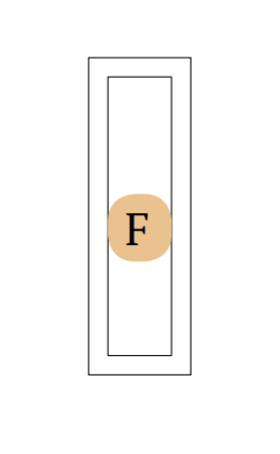
F. Back Welt Pocket Facing – cut x2 fabric
G. Front Slit Facing – cut x2 fabric

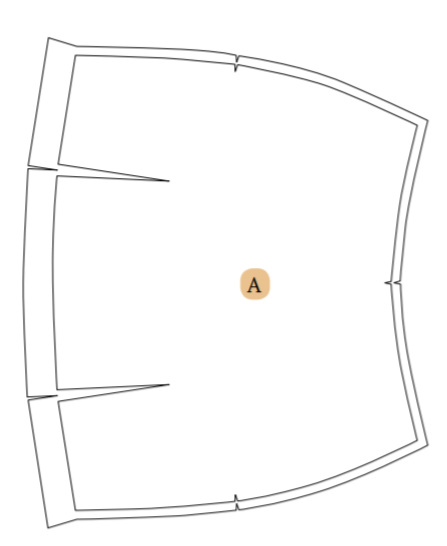
Cutting Layout
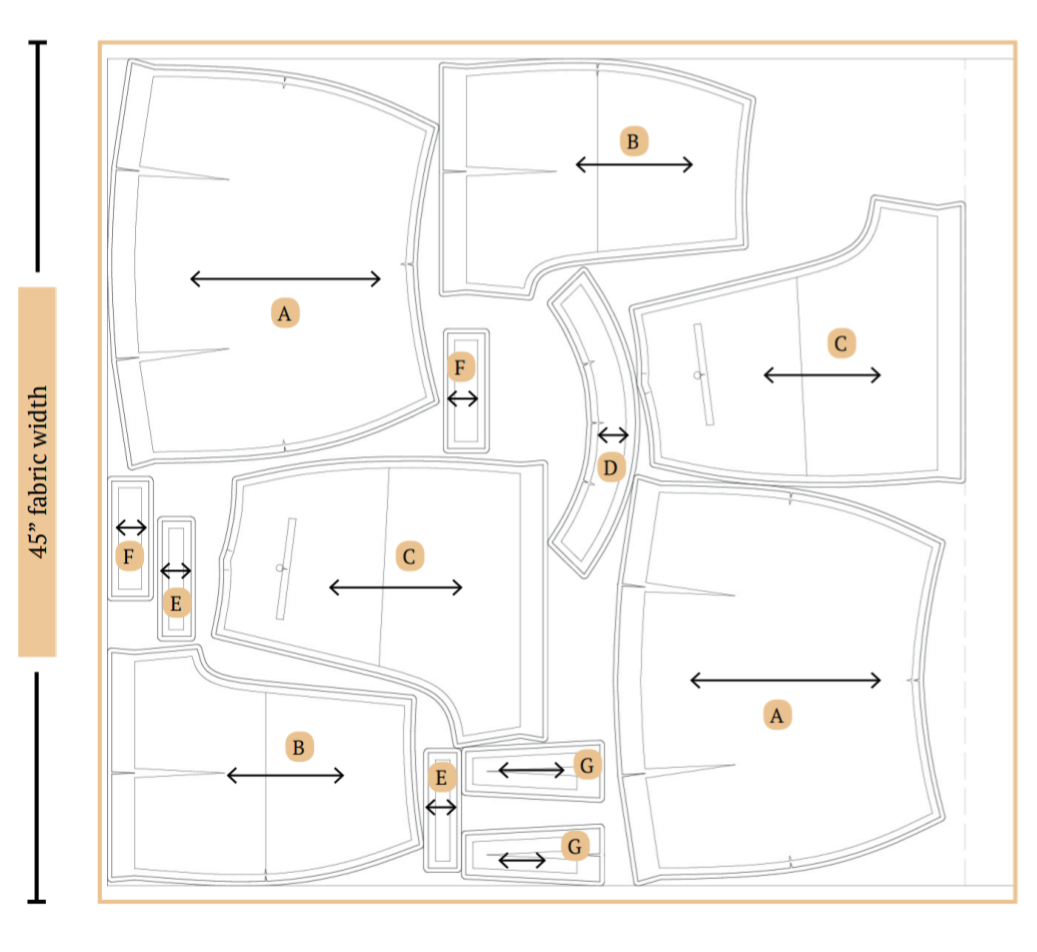
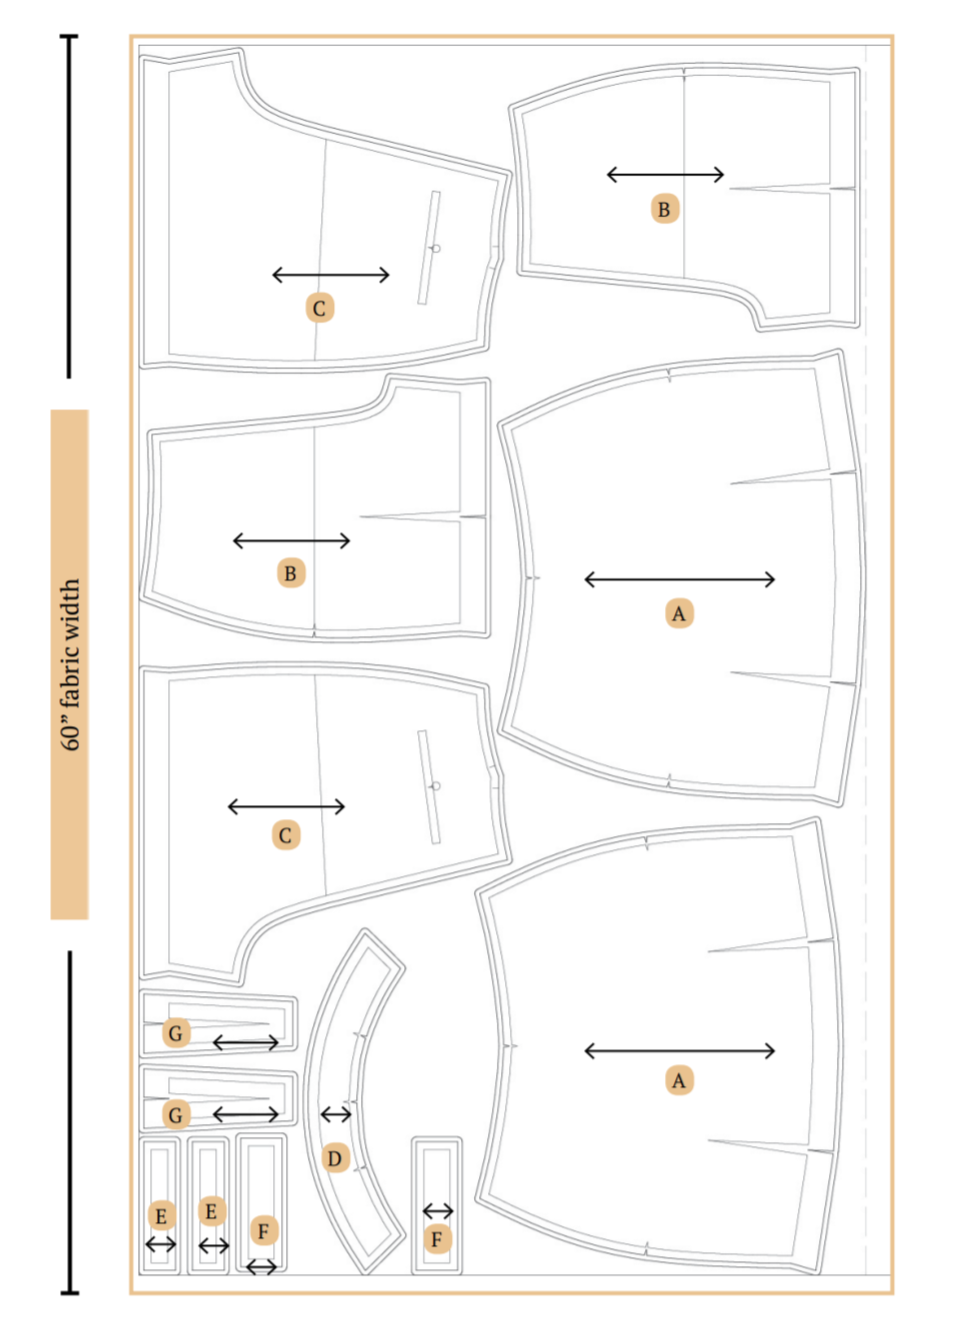
- Small size has been used for representation of this cutting layout.
- Ensure the pattern layout is on-grain for fabric alignment.
- Use pins to secure fabric, aiding accurate cutting.
- These pattern layouts are non-directional.
- If using fabric with nap or prints, purchase additional length.
Fabric Preparation and Cutting
- Arrange pattern pieces as shown in the above cutting diagram, ensuring the grainline arrow aligns with the selvage.
- Trace and cut fabric pieces using fabric shears, removing any markings.
- Transfer pattern markings to the wrong side of the fabric, including circles, buttonholes, and fold lines, using a marking pen or chalk.
- Mark the center front for fold pieces to aid in accurate alignment.
Sewing Steps
Step 1: How to Fold and Sew Darts
Fold the dart by putting the dart legs with right sides together.
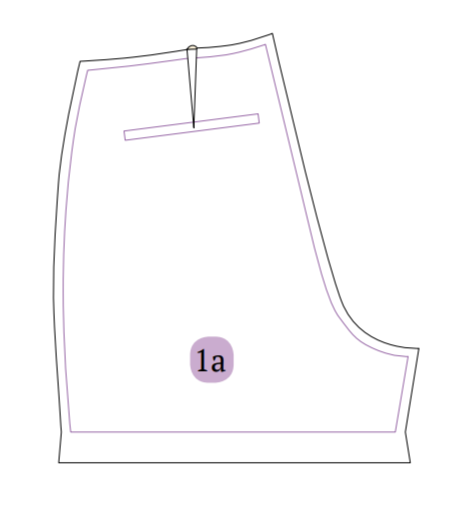
Then, sew along the line on the inside of the fabric and press it flat to one side.
Do the same for the other dart.
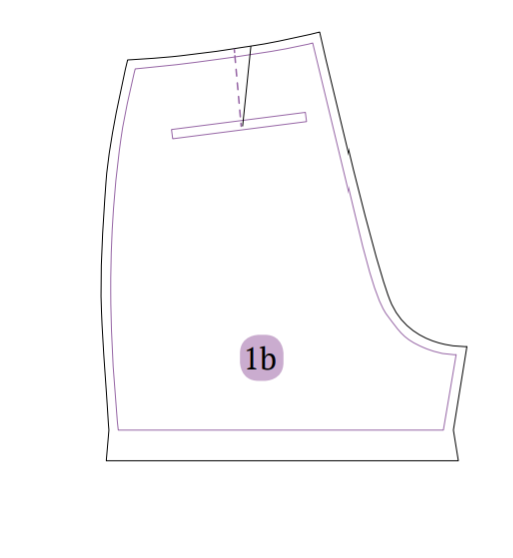
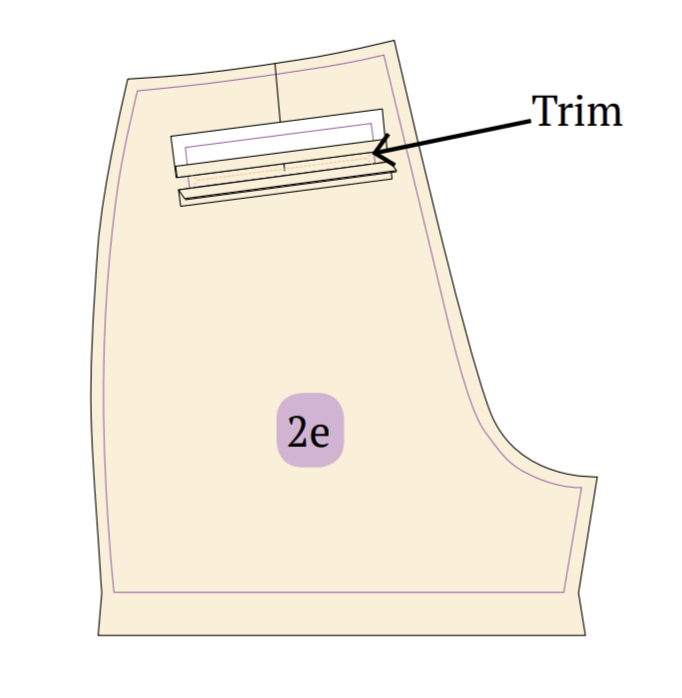
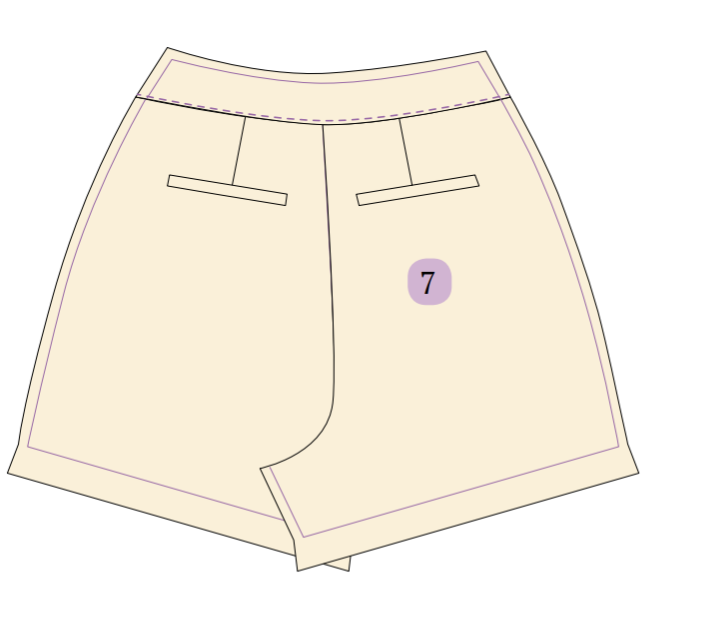
Step 2: How to Attach Faux Welt Pockets
Put the welt pocket facing on the back piece, with the right sides together. Make sure the bottom edge of the facing matches the top line of the welt pocket marking on the back piece. Sew along the bottom edge of the facing.
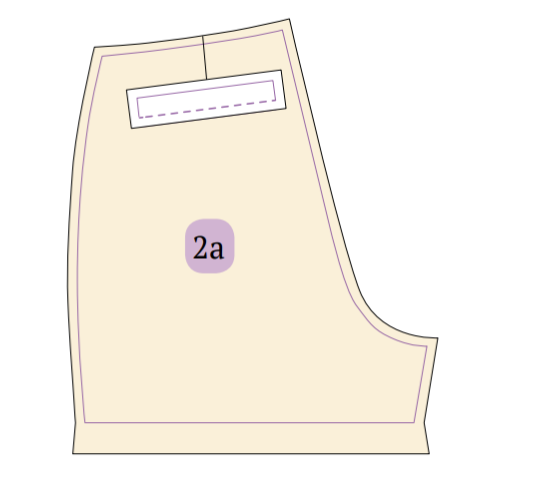
Fold the seam allowance and press it flat, using pins if needed.
Fold the welt pocket piece in half towards the wrong side and sew along the seam.
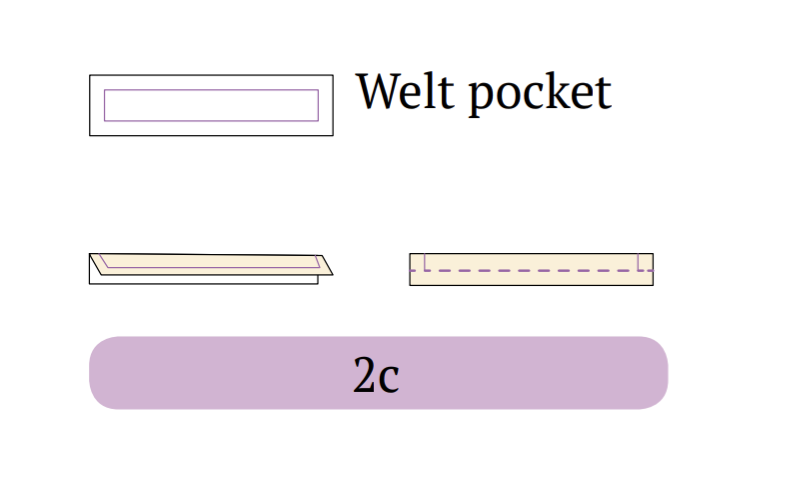
Place the welt pocket along the bottom line of the welt pocket marking and sew along the seam.
Carefully fold the welt pocket away from the marking and trim it.
Pass both the welt pocket and welt pocket facing inside the trimmed area towards the wrong side of the back piece. Press them neatly.
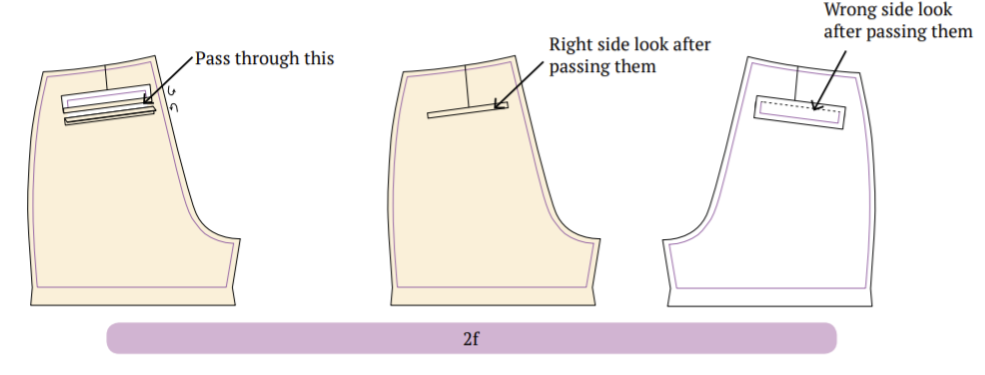
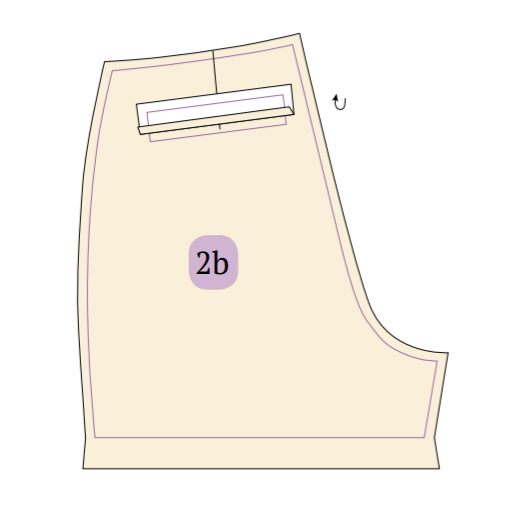
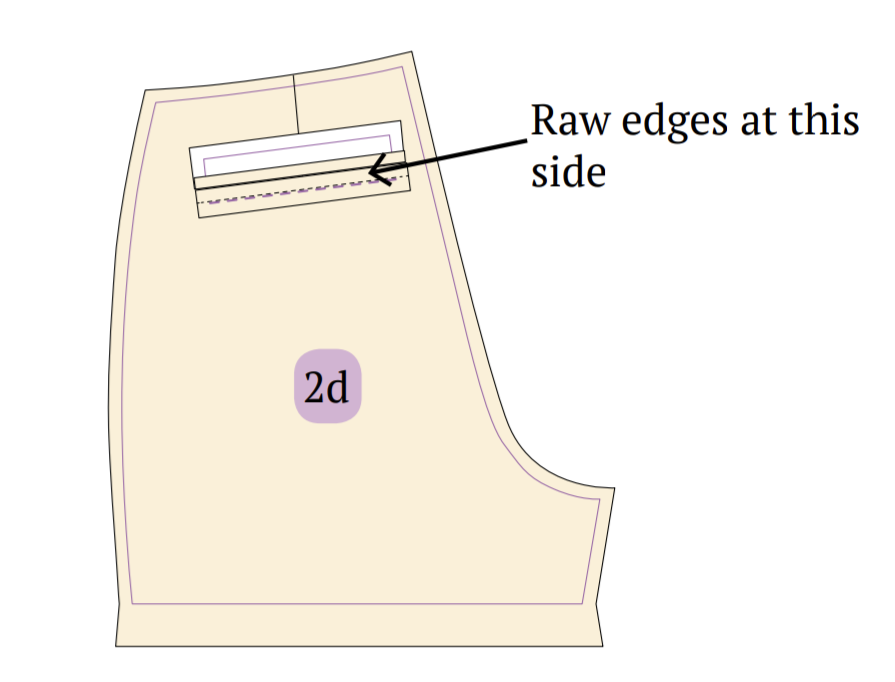
Flip the back piece over to expose the welt pocket side seam. Sew along the edges of the welt pocket to close and secure it. Repeat for the other side.
Pull up the bottom part of the back piece to reveal the bottom of the welt pocket pieces. Stitch two to three lines along the edges of the pocket to close and secure it.
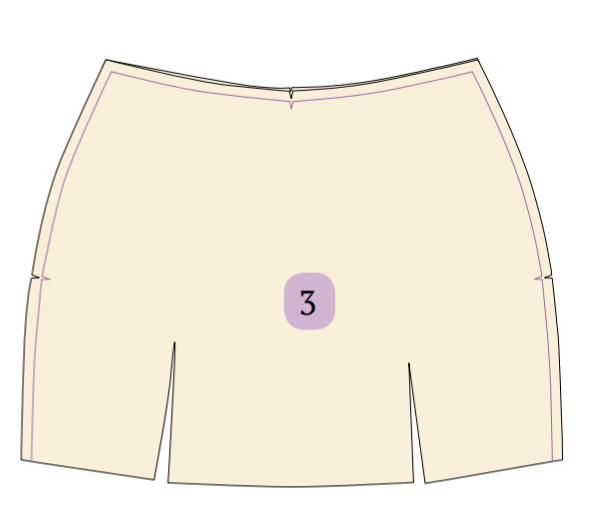
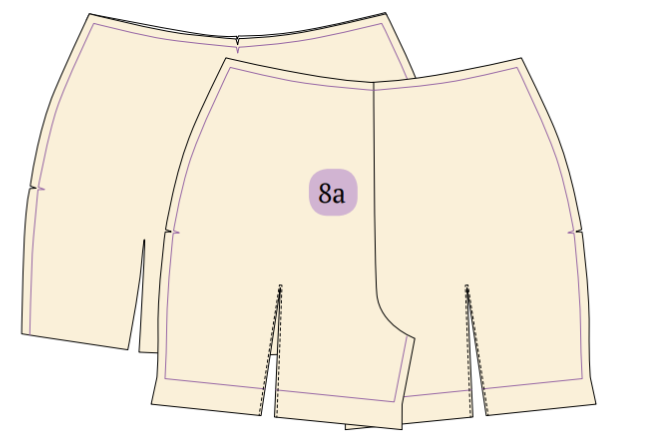
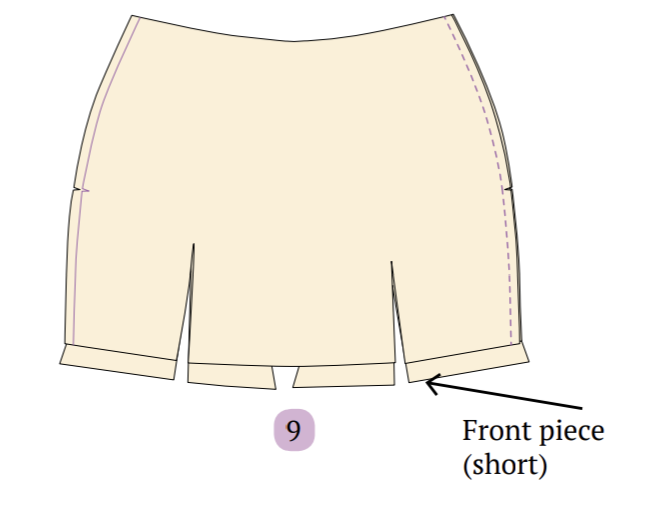
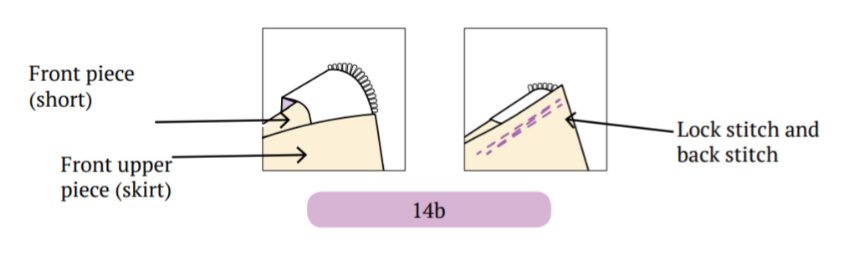
Step 3: Joining the Front Upper Skirt Pieces
Place the front upper “skirt” pieces together with the right sides facing each other.
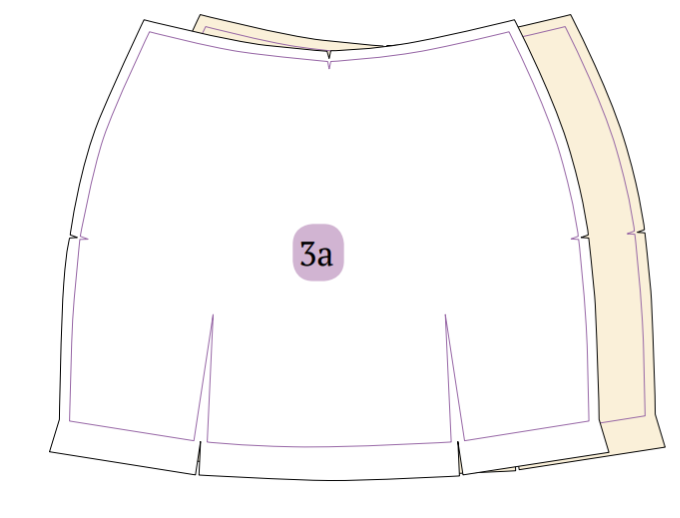
Sew along the hem and slit area. Trim the seam allowance up to the point where the slit meets.
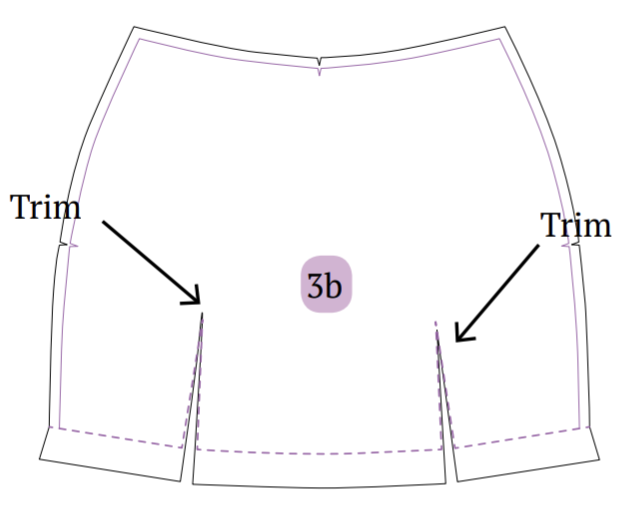
Turn the pieces right side out and press them flat.
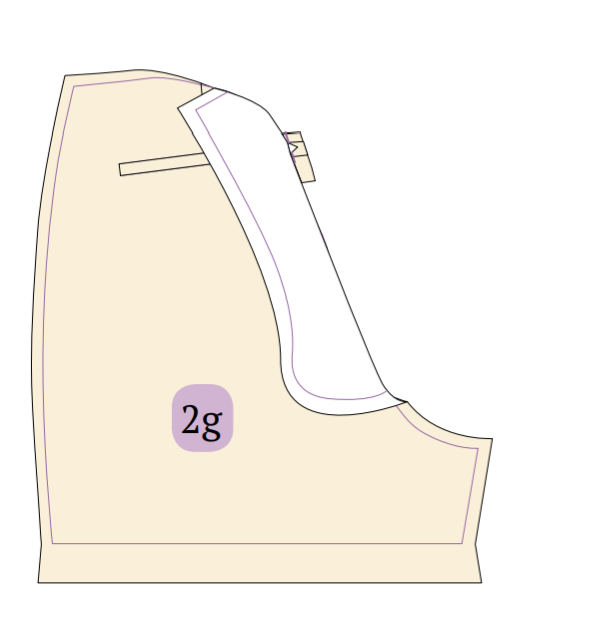
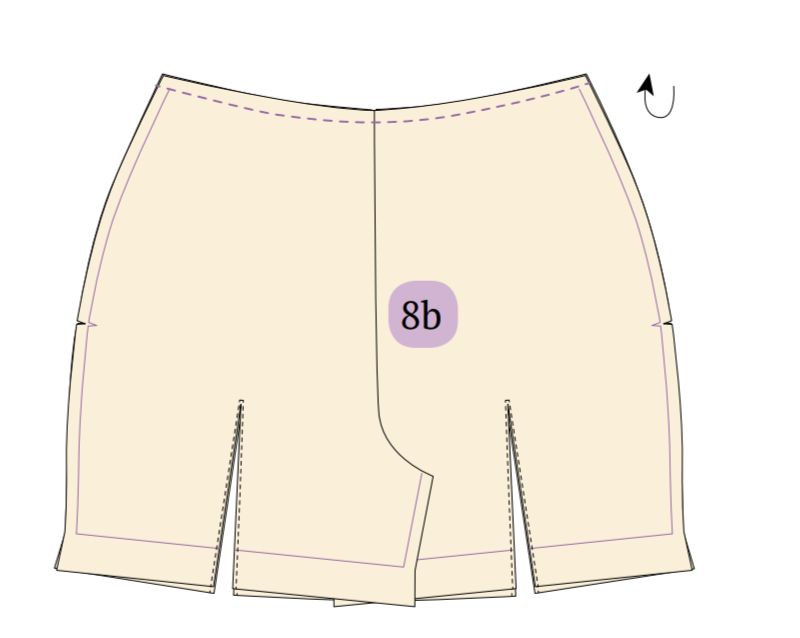
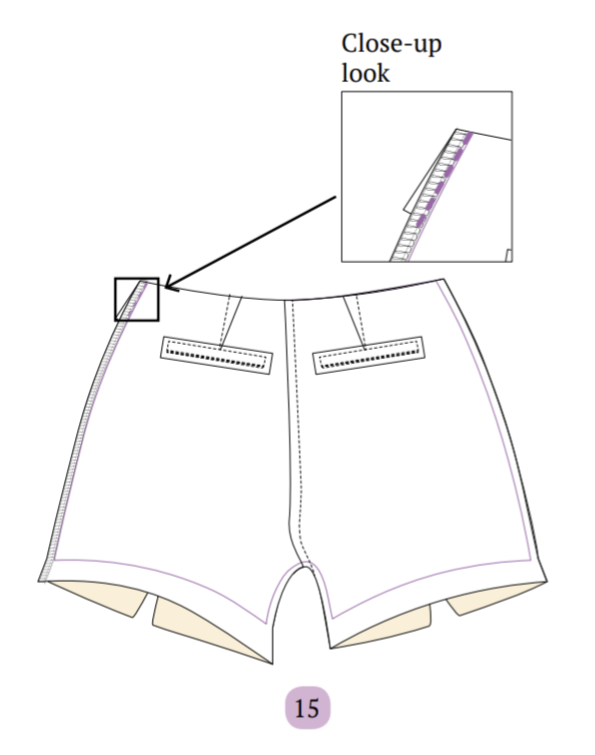
Step 4: Attaching the Slit Facing
Place the right side of the slit facing with the right side of the front piece (short). Sew along the slit seamline.
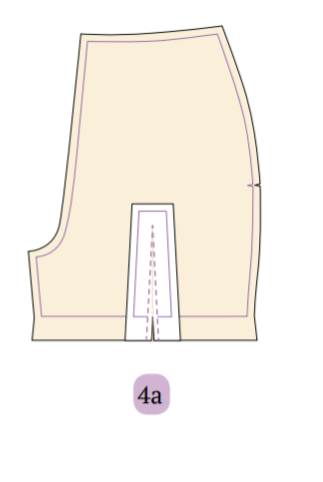
Trim the slit up to the meeting point. Turn the facing to the wrong side of the front piece and press it neatly. Clip the seam allowance if needed.

Sew from the top of the front piece to secure the slit.

Repeat the same process for the other slit on the front piece (short).
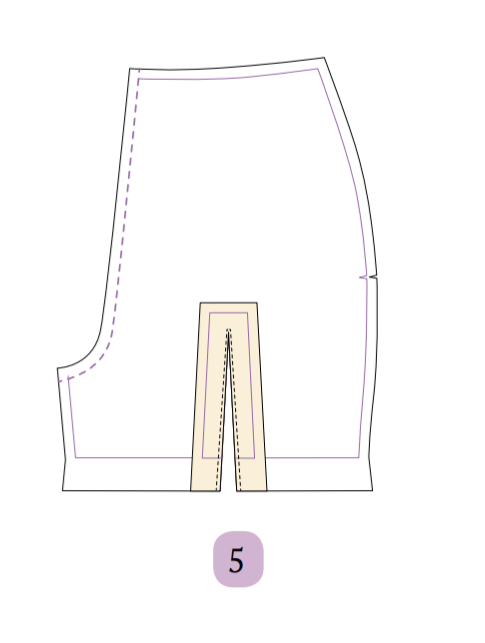
Step 5: Joining the Front Pieces (Short)
Put both front pieces (short) together with their right sides facing each other. Sew along the crotch line.
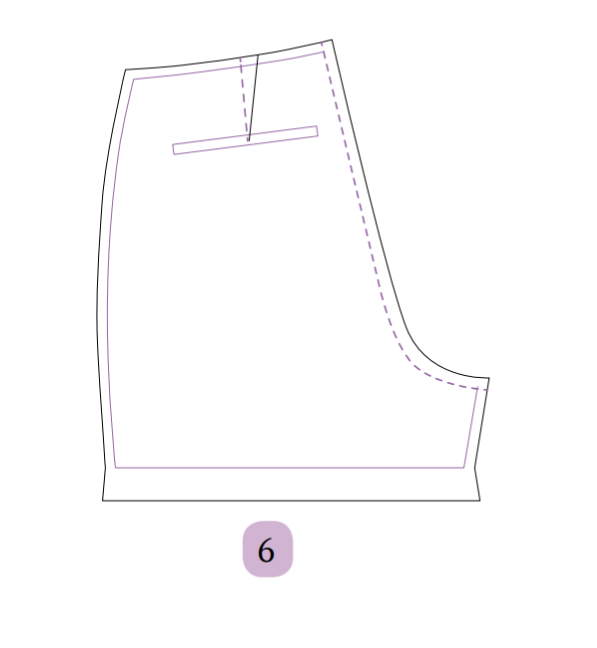
Step 6: Joining the Back Pieces
Repeat step 5 for both back pieces, aligning them with their right sides facing each other, and sew along the crotch line.
Step 7: Attaching the Back Facing
Place the back facing and the back piece with their right sides together, along the waistline. Pin and match them in place.
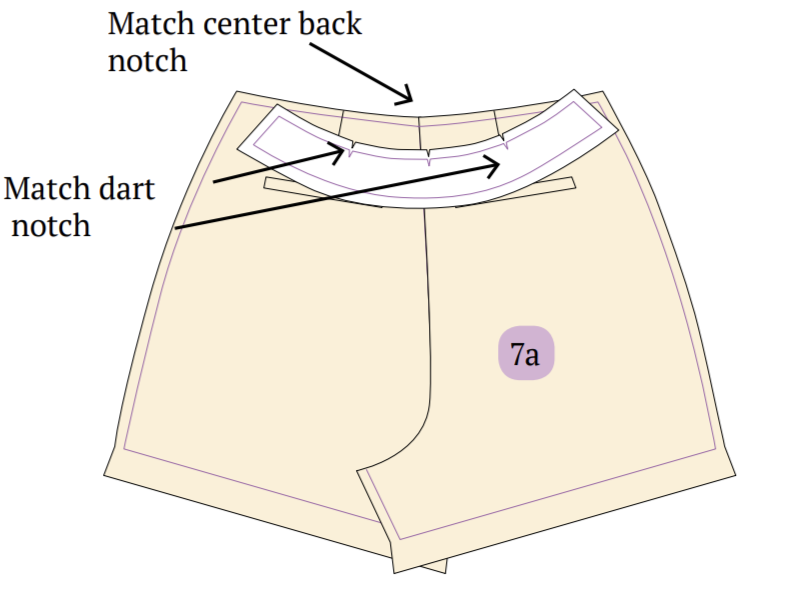
Sew along the waistline.
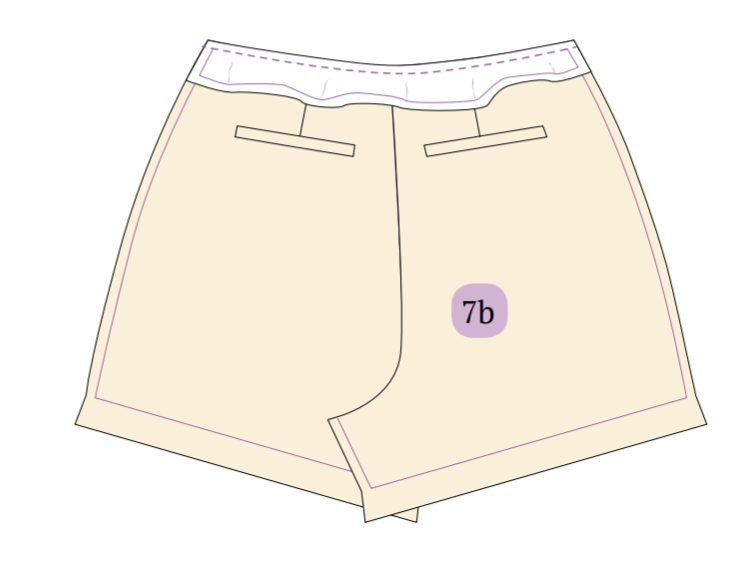
Open up the back facing and the back piece. Understitch them together.
Step 8: Attaching the Front Piece (Short) to the Front Upper Piece
Place the wrong side of the front piece (short) onto the front upper piece, aligning them along the waistline.
Sew along the waistline.
Turn the front piece to the right side, joining it with the front upper piece.
Step 9: Sewing Along the Zipper Side
Sew along the zipper side, using a basting stitch if desired.
Step 10: Attaching the Back Piece
Place the right side of the back piece facing down.
Sew along the non-zipper side of the side seam.
Step 11: Matching and Sewing the Skirt Pieces
Roll up the skirt piece from the crotch line of the short pieces. Match the front and back short inseams from the crotch line, ensuring the right sides are together.
Next, sew along the seamline.
Step 12: Attaching the Zipper
Position the front side of the zipper along the waistline of the back piece seam allowance. Sew beside the zipper teeth until reaching the zipper end notch.
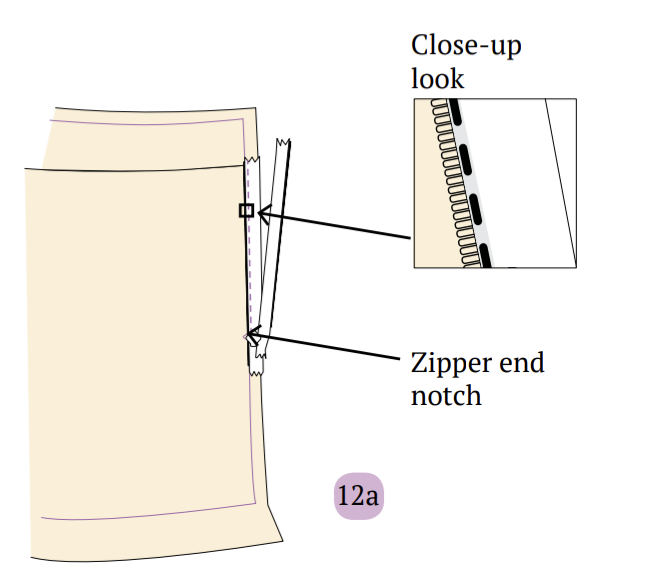
Repeat the same process for the other zipper tape on the front side of the short. Remember to transfer the zipper end marking from the front, as the back doesn’t have a notch.
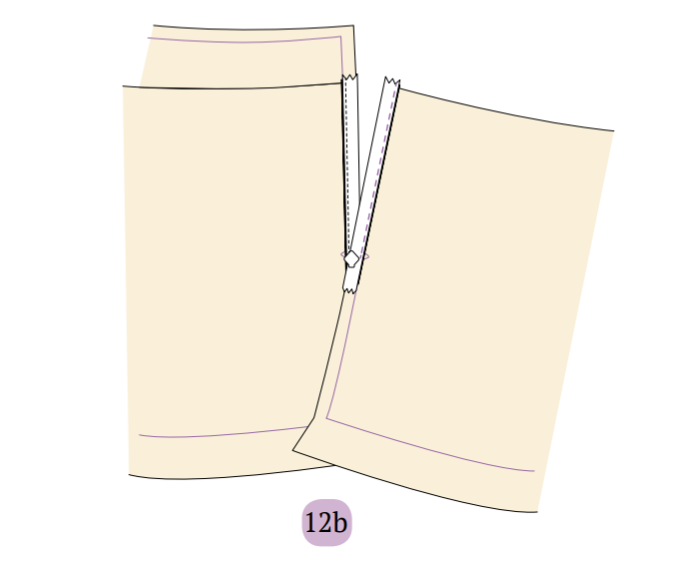
Secure the zipper end with a few back stitches.
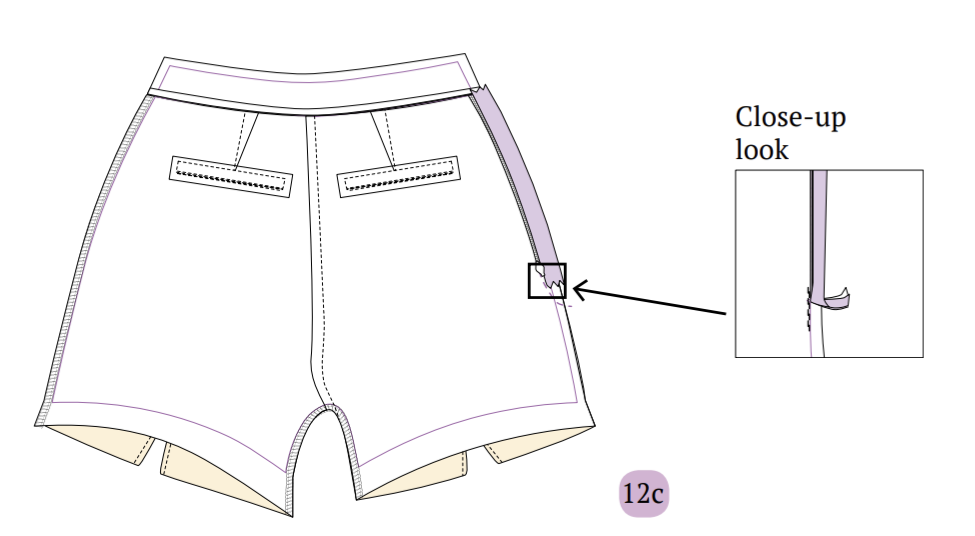
Step 13: Sewing the Side Seam to the Hem
Starting from the zipper end, sew the side seam all the way down to the hem.

Step 14: Finishing the Zipper Top
Use a serger to finish the back facing.
Turn the back facing and sew along the edge of the zipper. Turn the facing to the wrong side to achieve a finished zipper look.
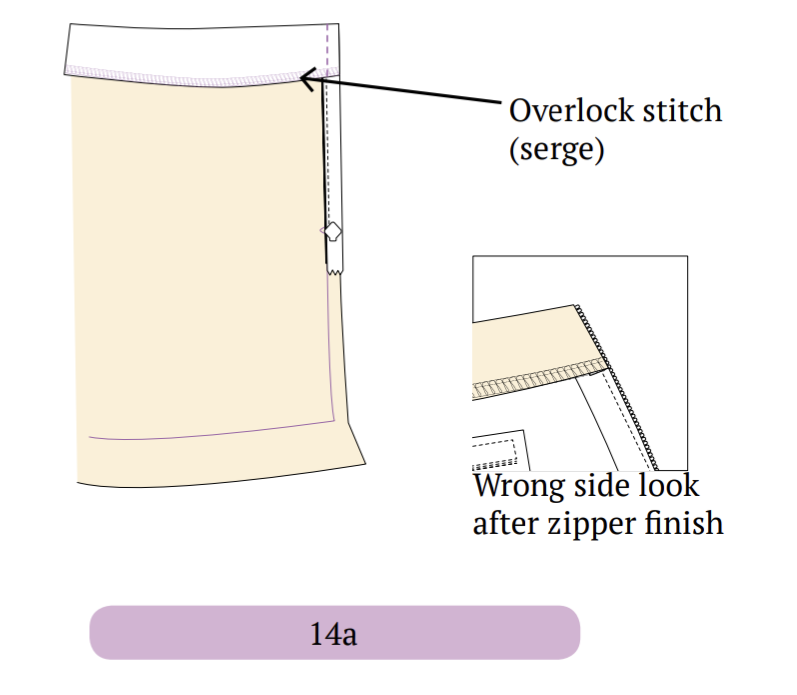
Remove a few stitches at the corner of the waistline on the zipper side of the front garment. Insert the zipper end inside and hand stitch it or use back stitches to secure it.
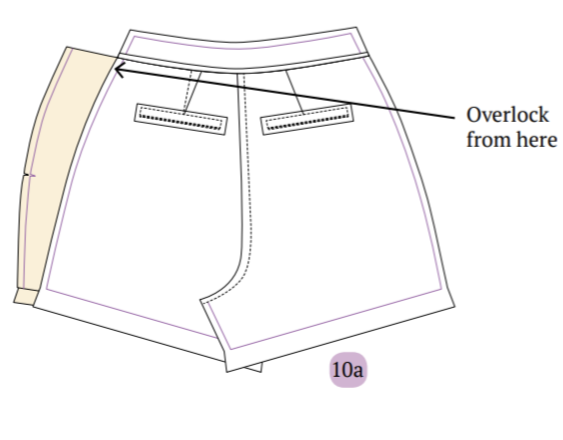
Step 15: Attaching the Back Facing
Attach the wrong side of the back facing to the seam allowance of the other side seam. Sew along the seam allowance.
Optionally, turn the facing to the wrong side of the back piece for a finished back facing look.
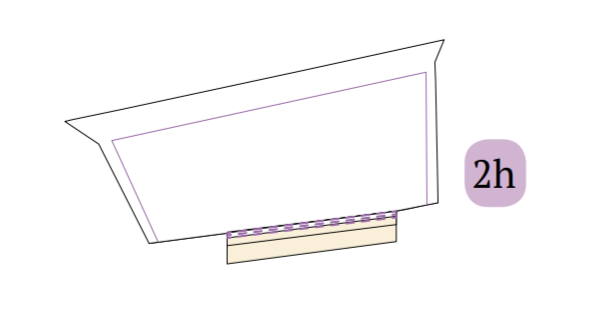
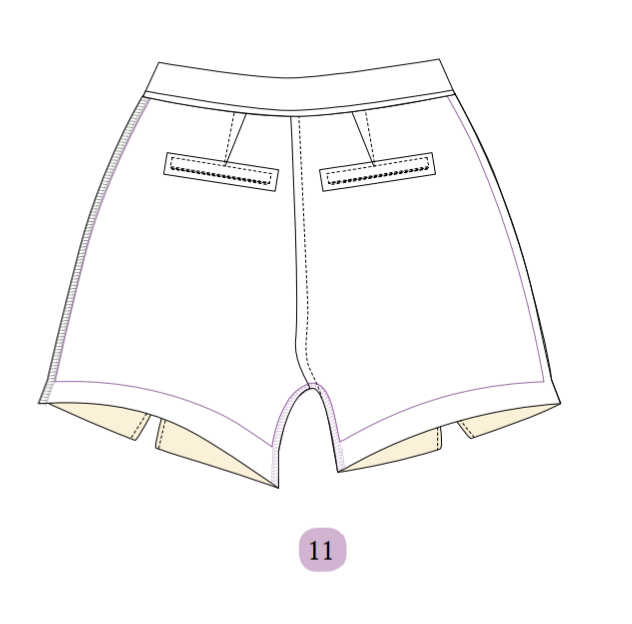
Step 16: Hemming the Short of the Skort
Fold the hem of the short of the skort. Sew all around the hem, starting from the inseam and returning to it.

Summary
That’s everything! I think this project is highly fulfilling and a wonderful complement to your wardrobe. Pair the mini skort with a cable-knit sweater for a cozy autumn vibe, or opt for a glamorous blouse to make a statement on your evening outing. The options are limitless, and the outcome is consistently stunning!
Check out some final images of this adorable mini skort created with the Winslet’s JASMINE Mini Skort Pattern:

Will you be making this skort for yourself? How did it turn out? Have you tried any of the other sewing projects? Let me know in the comments below!
Join the Winslet sewing community by sharing your masterpiece with the hashtag #madewithwinslets!


