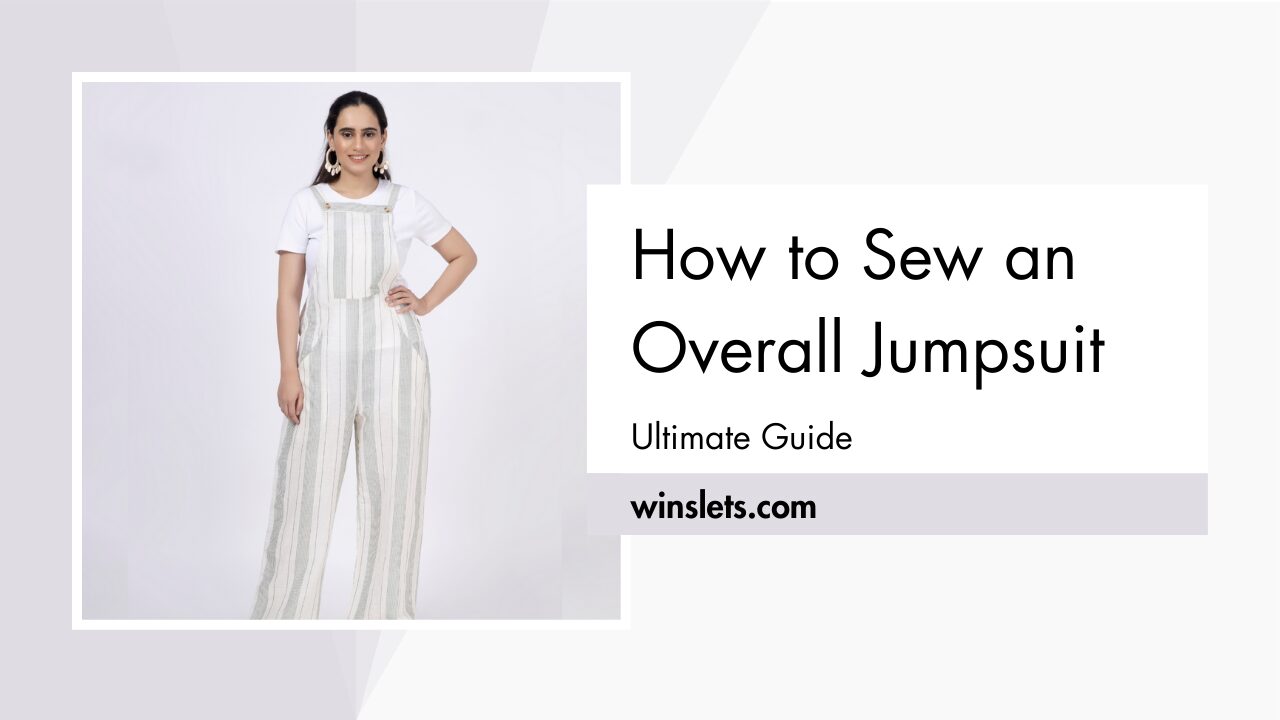
How to Sew an Overall Jumpsuit?
An overall jumpsuit is a one-piece garment that combines trousers and a bib-like top. It typically has shoulder straps that come together at the back, and it may have pockets on the chest, hips, and/or back. Overalls are often worn for practical purposes, such as workwear or gardening, but they can also be styled for fashion purposes.
I used the BELLE Overall Jumpsuit Pattern from Winslet’s to sew my overall jumpsuit. This jumpsuit is designed to have a looser, more comfortable fit, rather than being tight or form-fitting. The jumpsuit has straps that go over the shoulders and feature a bib-like front.
Continue reading to discover how I crafted this jumpsuit entirely from scratch, ideal for enjoying those warm summer days.
What supplies do you need to sew an overall jumpsuit?
The basic supplies that you’ll need to sew an overall jumpsuit are a Sewing Pattern (I used Winslet’s BELLE Overall Jumpsuit Pattern for this project), Sewing Machine, Tape Measure, Chalk, Shears, Pins, Iron, Needles, Thread (preferably 3-ply polyester), Thread Cutter, Buttons, and a Buttonhole Presser Foot.
Fabric Recommendation
Confused about the right fabric for your jumpsuit? I prefer to use light weight fabric, such as 100% cotton, cotton blend, cotton twill, silk blend, crepe, georgette, and viscose when it comes to sewing jumpsuits. Lightweight fabrics are preferred for jumpsuits because they offer comfort, ease of movement, and a flattering drape.
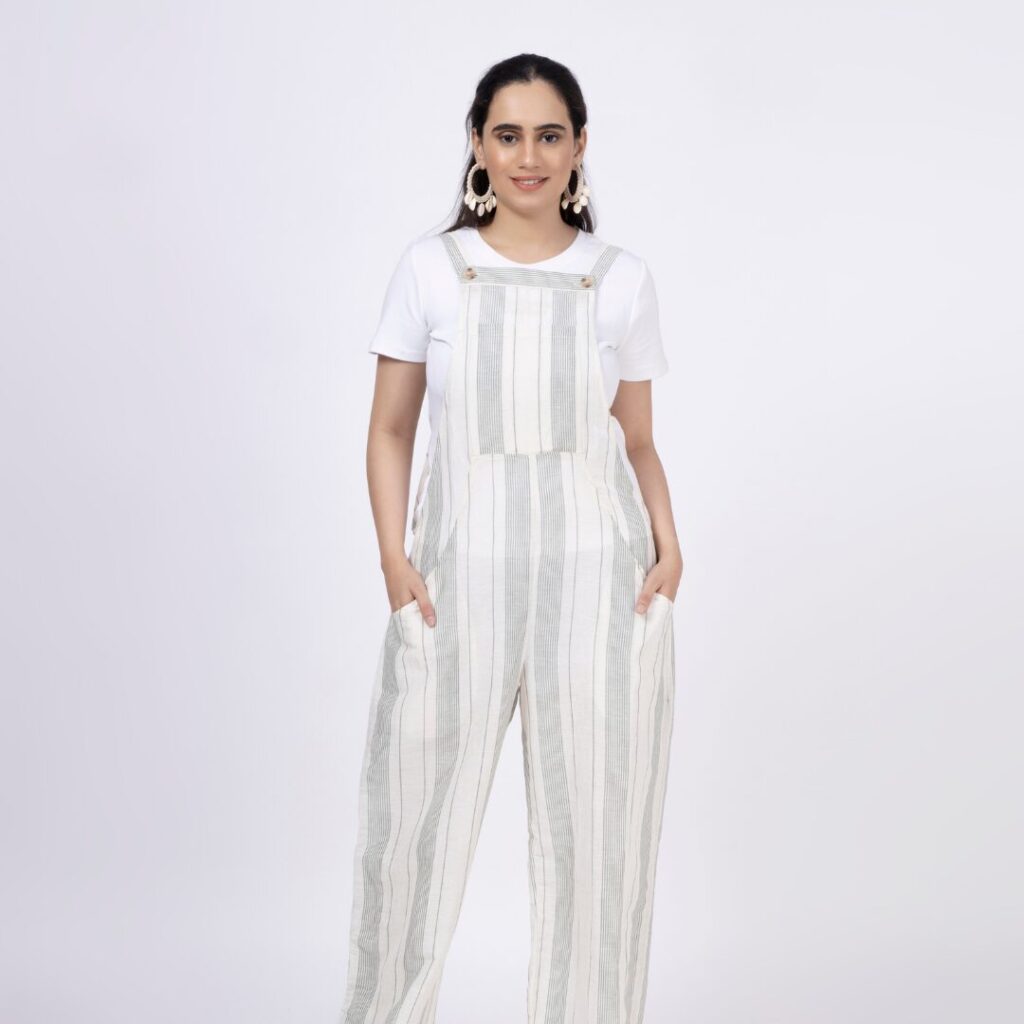
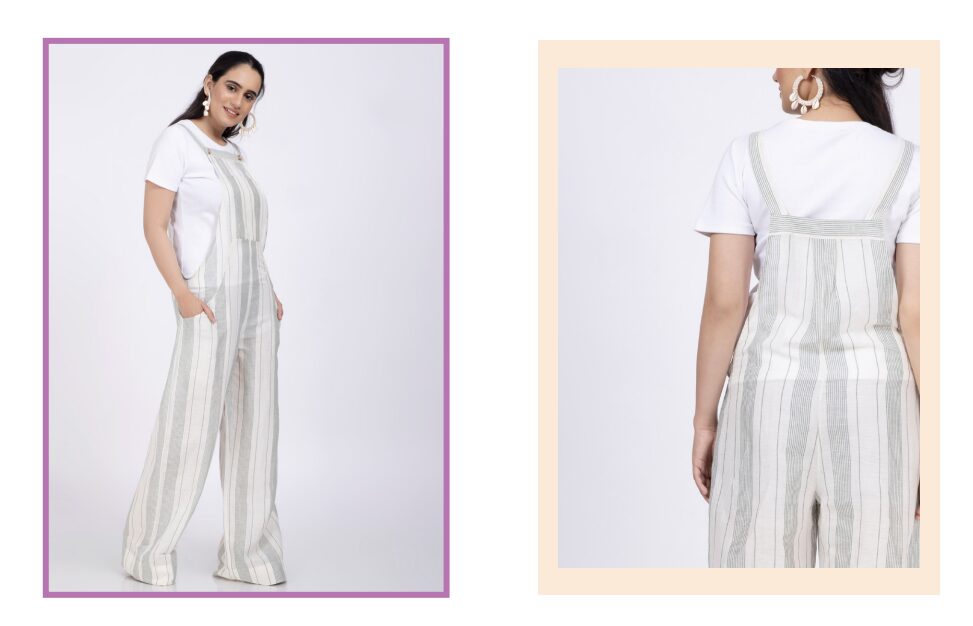
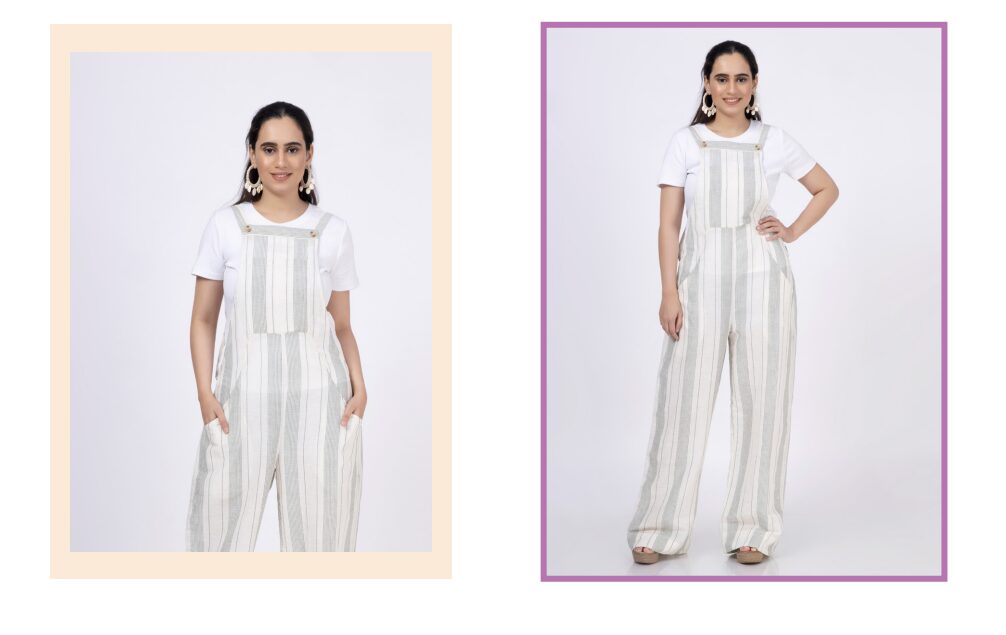
The model above is wearing an overall jumpsuit made from Winslet’s BELLE Overall Jumpsuit Pattern. The jumpsuit is made from yarndyed stripe cotton linen fabric, ideal for its breathability, durability, crease resistance, and easy ironing.
Size Charts
The overall jumpsuit sewing pattern measurements for sizes (XS, S, M, L, XL, 2XL, or 3XL) are detailed below. Choose a size that corresponds most closely to your body measurements.
It’s worth noting that if your exact measurements are not listed in the table, you may want to consider ordering a size larger.
The size chart includes measurements in both inches and centimeters for your reference.
Body Measurements
| XS (inches) | XS (cm) | S (inches) | S (cm) | M (inches) | M (cm) | L (inches) | L (cm) | XL (inches) | XL (cm) | 2XL (inches) | 2XL (cm) | 3XL (inches) | 3XL (cm) | |
| Bust | 32 | 81.3 | 34 | 86.4 | 36 | 91.4 | 38 | 96.5 | 40 | 101.6 | 42 | 106.7 | 44 | 111.8 |
| Waist | 26 | 66.0 | 28 | 71.1 | 30 | 76.2 | 32 | 81.3 | 34 | 86.4 | 36 | 91.4 | 38 | 96.5 |
| Hip | 34 | 86.4 | 36 | 91.4 | 38 | 96.5 | 40 | 101.6 | 42 | 106.7 | 44 | 111.8 | 46 | 116.8 |
Final Garment Measurements
| XS (inches) | XS (cm) | S (inches) | S (cm) | M (inches) | M (cm) | L (inches) | L (cm) | XL (inches) | XL (cm) | 2XL (inches) | 2XL (cm) | 3XL (inches) | 3XL (cm) | |
| Hip Round | 37 | 93.98 | 39 | 99.06 | 41 | 104.14 | 43 | 109.22 | 45 | 114.3 | 47 | 119.38 | 49 | 124.46 |
| Full Length | 48 | 121.92 | 48.5 | 123.19 | 49 | 124.46 | 49.25 | 125.10 | 49.75 | 126.40 | 50 | 127 | 50.5 | 128.27 |
Yardage Chart
| Width of the Fabric | XS (yards) | XS (meters) | S (yards) | S (meters) | M (yards) | M (meters) | L (yards) | L (meters) | XL (yards) | XL (meters) | 2XL (yards) | 2XL (meters) | 3XL (yards) | 3XL (meters) |
| 45” | 1.53 | 1.40 | 1.80 | 1.65 | 2.12 | 1.94 | 2.44 | 2.23 | 2.80 | 2.56 | 3.22 | 2.95 | 3.71 | 3.39 |
| 60” | 1.46 | 1.33 | 1.72 | 1.57 | 2.02 | 1.85 | 2.32 | 2.12 | 2.67 | 2.44 | 3.07 | 2.81 | 3.53 | 3.23 |
Steps To Follow For Sewing an Overall Jumpsuit
The Winslet’s BELLE Overall Jumpsuit Pattern is suitable for printing on both A4 and A0 size paper:
- Print at home: A4 Pattern
- Print at a copy shop: A0 Pattern
Let’s dive into the steps for sewing your very own unique overall jumpsuit:
Pattern Marking and Inventory
The fabric needs to be cut into following pieces:
A. Front upper – cut x1 fabric
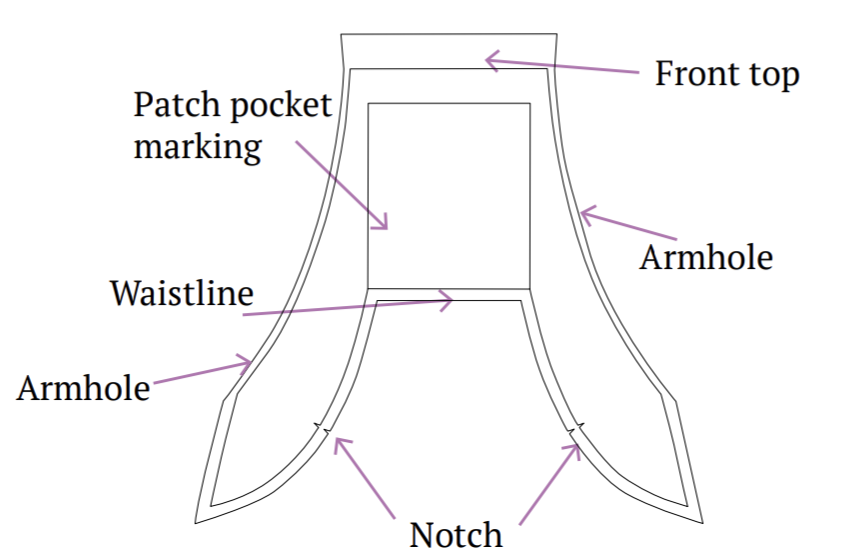
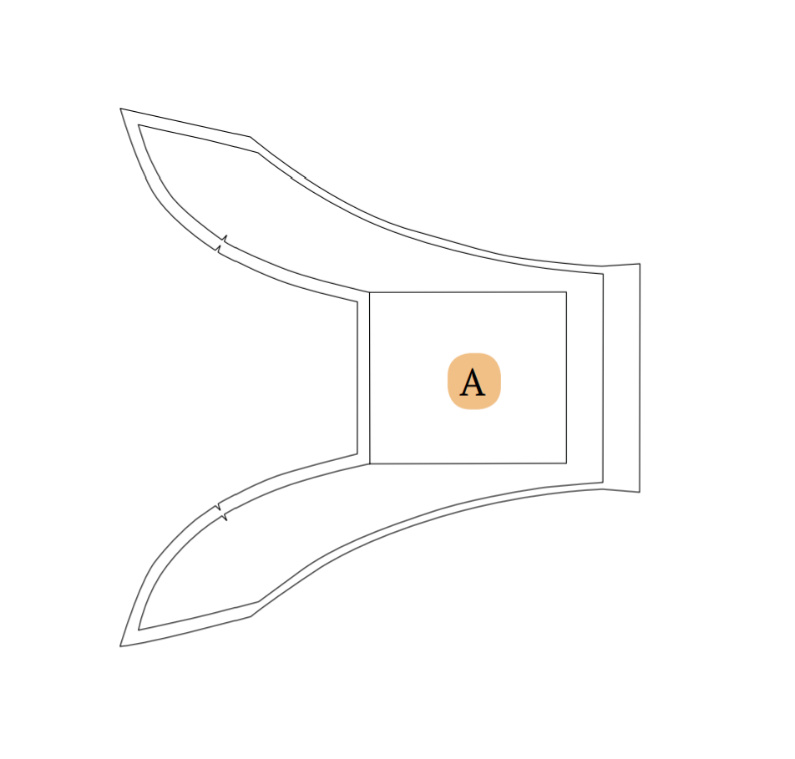
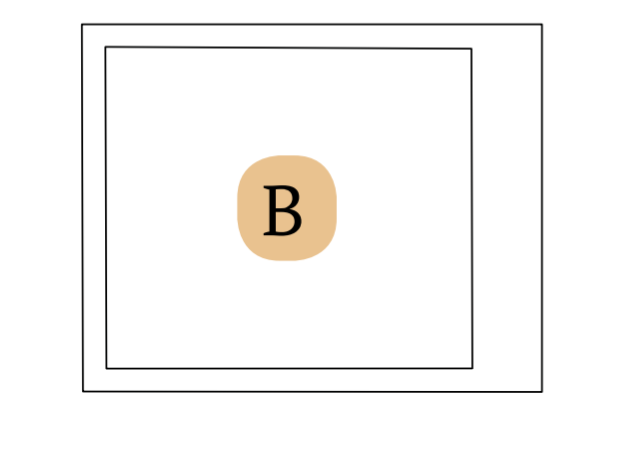
B. Patch pocket – cut x1 fabric
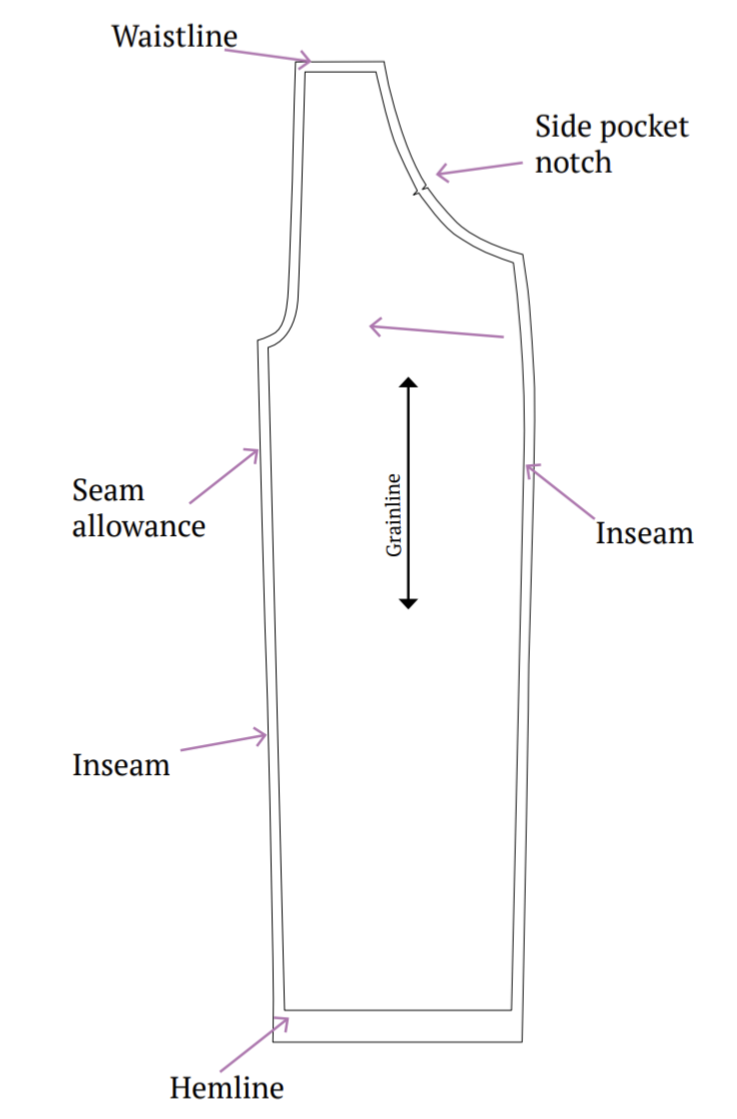
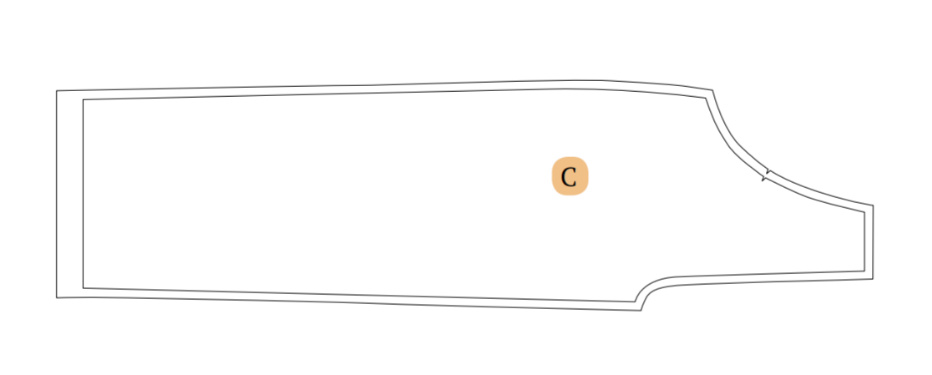
C. Front bottom – cut x2 fabric
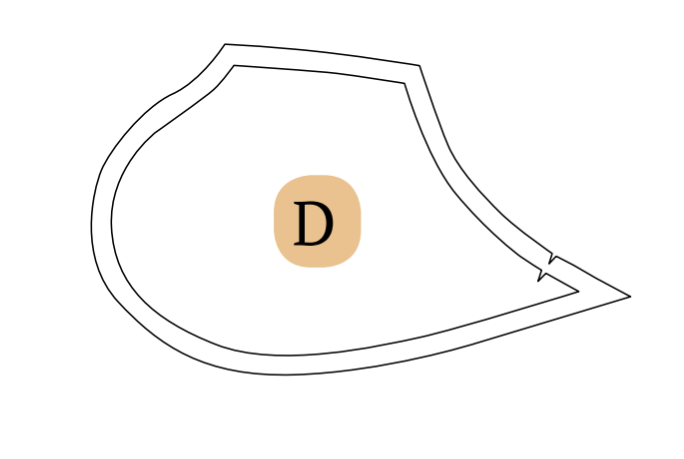
D. Side pocket – cut x4 fabric
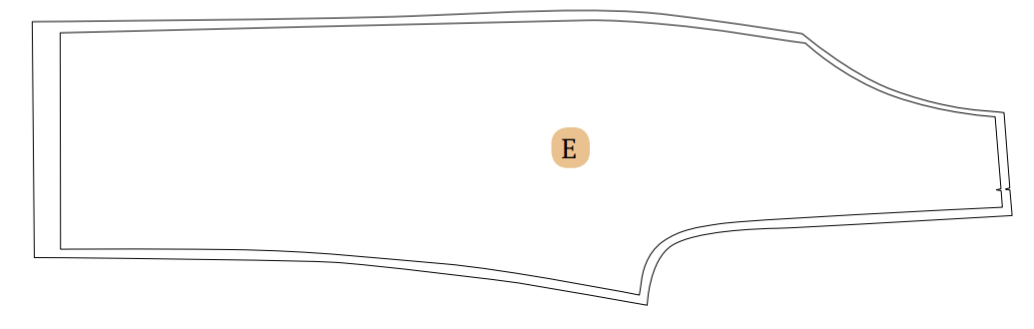
E. Back – cut x2 fabric
Note: An inseam refers to the measurement from your crotch down to your ankle bone, essentially representing the length of your inner leg.
F. Back upper yoke – cut x2 fabric

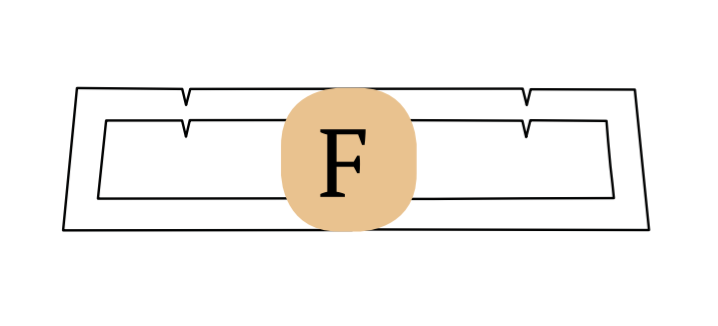
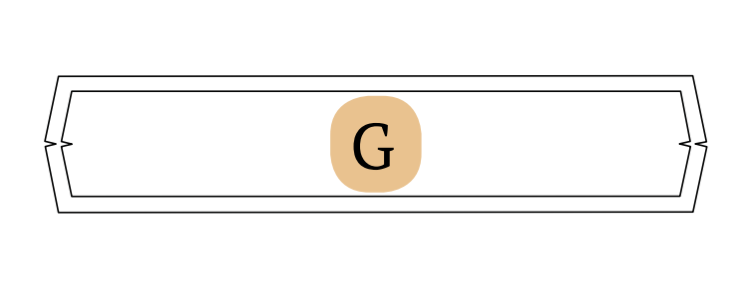
G. Strap – cut x2 fabric
H. Binding strip – cut x4 fabric (armhole)

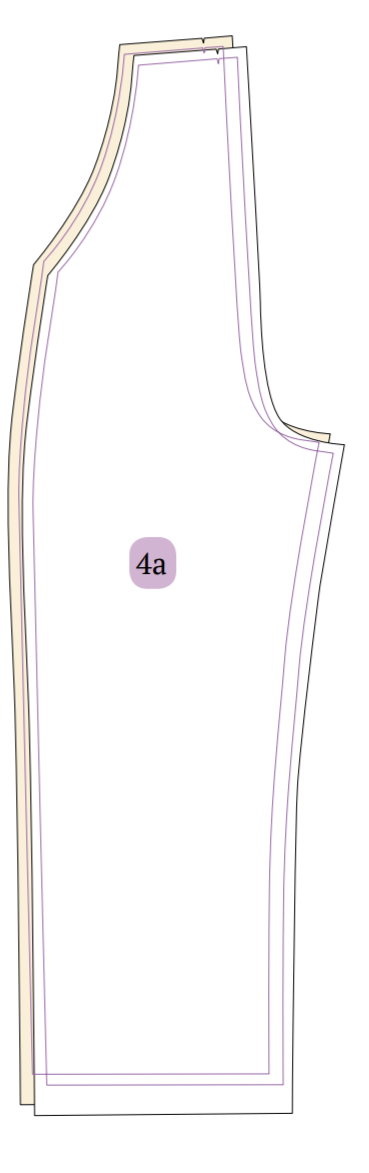
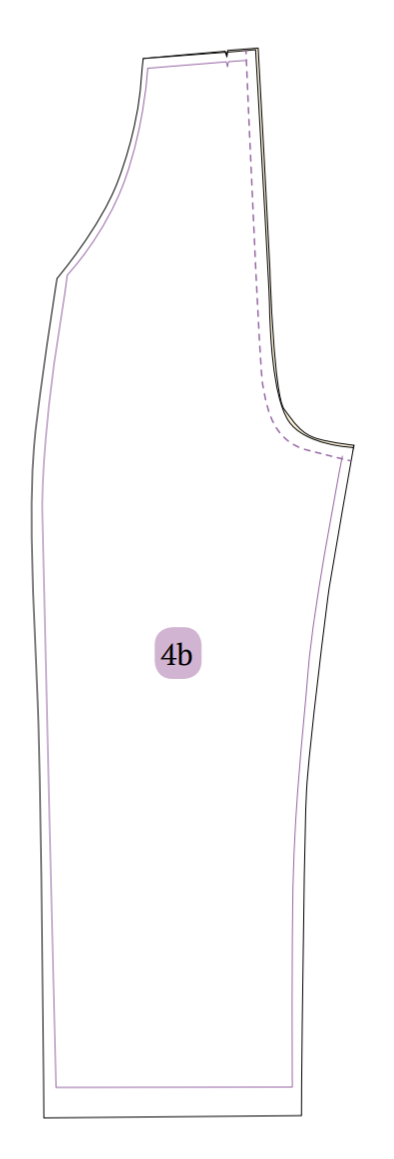
Cutting Layout
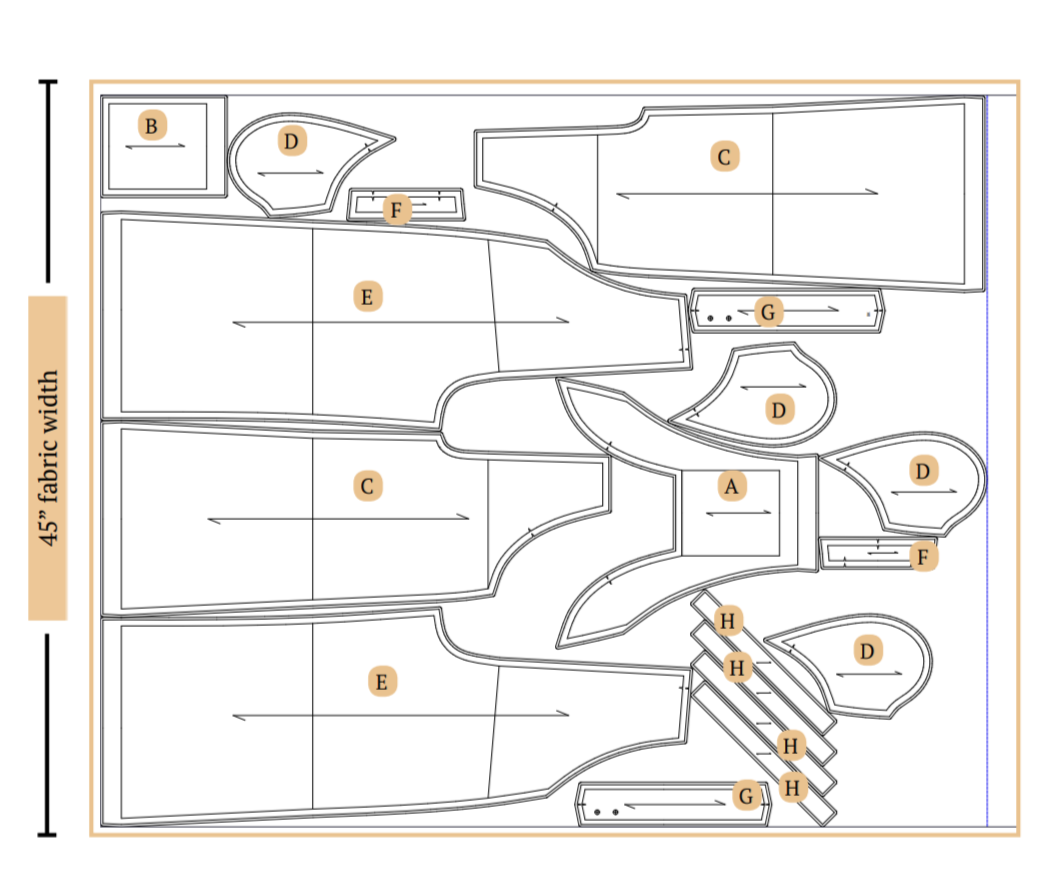
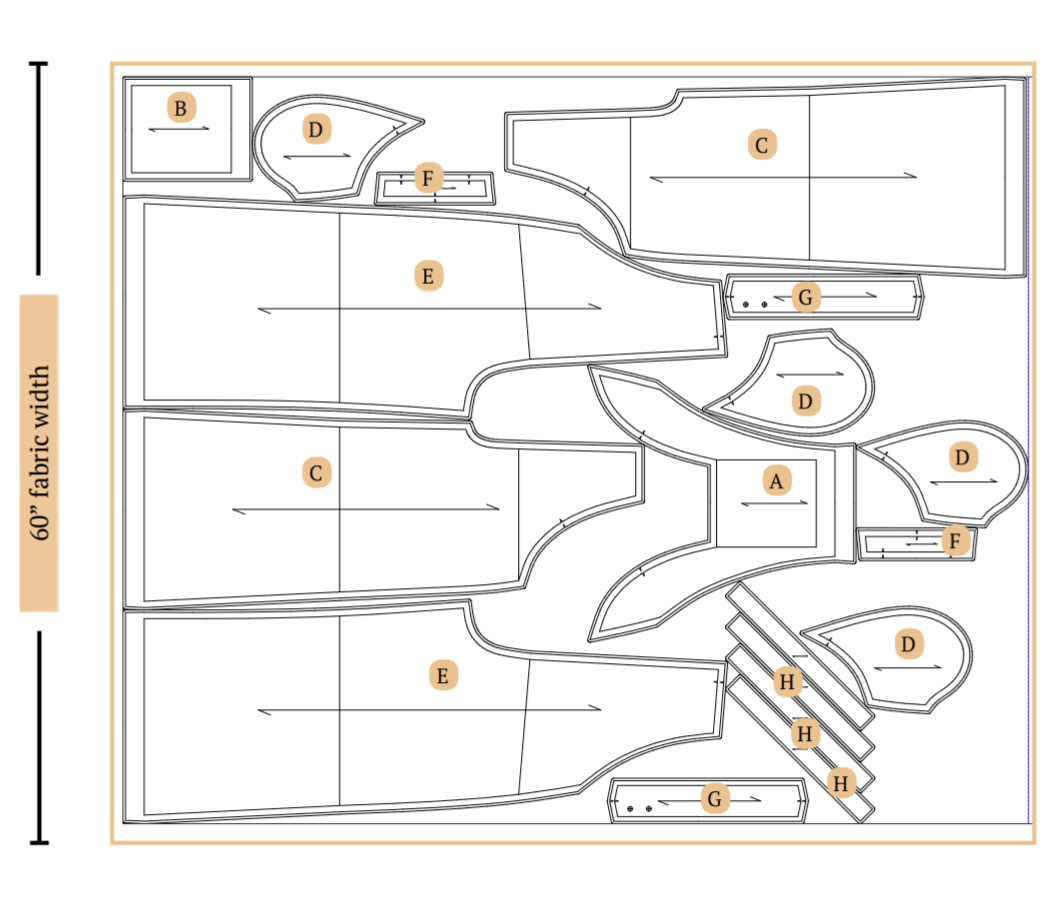
- Medium size has been used for representation of this cutting layout.
- Ensure the pattern layout is on-grain for fabric alignment.
- Use pins to secure fabric, aiding accurate cutting.
- These pattern layouts are non-directional.
- If using fabric with nap or prints, purchase additional length.
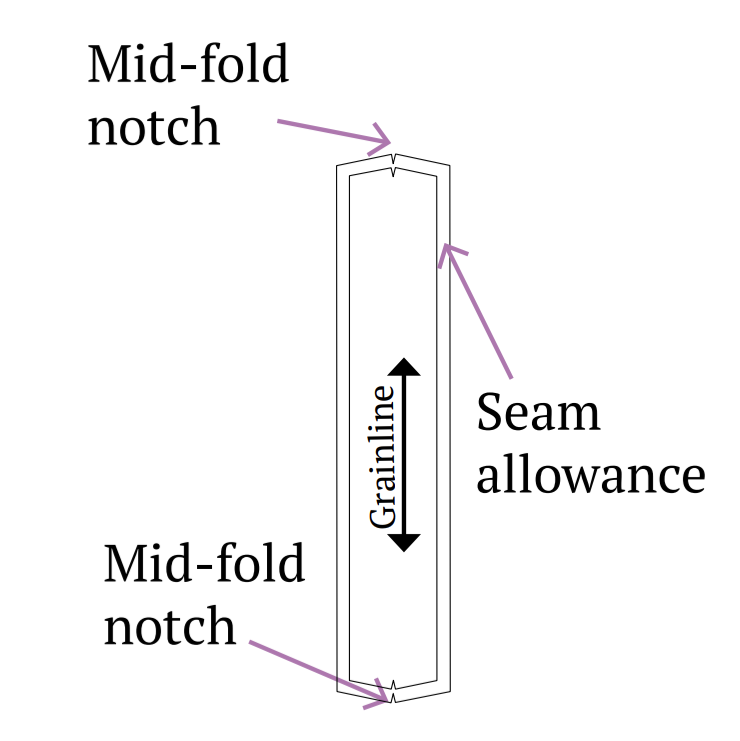
Fabric Preparation and Cutting
- Arrange pattern pieces as shown in the above cutting diagram, ensuring the grainline arrow aligns with the selvage.
- Trace and cut fabric pieces using fabric shears, removing any markings.
- Transfer pattern markings to the wrong side of the fabric, including circles, buttonholes, and fold lines, using a marking pen or chalk.
- Mark the center front for fold pieces to aid in accurate alignment.
Sewing Steps
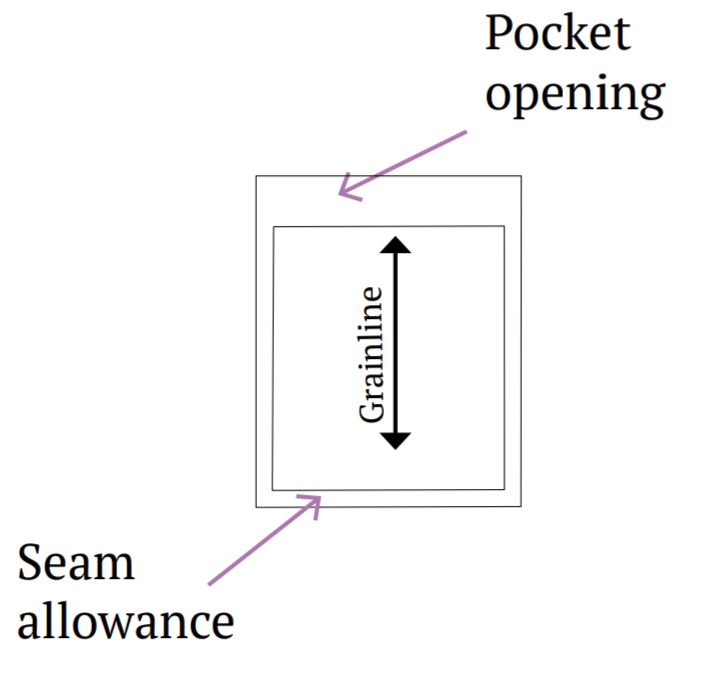
Step 1: Attaching a Patch Pocket
Prepare the patch pocket by folding the opening 1 cm inward and pressing it firmly.
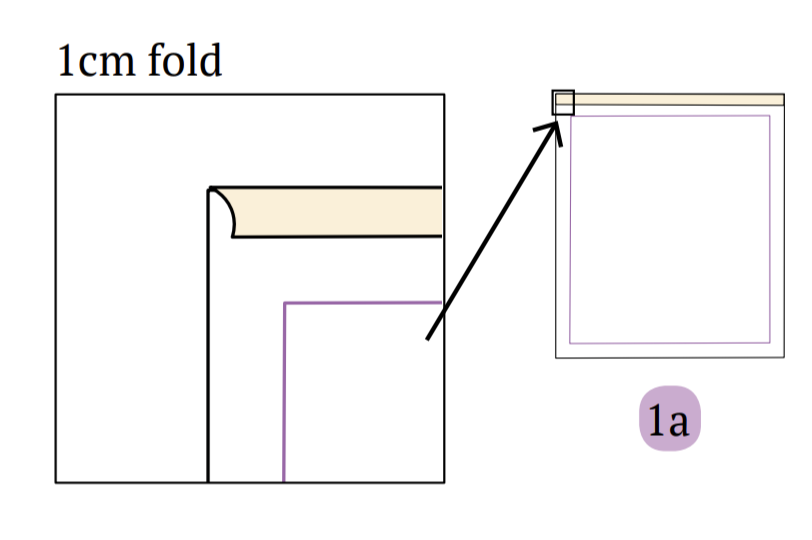
Fold the opening again towards the wrong side, including the seam allowance.
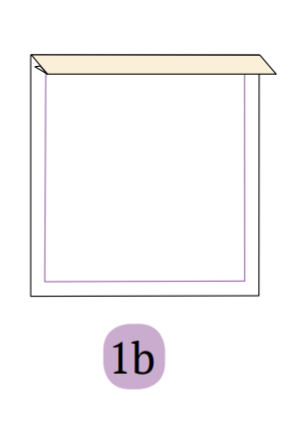
Stitch along the folded edge to secure the pocket opening.
Fold all three sides of the patch pocket towards the wrong side, pressing to create a crease.
Position the patch pocket on the front piece according to the chalk marking, and sew around three sides, leaving the pocket opening side unstitched.

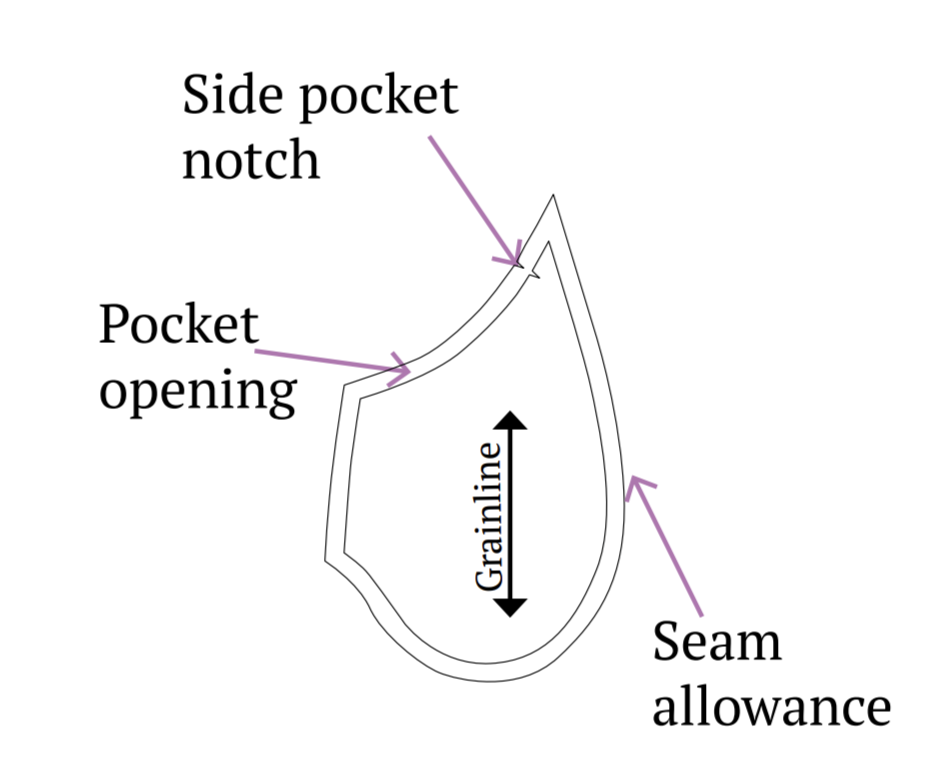
Step 2: Attaching Side Pockets
Match the notches and position one side pocket piece onto the front leg piece. Sew along the seamline of the pocket opening.
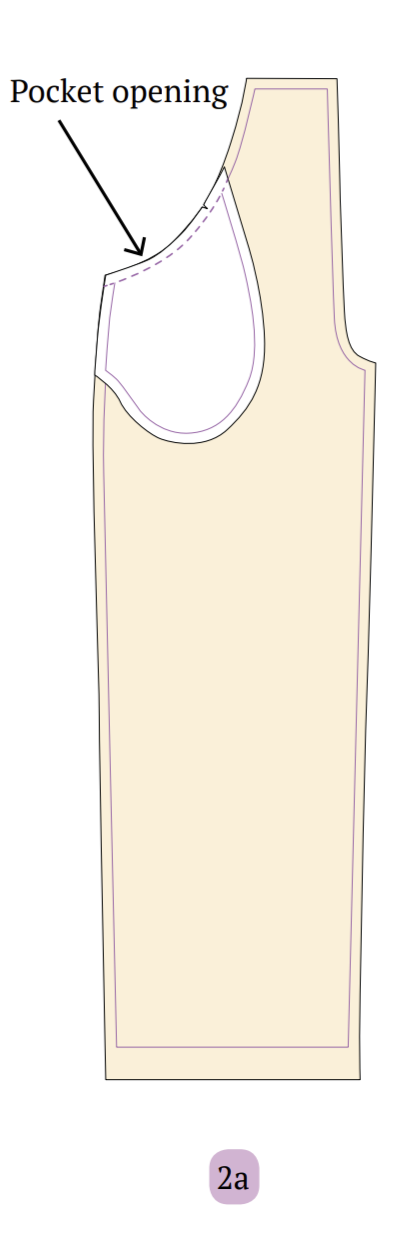
Spread open the pocket and front leg piece, then stitch along the edge of the pocket seamline to reinforce it (known as under stitching).
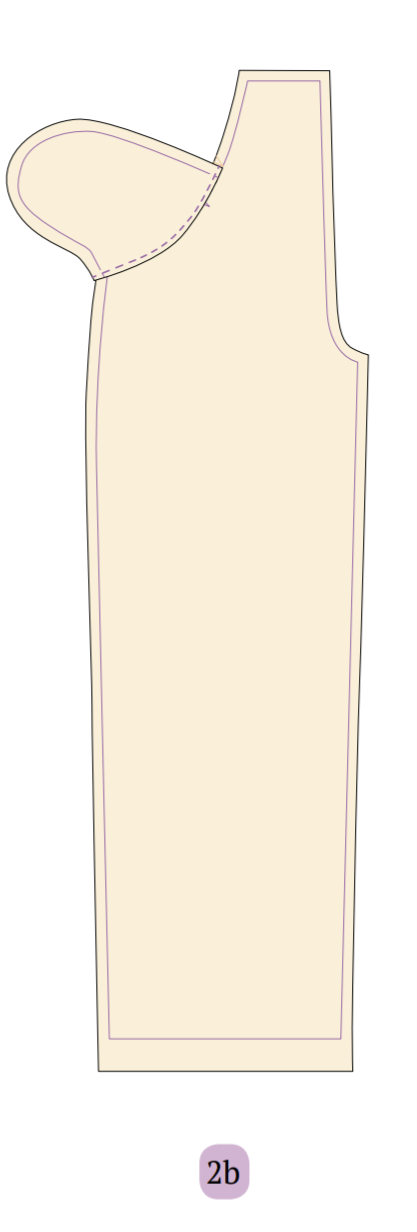
Fold the fabric from the pocket opening seamline, with the wrong side facing towards the front leg piece. Position the second side pocket piece onto the attached pocket piece of the front leg piece.
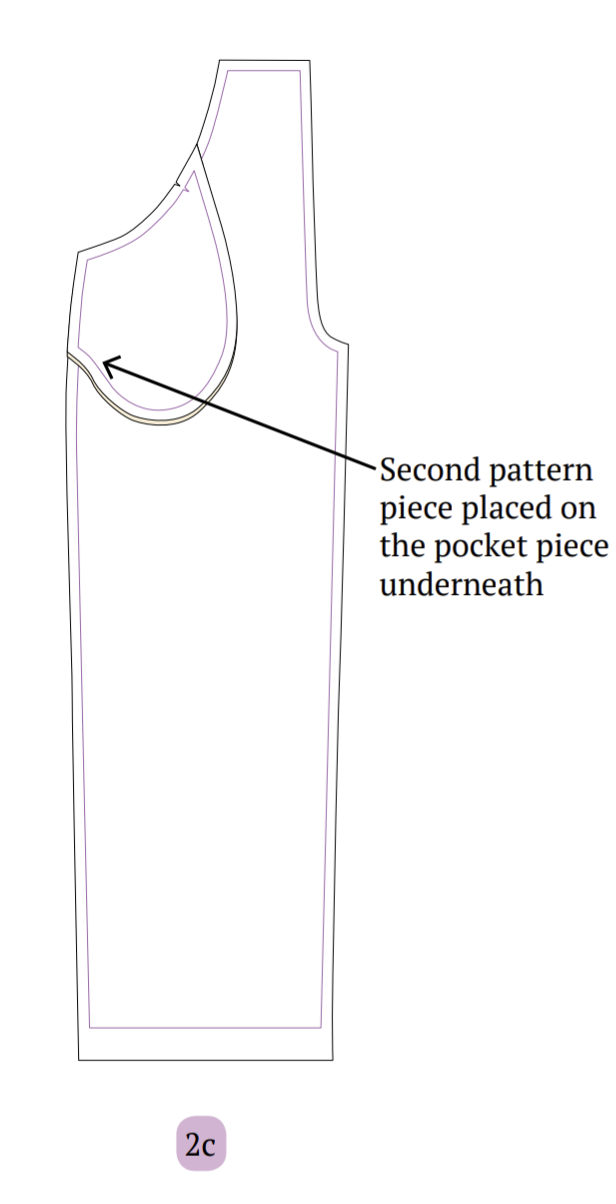
Stitch the pocket pieces together, excluding the front leg piece, leaving only the pocket opening of the front leg piece unstitched.
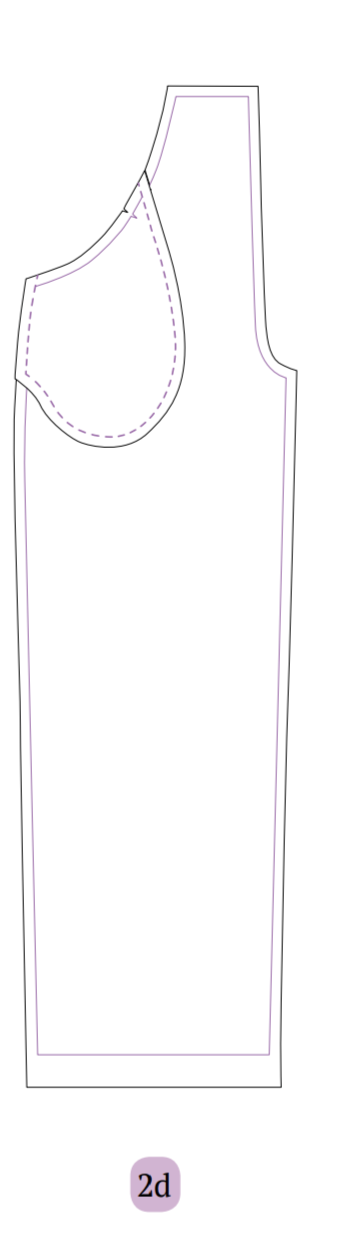
Repeat the same process for the other side pocket and front leg pieces.
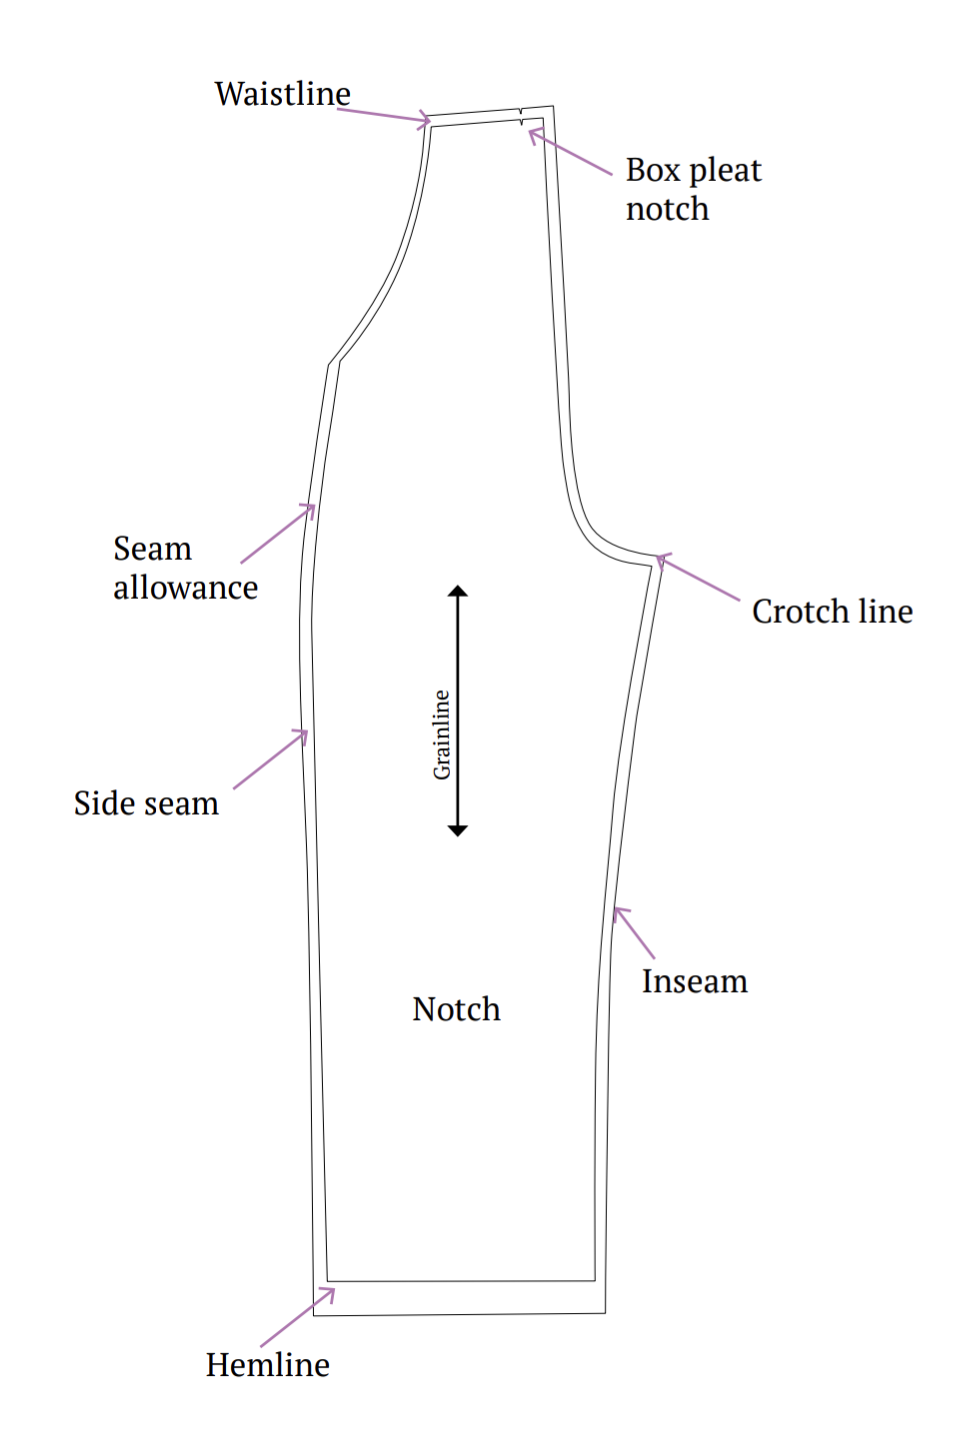
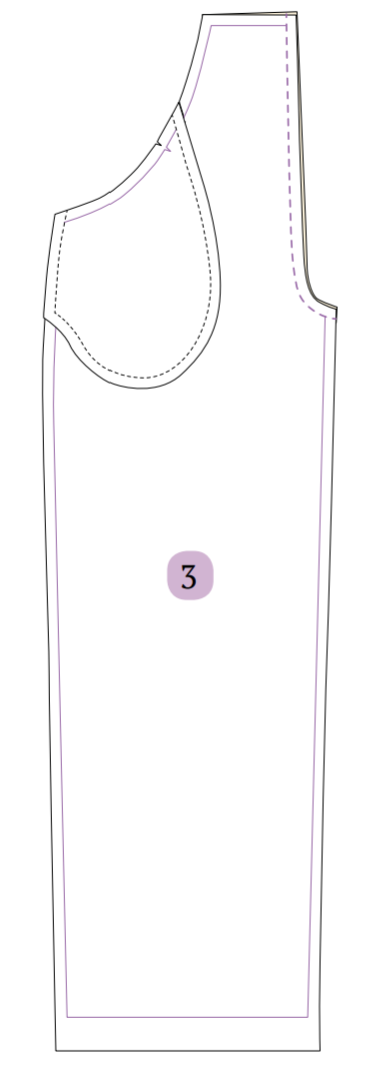
Step 3: Sewing Front Leg Pieces Together
Align the front leg pieces together with their right sides facing each other.
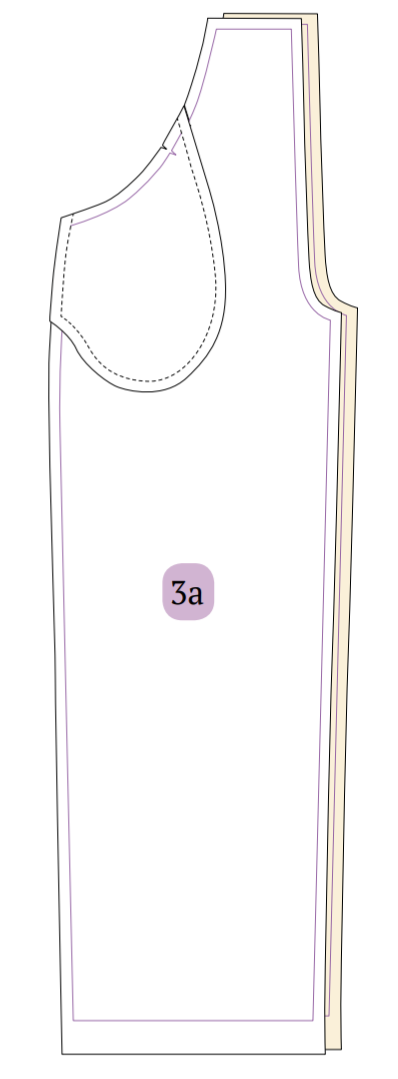
Stitch along the crotch line.
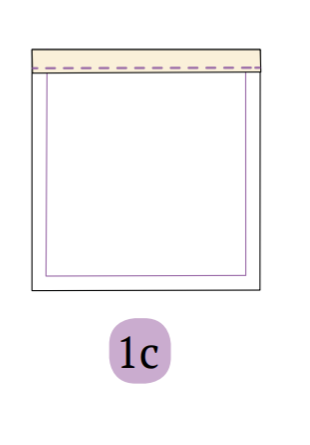
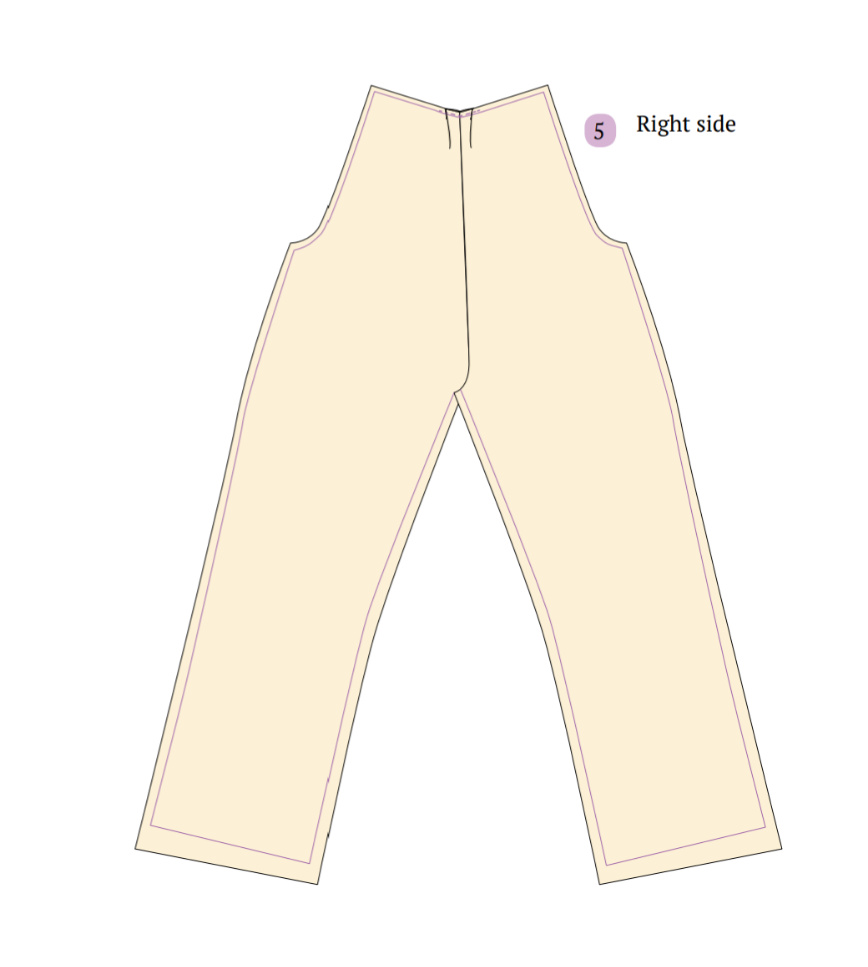
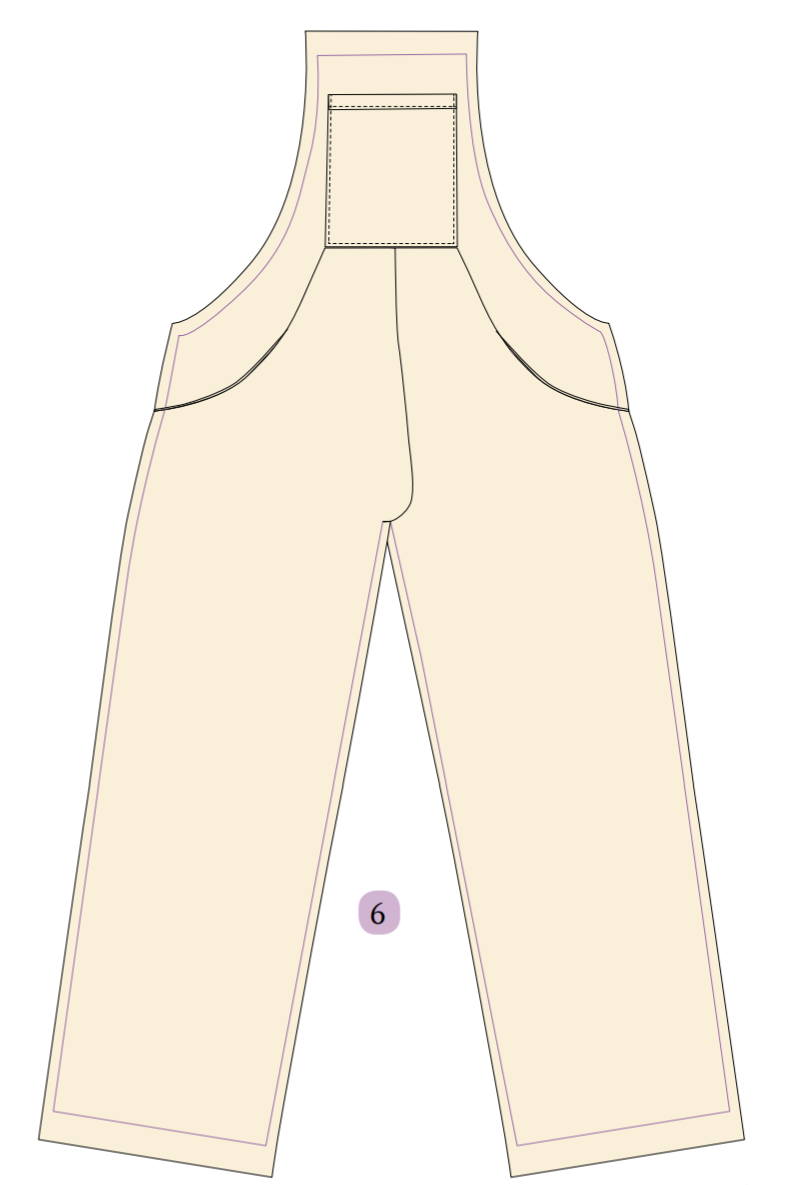
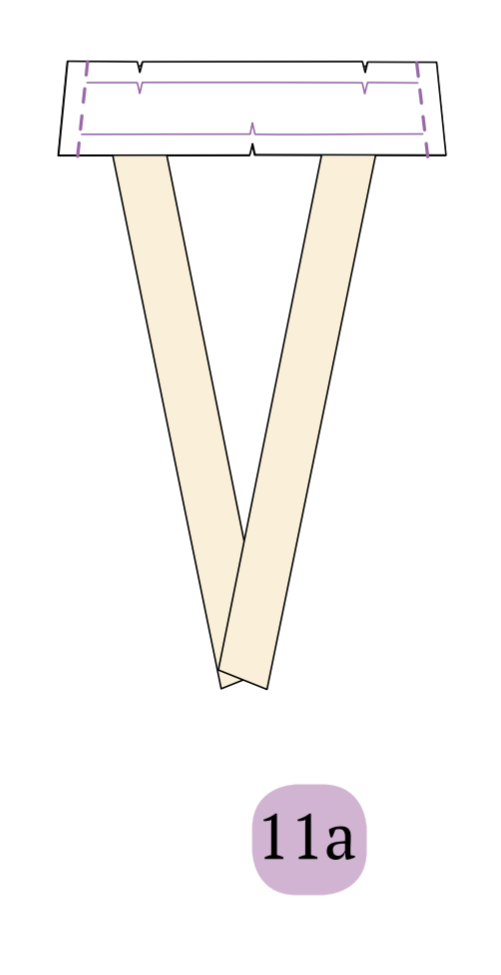
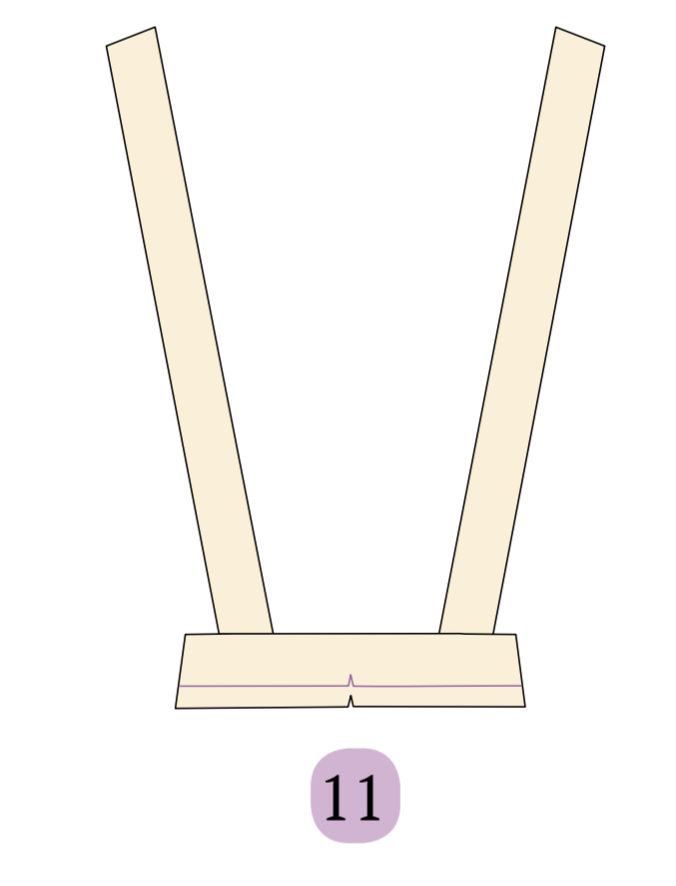
Step 4: Sewing Back Leg Pieces Together
Align both back leg pieces with their right sides facing each other.
Sew along the crotch line.
Picture 4 displays the back leg panel spread open subsequent to sewing the crotch.
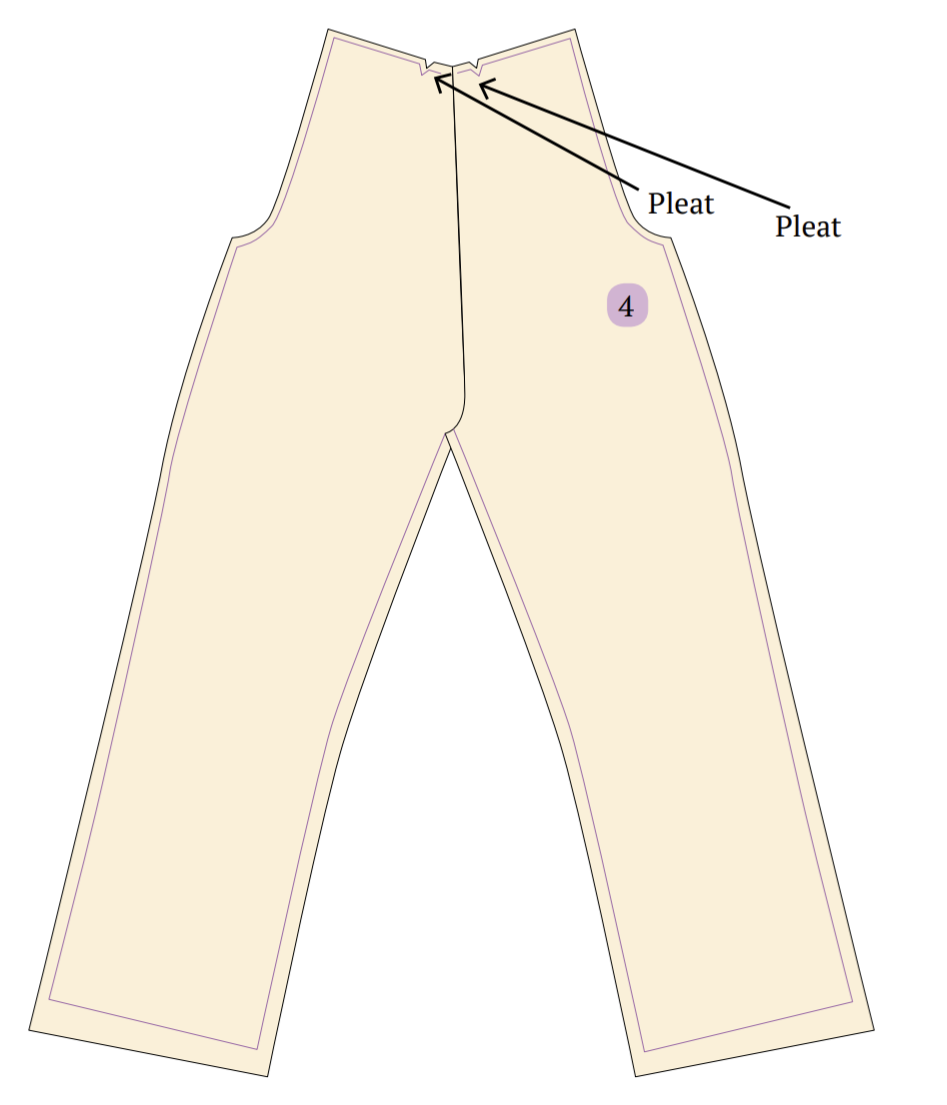
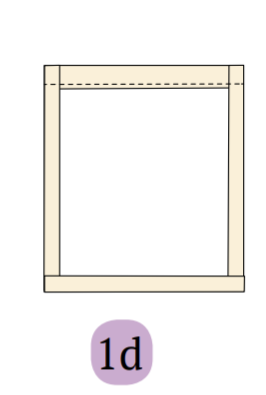
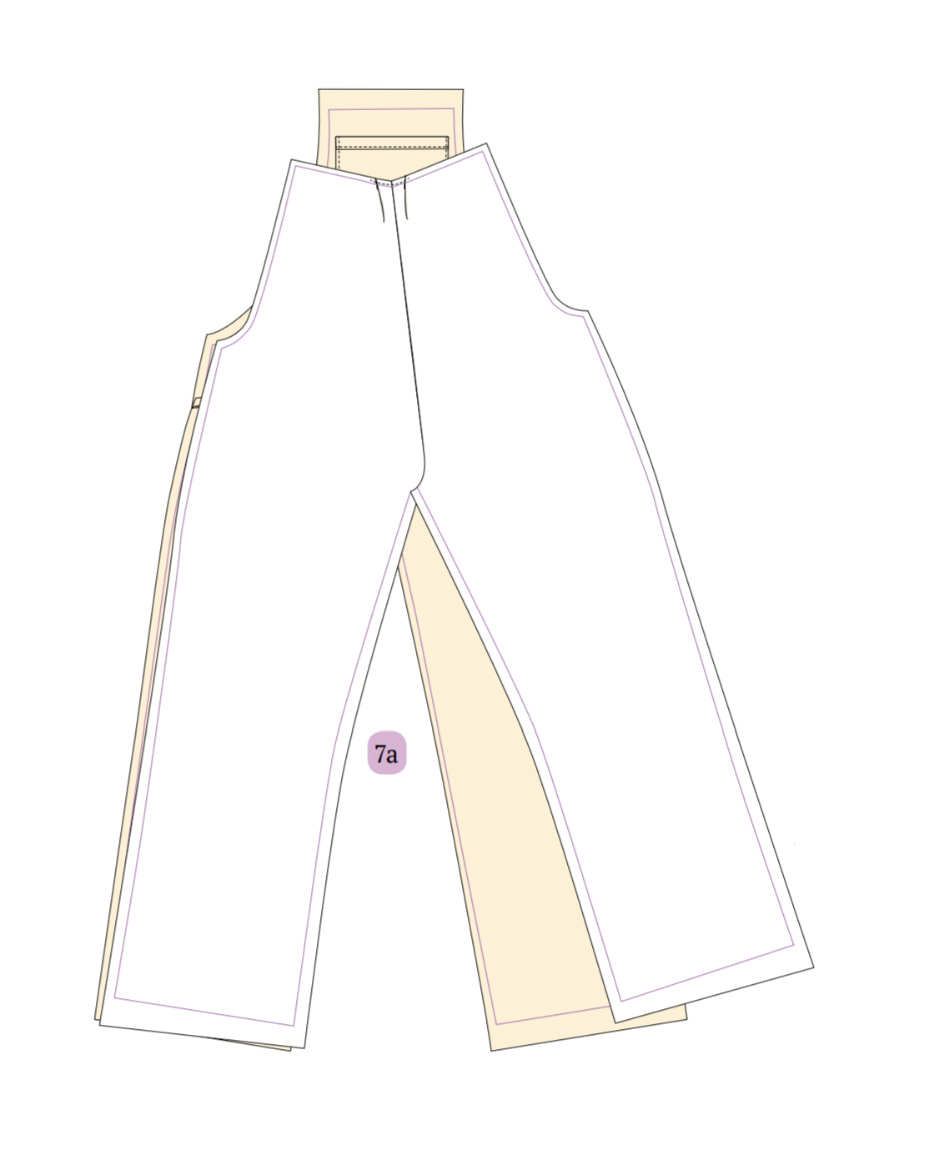
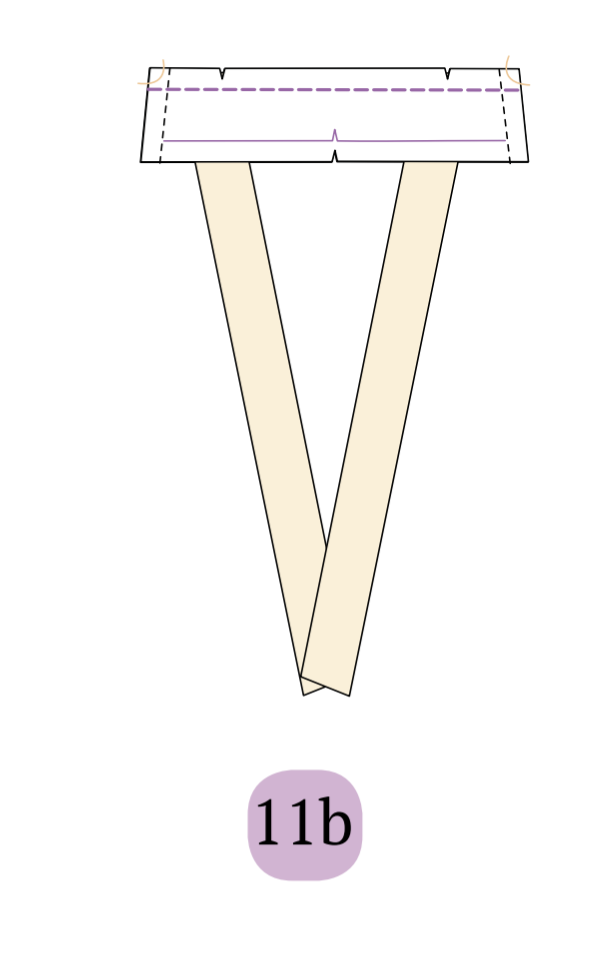
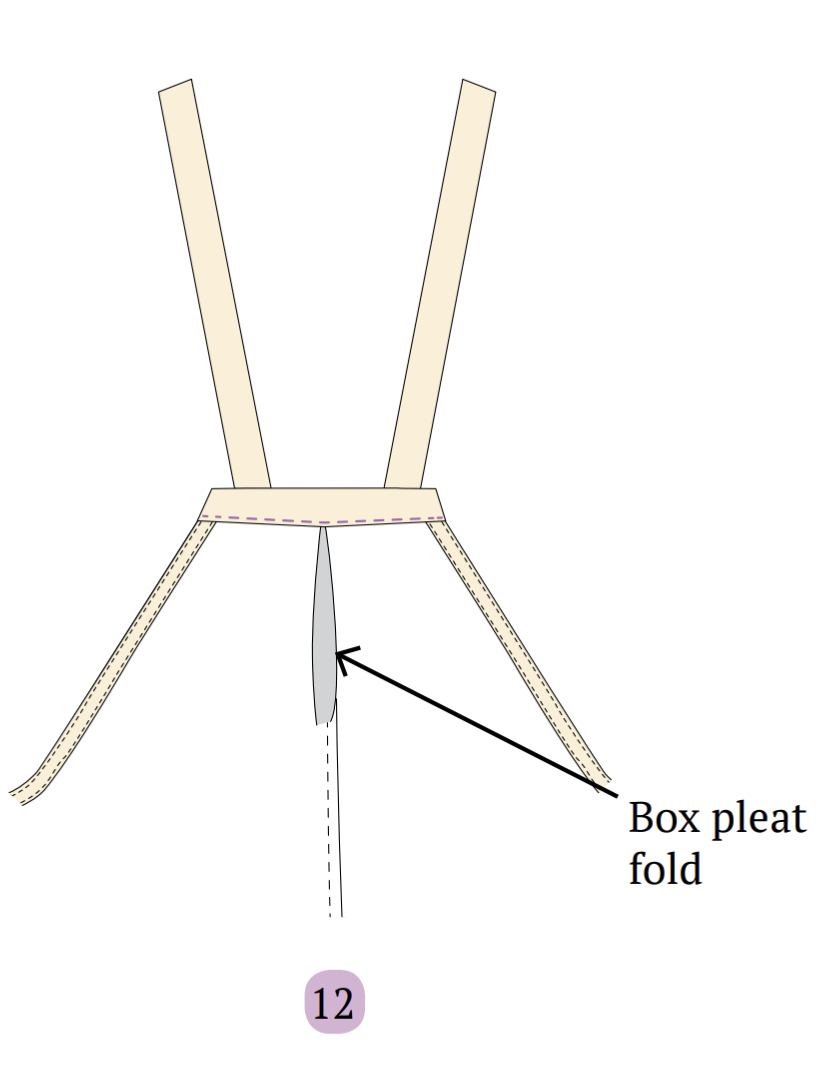
Step 5: Creating Pleats on the Back Leg Panel
For the back leg panel pleats, align the notch with the center back line.
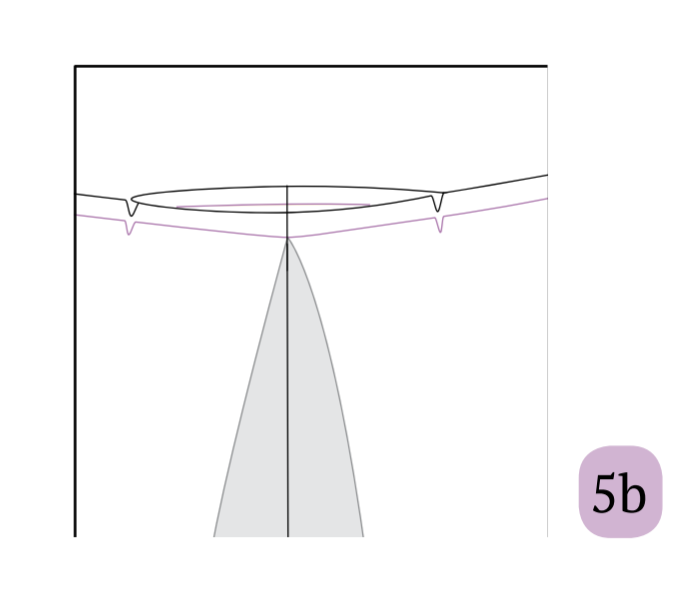
Fold both pleats from the wrong side.
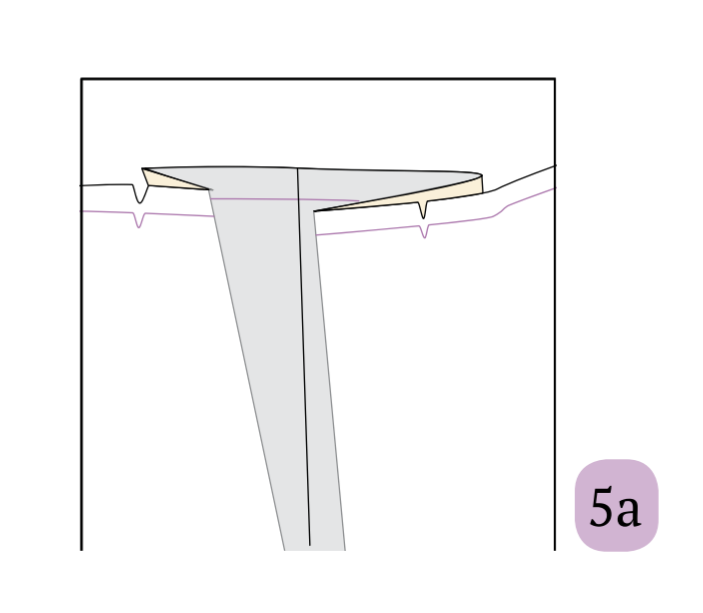
Secure the pleats by stitching along the seam allowance.

Picture 5 illustrates the right side view of the sewn pleats.
Step 6: Assembling the Front Top Piece and Front Leg Piece
Position the front top piece and front leg piece with their right sides facing each other, aligning the notches on the waistline.
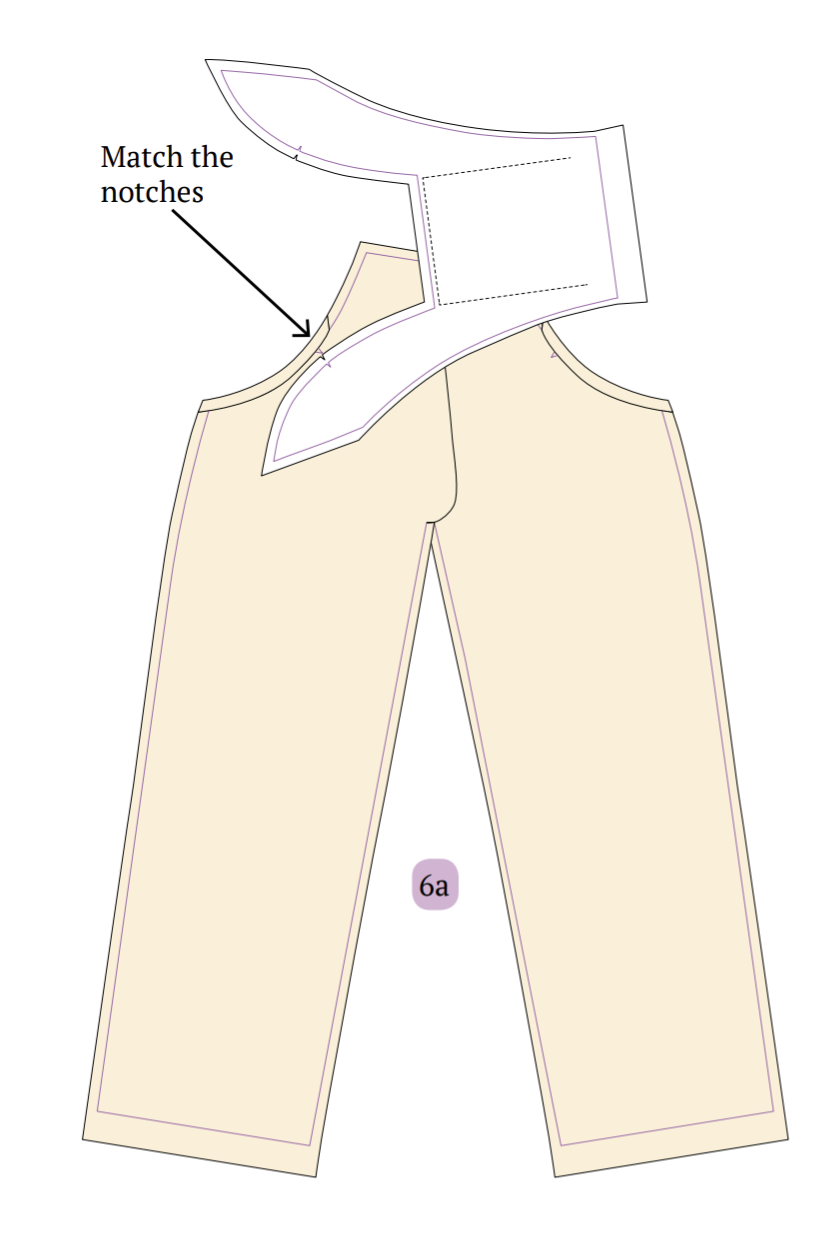
Secure them with pins to prevent unwanted folds and to ensure even joining.
Proceed to sew them together.
Step 7: Joining the Front and Back Panels
Align the front and back panels of the jumpsuit together with their right sides facing each other.
Sew the side seams.
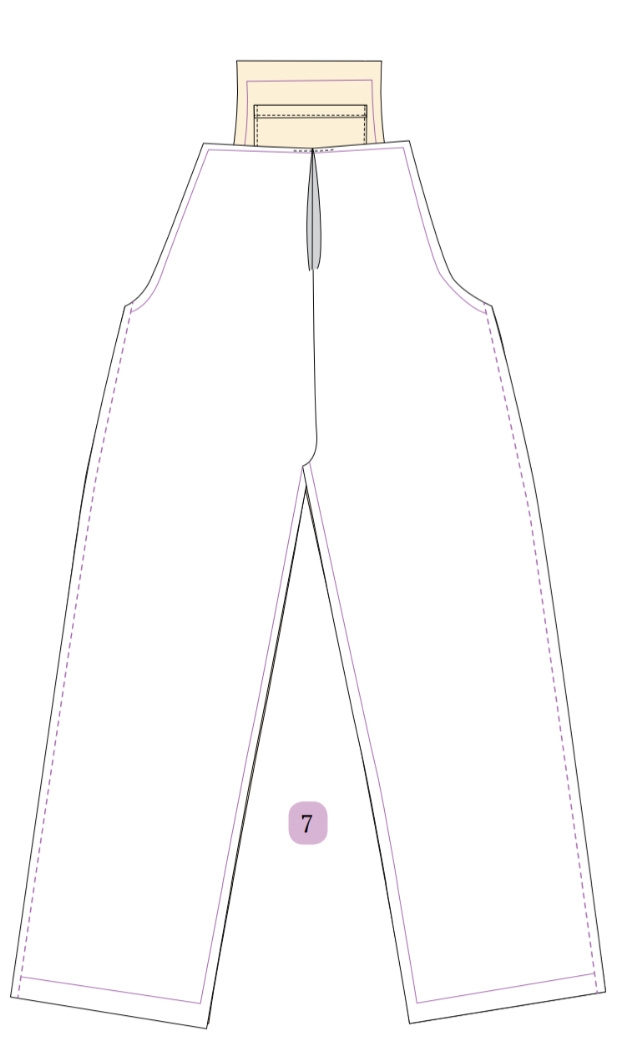
Step 8: Matching and Sewing the Inseam
Match the inseam from the crotch end and secure them with pins.
Proceed to sew the inseam.
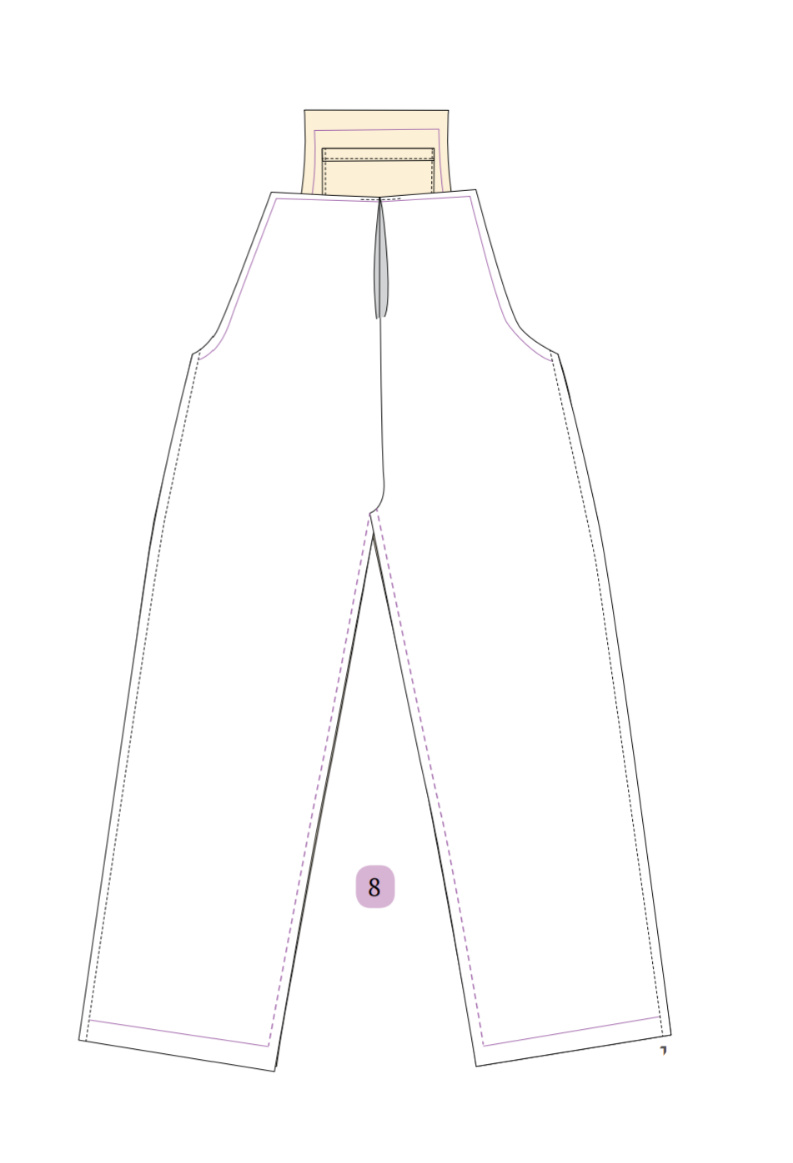
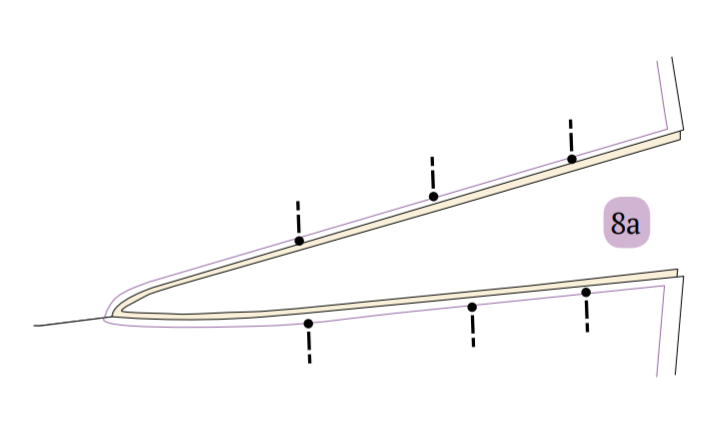
Step 9: Finishing the Armholes
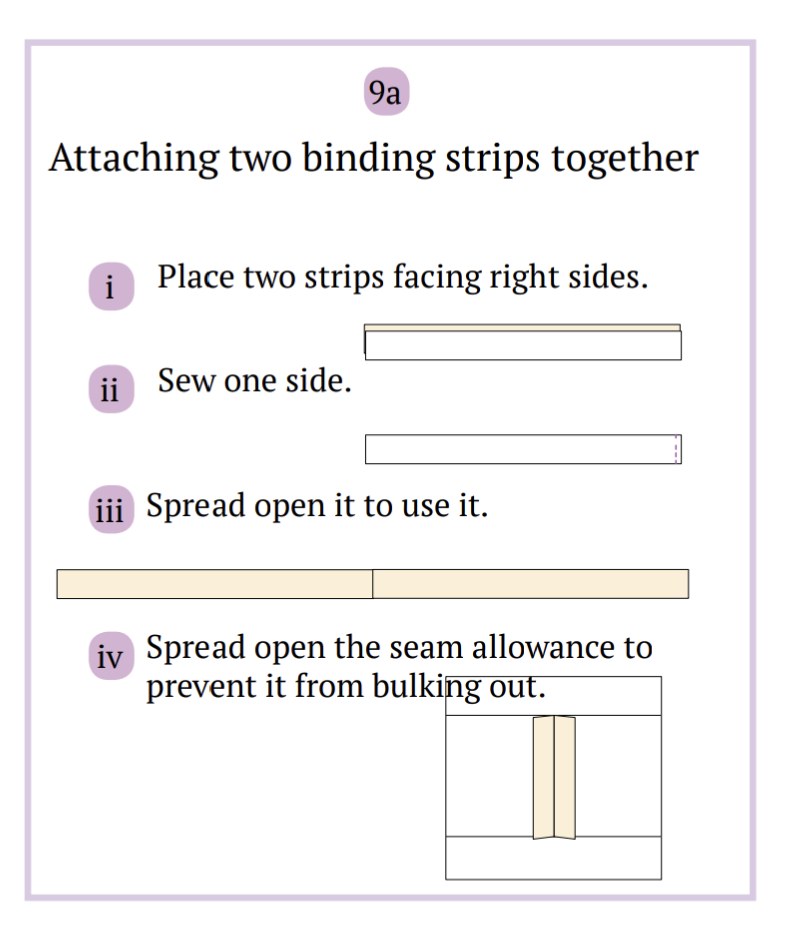
1. Prepare the Binding Strip
Attach two binding strips together.
2. Attach Bias Binding to Bodice
- Place the bias binding strip on the right sides of the bodice.
- Pin it in place and sew along the armhole seamline.
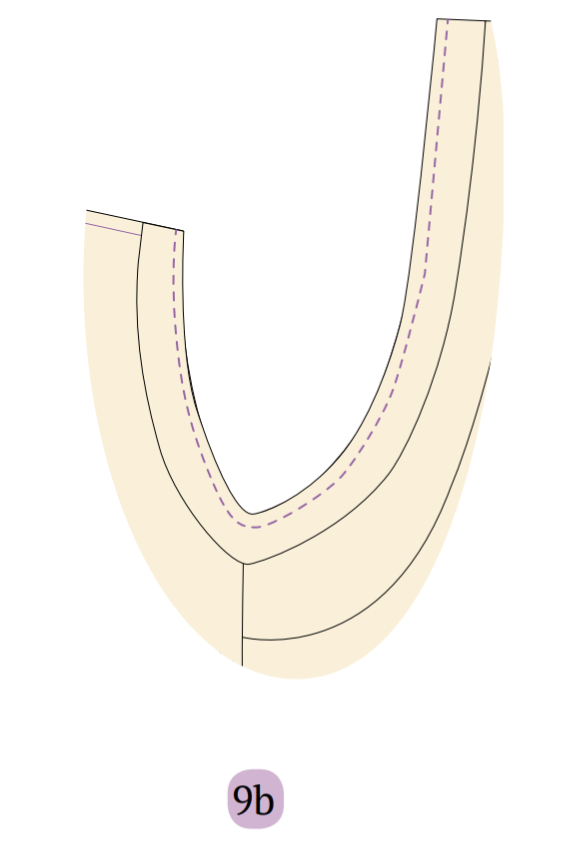
3. Secure Bias Binding
- Spread open the binding strip onto the bodice.
- Sew along the edge of the binding strip to secure it in place.
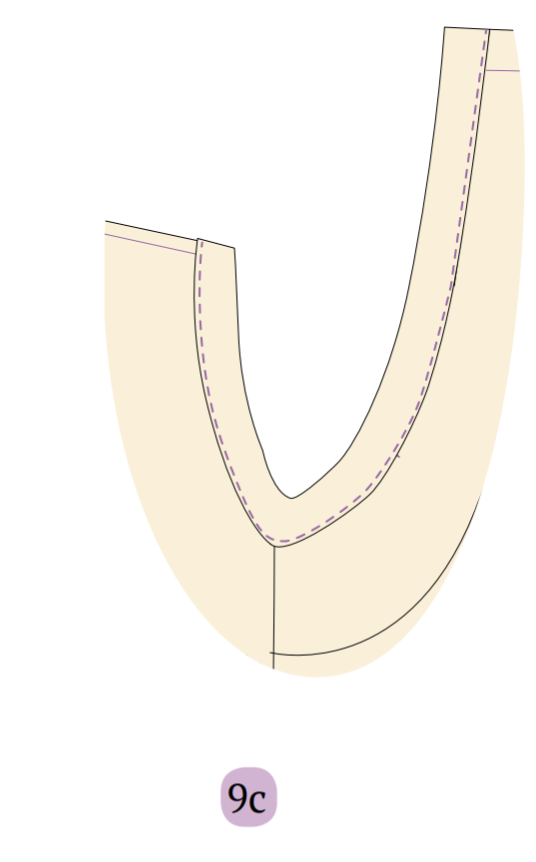
4. Fold and Finish the Binding
- Fold the binding strip from the armhole seamline.
- Fold the unstitched binding strip inwards twice towards the wrong side of the bodice.
- Press it down and sew along the edge to finish the armhole binding.

Tip: If you run out of binding strips, you can cut more binding strips from the provided pattern for the armholes.
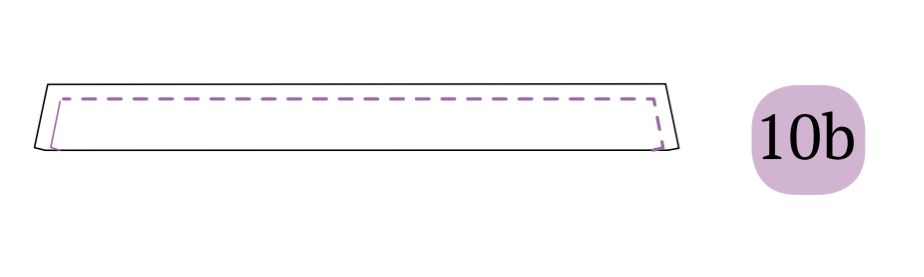
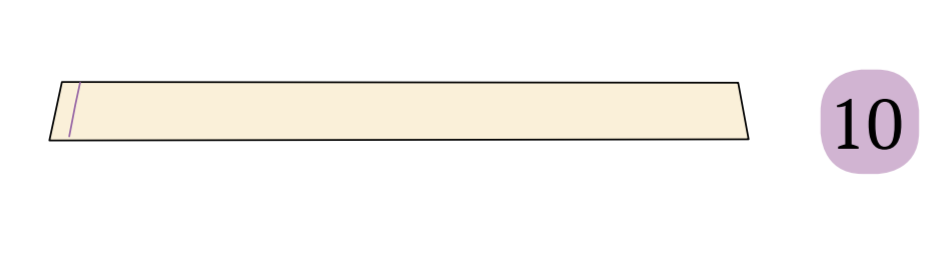
Step 10: Creating a Strap
Fold one strap with the right side facing inwards.
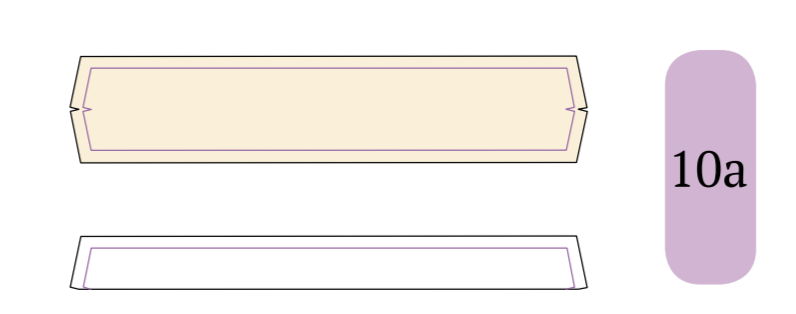
Sew along three sides of the seamlines, leaving the inside unsewn.
Turn the pieces inside out using a darning needle.
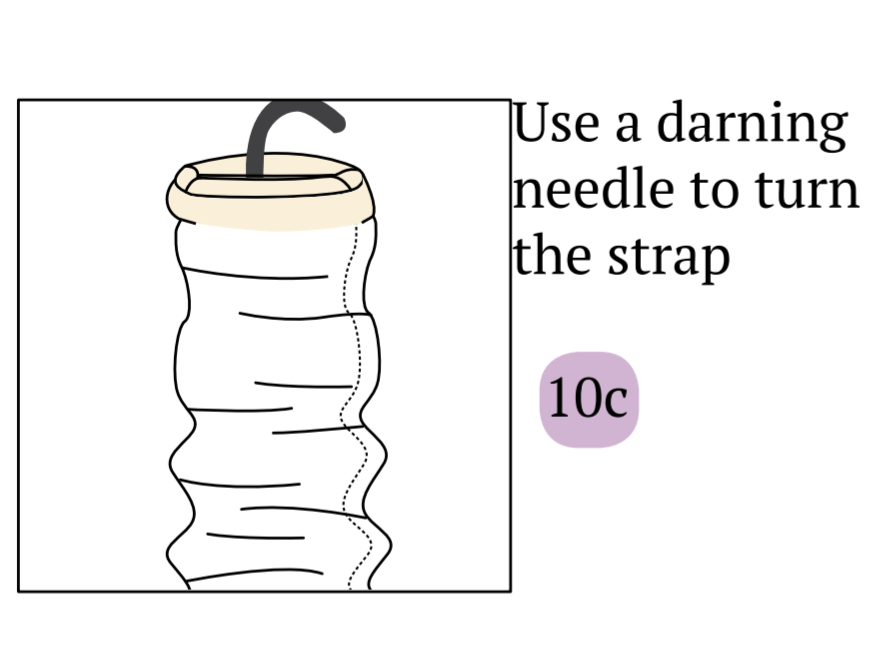
Iron the strap to achieve the desired shape.
Step 11: Attaching Straps to Back Yoke
Take both back yoke pieces with their right sides facing each other. Sandwich both straps in between at the seam allowance and pin them.
Sew along three sides of the back yoke, leaving one longer side unsewn.
Turn the back yoke inside out, flipping the straps outward. Iron to crisp the straps.
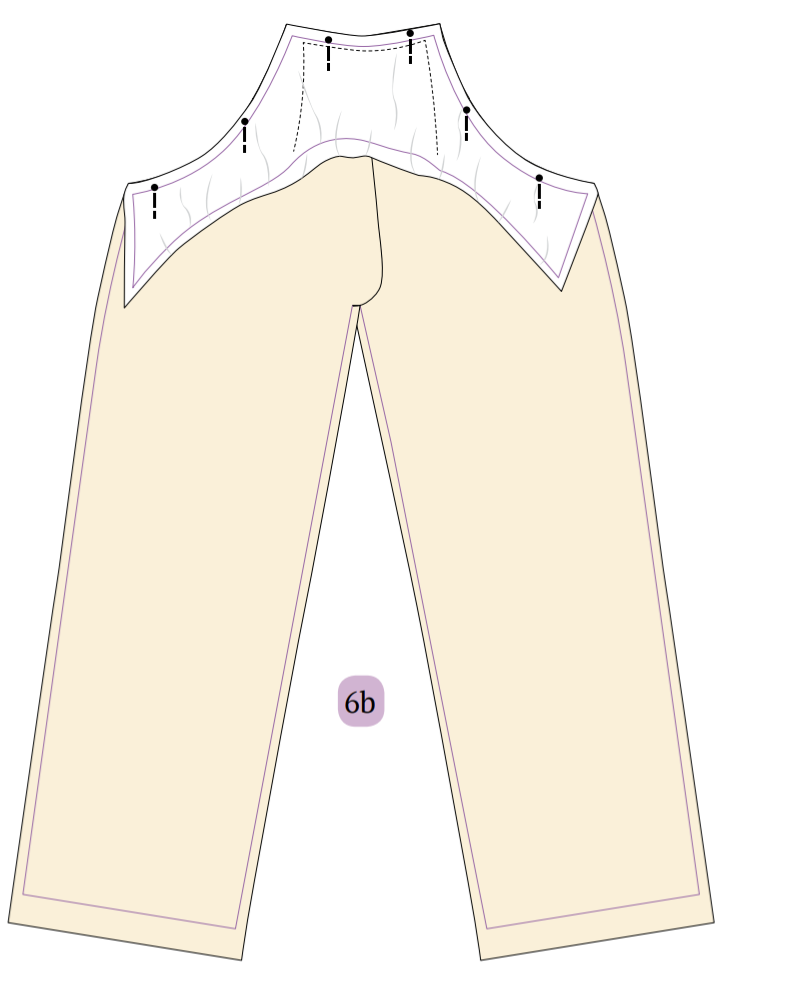
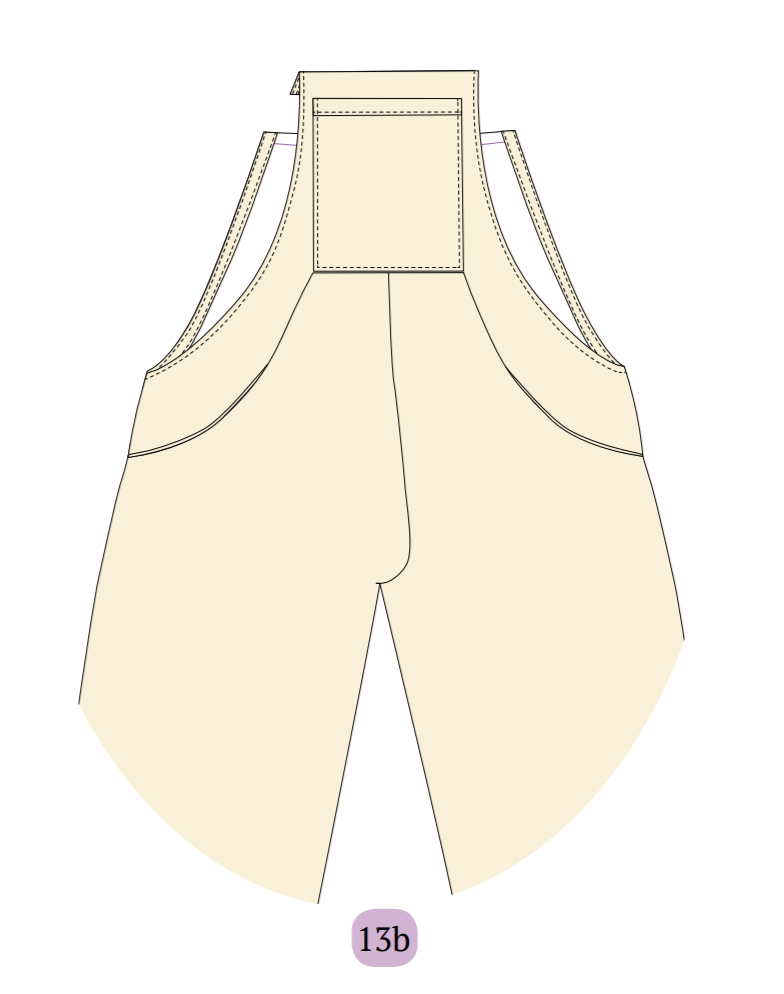
Step 12: Finalizing the Back Yoke
Fold and press down the seam allowance inside the back yoke.
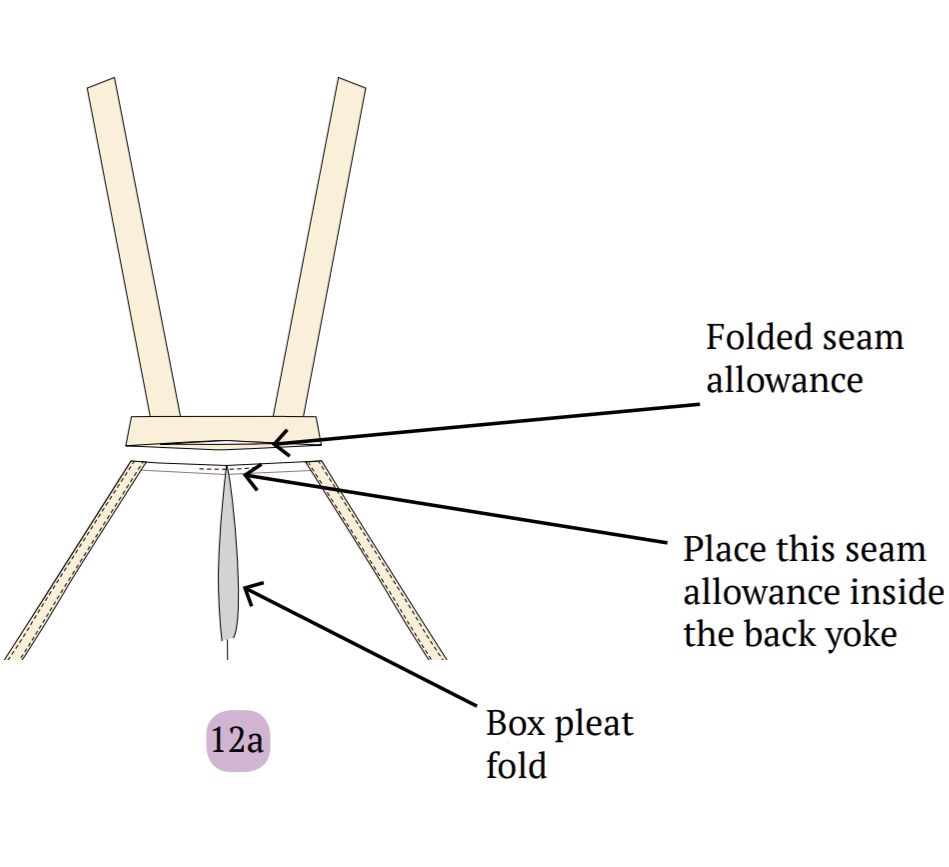
Place the back yoke inside the back side of the jumpsuit, aligning them appropriately. Pin them together securely.
Sew the back yoke to the back side of the jumpsuit.
Step 13: Closing the Top Front Raw Edges
Fold the seam allowance of the top front towards the wrong side and press it down.
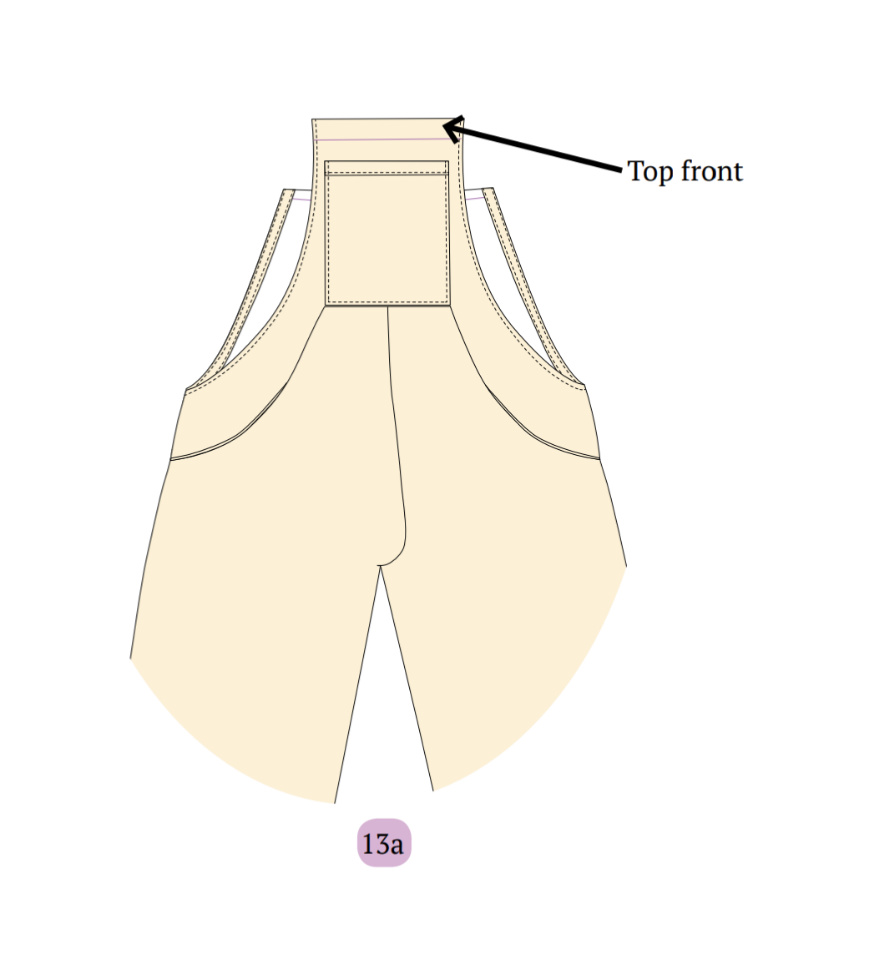
Sew along the top front to finish the raw edges.
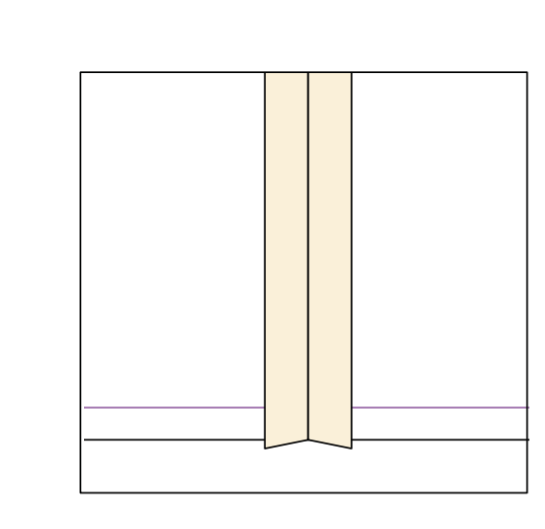
Step 14: Creating the Bottom Leg Hem
Fold the bottom leg hem inside twice to create a clean edge. Sew along the edge of the hem, starting from the inseam and returning to it, ensuring a secure and neat finish.
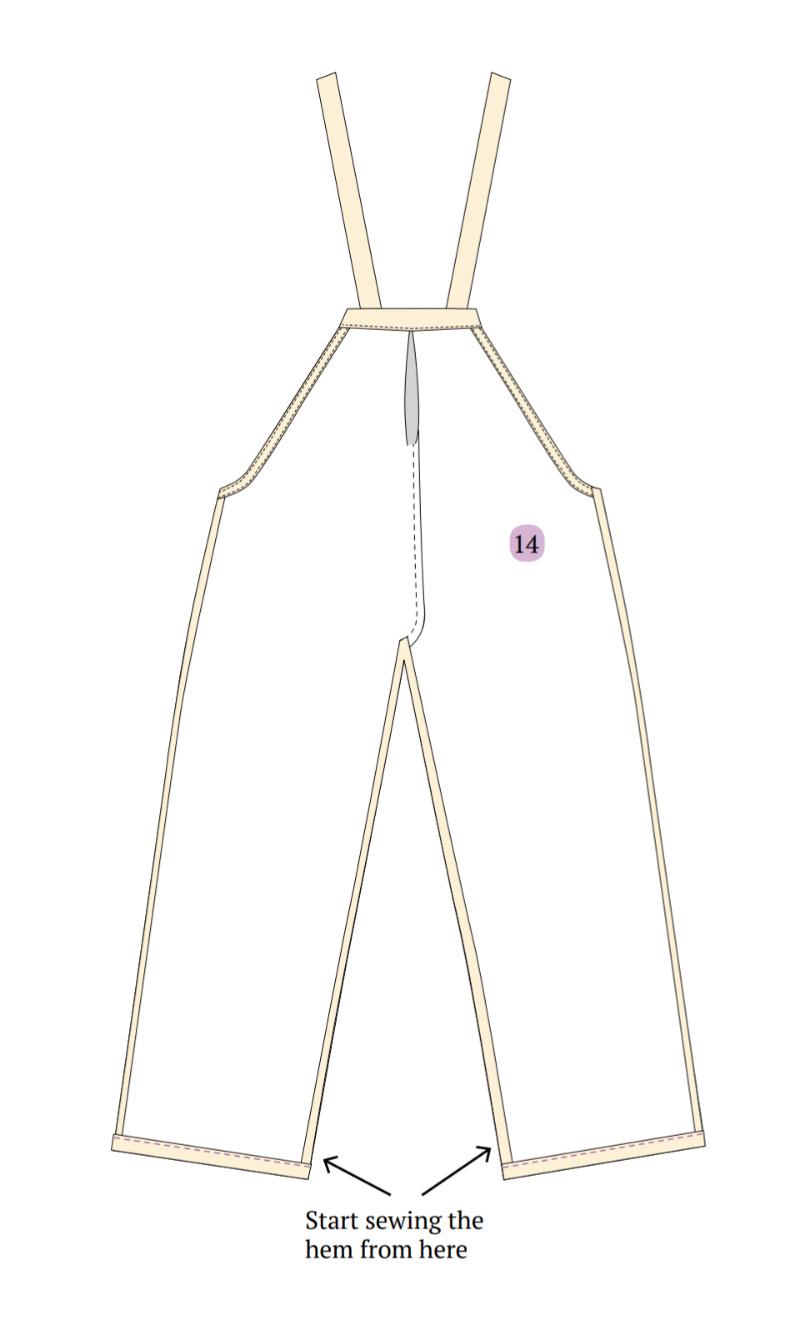
Optional: Spread open the stitched seam allowance to reduce bulkiness when sewing the hem.
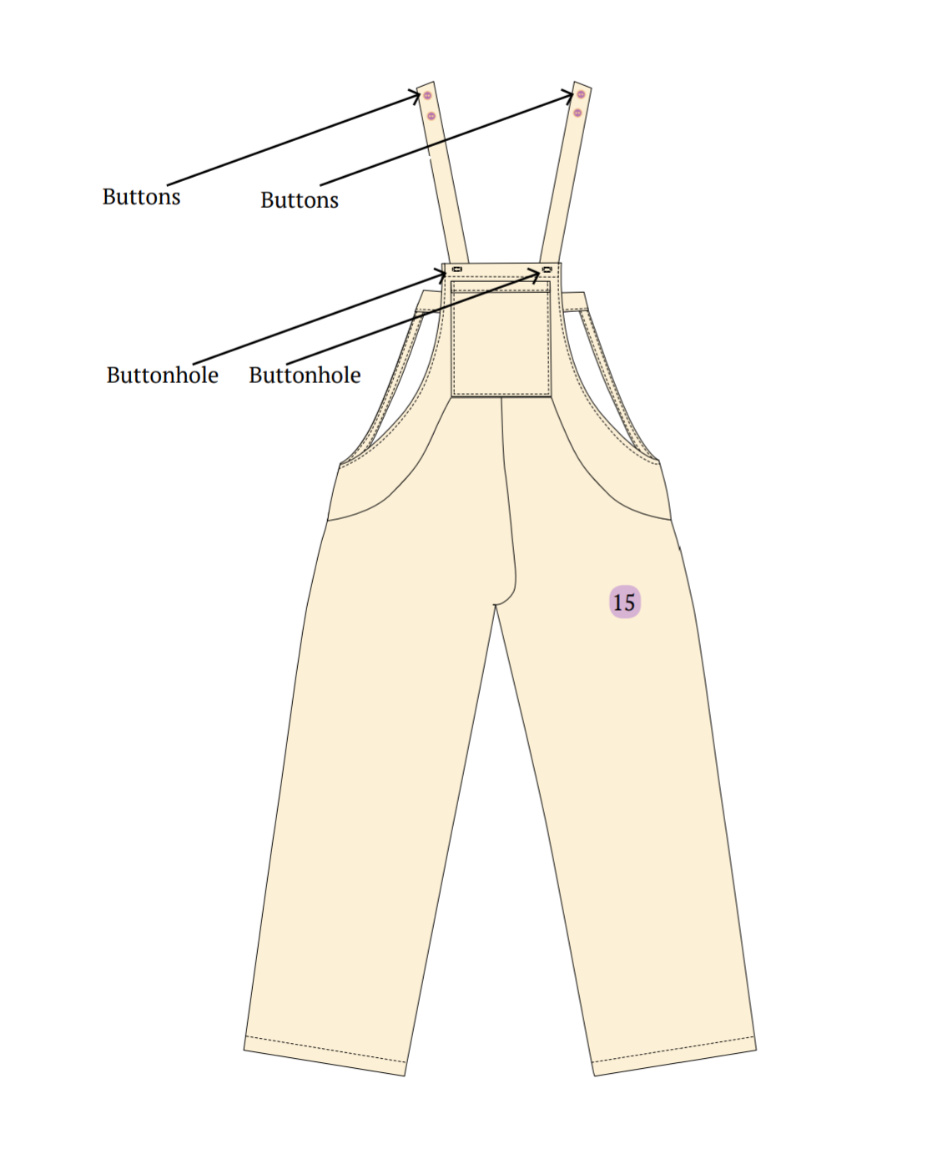
Step 15: Sewing Buttons and Buttonholes
1. Creating Buttonholes
Utilize a buttonhole presser foot to sew two buttonholes on the top front, positioned approximately 1.5 inches away from the armholes.
2. Attaching Buttons
- Sew two buttons on the strap end, spaced approximately 1 inch apart and situated about 1-1.5 inches away from the armholes.
- Adjust the placement of both buttons and buttonholes as desired to achieve the desired look and functionality.
Summary
Great job! Your overall jumpsuit is now complete and prepared to enhance any event!
Overall jumpsuits offer both comfort and versatility, making them essential wardrobe pieces. Their loose fit and soft fabrics provide unparalleled comfort, allowing wearers to move freely throughout the day without feeling restricted. Additionally, the one-piece design eliminates the hassle of coordinating separate tops and bottoms, simplifying the outfit selection process.
They can be dressed up with accessories and heels for formal events or paired with sneakers for a casual outing. Their adaptability makes them ideal for transitioning seamlessly from day to night, catering to different style preferences.
Check out some final images of this adorable overall jumpsuit created with the Winslet’s BELLE Overall Jumpsuit Pattern:
How do you feel about jumpsuits? Will you be making this jumpsuit or a different sewing project for yourself? Let me know in the comments below!
Join the Winslet sewing community by sharing your masterpiece with the hashtag #madewithwinslets!


