How to Sew a Gathered Midi Skirt?
Gathered midi skirts are simply wonderful! With their flattering silhouette and playful movement, they add a touch of charm to any outfit, whether you’re dressing up for a special occasion or keeping it casual for a day out. Plus, the gathering detail adds a subtle flair that sets them apart from ordinary skirts.
Today, I’ll walk you through how to sew a gathered midi skirt. From choosing the perfect fabric to mastering those dreamy gathers, this guide will walk you through the steps with ease.
I’m using the Winslet’s Gathered Midi Skirt Pattern for my project. This skirt features a gathered design that creates volume and movement, with a midi length that typically falls below the knee and above the ankle. Additionally, it includes front pockets, which are functional elements sewn into the front of the skirt for holding small items like keys or lip balm. The pattern is super easy to sew and can be completed with relative ease.
What supplies do you need to sew a gathered midi skirt?
The basic supplies that you’ll need to sew a gathered midi skirt are a Sewing Pattern (I used Winslet’s ZINNIA Gathered Midi Skirt Pattern for this project), Sewing Machine, Tape Measure, Chalk, Shears, Pins, Iron, Needles, Thread (preferably 3-ply polyester), Thread Cutter, and an Elastic Band.
Fabric Recommendation
Consider using cotton blend, georgette, or viscose for sewing the gathered skirt due to their excellent drape, comfort, versatility, ease of sewing, and durability.

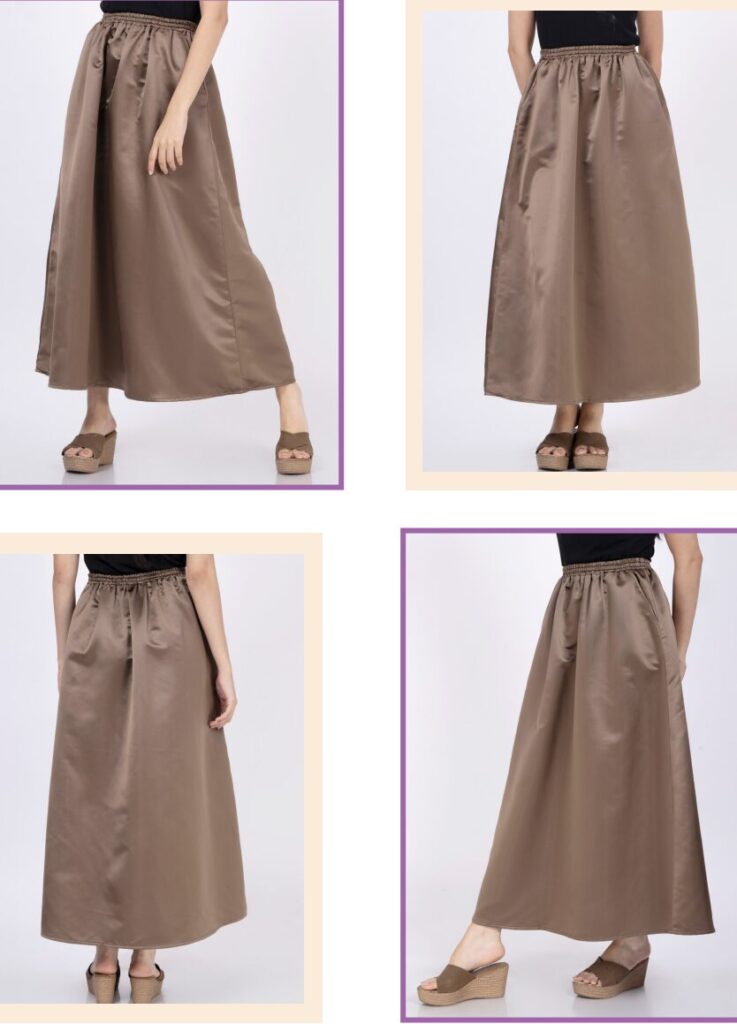
The model above is wearing a gathered midi skirt made from Winslet’s ZINNIA Gathered Midi Skirt Pattern. The skirt is made from duchess satin fabric, favored for its warmth, comfort, versatility in making dresses, skirts, and tops, and durability against wear and tear.
Size Charts
The gathered midi skirt sewing pattern measurements for sizes (XS, S, M, L, XL, 2XL, or 3XL) are detailed below. Choose a size that corresponds most closely to your body measurements.
It’s worth noting that if your exact measurements are not listed in the table, you may want to consider ordering a size larger.
The size chart includes measurements in both inches and centimeters for your reference.
Body Measurements
| XS (inches) | XS (cm) | S (inches) | S (cm) | M (inches) | M (cm) | L (inches) | L (cm) | XL (inches) | XL (cm) | 2XL (inches) | 2XL (cm) | 3XL (inches) | 3XL (cm) | |
| Bust | 32 | 81.3 | 34 | 86.4 | 36 | 91.4 | 38 | 96.5 | 40 | 101.6 | 42 | 106.7 | 44 | 111.8 |
| Waist | 26 | 66.0 | 28 | 71.1 | 30 | 76.2 | 32 | 81.3 | 34 | 86.4 | 36 | 91.4 | 38 | 96.5 |
| Hip | 34 | 86.4 | 36 | 91.4 | 38 | 96.5 | 40 | 101.6 | 42 | 106.7 | 44 | 111.8 | 46 | 116.8 |
Final Garment Measurements
| XS (inches) | XS (cm) | S (inches) | S (cm) | M (inches) | M (cm) | L (inches) | L (cm) | XL (inches) | XL (cm) | 2XL (inches) | 2XL (cm) | 3XL (inches) | 3XL (cm) | |
| Full Length (From Waist) | 37.5 | 95.2 | 38 | 96.5 | 38.5 | 97.7 | 39 | 99 | 39.5 | 100.3 | 40 | 101.6 | 40.5 | 102.8 |
| Waist Round | 23 | 58.4 | 25 | 63.5 | 27 | 68.5 | 29 | 73.6 | 31 | 78.7 | 33 | 83.8 | 35 | 88.9 |
Yardage Chart
| Width of the Fabric | XS (yards) | XS (meters) | S (yards) | S (meters) | M (yards) | M (meters) | L (yards) | L (meters) | XL (yards) | XL (meters) | 2XL (yards) | 2XL (meters) | 3XL (yards) | 3XL (meters) |
| 45” | 2.31 | 2.12 | 2.72 | 2.49 | 3.13 | 2.86 | 3.60 | 3.29 | 4.14 | 3.79 | 4.76 | 4.35 | 5.47 | 5.01 |
| 60” | 1.93 | 1.76 | 2.27 | 2.07 | 2.61 | 2.39 | 3.00 | 2.74 | 3.45 | 3.15 | 3.97 | 3.63 | 4.56 | 4.17 |
Steps To Follow For Sewing a Gathered Midi Skirt
The Winslet’s ZINNIA Gathered Midi Skirt Pattern is suitable for printing on both A4 and A0 size paper:
- Print at home: A4 Pattern
- Print at a copy shop: A0 Pattern
Let’s dive into the steps for sewing your very own unique gathered midi skirt:
Pattern Marking and Inventory
The fabric needs to be cut into following pieces:
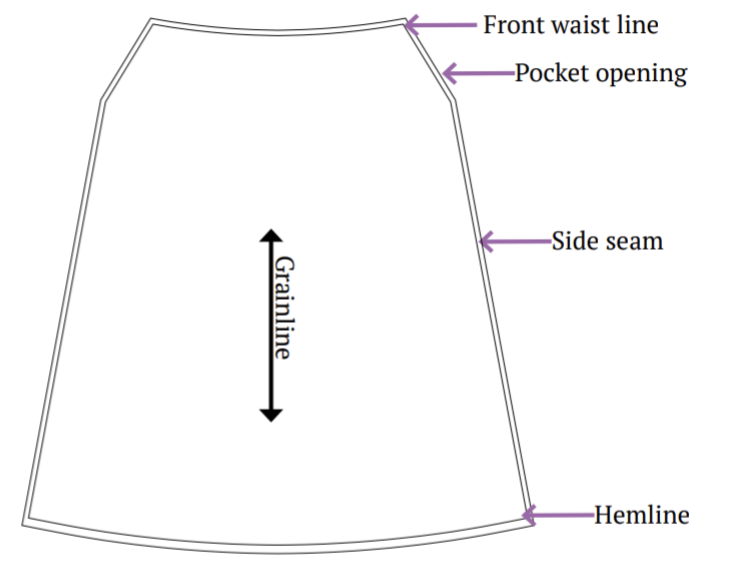
A. Front Skirt Panel – cut x1 fabric

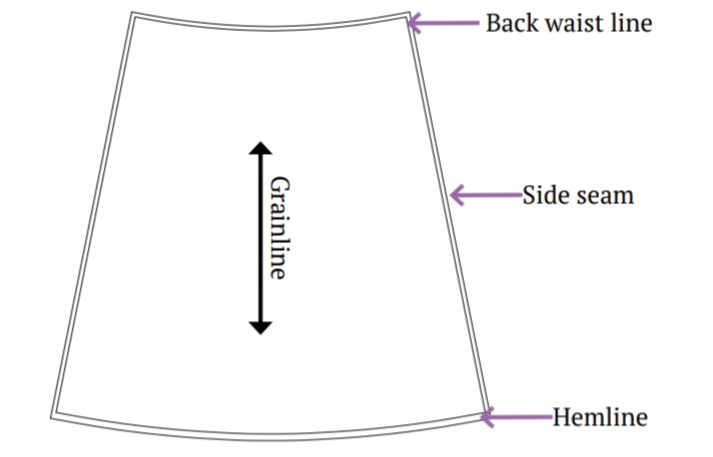
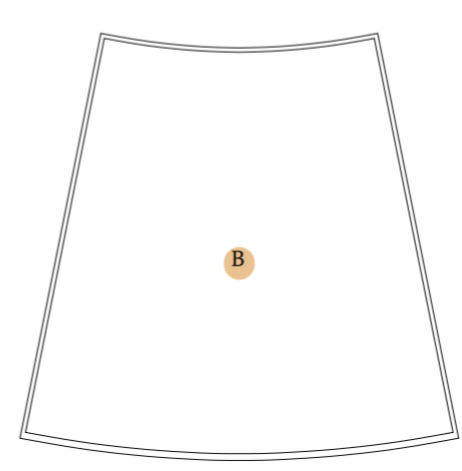
B. Back Skirt Panel – cut x1 fabric
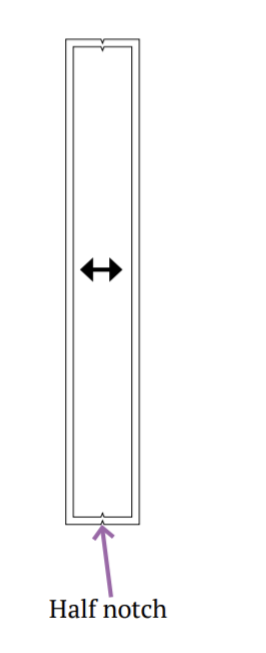
C. Waistband – cut x2 fabric

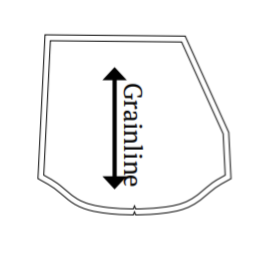
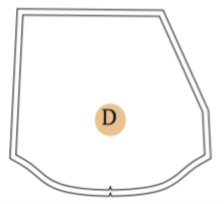
D. Pocket – cut x2 fabric
The below pattern does not require cutting on the fabric; instead, it will be cut on elastic.
E. Elastic Band

Cutting Layout
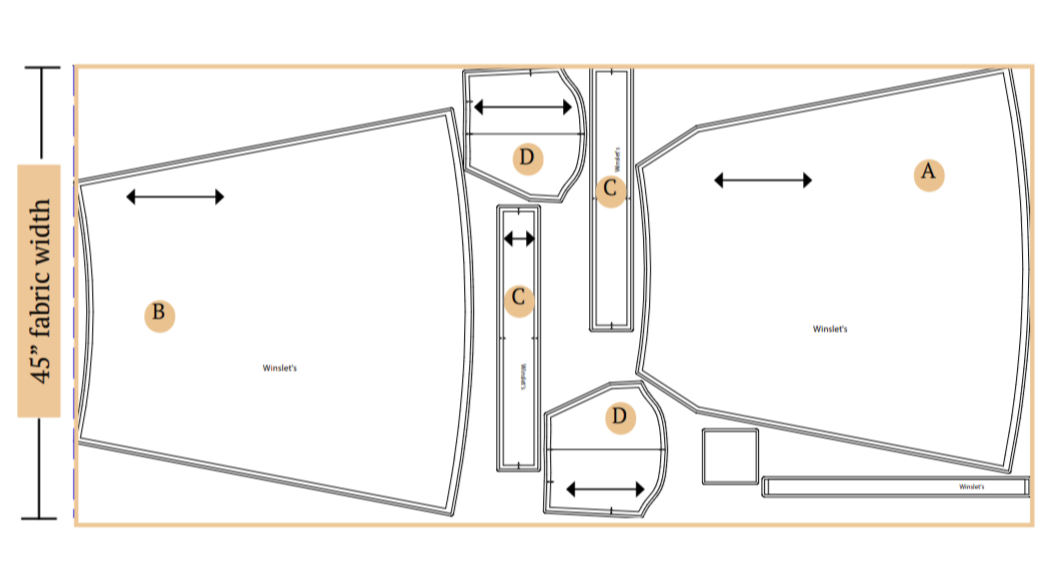
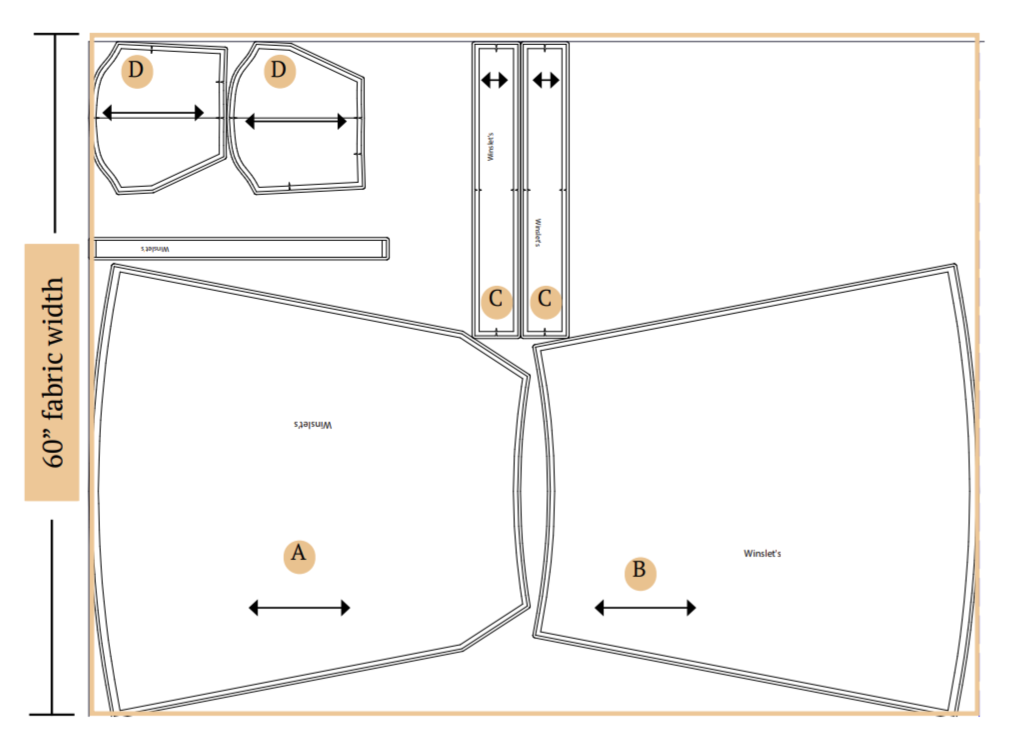
- Small size has been used for representation of this cutting layout.
- Ensure the pattern layout is on-grain for fabric alignment.
- Use pins to secure fabric, aiding accurate cutting.
- These pattern layouts are non-directional.
- If using fabric with nap or prints, purchase additional length.
Fabric Preparation and Cutting
- Arrange pattern pieces as shown in the above cutting diagram, ensuring the grainline arrow aligns with the selvage.
- Trace and cut fabric pieces using fabric shears, removing any markings.
- Transfer pattern markings to the wrong side of the fabric, including circles, buttonholes, and fold lines, using a marking pen or chalk.
- Mark the center front for fold pieces to aid in accurate alignment.
Sewing Steps

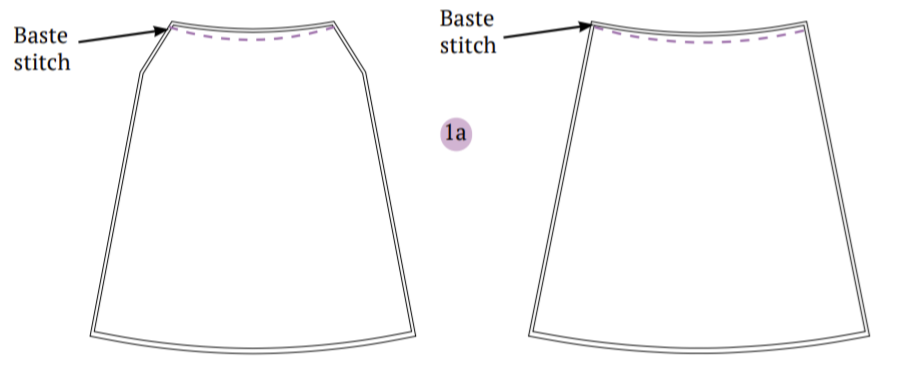
Step 1: Creating Gathers for Skirt Waistline
Sew a basting stitch along the waistline of both the front and back skirt panels.
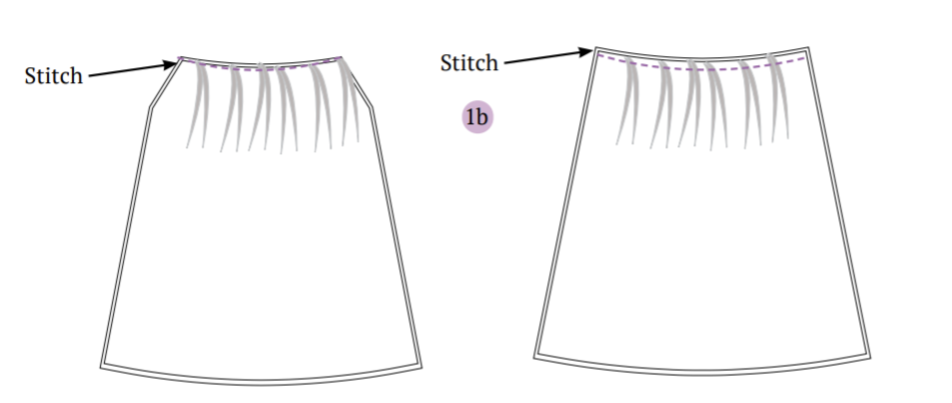
Pull the threads gently from the edges to form gathers, then adjust them evenly to fit the desired waist measurement. Stitch over the gathers to secure them firmly in place.
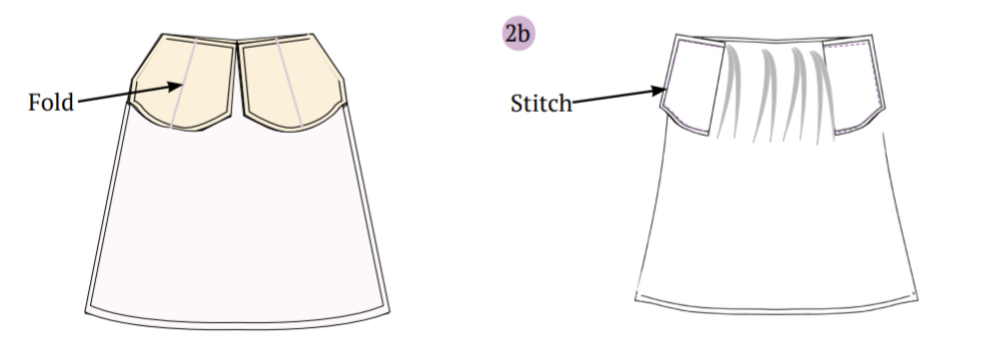
Step 2: Attaching Pockets to Skirt
Position the pocket pieces onto the front skirt panel, ensuring their right sides are facing each other. Line up the pocket edges with the seamline and sew them together.
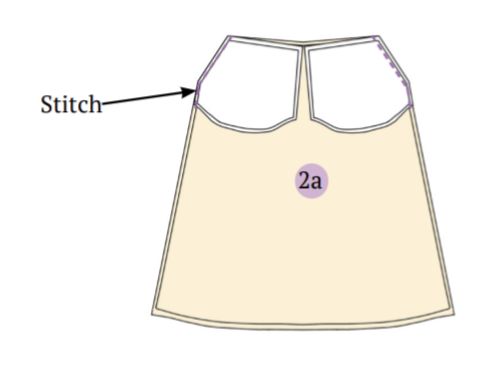
Flip the pockets towards the wrong side and fold them at the halfway notch indicated in the pattern. Once folded, sew the pocket edges onto the skirt by matching up the waistline and side seam.
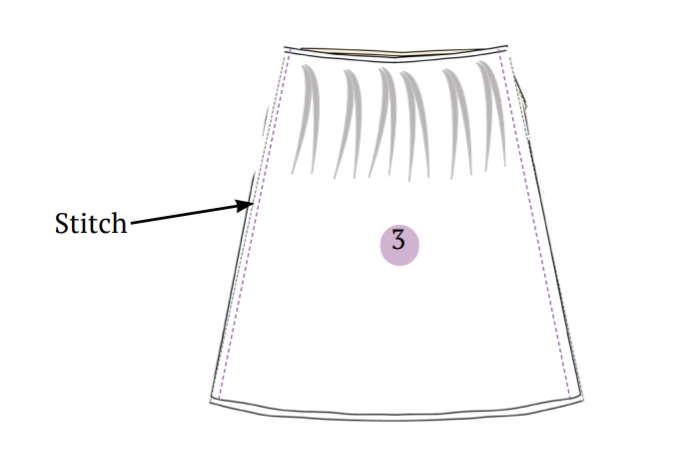
Step 3: Joining Back and Front Skirt Panels
Lay the back skirt panel over the front skirt panel, ensuring their right sides are facing each other. Align the side seams of both panels and sew along the seamline to connect them together.
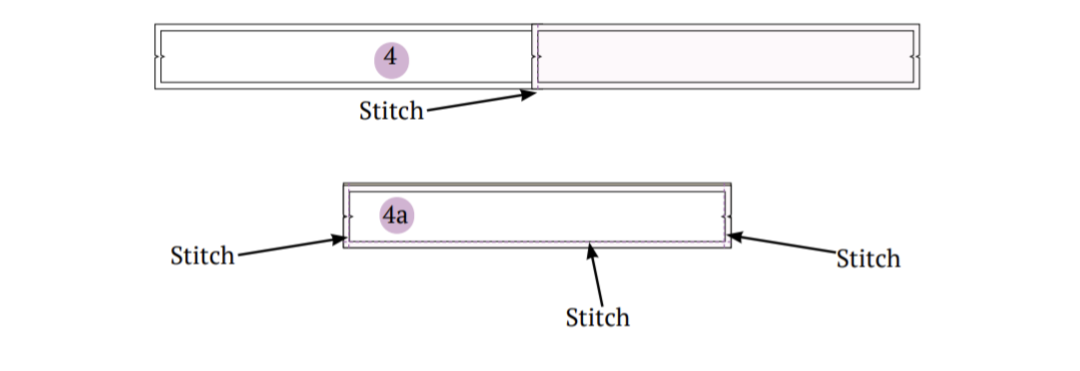
Step 4: Preparing and Attaching Elastic Waistband
Place the waistband pieces together with their right sides facing each other, aligning the edges. Sew along the side edges and bottom edge to join the pieces.
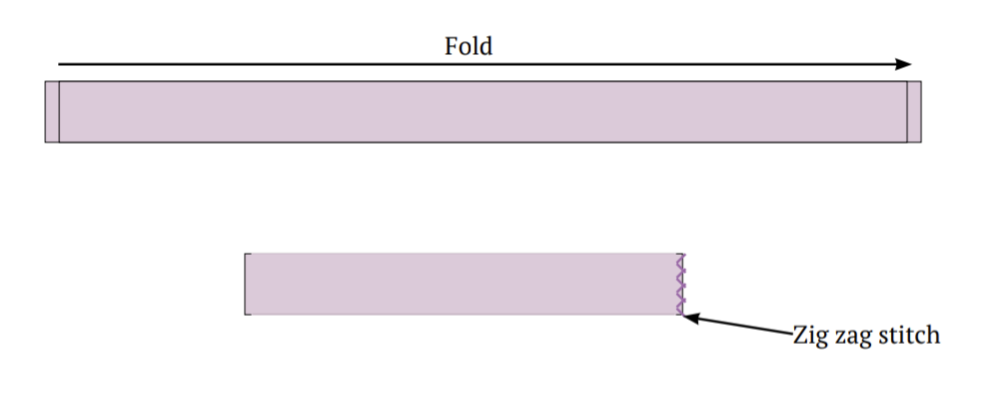
Fold the elastic in half and secure the side edge with a zigzag stitch.
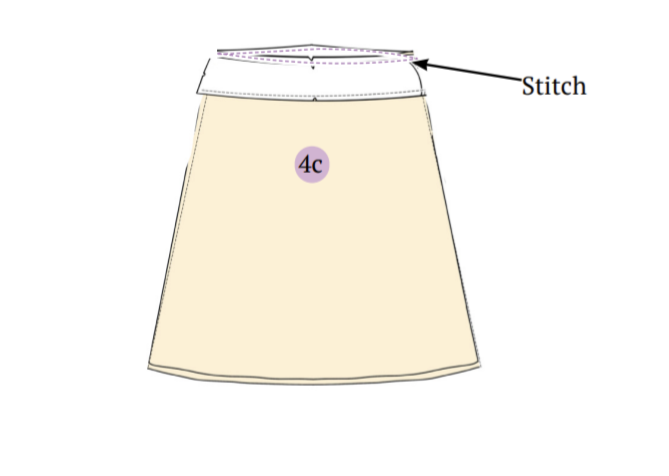
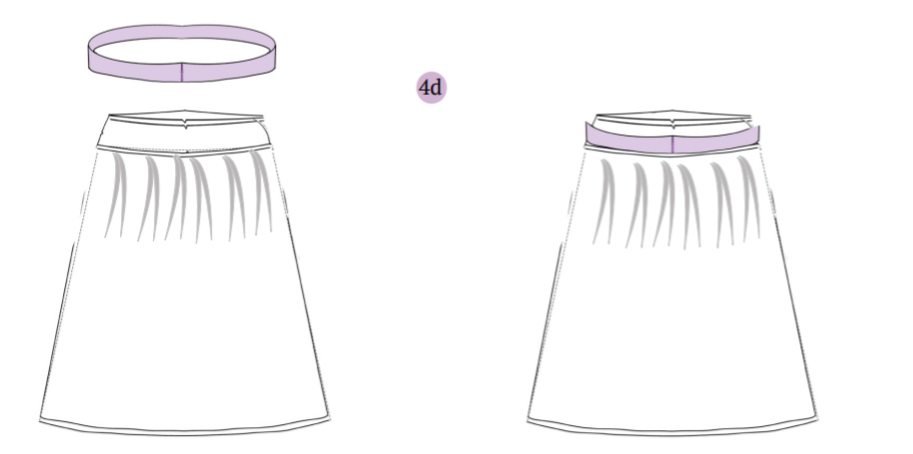
Position the assembled waistband onto the skirt, with right sides facing together. Stitch along the seamline of the waist round to attach the waistband to the skirt.
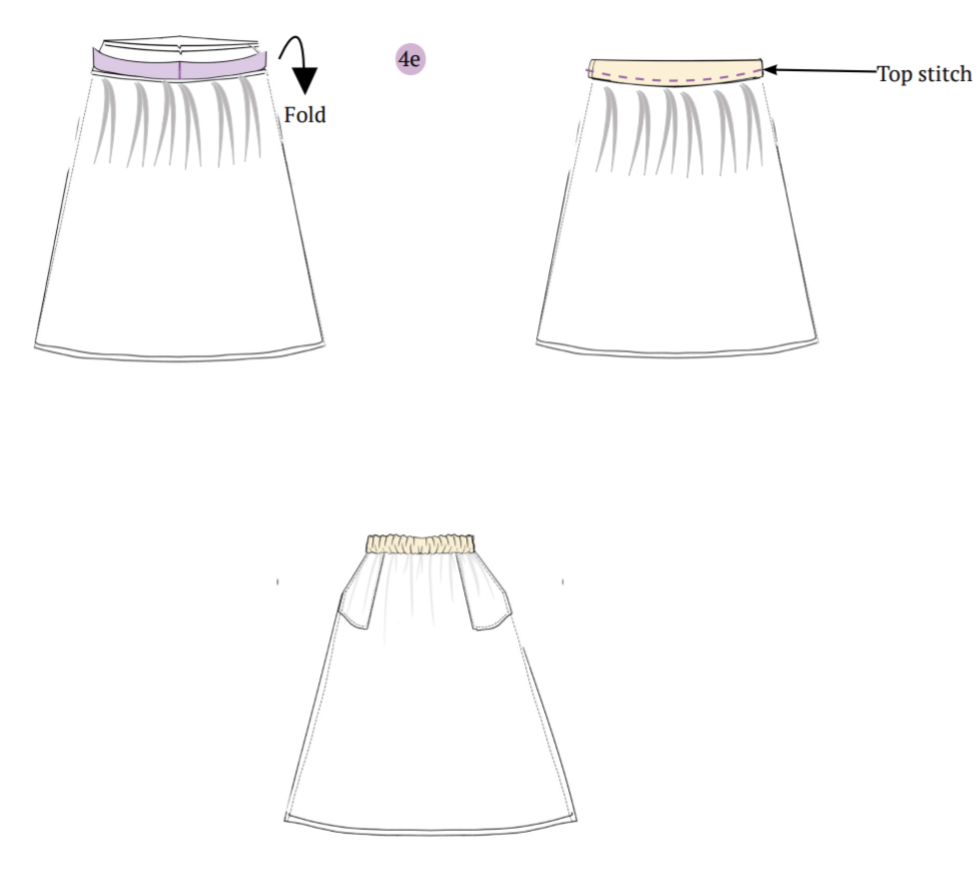
Lay the elastic band on top of the open waistband, ensuring it’s on the wrong side of the fabric.
Fold the waistband over the elastic band, covering it completely, and align it with the skirt’s waistline. Stretch the waistband as needed, then sew it in place along the waistline.
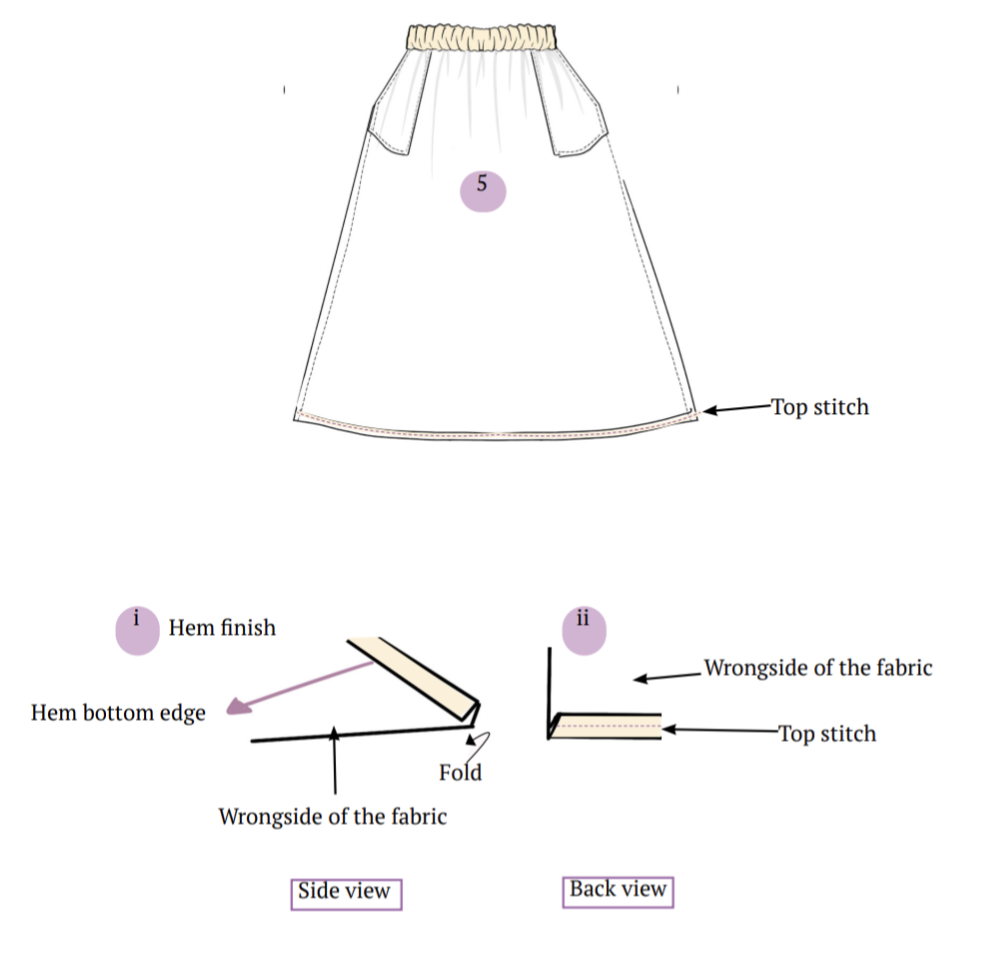
Step 5: Finishing the Hem
Fold the fabric edge over twice, ensuring the raw edge is tucked inside. Press the fold to create a crisp edge. Topstitch along the hem to secure it in place and give a polished finish.
Summary
That’s all! I believe this project is incredibly rewarding and it’s a fantastic addition to your wardrobe. Pair the skirt with a cozy sweater for a cozy autumn look or dress them up with a chic blouse for a night on the town. The possibilities are endless, and the result is always fabulous!
Check out some final images of this adorable gathered midi skirt created with the Winslet’s ZINNIA Gathered Midi Skirt Pattern:
Will you be making this skirt for yourself? How did it turn out? Let me know in the comments below! Go here for more projects and skirts patterns.
Join the Winslet sewing community by sharing your masterpiece with the hashtag #madewithwinslets!


