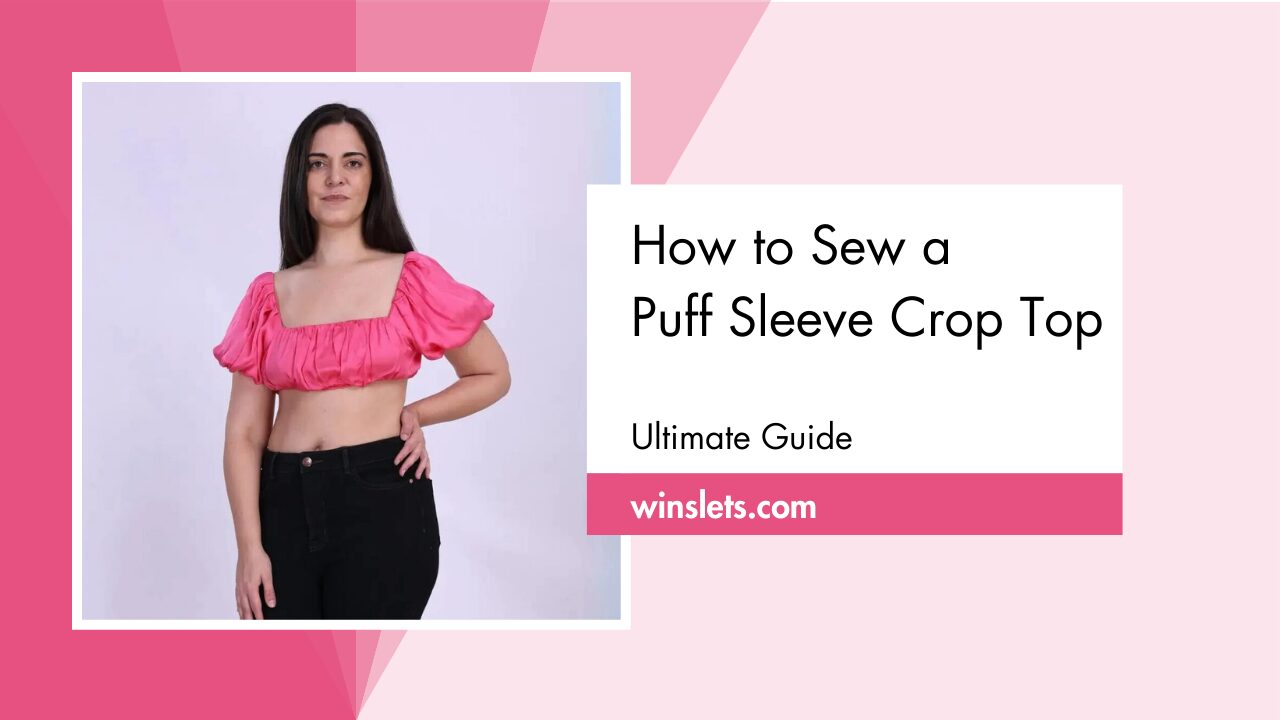
How to Sew a Puff Sleeve Crop Top?
Have you wondered how to sew a puff sleeve crop top?
The past few years have seen a significant resurgence of puffy sleeves. And I have to admit, these days, I’m completely obsessed with puff sleeve crop tops. I am naturally drawn to this style since it is something I truly adore.
This sewing project is easy enough both for beginners and intermediates, and you may sew along with me and hope my instructions below help.
I used the Winslet’s HOLLIE Puff Sleeve Crop Top Pattern for my project as it is a charming crop top with its gathered form, puffy sleeves, and square neckline for a stylish and current look.
What sewing supplies do you need to sew a puff sleeve crop top?
The basic supplies you need to sew a puff sleeve crop top are Sewing Pattern (I used Winslet’s HOLLIE Puff Sleeve Crop Top Pattern in this example), Sewing Machine, Tape Measure, Chalk, Shears, Pins, Iron, Needles, Thread (preferably 3-ply polyester), Thread Cutter, and Elastic Band.
Fabric Recommendation
Puff sleeve crop tops shine in fabrics, such as cotton blend, modal satin, satin, or organza.

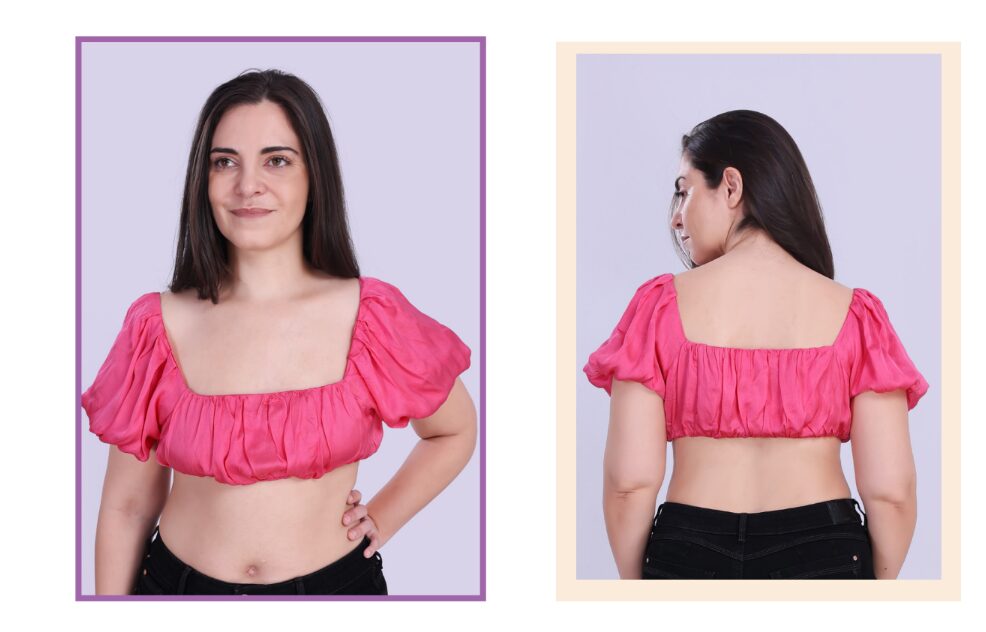
Above, Katie (our co-founder and model :)) features a puff sleeve crop top made with Winslet’s HOLLIE Puff Sleeve Crop Top Pattern. The fabric used is a 100% viscose fabric that offers a soft, versatile feel resembling silk and providing comfort year-round.
Size Charts
The puff sleeve crop top sewing pattern measurements for sizes (XS, S, M, L, XL, 2XL, or 3XL) are detailed below. Choose a size that corresponds most closely to your body measurements.
Measure the largest areas for the chest and hips, and for the waist, measure at its narrowest part just above the belly button.
It’s worth noting that if your exact measurements are not listed in the table, you may want to consider ordering a size larger.
The size chart includes measurements in both inches and centimeters for your reference.
Body Measurements
| XS (inches) | XS (cm) | S (inches) | S (cm) | M (inches) | M (cm) | L (inches) | L (cm) | XL (inches) | XL (cm) | 2XL (inches) | 2XL (cm) | 3XL (inches) | 3XL (cm) | |
| Bust | 32 | 81.3 | 34 | 86.4 | 36 | 91.4 | 38 | 96.5 | 40 | 101.6 | 42 | 106.7 | 44 | 111.8 |
| Waist | 26 | 66.0 | 28 | 71.1 | 30 | 76.2 | 32 | 81.3 | 34 | 86.4 | 36 | 91.4 | 38 | 96.5 |
Final Garment Measurements
| XS (inches) | XS (cm) | S (inches) | S (cm) | M (inches) | M (cm) | L (inches) | L (cm) | XL (inches) | XL (cm) | 2XL (inches) | 2XL (cm) | 3XL (inches) | 3XL (cm) | |
| Chest Round | 32 | 81.2 | 33 | 83.8 | 35 | 88.9 | 37 | 93.9 | 39 | 99 | 41 | 104.1 | 43 | 109.2 |
| Full Length (from shoulder) | 12 | 30.4 | 12 | 30.4 | 12.5 | 31.7 | 13 | 33.0 | 13.5 | 34.2 | 14 | 35.5 | 14.5 | 36.8 |
| Sleeve Length | 8.5 | 21.5 | 9 | 22.8 | 9.5 | 24.1 | 10 | 25.4 | 10.5 | 26.6 | 11 | 27.9 | 11.5 | 29.2 |
Fabric Yield
| Width of the Fabric | XS (yards) | XS (meters) | S (yards) | S (meters) | M (yards) | M (meters) | L (yards) | L (meters) | XL (yards) | XL (meters) | 2XL (yards) | 2XL (meters) | 3XL (yards) | 3XL (meters) |
| 45” | 1.28 | 1.17 | 1.50 | 1.37 | 1.77 | 1.62 | 2.03 | 1.86 | 2.34 | 2.14 | 2.69 | 2.46 | 3.09 | 2.83 |
| 60” | 0.85 | 0.78 | 1.00 | 0.91 | 1.18 | 1.08 | 1.35 | 1.24 | 1.56 | 1.42 | 1.79 | 1.64 | 2.06 | 1.88 |
Steps To Follow For Sewing a Puff Sleeve Crop Top
Let’s dive into the steps for sewing your very own unique puff sleeve crop top:
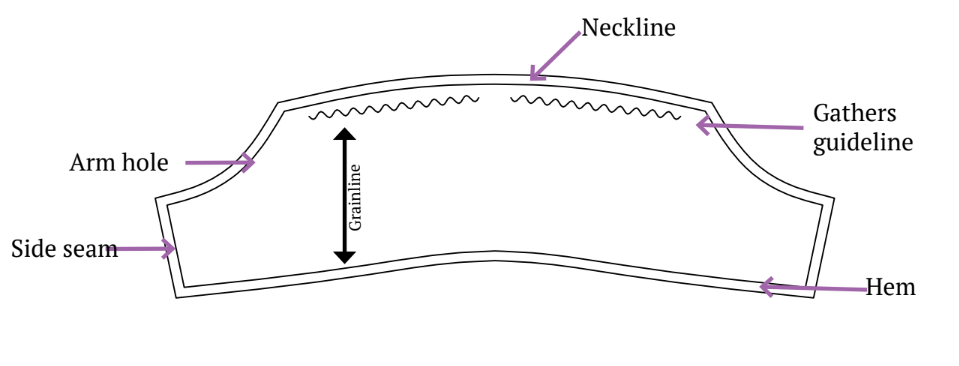
Pattern Marking and Inventory
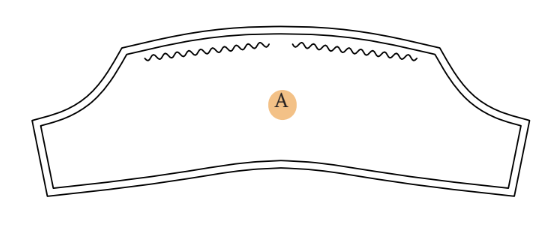
Before you start sewing, cut out all the pattern pieces as listed in the pattern instructions. You should have all the pieces as listed below:
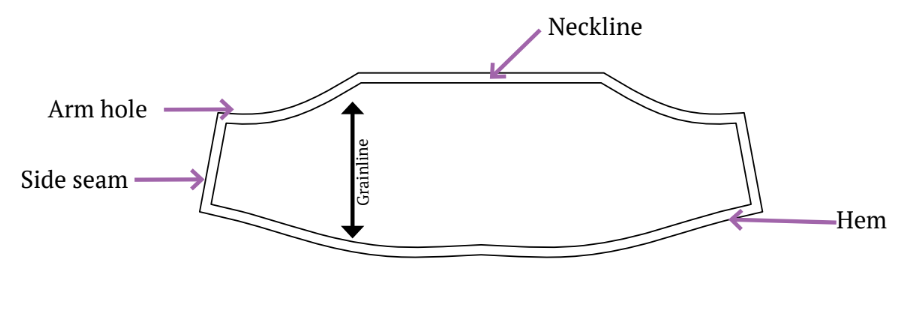
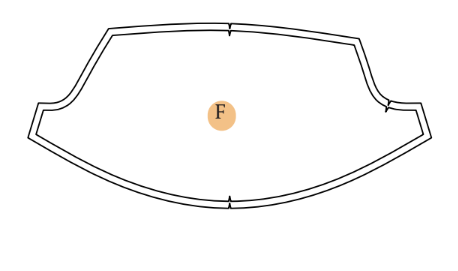
A. Front Bodice – cut x1 fabric
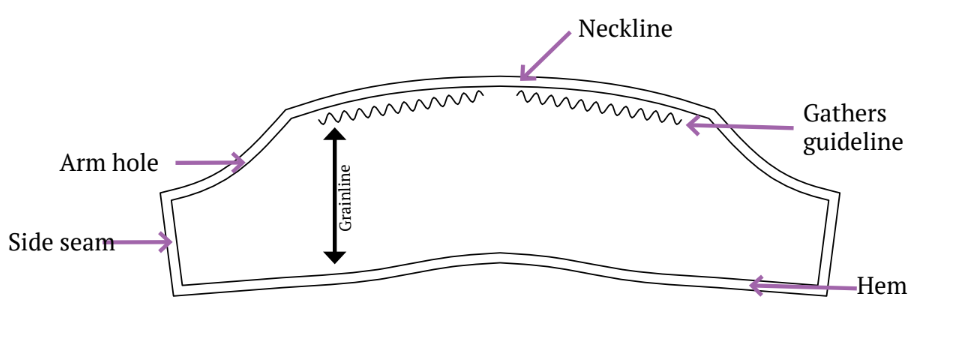
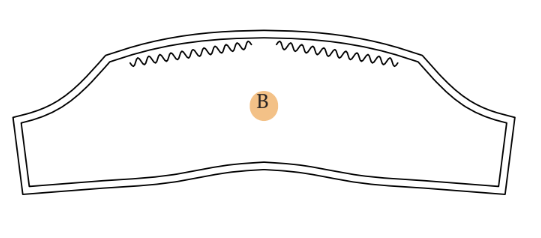
B. Back Bodice – cut x1 fabric
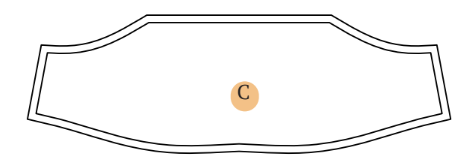
C. Front Body Lining – cut x1 fabric
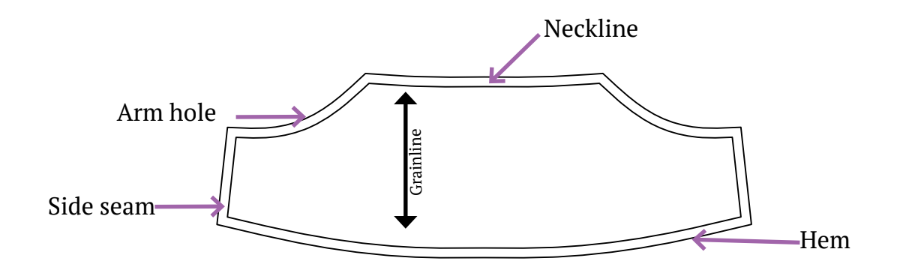
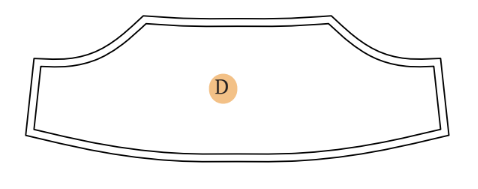
D. Back Body Lining – cut x1 fabric
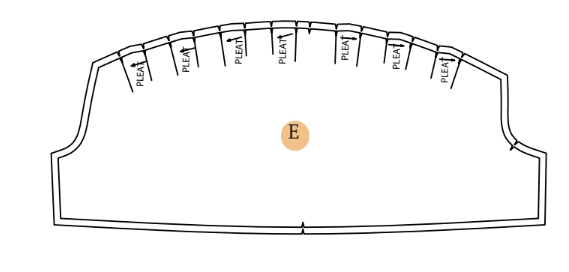
E. Sleeve – cut x2 fabric
F. Sleeve Body Lining – cut x2 fabric
Cutting Layout
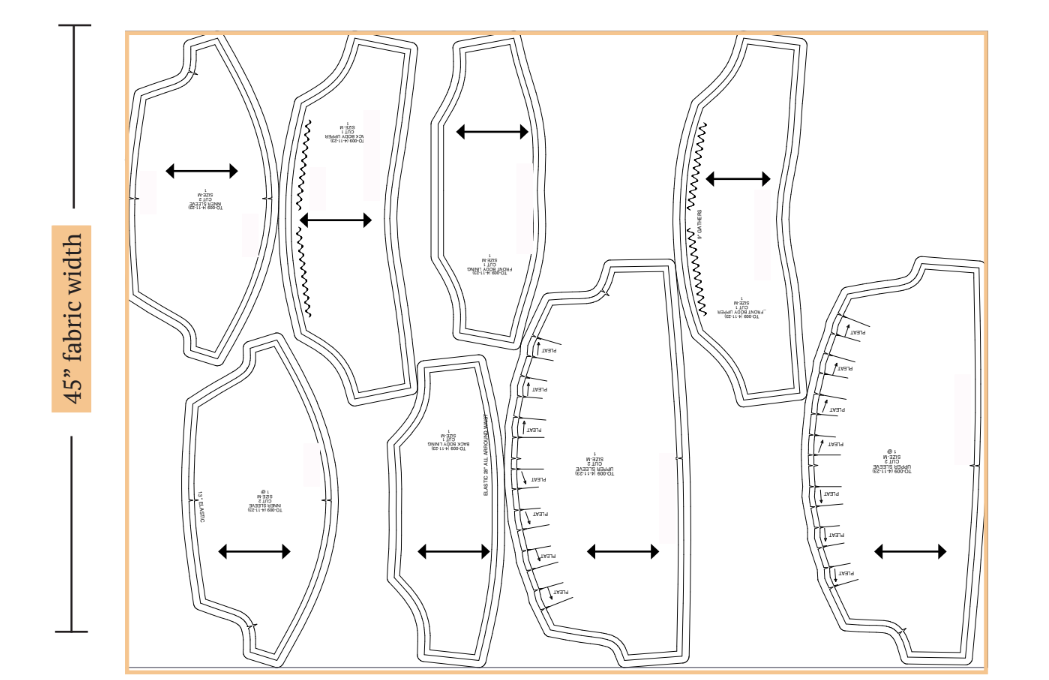
- Ensure your garment is cut on-grain.
- Pin fabric accurately; these layouts are nondirectional.
- Buy extra length for nap or prints.
Sewing Steps
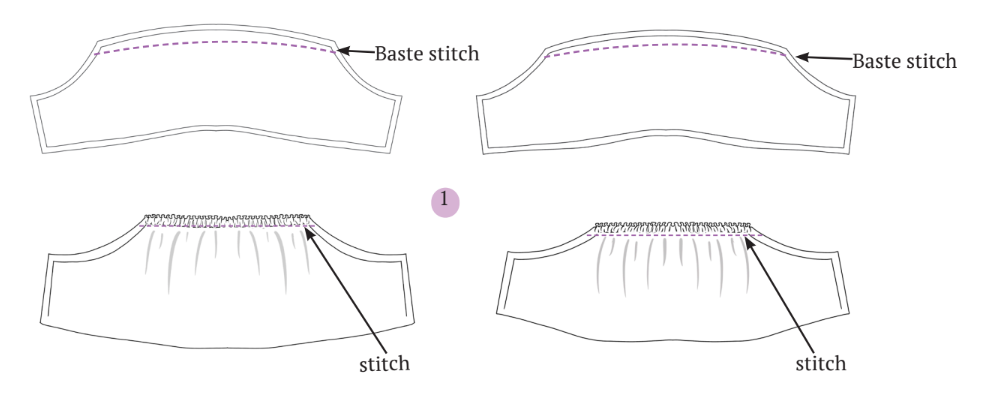
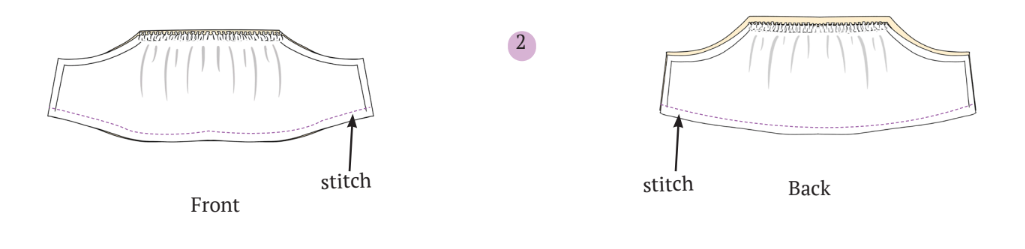
1. Sew a basting stitch along the back and front bodice necklines. Gather the fabric by pulling the threads from the ends. Ensure the gathers are evenly distributed and match the length of the lining neckline. Topstitch and secure the gathers in place. Repeat these steps for the back bodice.
2. Align front bodice and front lining, right sides together. Stitch along hem seamline. Repeat for back bodice.
3. Separate the bodice and lining fabric, then align the front bodice and back bodice with their right sides facing each other. Stitch along the side seam to join them together.

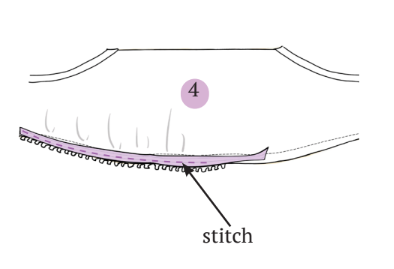
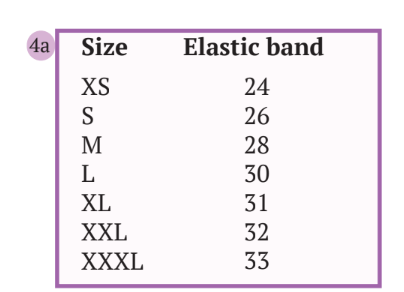
4. Sew an elastic band of the specified length (refer to table 4a) onto the underside of the hem. Position the elastic along the bodice hem and commence stitching, securing it at the side seam. Pull the elastic gently while stitching on the fabric. Adjust the machine tension dial to 4 or 5. When you reach the opposite end, secure the elastic with a lock stitch. Flip the bodice right side out and use a steam iron to smooth and set the gathers.
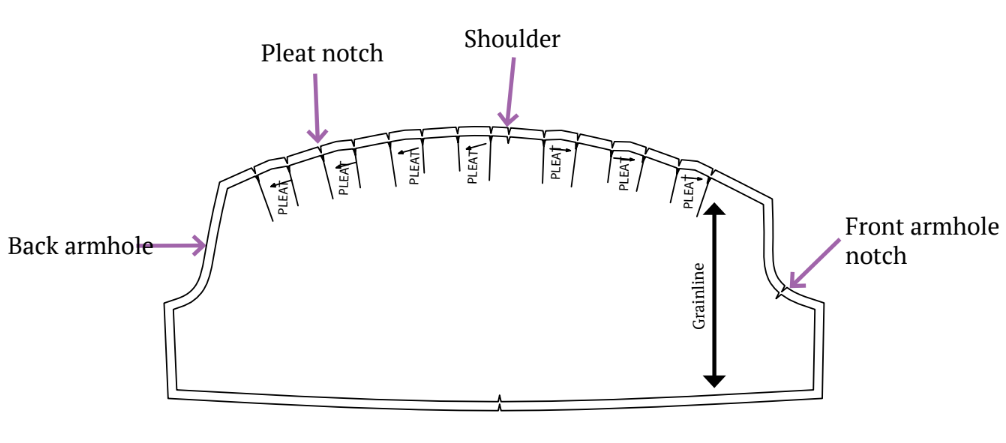
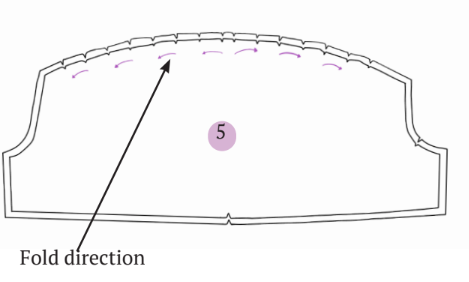
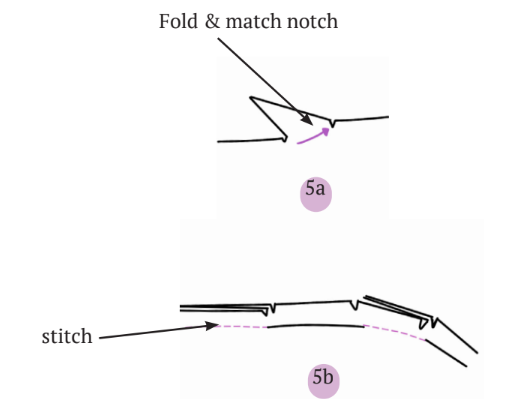
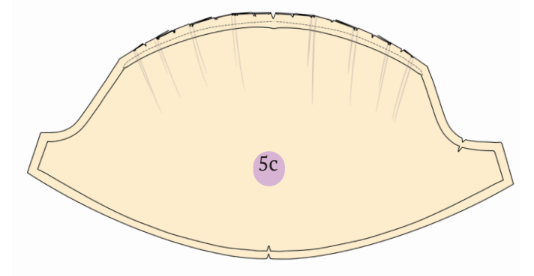
5. Get the sleeve ready by forming knife pleats on the shoulder. Utilize the pleat notches as a reference, aligning one notch with the corresponding one as you fold the sleeve fabric. Refer to the image for the correct direction, and make sure to complete all the pleats on the sleeve.
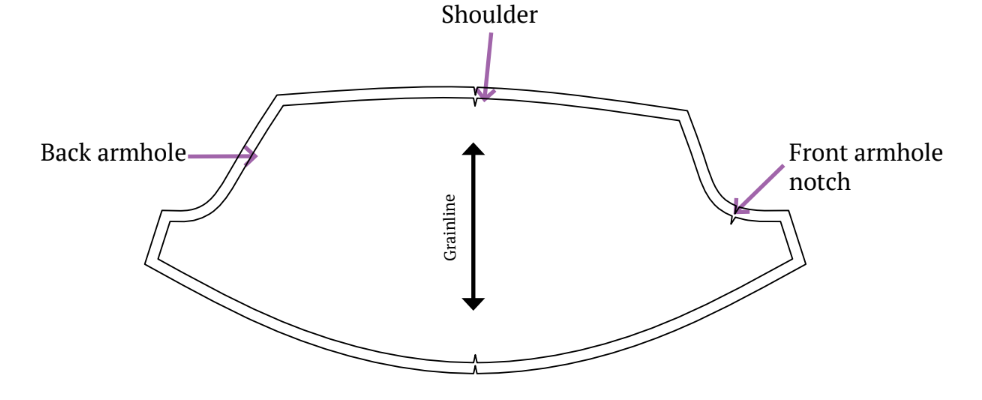
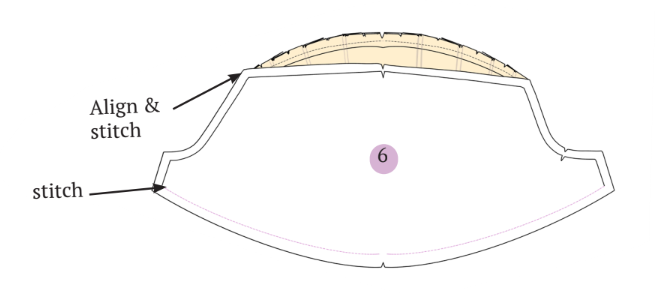
6. Place sleeve on sleeve lining, right sides together, and stitch shoulder and sleeve hem seamline.
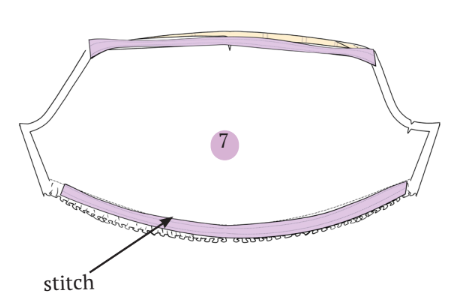
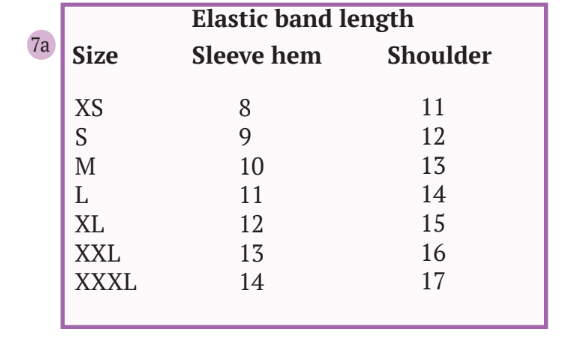
7. Affix an elastic band, cut to the length specified in Table 7a, to the underside of the sleeve fabric. Position the elastic along the hem, extending it up to the shoulder to match the prescribed length from Table 7a. Commence sewing at one end, anchoring the elastic with a lock stitch. While sewing, gently stretch the elastic to align it with the fabric. Set your sewing machine’s tension between 4 and 5 for optimal results. Secure the opposite end of the elastic with another lock stitch. Repeat this process to attach the necessary length of elastic on the shoulder.
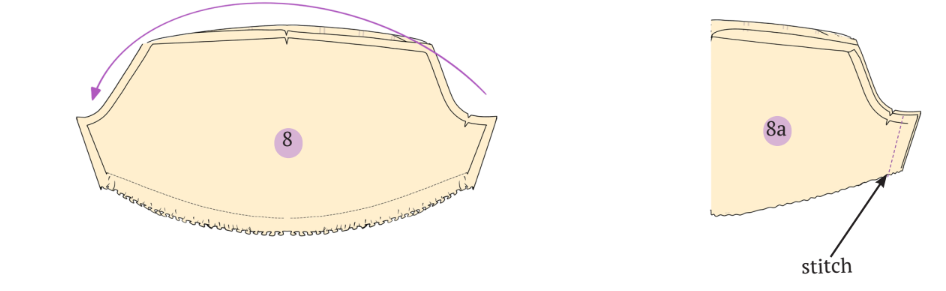
8. Flip the sleeve so that the right sides of the fabric are facing outward. Fold the sleeve in half, aligning the side seam of the sleeve with the front side of the sleeve facing each other. Stitch along the sleeve side seamline to join them together.
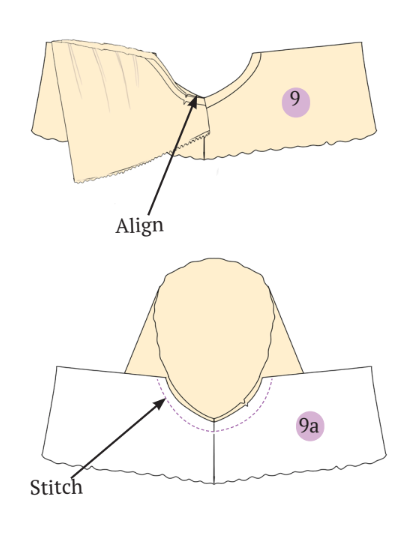
9. Connect the sleeve to the bodice by positioning the sleeve on the bodice, ensuring that the sleeve armhole aligns with the bodice armhole, with the right sides facing each other. Pay attention to matching the front-to-front armhole and back-to-back armhole notches. Stitch along the armhole seamline, and repeat the same process for the other sleeve.
10. Flip the top so that the right side is facing outward, and use a steam iron to smooth and set the gathers, giving the top a clean and finished appearance.
Summary: How to sew a puff sleeve crop top
That’s it! You have finished sewing yourself a very delightful puff sleeve crop top!
Check out some final images of this adorable top created with Winslet’s HOLLIE Puff Sleeve Crop Top Pattern:

If you have any questions about this DIY project please comment below and if you’re looking for more projects, check our Sewing Projects section
Share your photos with us, and let us know how it went.
Join the Winslet sewing community by sharing your masterpiece with the hashtag #madewithwinslets!


