How to Sew a Zip-Up Hoodie?
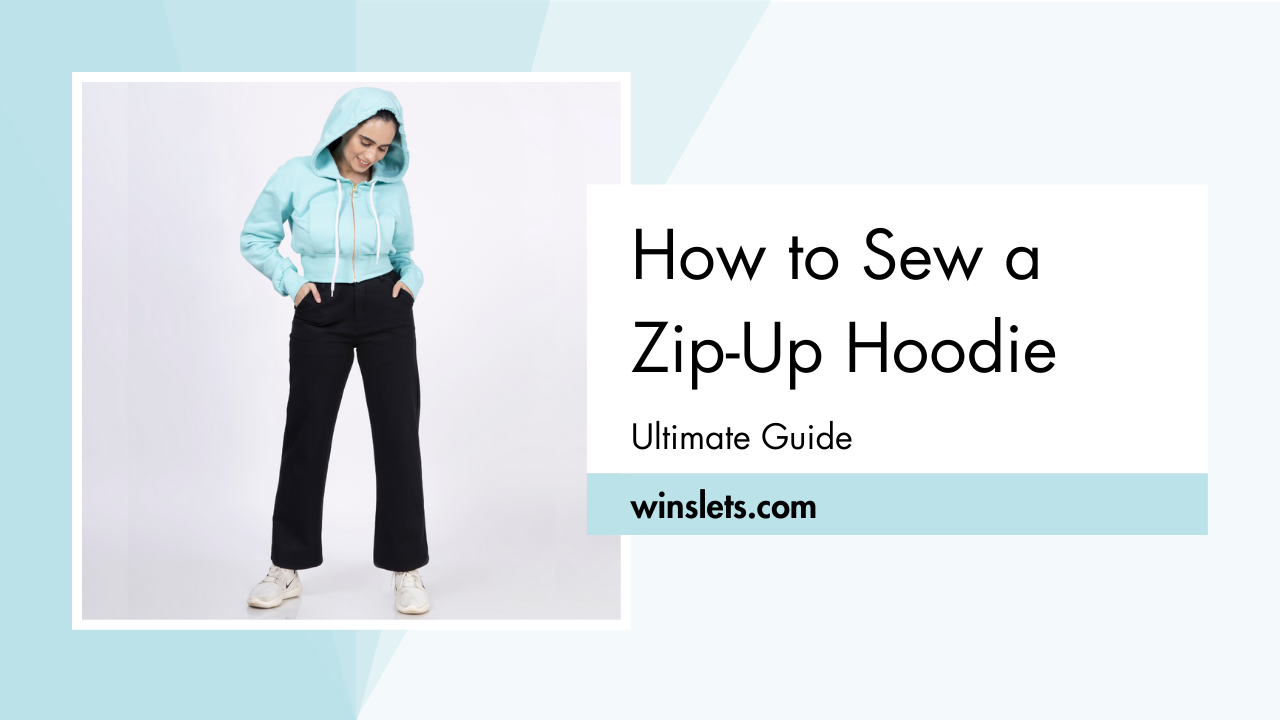
Have you ever wondered how to sew a hoodie? Today, I’ll walk you through the process of making your own hoodie, using Winslet’s RUE Zip-Up Hoodie Pattern, along with instructions. This zip-up hoodie includes a zipper closure, long sleeves, and a hood with an adjustable drawstring, and if you sew it in polycotton fleece fabric, it’s the perfect cozy garment.
This particular hoodie design is super easy to sew, making it an ideal project for beginners and experienced sewists.
What supplies do you need to sew a zip-up hoodie?
The basic supplies that you’ll need to sew a zip-up hoodie are a Sewing Pattern (I used Winslet’s RUE Zip-Up Hoodie Pattern for this project), Sewing Machine, Tape Measure, Chalk, Shears, Pins, Iron, Needles, Thread (preferably 3-ply polyester), Thread Cutter, Jacket Zipper (15 inches), and a Cord (drawstring for the hood).
Fabric Recommendation
Consider using medium weight fabrics, such as rib fabric, jersey, or terry for the hoodie. Medium weight fabrics are excellent choices because they offer the perfect balance of durability, flexibility, and comfort.

The model above is wearing a zip-up hoodie made from Winslet’s RUE Zip-Up Hoodie Pattern. The hoodie is made from 280gsm polycotton fleece fabric, recommended for its warmth, water resistance, and ease of sewing, making it perfect for winter wear and ideal for beginners.
Size Charts
The zip-up hoodie sewing pattern measurements for sizes (XS, S, M, L, XL, 2XL, or 3XL) are detailed below. Choose a size that corresponds most closely to your body measurements.
It’s worth noting that if your exact measurements are not listed in the table, you may want to consider ordering a size larger.
The size chart includes measurements in both inches and centimeters for your reference.
Body Measurements
| XS (inches) | XS (cm) | S (inches) | S (cm) | M (inches) | M (cm) | L (inches) | L (cm) | XL (inches) | XL (cm) | 2XL (inches) | 2XL (cm) | 3XL (inches) | 3XL (cm) | |
| Bust | 32 | 81.3 | 34 | 86.4 | 36 | 91.4 | 38 | 96.5 | 40 | 101.6 | 42 | 106.7 | 44 | 111.8 |
| Waist | 26 | 66.0 | 28 | 71.1 | 30 | 76.2 | 32 | 81.3 | 34 | 86.4 | 36 | 91.4 | 38 | 96.5 |
| Hip | 34 | 86.4 | 36 | 91.4 | 38 | 96.5 | 40 | 101.6 | 42 | 106.7 | 44 | 111.8 | 46 | 116.8 |
Final Garment Measurements
| XS (inches) | XS (cm) | S (inches) | S (cm) | M (inches) | M (cm) | L (inches) | L (cm) | XL (inches) | XL (cm) | 2XL (inches) | 2XL (cm) | 3XL (inches) | 3XL (cm) | |
| Bust Round | 38 | 96.52 | 39.5 | 100.3 | 41 | 104.1 | 42.5 | 107.9 | 44 | 111.7 | 45.5 | 115.5 | 47 | 119.3 |
| Full Length (From Shoulder) | 14.5 | 36.8 | 14.75 | 37.4 | 15.35 | 38.9 | 15.65 | 39.7 | 16.15 | 41 | 16.55 | 42.03 | 17 | 43.1 |
| Sleeve Length | 22 | 55.8 | 22.5 | 57.1 | 23 | 58.4 | 23.5 | 59.6 | 24 | 60.9 | 24.5 | 62.2 | 25 | 63.5 |
Yardage Chart
| Width of the Fabric | XS (yards) | XS (meters) | S (yards) | S (meters) | M (yards) | M (meters) | L (yards) | L (meters) | XL (yards) | XL (meters) | 2XL (yards) | 2XL (meters) | 3XL (yards) | 3XL (meters) |
| 45” | 1.35 | 1.23 | 1.59 | 1.45 | 1.87 | 1.71 | 2.15 | 1.97 | 2.47 | 2.26 | 2.84 | 2.60 | 3.27 | 2.99 |
| 60” | 1.03 | 0.94 | 1.21 | 1.11 | 1.43 | 1.31 | 1.64 | 1.50 | 1.89 | 1.73 | 2.17 | 1.99 | 2.50 | 2.29 |
Steps To Follow For Sewing a Zip-Up Hoodie
The Winslet’s RUE Zip-Up Hoodie Pattern is suitable for printing on both A4 and A0 size paper:
- Print at home: A4 Pattern
- Print at a copy shop: A0 Pattern
Let’s dive into the steps for sewing your very own unique zip-up hoodie:
Pattern Marking and Inventory
The fabric needs to be cut into following pieces:
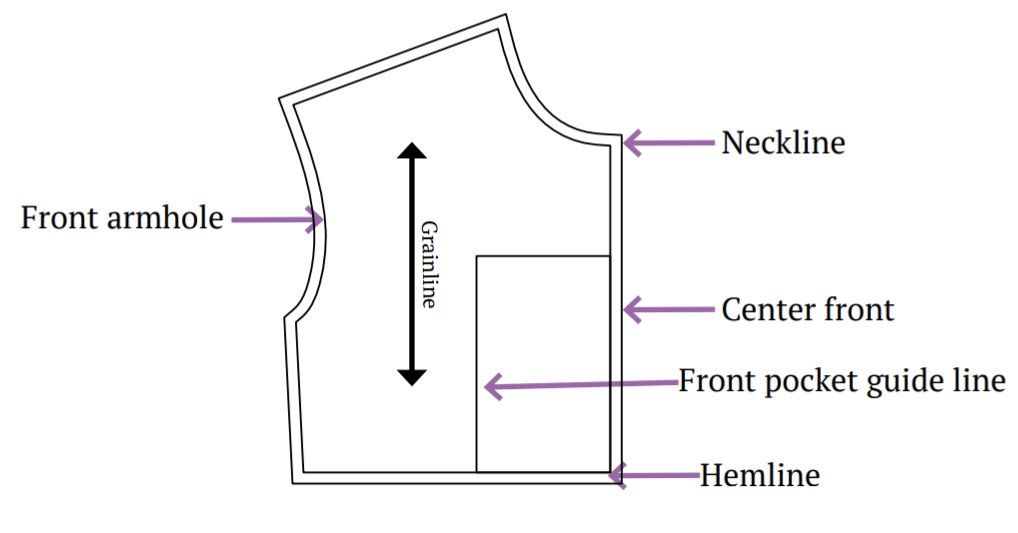
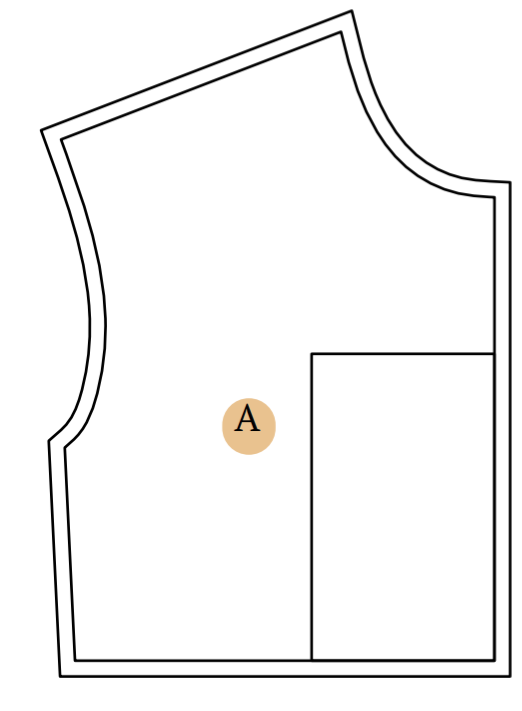
A. Front Bodice – cut x2 fabric
B. Back Bodice – cut x1 fabric

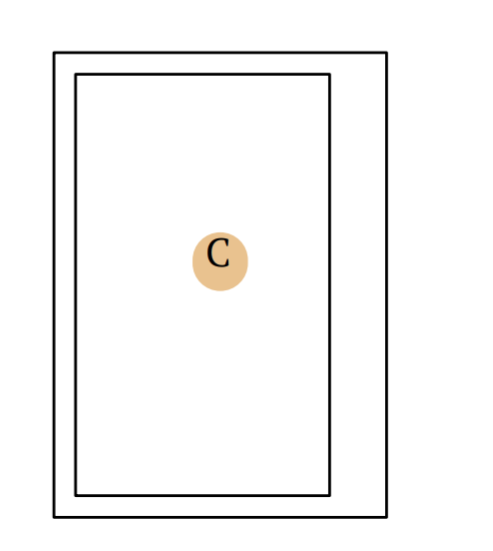
C. Front Pocket – cut x2 fabric
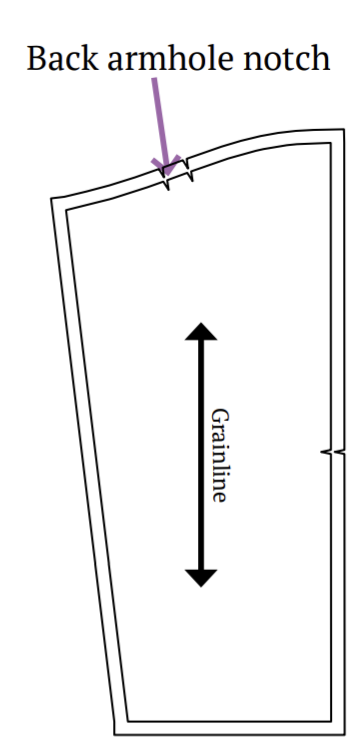
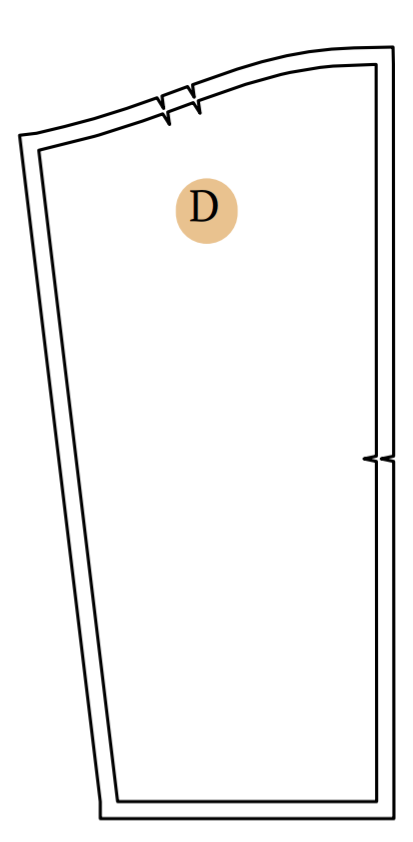
D. Back Sleeve – cut x2 fabric
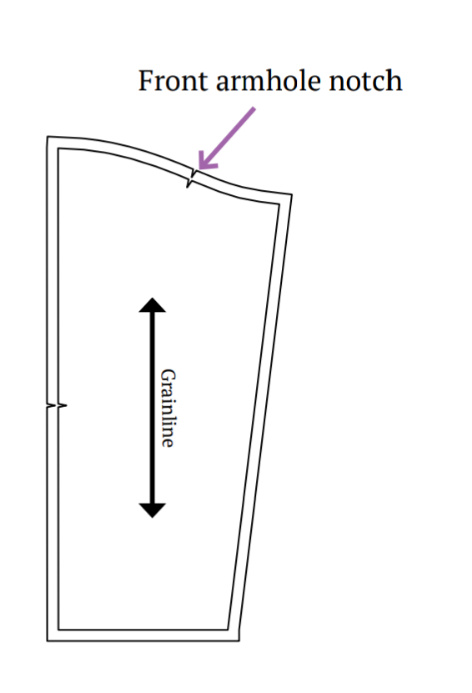
E. Front Sleeve – cut x2 fabric
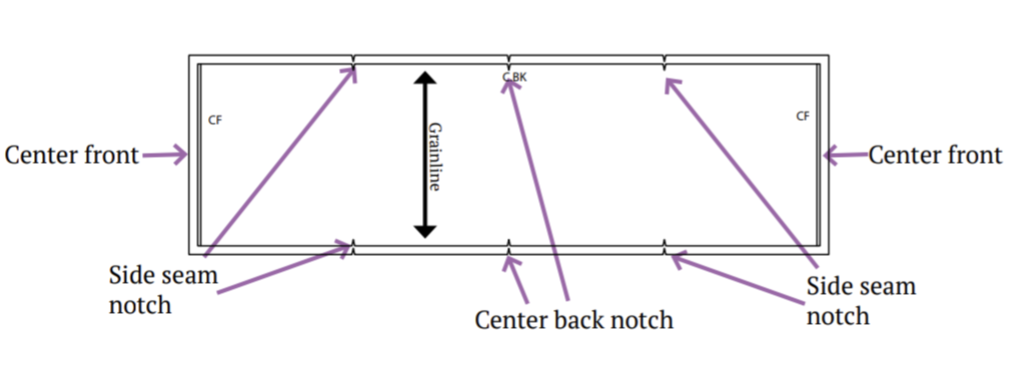
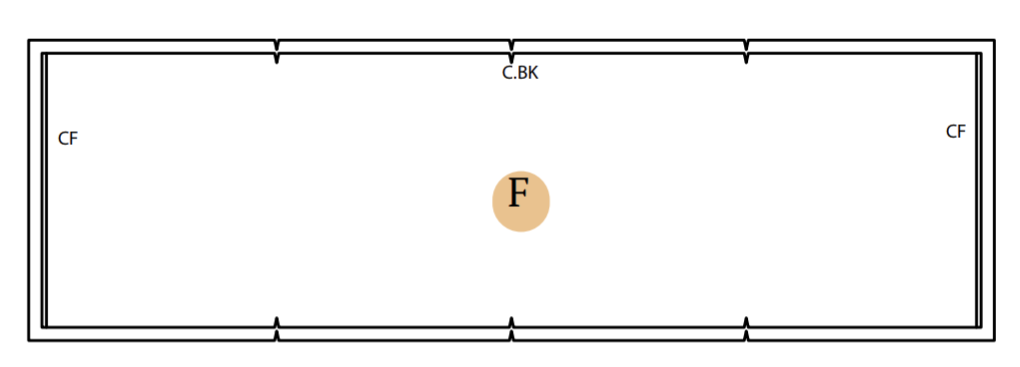
F. Waistband – cut x1 fabric
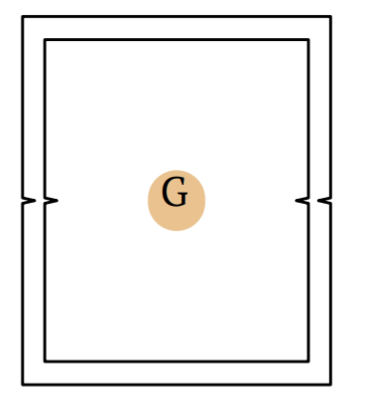
G. Cuff – cut x2 fabric
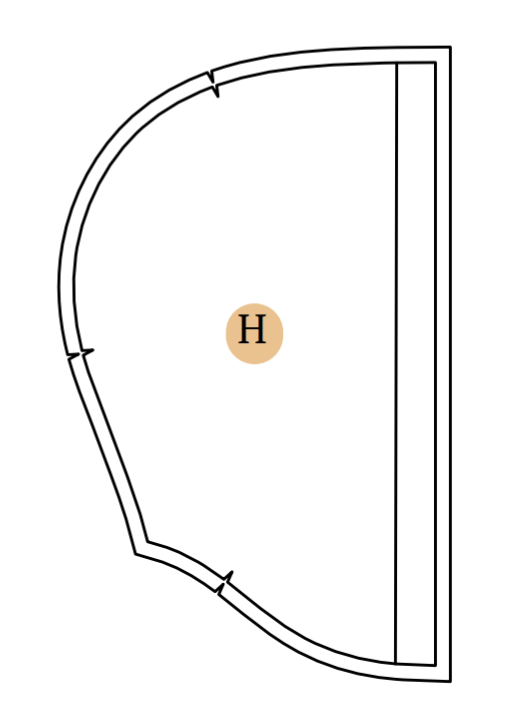
H. Hood Side Panel – cut x4 fabric
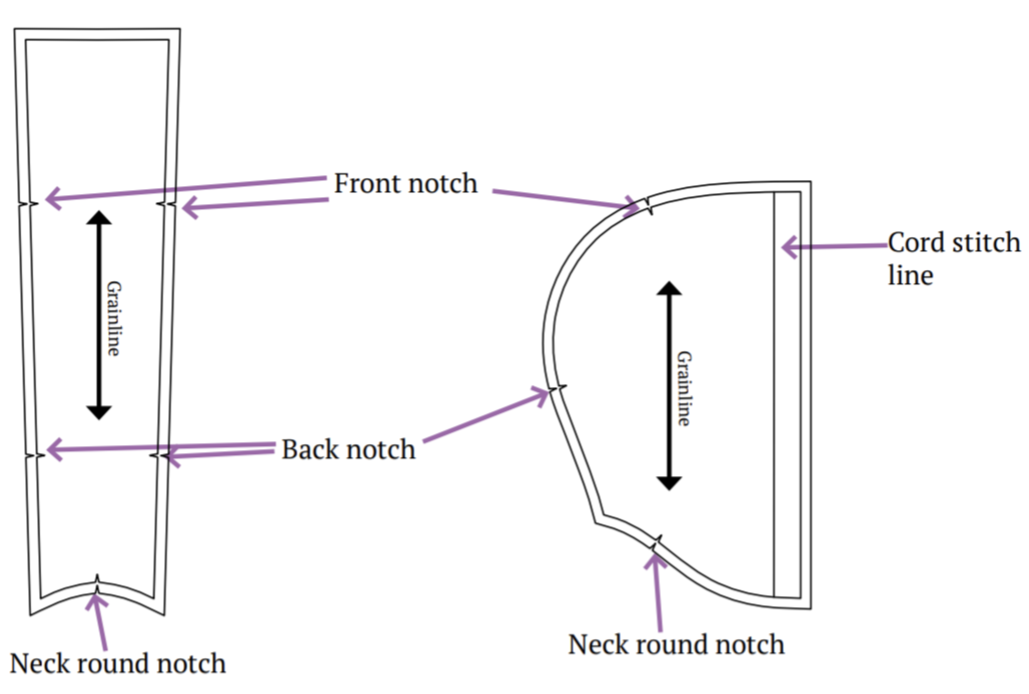
I. Hood Center Panel – cut x2 fabric
Cutting Layout

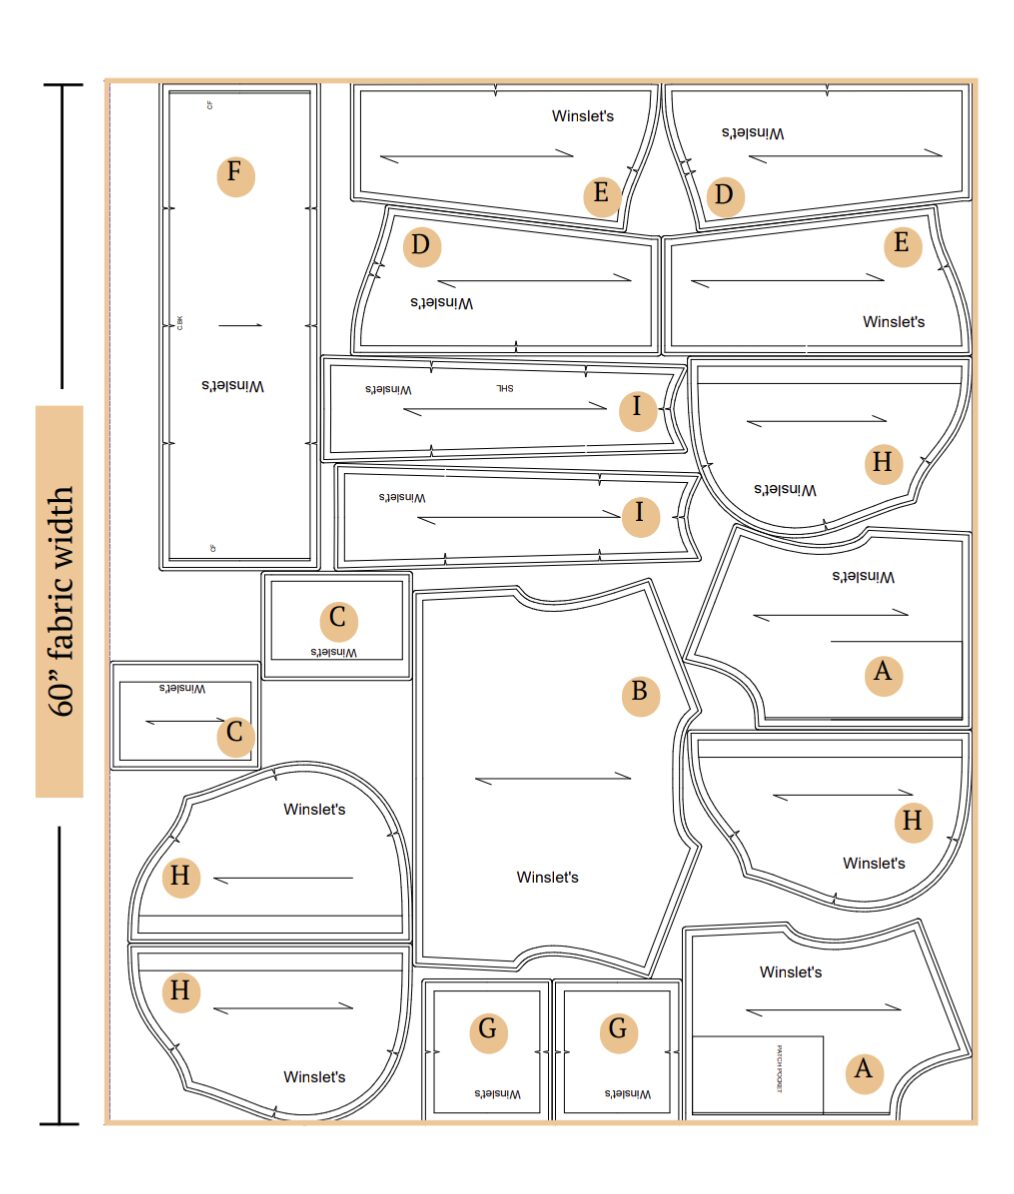
- Medium size has been used for representation of this cutting layout.
- Ensure the pattern layout is on-grain for fabric alignment.
- Use pins to secure fabric, aiding accurate cutting.
- These pattern layouts are non-directional.
- If using fabric with nap or prints, purchase additional length.
Fabric Preparation and Cutting
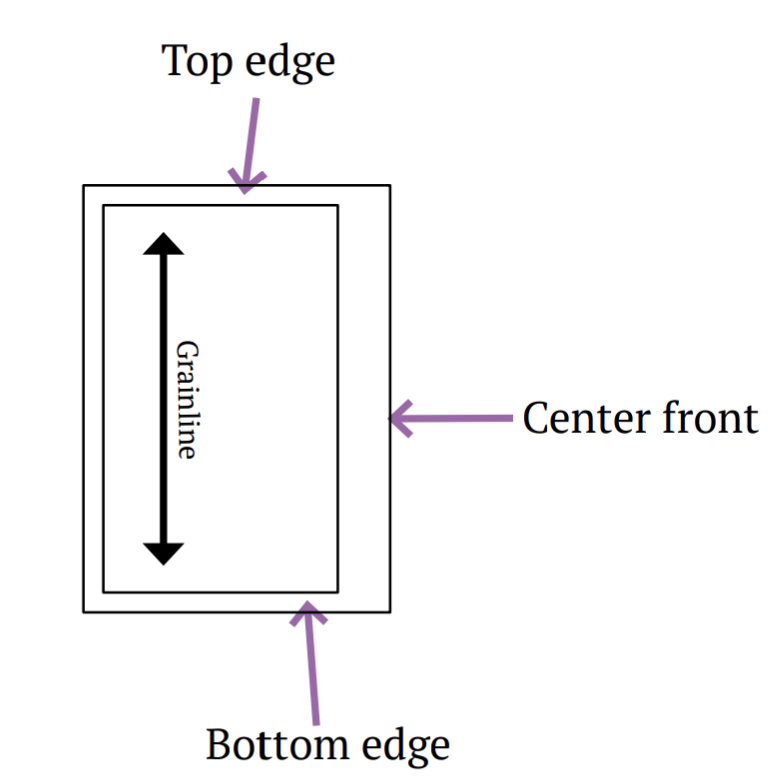
- Arrange pattern pieces as shown in the above cutting diagram, ensuring the grainline arrow aligns with the selvage.
- Trace and cut fabric pieces using fabric shears, removing any markings.
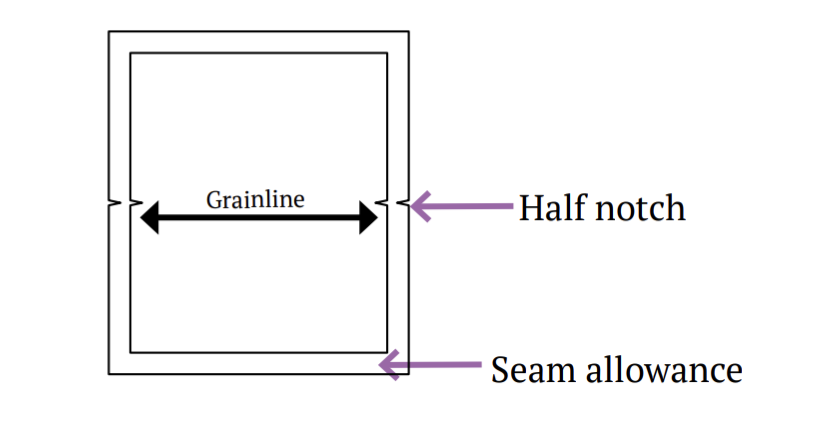
- Transfer pattern markings to the wrong side of the fabric, including circles, buttonholes, and fold lines, using a marking pen or chalk.
- Mark the center front for fold pieces to aid in accurate alignment.
Sewing Steps

Step 1: Front Patch Pocket Preparation
Overlock the top and side edges of the pocket.
Fold the side edge of the pocket inward by approximately 0.5 inches and top stitch.

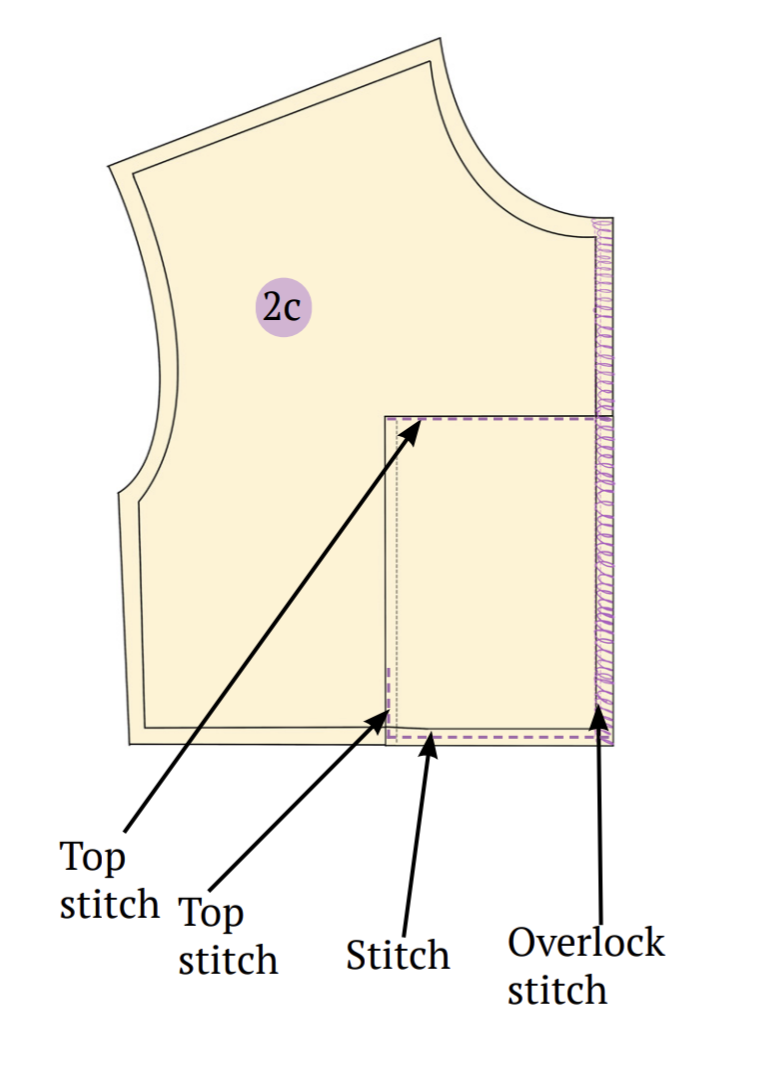
Step 2: Attaching Front Pocket to Bodice
Follow the pocket guideline provided in the pattern.

Position the pocket on the front bodice with right sides together, ensuring the center front (Cf) of both align. Stitch along the top edge seam of the pocket.
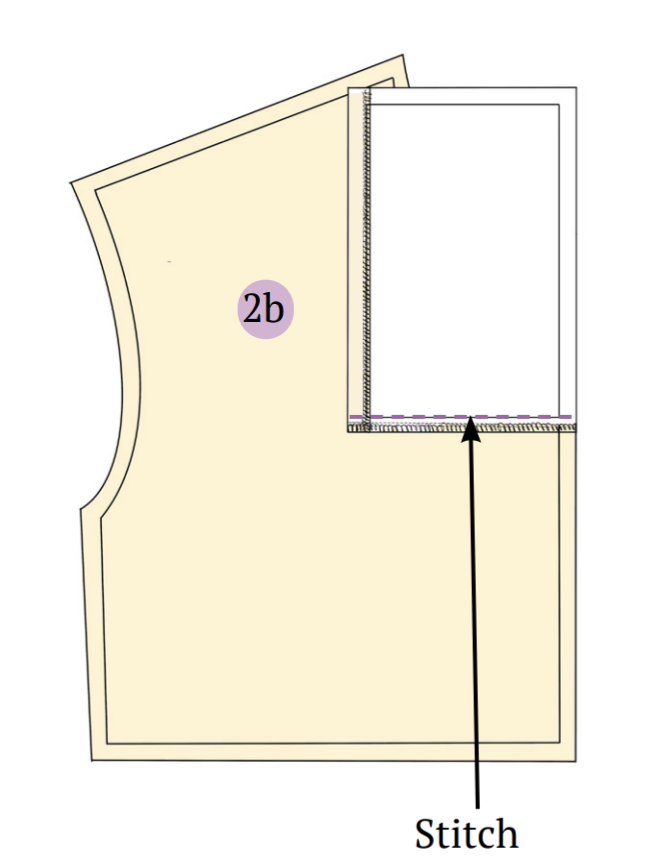
Secure the pocket to the front bodice by overlocking the center front and top stitching the top and bottom edges, as well as approximately 2 inches of the bottom side edge.
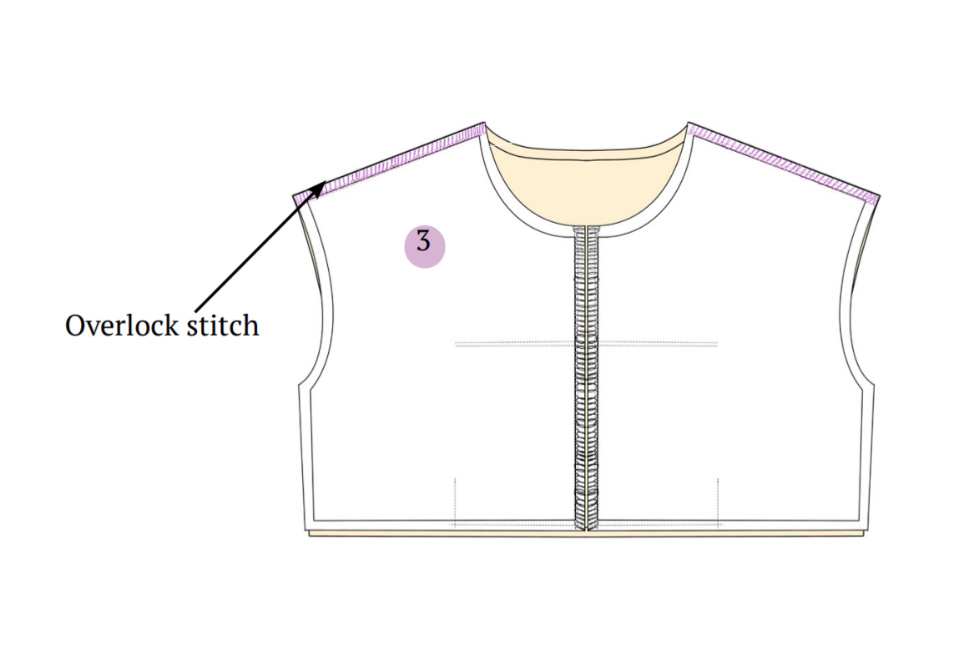
Step 3: Connecting Front and Back Bodice
To join the front and back bodice, place them with right sides together. Align the shoulders and overlock the shoulder seams.
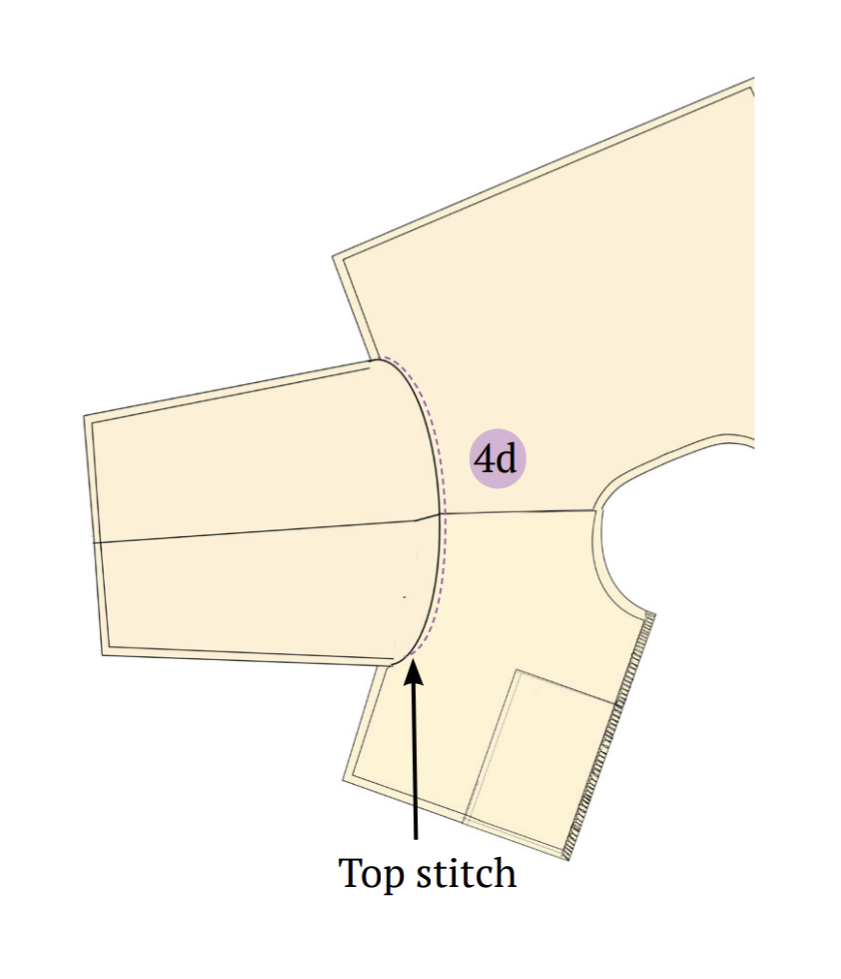
Step 4: Creating Sleeve Panels and Attaching to Bodice
Connect the sleeve pieces by placing them right sides together and overlocking the edges on the wrong side of the fabric. Press open along the stitch.
Position the sleeve on the bodice with right sides together, aligning the armhole. Ensure alignment of the front and back armholes using the notches.
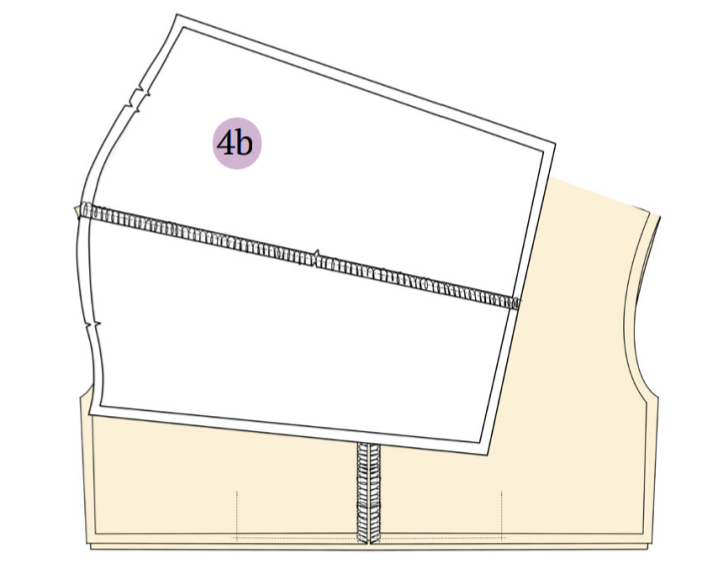
Overlock the armhole. Repeat the process for the other sleeve.
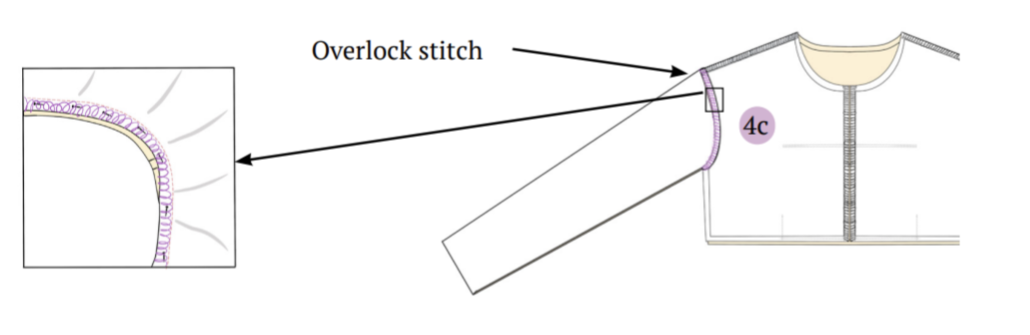
Top stitch along the shoulder, directing the armhole seam allowance towards the shoulder side.
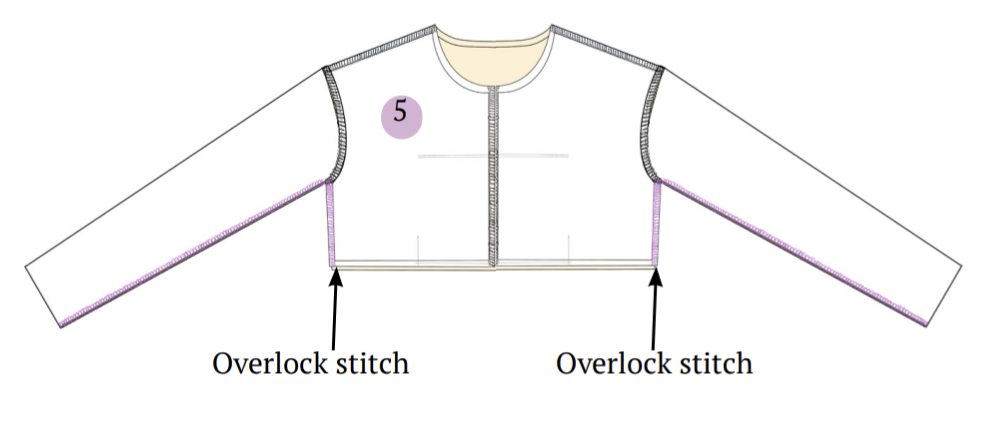
Step 5: Aligning Jacket and Overlocking Side Seams
Align the jacket with the right sides facing together, ensuring the side seams match up, and overlock along the side seam. Begin from the sleeve wrist side seam and continue towards the hem side seam.
Step 6: Preparing and Attaching Waistband to Bodice
Fold the waistband in half with the wrong sides facing together and overlock the sides.
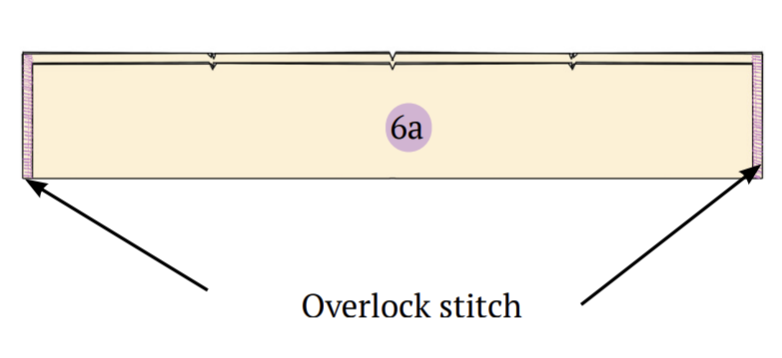
Pin the waistband piece to the bodice, aligning the center back and center front notches, and overlock along the seam allowance.
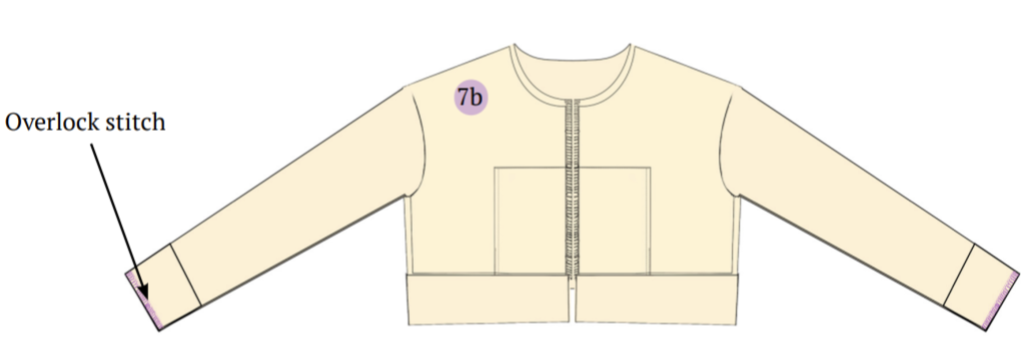
Step 7: Attaching Cuffs to Sleeves
Fold the cuff with the right sides together and sew the side edge.
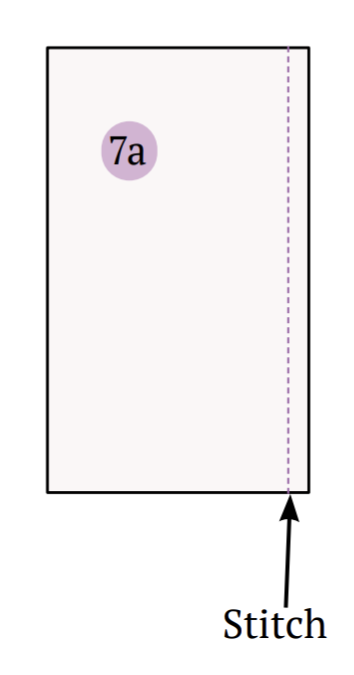
Flip the cuff so the right side is out, then fold it in half lengthwise. Align the bottom edge of the sleeve with the top edge of the cuff and pin them together. Make sure the side seams match up, then overlock along the seam allowance.
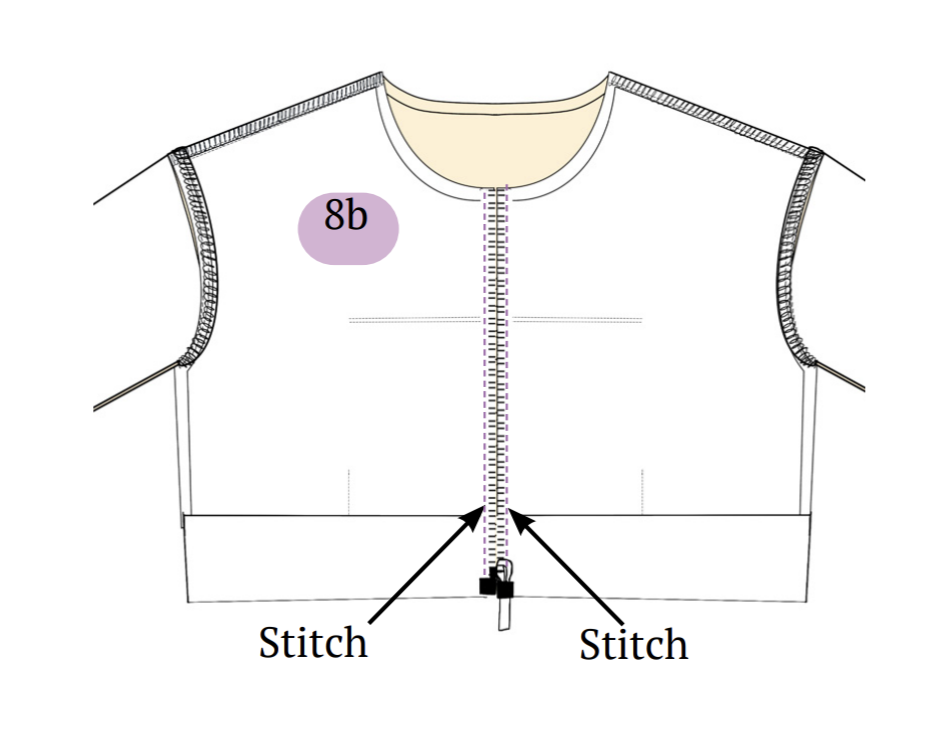
Step 8: Attaching the Jacket Zipper
Separate the zipper and position it on the center front of the bodice, with right sides together. Make sure the slider and bottom stop are on the right side, and the pins of the zipper side are on the left. Sew the zipper along the seam allowance using a single pressure foot.
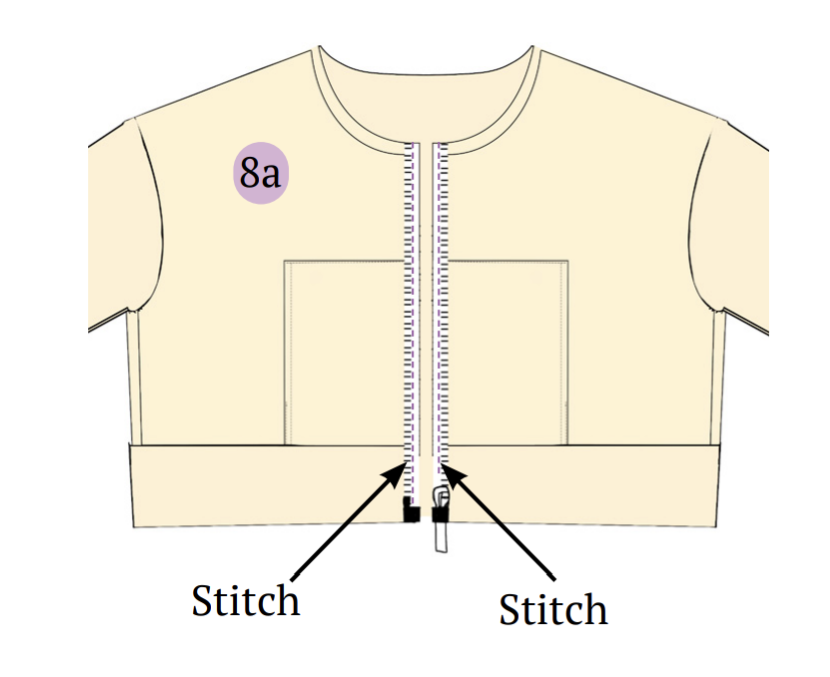
Flip the zipper seam so it faces towards the wrong side, then stitch along the edge of the zipper to secure it.
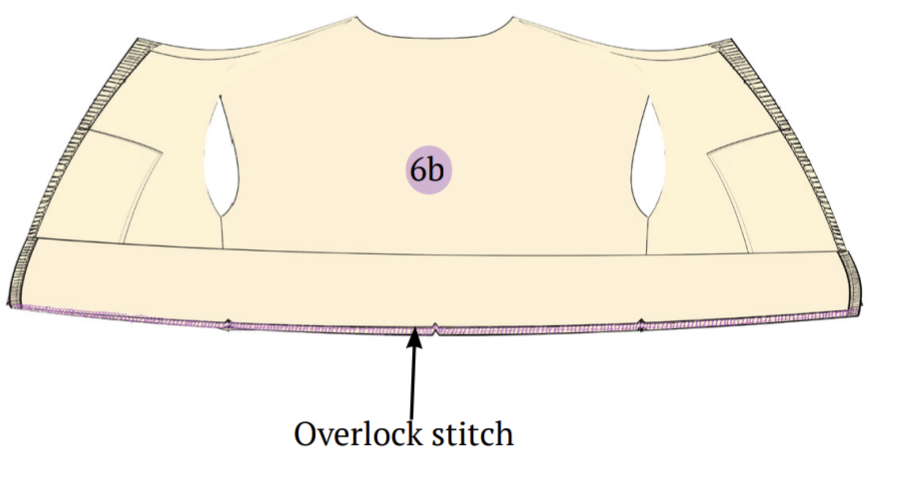
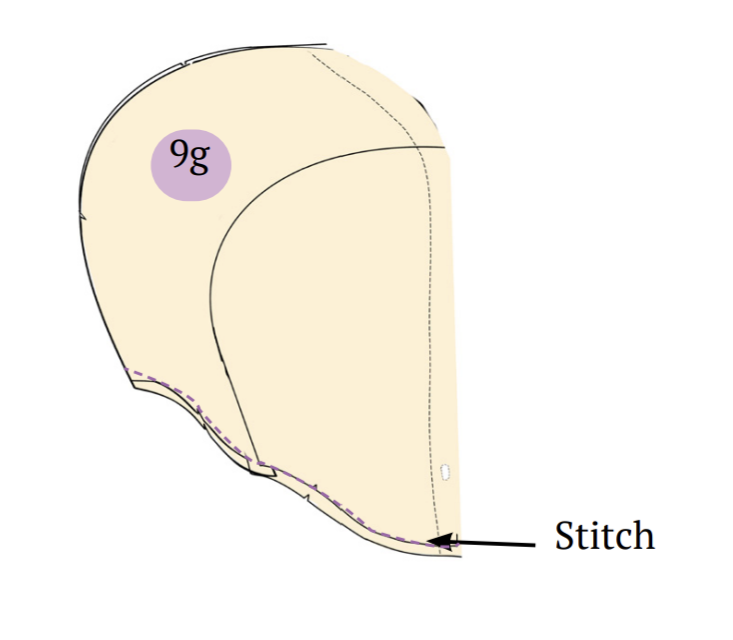
Step 9: Preparing and Attaching the Hood to the Bodice
Place the hood side panel on the hood center piece, aligning the center piece seam and hood side panel’s notches. Stitch along the seam.
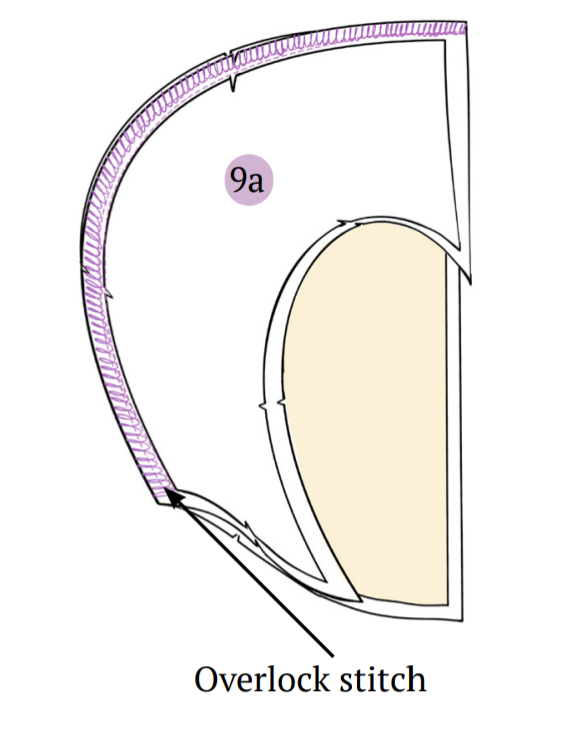
Repeat the process for the other hood side piece.
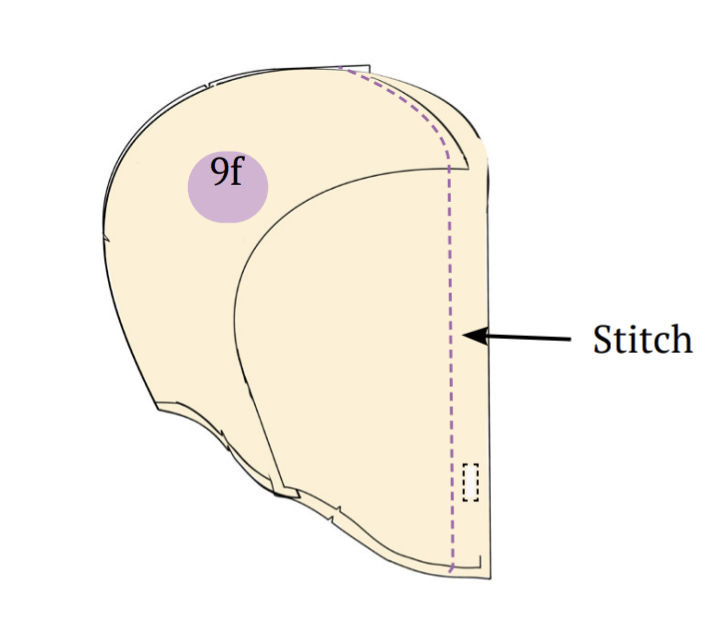
Create a hole on the hood main piece for inserting a cord. Position the hole on both sides, 2 inches above the neckline round and 0.5 inches from the top edge.
There are three methods to finish the hole: using rivets, creating a buttonhole, or cutting a 0.5-inch wide hole and folding the edges towards the wrong side, then stitching around the hole by pressing the fabric edges.
Stitch the hood main piece and hood lining together, with right sides facing each other. Align the top edges and sew along the seam allowance.

Turn the hood inside out, then top stitch along the top edge following the cord guideline provided in the pattern.
Stitch the neckline round edge of the hood pieces together.
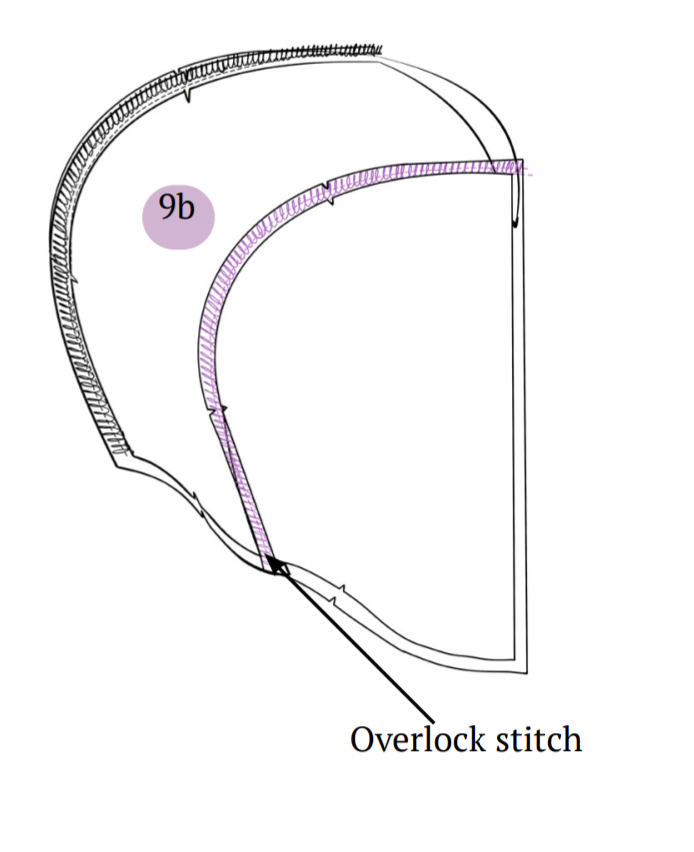
Step 10: Attaching the Hood to the Bodice Neckline
Stitch the hood to the bodice neckline round by placing them with right sides facing together, then use an overlock stitch around the neckline round.

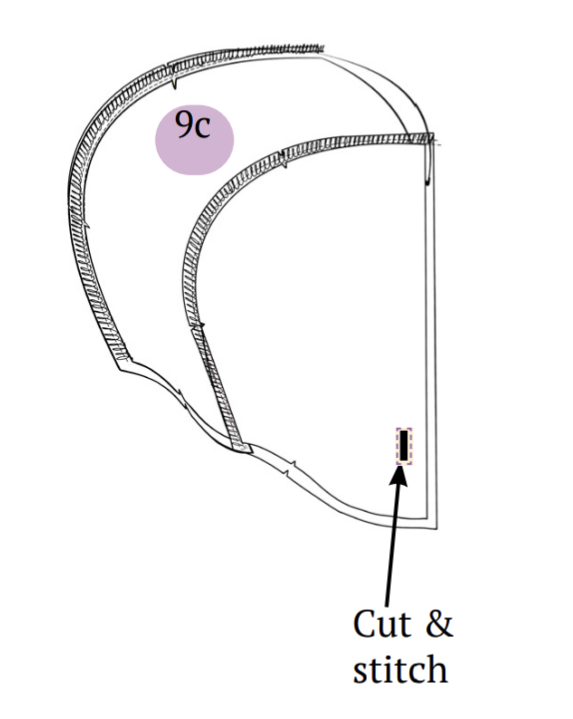
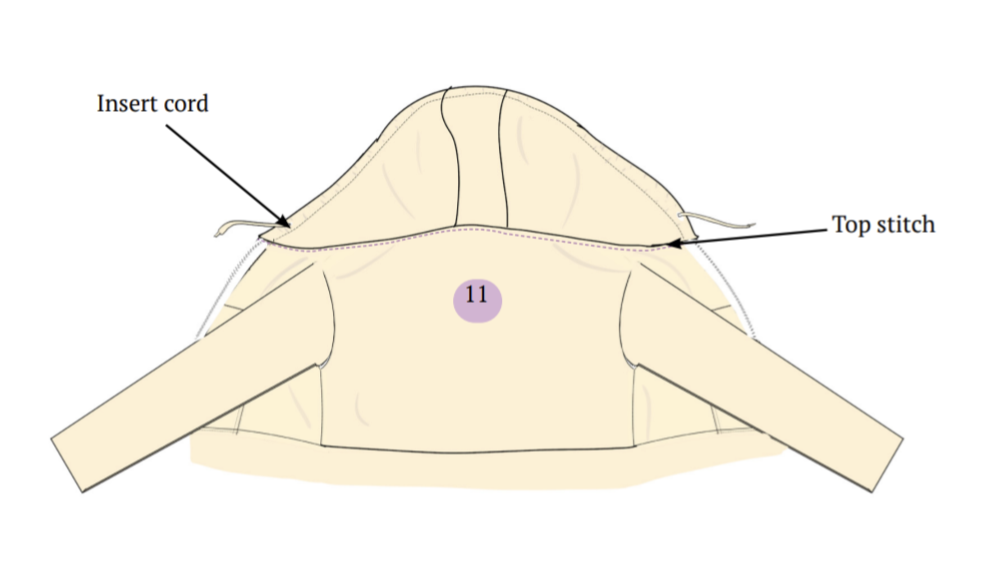
Step 11: Top Stitching and Inserting Cord
Top stitch along the edge of the neckline round, pressing the neck round seam allowance toward the bodice side. After completing the stitching, insert the cord into the hoodie.
Summary
That’s all! I believe this project is incredibly rewarding, and people will be impressed that you crafted it yourself. It’s a fantastic addition to any wardrobe and doesn’t demand much fabric, so don’t hesitate to give it a go!
Check out some final images of this adorable zip-up hoodie created with the Winslet’s RUE Zip-Up Hoodie Pattern:

How do you feel about hoodies? Will you be making this hoodie or any other projects? Let me know in the comments below!
Join the Winslet’s sewing community by sharing your masterpiece with the hashtag #madewithwinslets!


