How to Sew Cargo Pants?
In the past few years, I’ve attempted to make pants, but it hasn’t been my strong suit. Pants are sometimes challenging to sew, presenting two main hurdles: finding a suitable pattern and mastering the art of creating well-fitted pants.
Guess what? I recently used the Winslet’s RAINA Cargo Pants Pattern, and it’s been a game-changer for me as they are “Wide Straight Cargo Pants,” which means they have a roomier fit and a classic straight leg style, just like typical cargo pants.
They’re labeled as intermediate level, so they might be a bit tricky for beginners, but don’t let that deter you! With a little patience, you’ll nail the sewing process and end up with some fabulous pants.
What supplies do you need to sew cargo pants?
The basic supplies that you’ll need to sew cargo pants are a Sewing Pattern (I used Winslet’s RAINA Cargo Pants Pattern for this project), Sewing Machine, Tape Measure, Chalk, Shears, Pins, Iron, Needles, Thread (preferably 3-ply polyester), Thread Cutter, Zipper, Fusible Interfacing, Buttons, and a Buttonhole Attachment.
Fabric Recommendation
Cargo pants are compatible with a range of different fabrics. Consider using denim, cotton, cotton-wool blend or light to medium weight knits like fleece and terry. These are excellent choices due to their durability, comfort, and suitability for the structured yet relaxed style of cargo pants.

The model above is wearing a cargo pant made from Winslet’s RAINA Cargo Pants Pattern. The cargo pant is made from cotton twill slub fabric, recommended for their natural feel, low maintenance, durability, and effortless care.
Size Charts
The cargo pants sewing pattern measurements for sizes (XS, S, M, L, XL, 2XL, or 3XL) are detailed below. Choose a size that corresponds most closely to your body measurements.
It’s worth noting that if your exact measurements are not listed in the table, you may want to consider ordering a size larger.
The size chart includes measurements in both inches and centimeters for your reference.
Body Measurements
| XS (inches) | XS (cm) | S (inches) | S (cm) | M (inches) | M (cm) | L (inches) | L (cm) | XL (inches) | XL (cm) | 2XL (inches) | 2XL (cm) | 3XL (inches) | 3XL (cm) | |
| Bust | 32 | 81.3 | 34 | 86.4 | 36 | 91.4 | 38 | 96.5 | 40 | 101.6 | 42 | 106.7 | 44 | 111.8 |
| Waist | 26 | 66.0 | 28 | 71.1 | 30 | 76.2 | 32 | 81.3 | 34 | 86.4 | 36 | 91.4 | 38 | 96.5 |
| Hip | 34 | 86.4 | 36 | 91.4 | 38 | 96.5 | 40 | 101.6 | 42 | 106.7 | 44 | 111.8 | 46 | 116.8 |
Final Garment Measurements
| XS (inches) | XS (cm) | S (inches) | S (cm) | M (inches) | M (cm) | L (inches) | L (cm) | XL (inches) | XL (cm) | 2XL (inches) | 2XL (cm) | 3XL (inches) | 3XL (cm) | |
| Waist Round (Stretched) | 26 | 66 | 28 | 71.1 | 30 | 76.2 | 32 | 81.2 | 34 | 86.3 | 36 | 91.4 | 38 | 96.5 |
| Full Length (From Waist) | 38 | 96 | 40 | 101 | 42 | 106.6 | 44 | 111.7 | 46 | 116.8 | 48 | 121.9 | 50 | 127 |
Yardage Chart
| Width of the Fabric | XS (yards) | XS (meters) | S (yards) | S (meters) | M (yards) | M (meters) | L (yards) | L (meters) | XL (yards) | XL (meters) | 2XL (yards) | 2XL (meters) | 3XL (yards) | 3XL (meters) |
| 45” | 1.83 | 1.62 | 2.15 | 1.90 | 2.53 | 2.24 | 2.91 | 2.57 | 3.35 | 2.96 | 3.85 | 3.40 | 4.42 | 3.91 |
| 60” | 0.48 | 1.15 | 0.57 | 1.35 | 0.67 | 1.59 | 0.77 | 1.82 | 0.88 | 2.10 | 1.02 | 2.41 | 1.17 | 2.77 |
Steps To Follow For Sewing Cargo Pants
The Winslet’s RAINA Cargo Pants Pattern is suitable for printing on both A4/ US Letter and A0 size paper:
- Print at home: A4 Pattern or US Letter
- Print at a copy shop: A0 Pattern
Let’s dive into the steps for sewing your very own unique cargo pants:
Pattern Marking and Inventory
The fabric needs to be cut into following pieces:
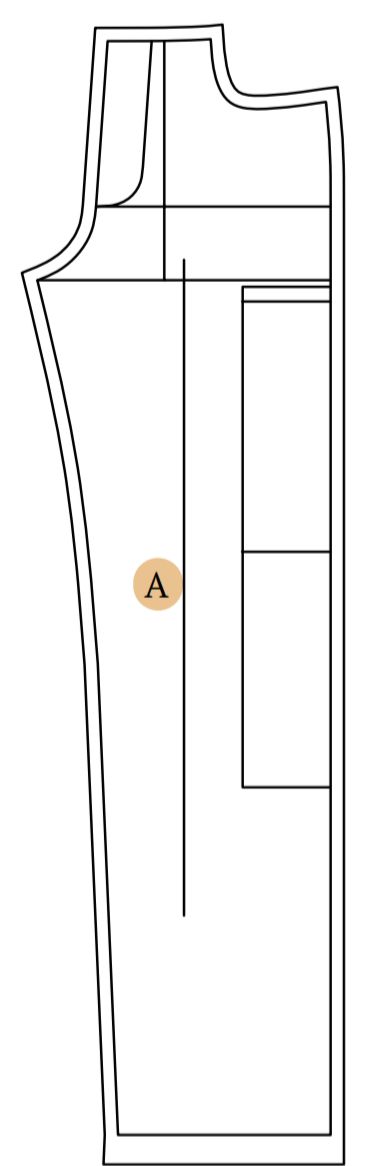
A. Front Leg – cut x2 fabric
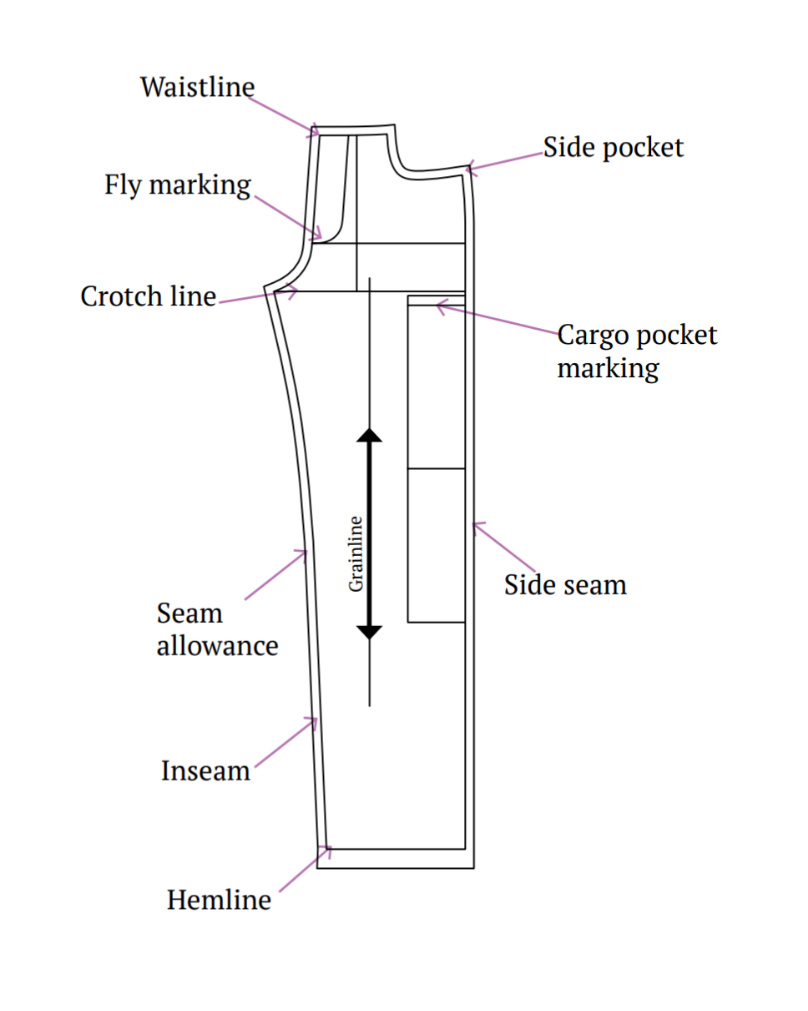
Note: An inseam refers to the measurement from your crotch down to your ankle bone, essentially representing the length of your inner leg.
B. Back Leg – cut x2 fabric
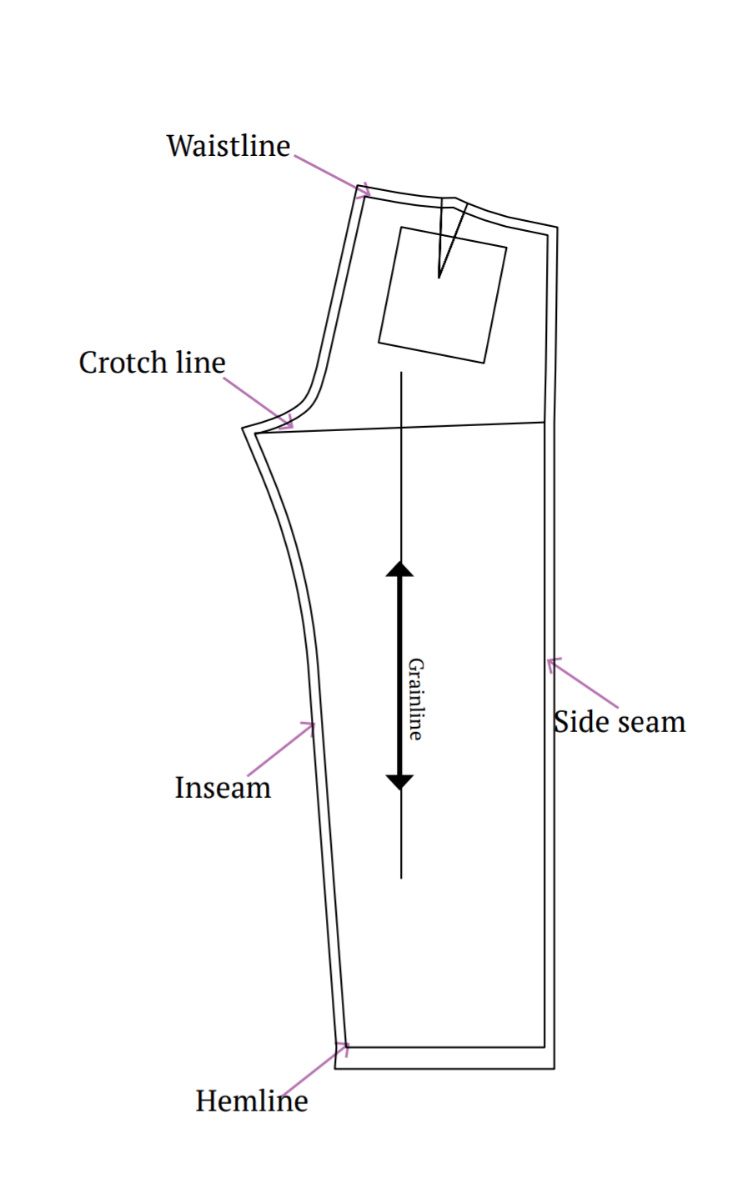
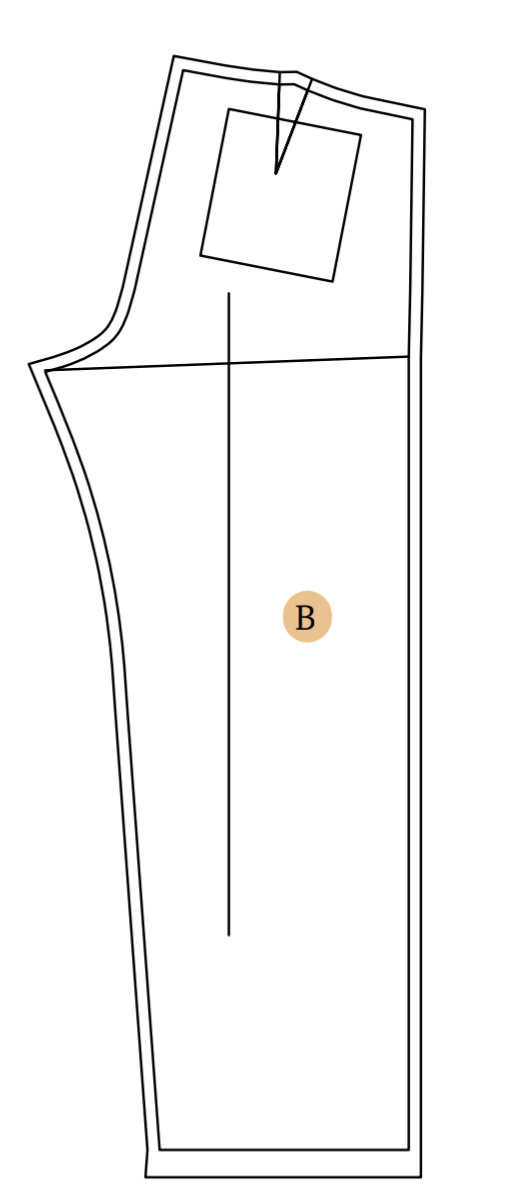
Note: An inseam refers to the measurement from your crotch down to your ankle bone, essentially representing the length of your inner leg.
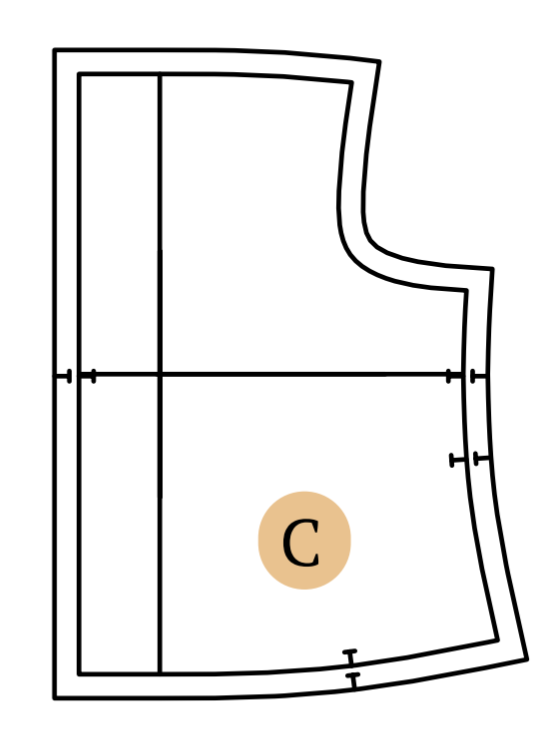
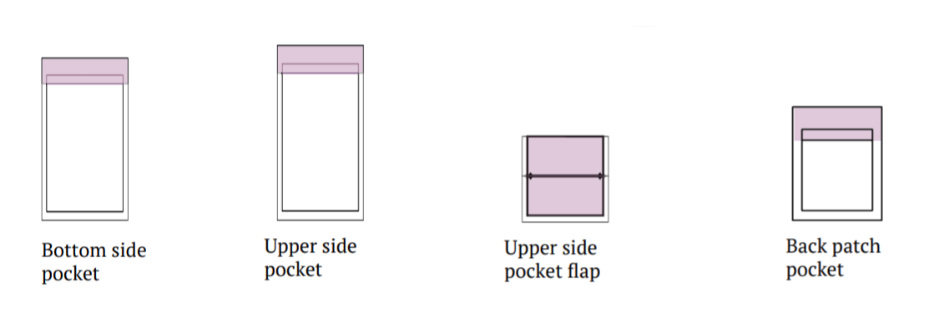
C. Side Pocket – cut x2 fabric

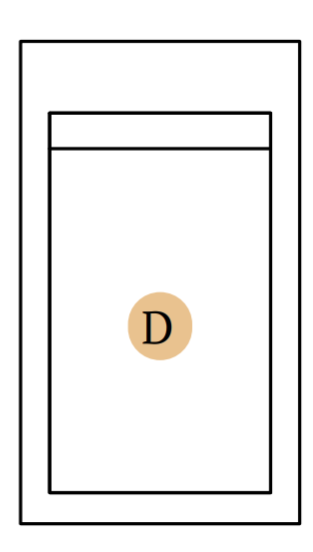
D. Upper Side Cargo Pocket – cut x2 fabric
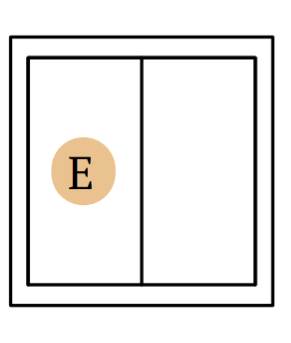
E. Upper Side Cargo Pocket Flap – cut x2 fabric
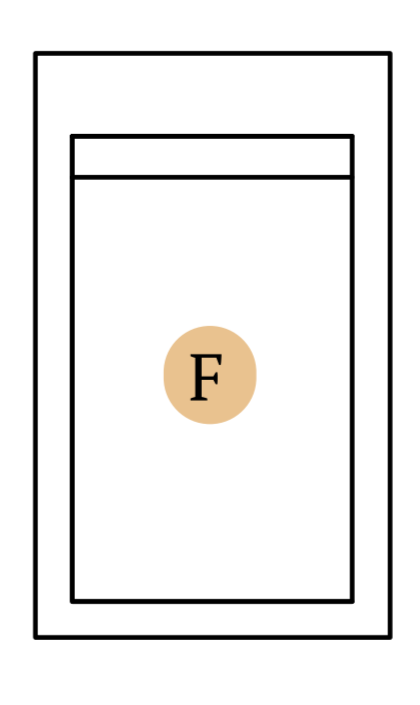
F. Bottom Side Cargo Pocket – cut x1 fabric
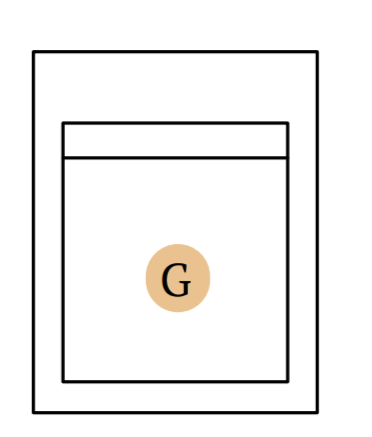
G. Back Patch Pocket – cut x2 fabric
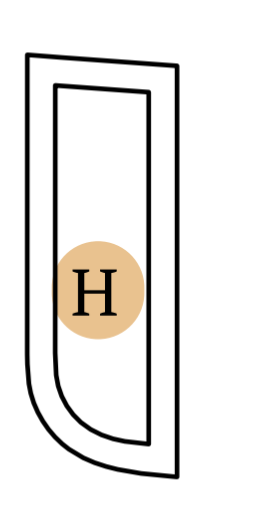
H. Fly – cut x1 fabric
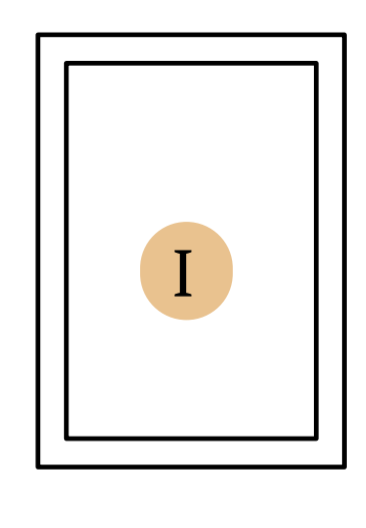
I. Fly Cover – cut x1 fabric
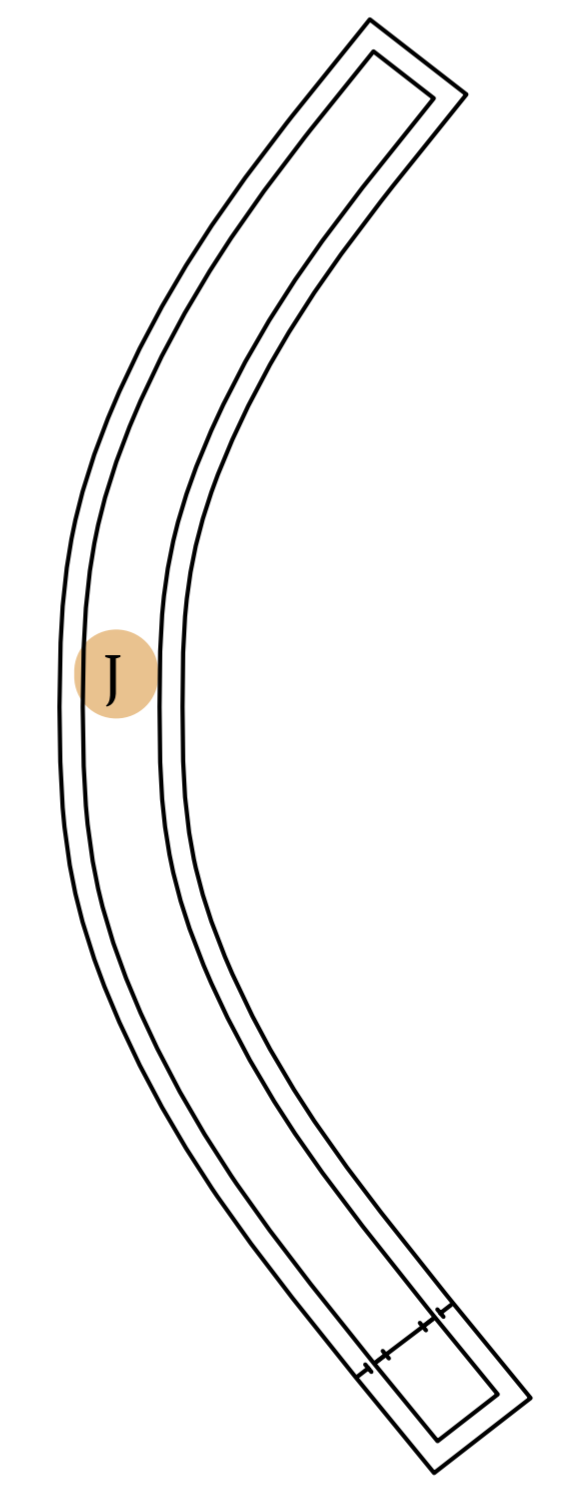
J. Waistband – cut x2 fabric

Cutting Layout

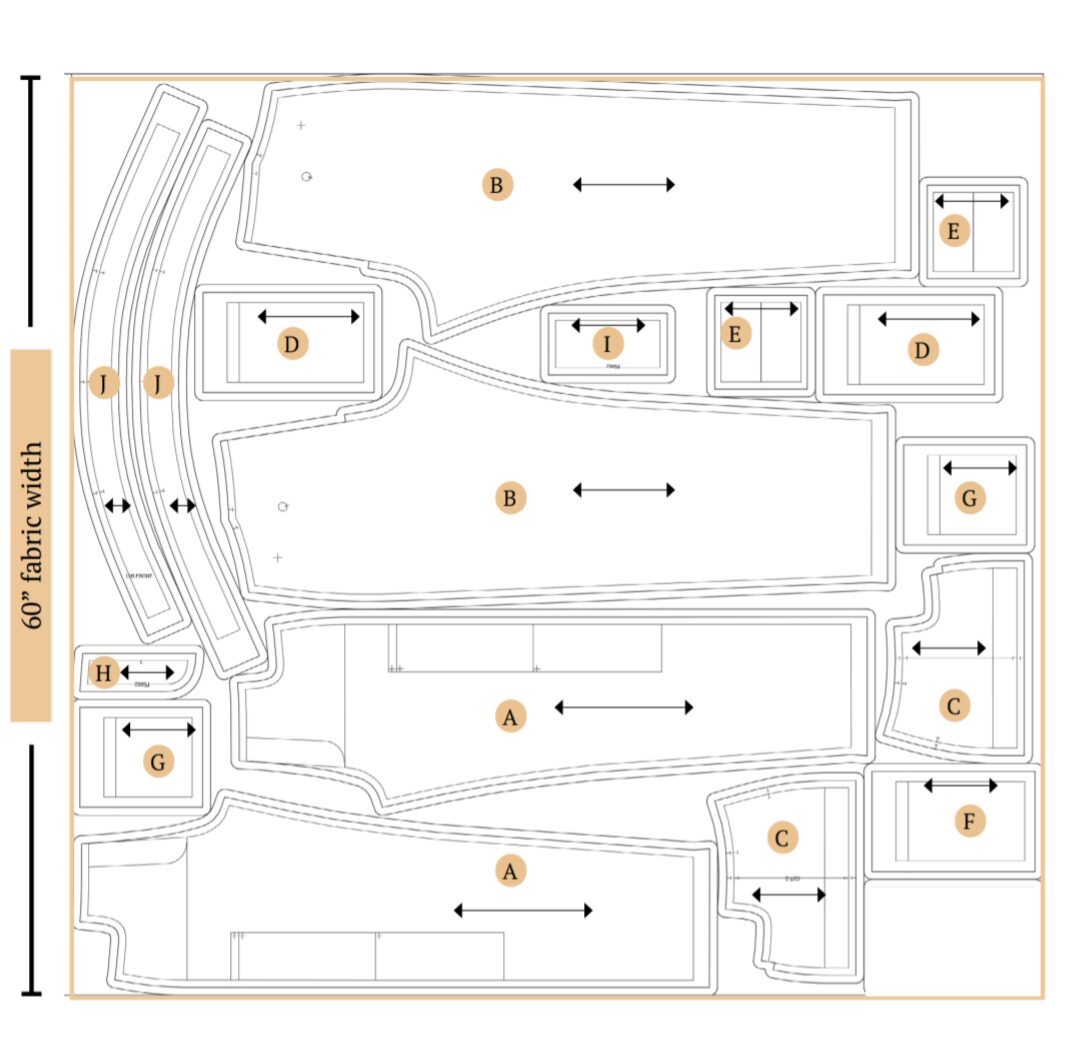
- Medium size has been used for representation of this cutting layout.
- Ensure the pattern layout is on-grain for fabric alignment.
- Use pins to secure fabric, aiding accurate cutting.
- These pattern layouts are non-directional.
- If using fabric with nap or prints, purchase additional length.
Fabric Preparation and Cutting
- Arrange pattern pieces as shown in the above cutting diagram, ensuring the grainline arrow aligns with the selvage.
- Trace and cut fabric pieces using fabric shears, removing any markings.
- Transfer pattern markings to the wrong side of the fabric, including circles, buttonholes, and fold lines, using a marking pen or chalk.
- Mark the center front for fold pieces to aid in accurate alignment.
Sewing Steps
Step 1: Attaching Side Seam Pockets
Position the left pocket piece with its right side facing the left front leg’s pocket opening marking. Pin them together and stitch along the opening line.
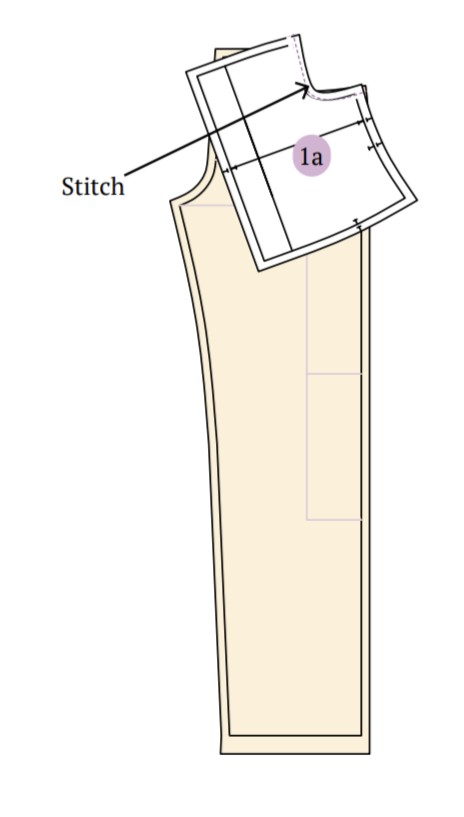
Open the seam and understitch the pocket.
Flip the pocket inside out and press it flat. Then, topstitch along the edge of the opening.
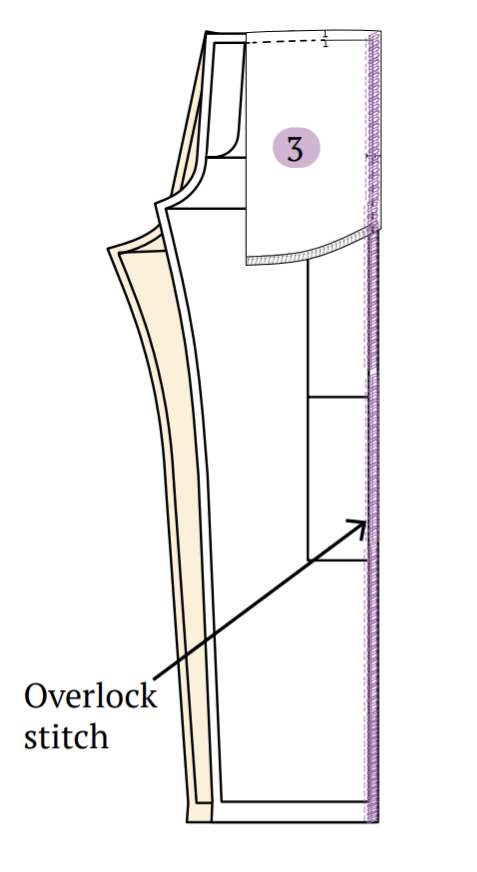
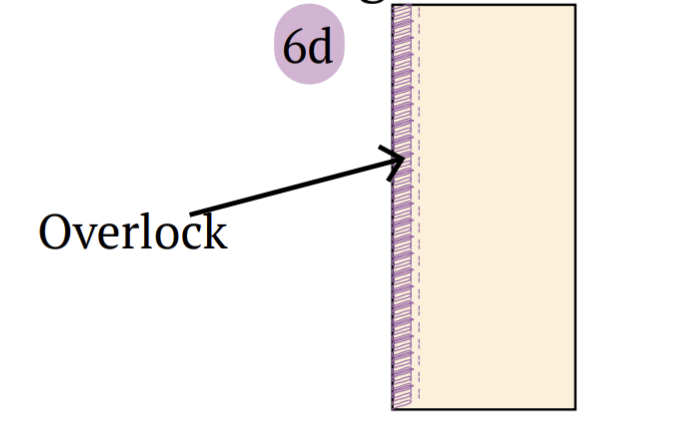
Fold the pocket facing so the right sides are together and pin them. Finish the pocket end with an overlock stitch.
Stitch a few stitches to secure both sides of the pocket opening up to the indicated notches.
Repeat the same process to attach the pocket to the opposite side of the leg piece.
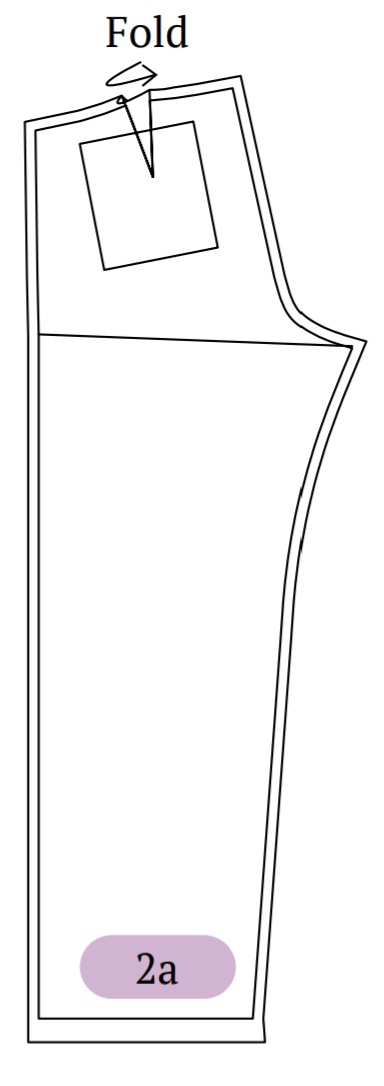
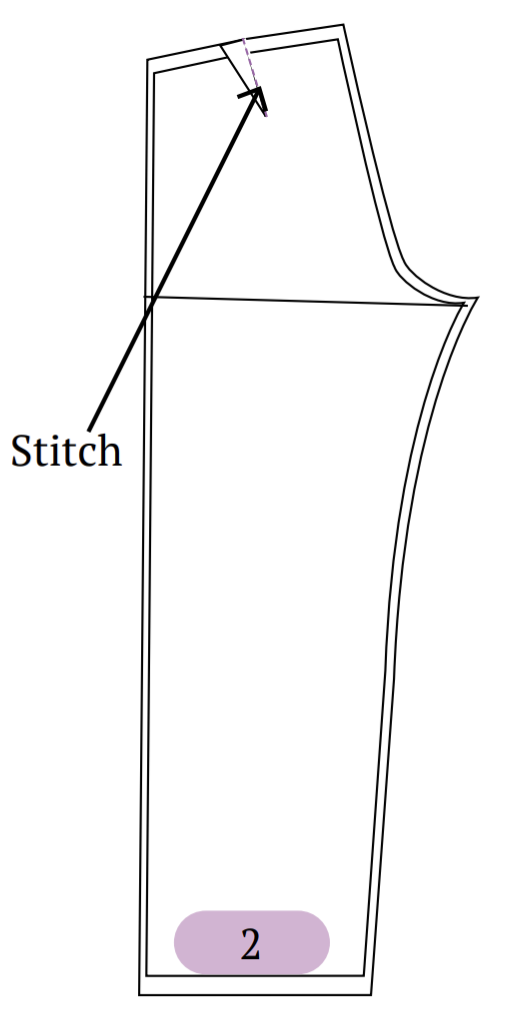
Step 2: Dart Folding and Stitching
Fold the fabric right side to right side, aligning it with the dart on the back leg piece.
Stitch along the dart leg on the wrong side to secure the dart fold. Press the dart to one side to minimize bulk in the finished garment.
Step 3: Assembling the Front and Back Pieces
Join the front and back pieces by aligning their right sides together and sewing the side seam.
Step 4: Preparing Cargo Pockets
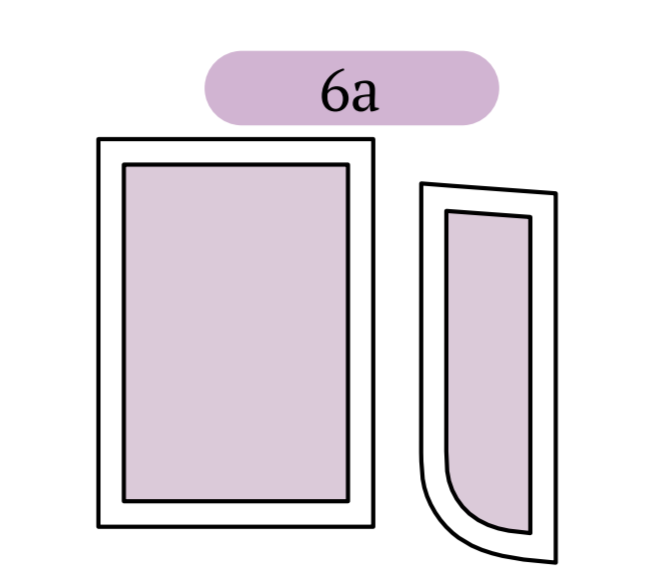
Cut fusible interfacing fabric for the cargo pocket flap, omitting seam allowance, and the opening seam allowance of the cargo pocket piece. Attach the adhesive side to the wrong side of the pocket pieces using an iron.

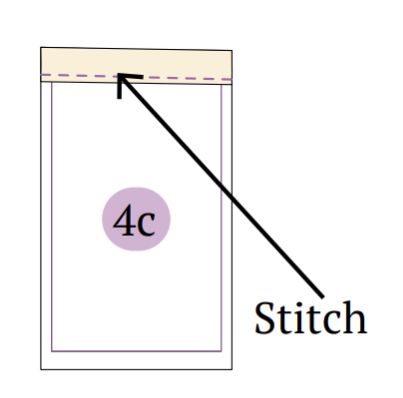
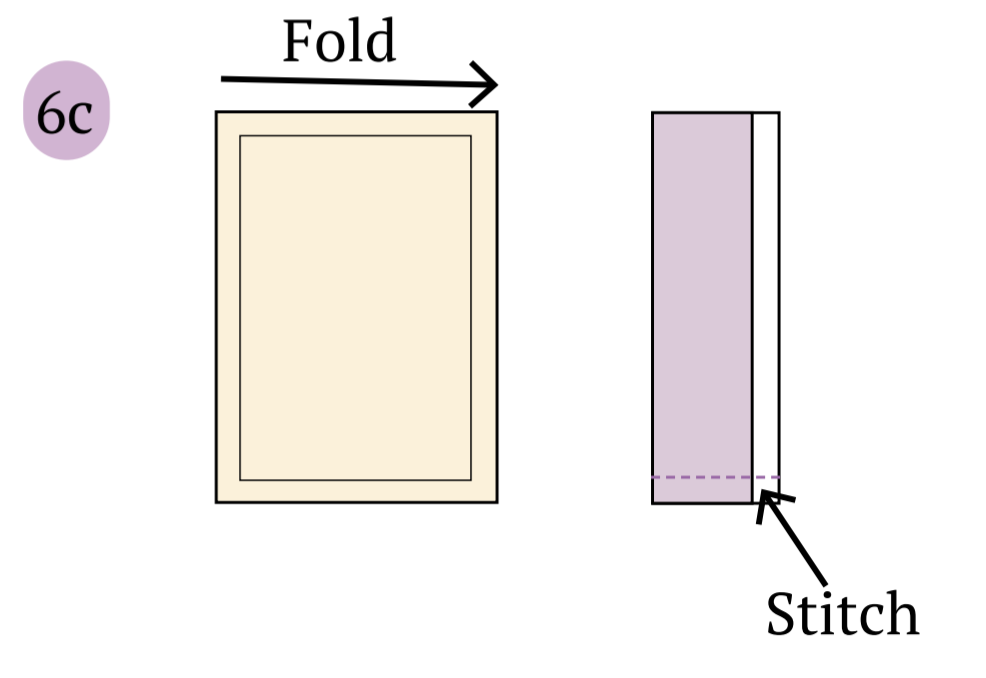
Fold the opening of the cargo pocket piece twice.
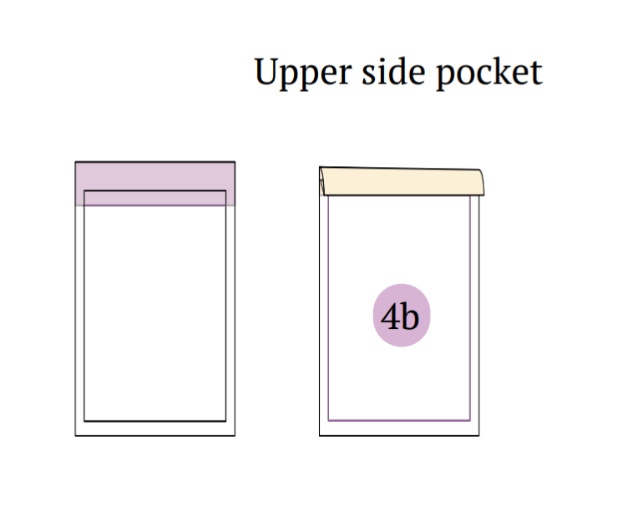
Stitch at the edge to secure the fold.
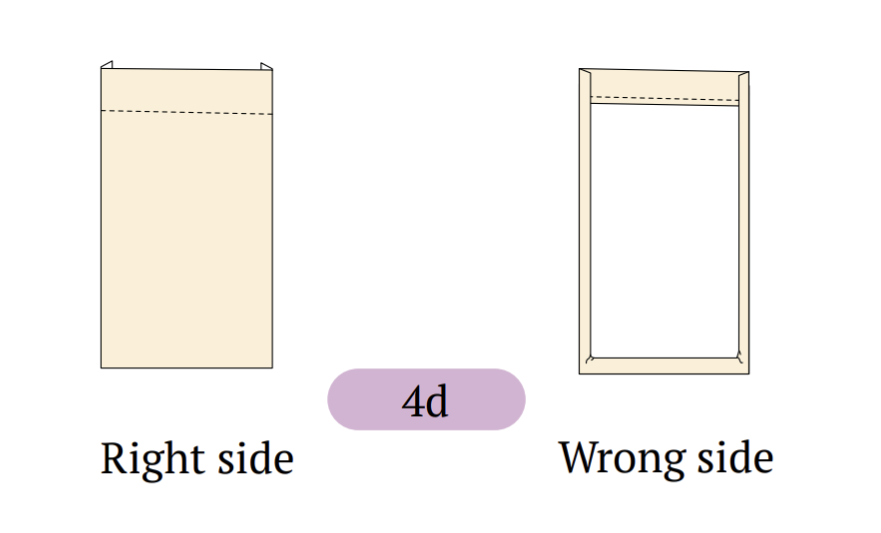
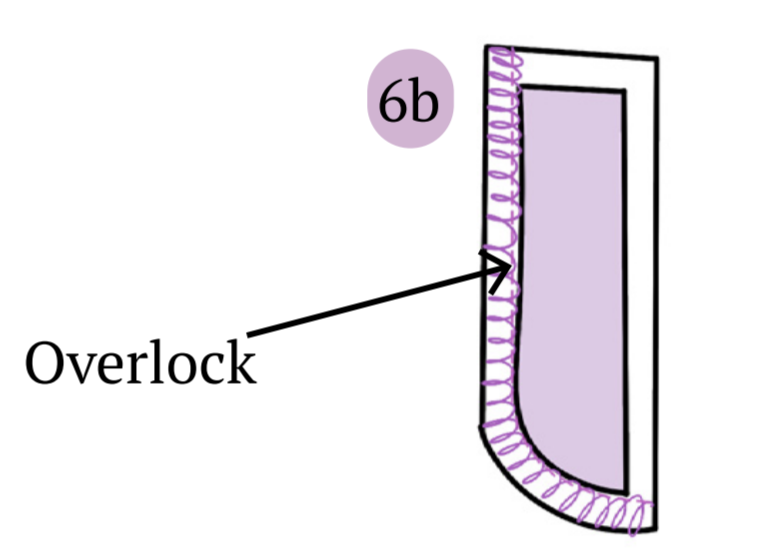
Fold and press the seam allowance of the pocket to the wrong side. Repeat this step for the other pockets.
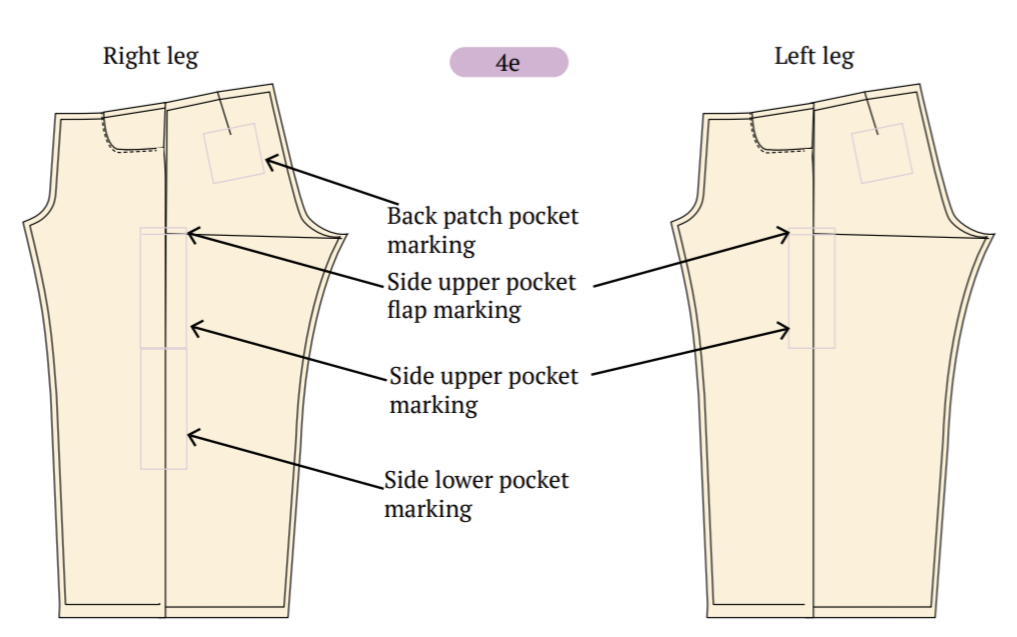
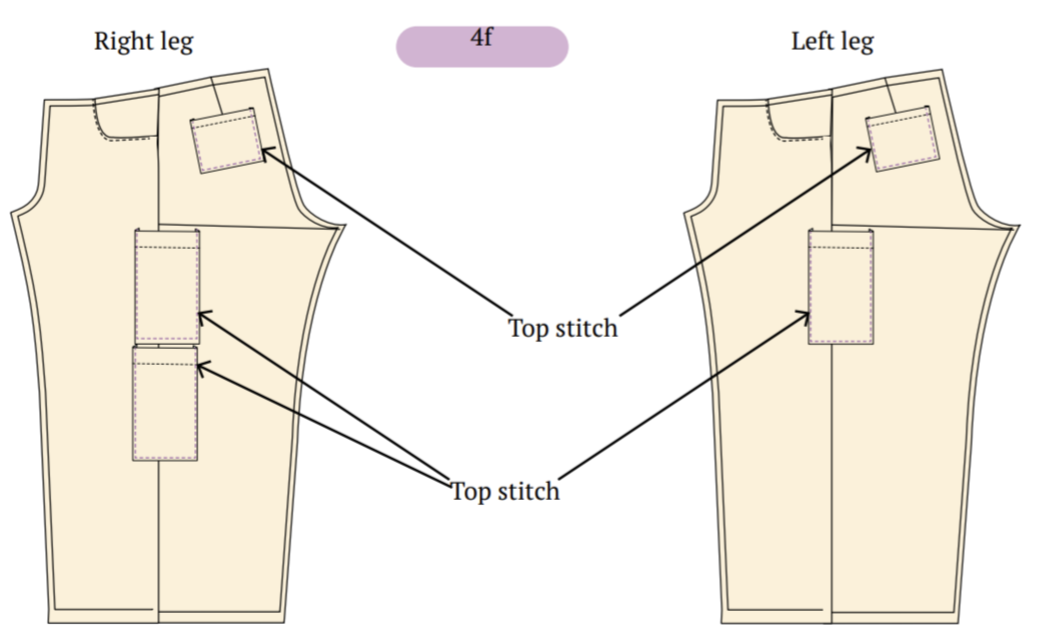
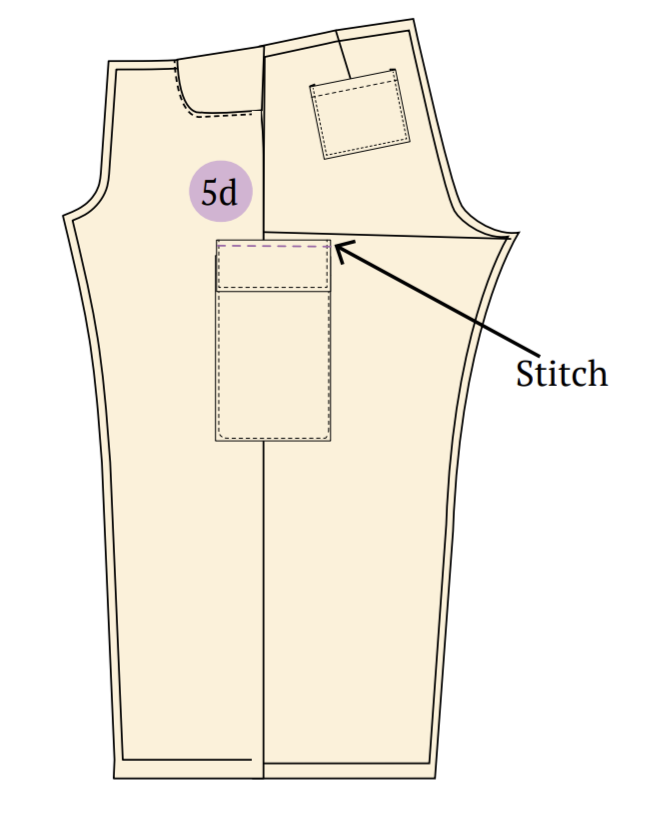
Use the provided leg patterns as guides to mark the side pockets and back patch pocket lines.
Secure both sides and the bottom of the pockets with top stitching.
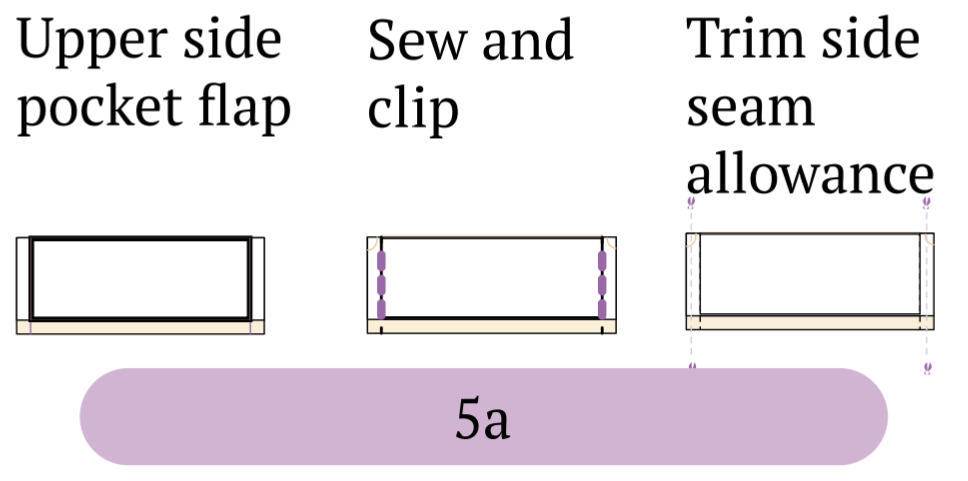
Step 5: Attaching Cargo Pocket’s Flap
Fold the pocket flap along the designated fold line, with right sides together. Stitch on both sides of the seam allowance. Clip at the corner, then flip the flap to the right side.

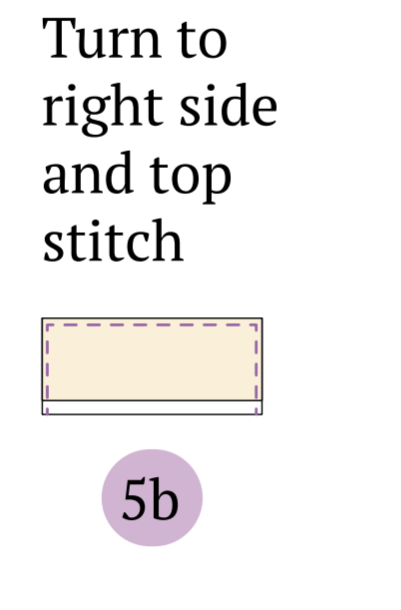
Sew along the edges of the flap, leaving the opening side unstitched.
Position the flap at the marked location on the pocket and sew along the line. Trim any excess seam allowance, then flip and press the flap.
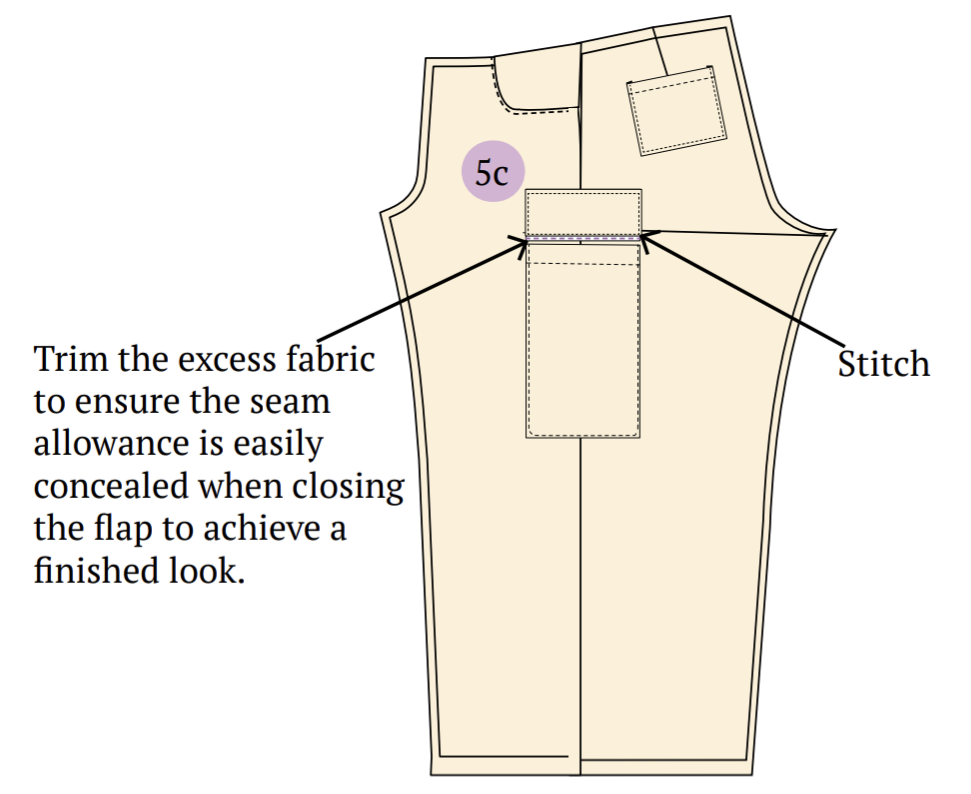
Stitch along the edge of the flap (0.5 cm) to conceal the trimmed seam allowance underneath. Repeat this process for the opposite side of the leg cargo pocket.
Tip: Trim the seam allowance on the sides for a neater rectangular flap.
Step 6: Attaching Fly and Zipper
Position the fly and fly cover with their wrong sides up, ensuring they are smooth and unwrinkled. Place the interfacing (cut according to the provided pattern, excluding seam allowance) and fuse it onto the fabric using a steam iron.
Overlock the edges of the fly.
Fold the fly cover in half and stitch the bottom edge with a lock stitch.
Turn the fly cover inside out, aligning the wrong sides together, and overlock the side edge.
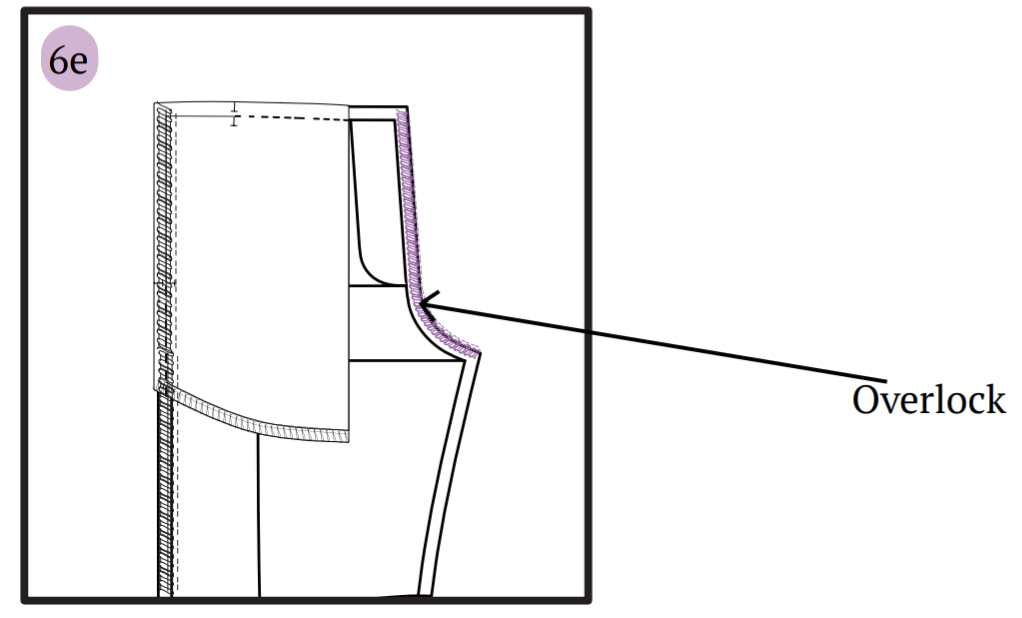
Overlock the crotch area for the front leg. Repeat this step for the other front leg.
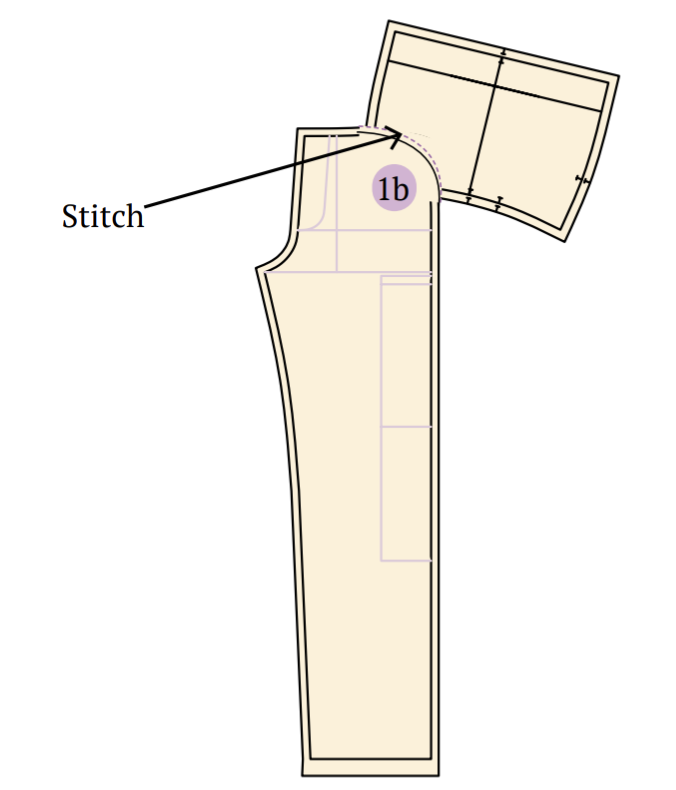
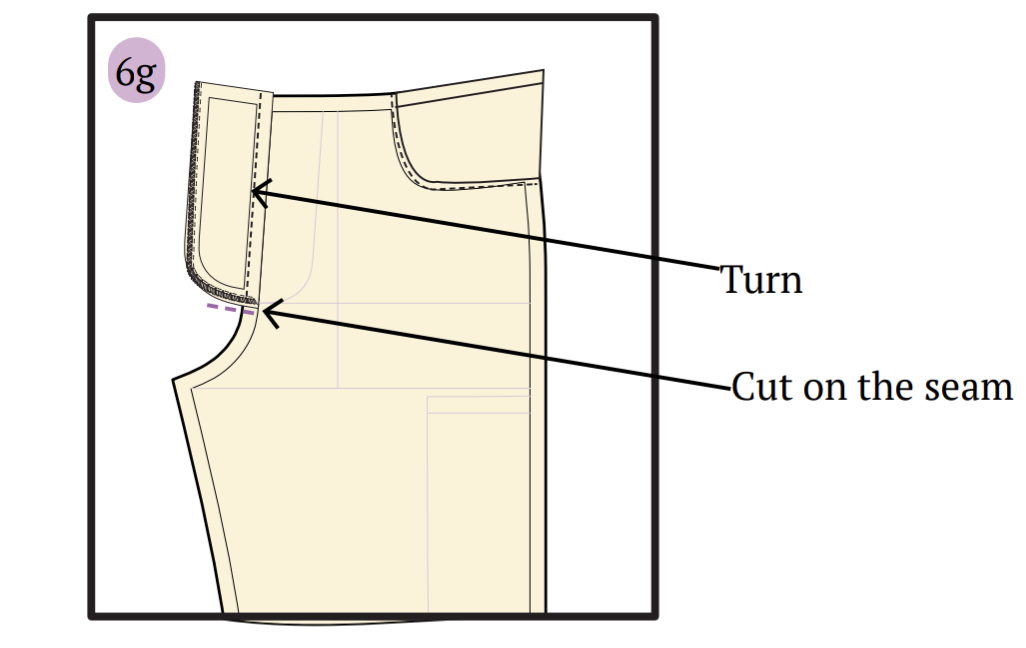
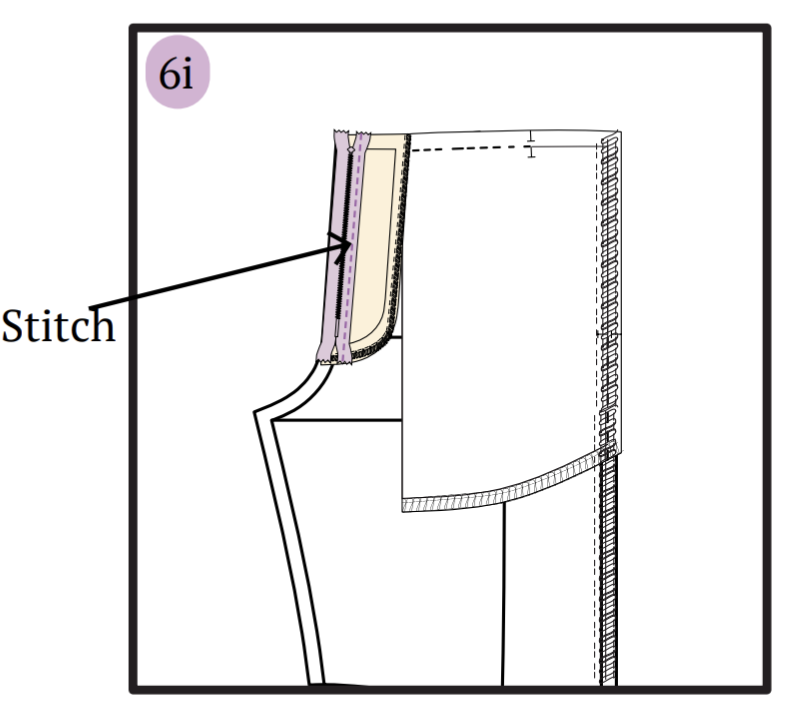
Place the fly piece on the left front leg, aligning the right sides together, and sew them together.

Next, turn them inside out and cut the seam of the leg crotch where the fly ends.
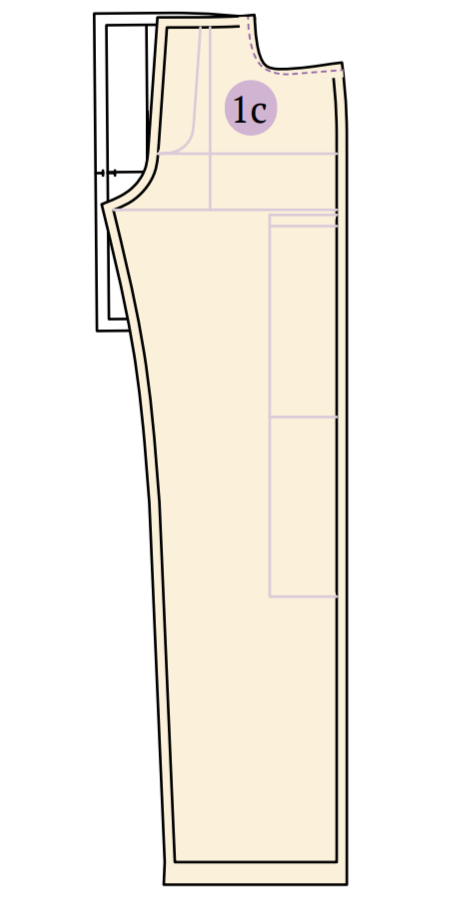
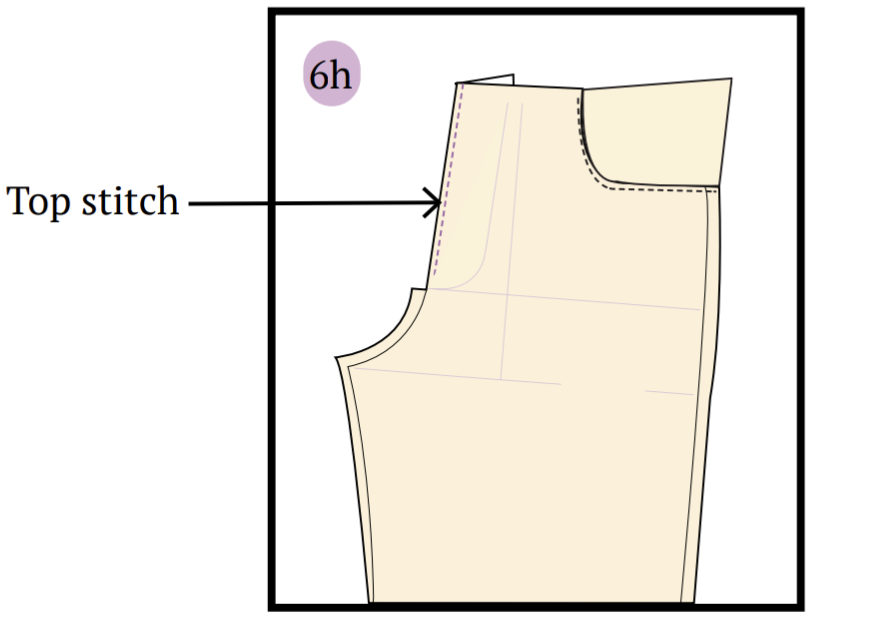
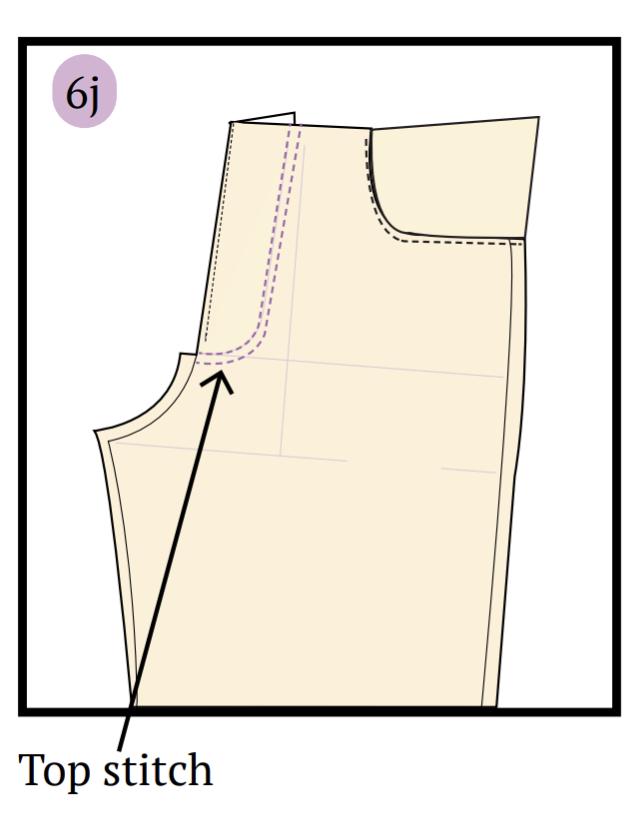
Finish by top-stitching along the edge of the fly.
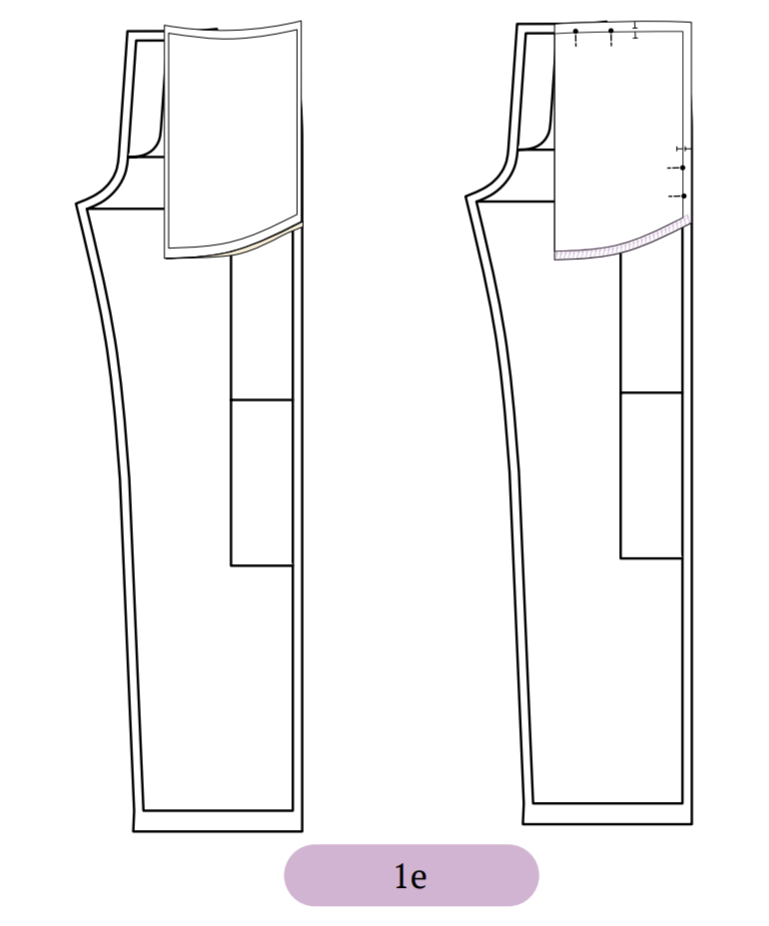
Align the zipper right sides together at the seam line edge and sew on the other side of the zipper tape, away from the seamline.
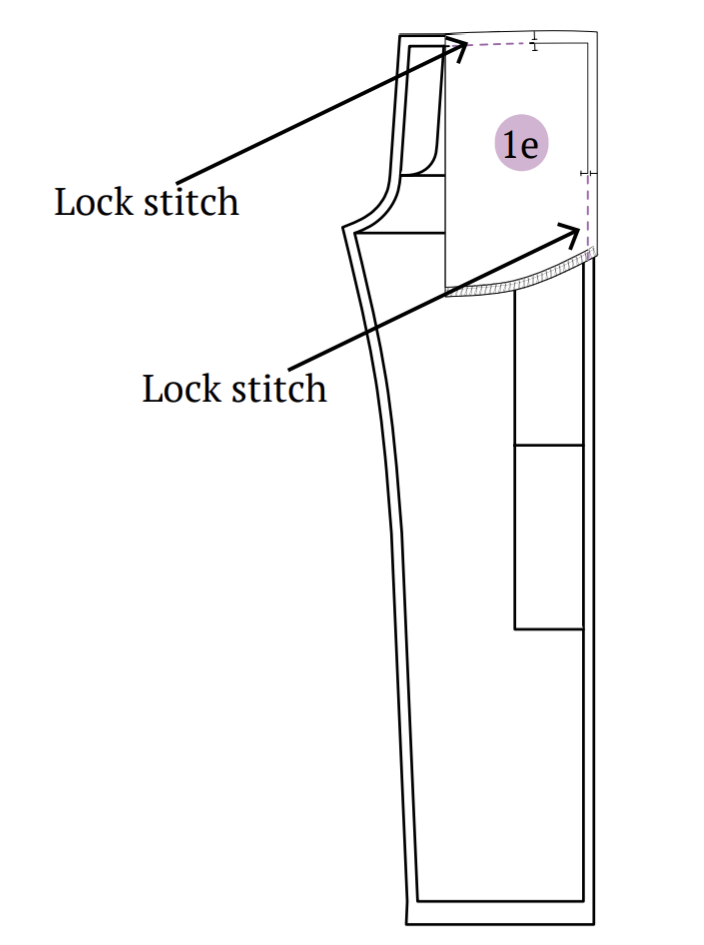
Using the provided fly markings on the front leg pattern as a guide, topstitch along the leg.
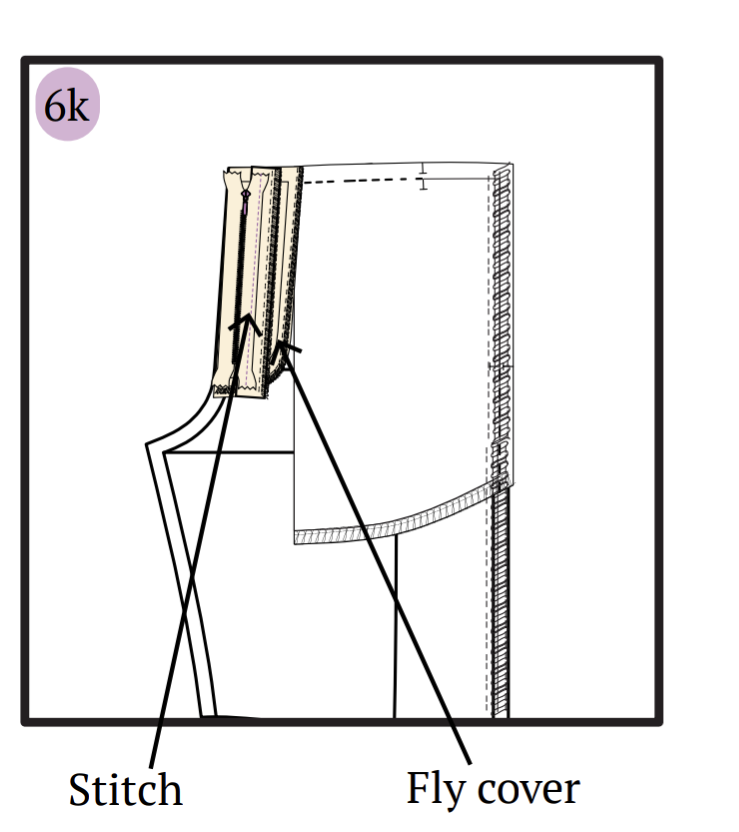
Place the prepared fly cover on top of the leg, aligning it with the fly crotch area, ensuring the overlocked side is on the outer edge. Stitch the other side of the zipper to the fly cover.
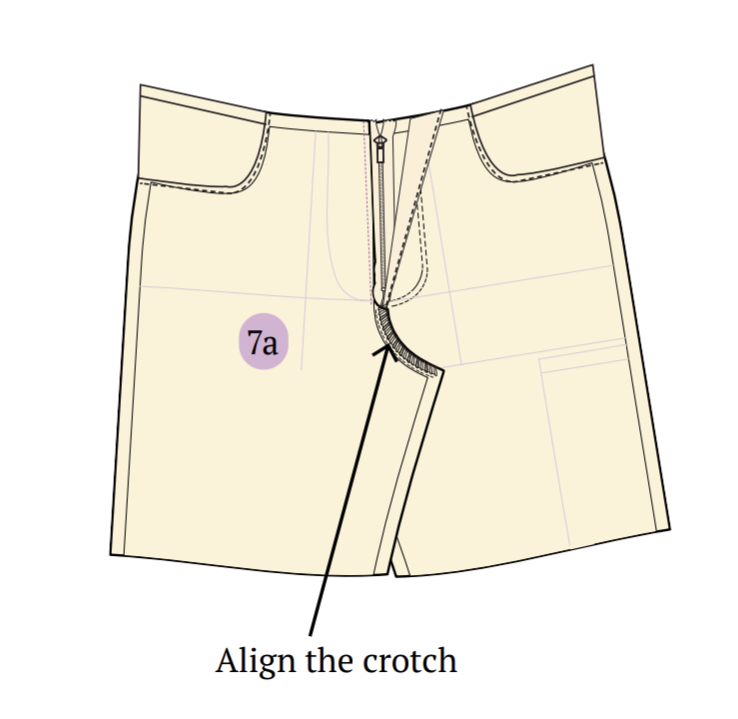
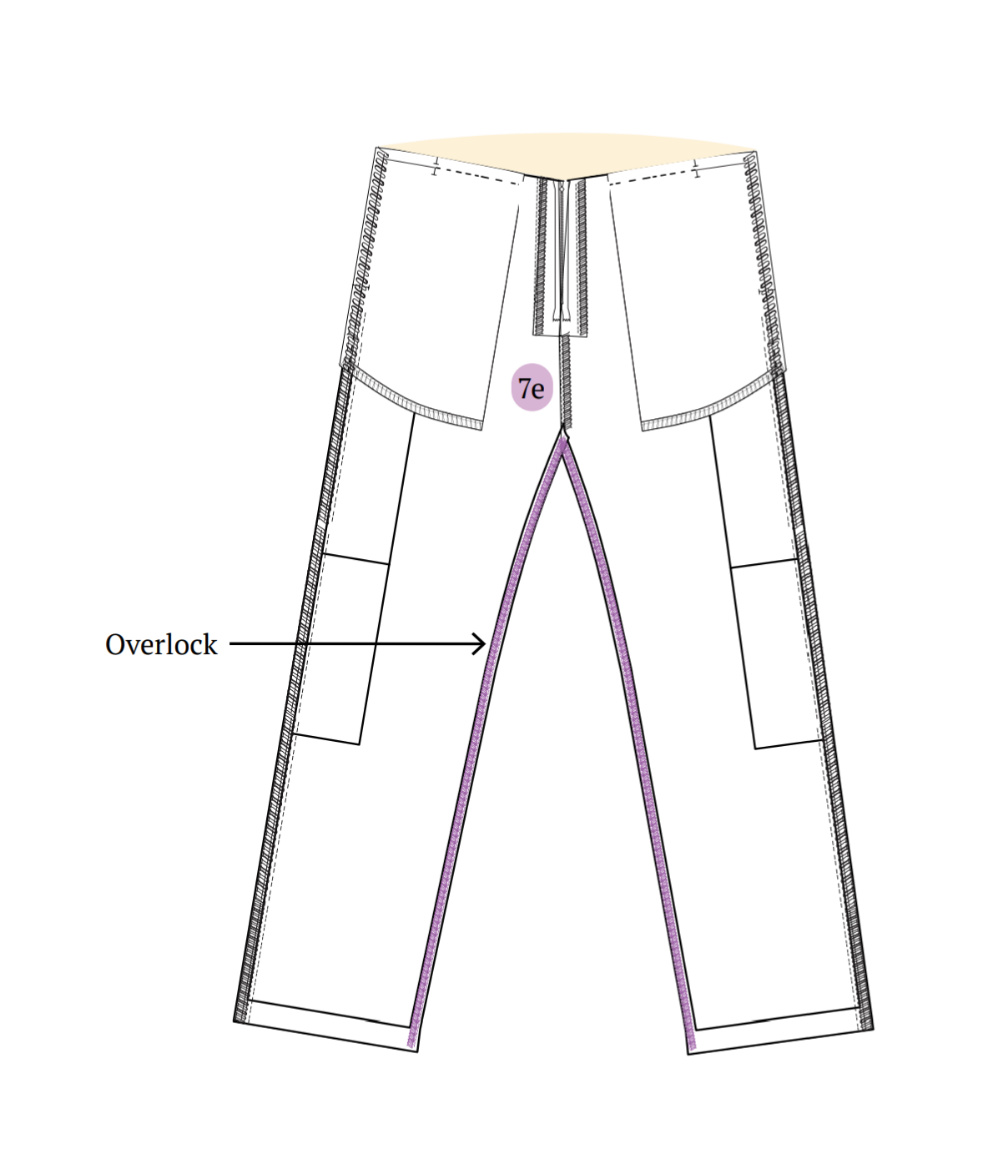
Step 7: Stitching the Crotch
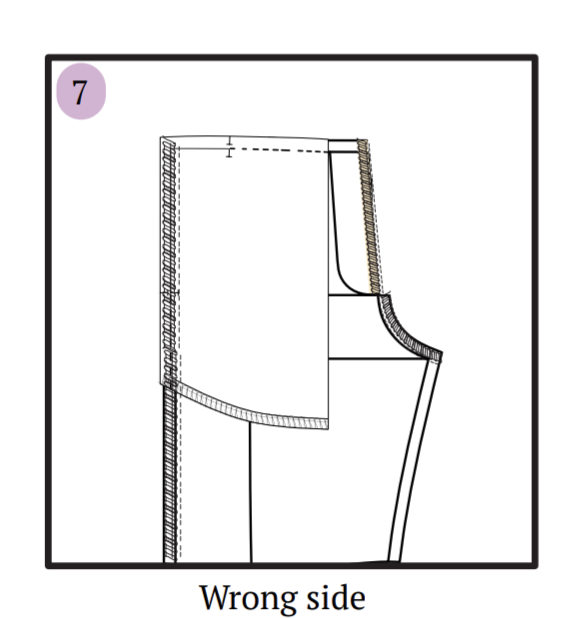
Align both front leg crotches together.
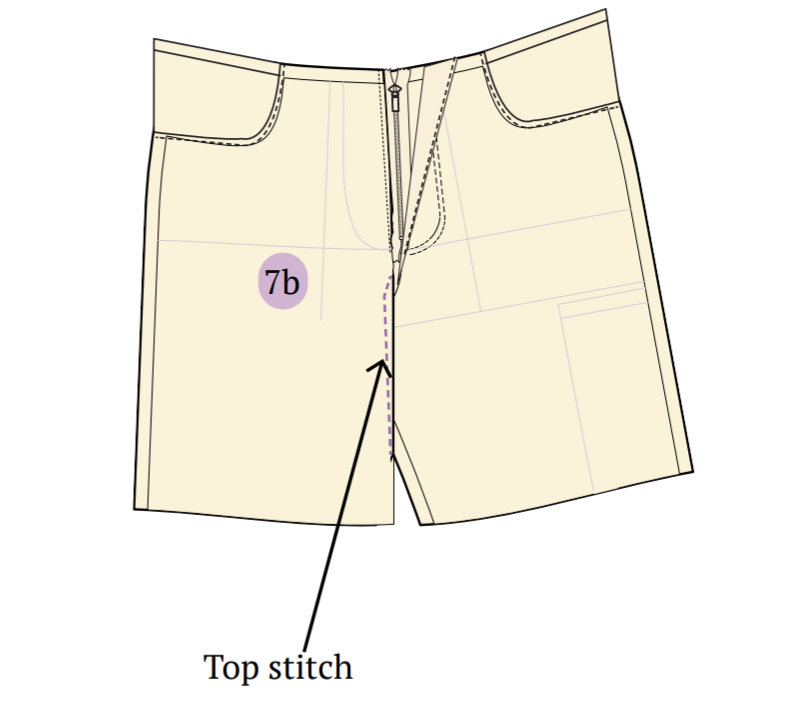
Fold the seam allowance of the crotch towards the wrong side and topstitch along the seam edge.
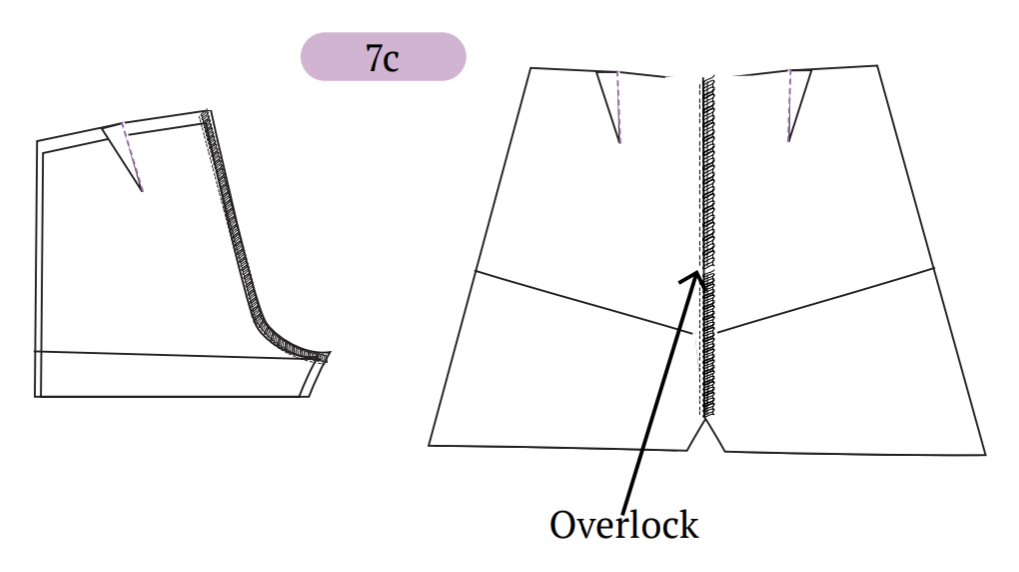
Align both back leg crotches together, facing right sides together, and overlock along the crotch seam line.
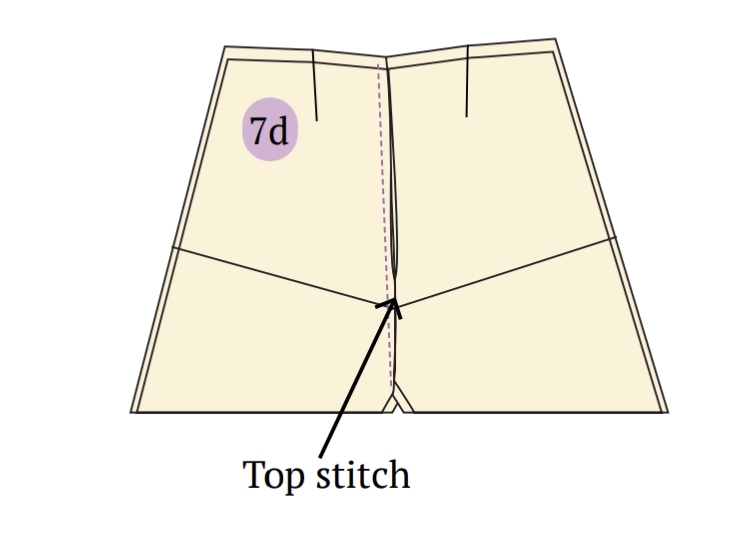
Topstitch along the seam of the crotch.
Match the crotch end of the front and back legs and place them together, facing right sides together. Begin overlocking the inseam from one hem to the crotch, continuing to the other hem end.
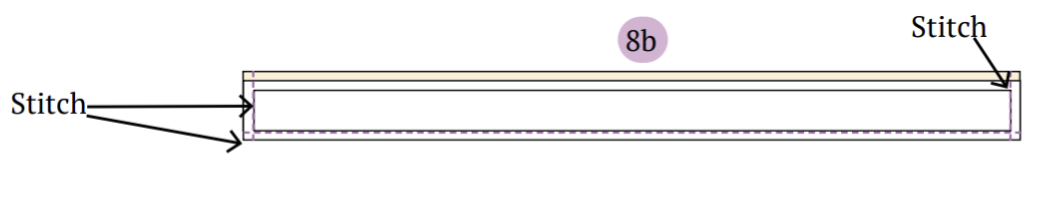
Step 8: Preparing Waistband
Cut fusible interfacing paper to the size of the waistband and iron it onto the waistband area, leaving the seam allowance untouched. Apply the interfacing to only one waistband piece.

Then, iron one side of the seam allowance inward.

Place both waistband pieces together with their right sides facing each other. Align the bottom and side edges, then stitch along the seamline of the bottom and side edges.
Step 9: Making Belt Loops
Cut a fabric piece measuring 1 inch in width and 15 inches in length (picture 9).
Fold both sides of the belt loops inside (picture 9a), then fold them again (picture 9b). Iron the fabric to create creases at every fold.
Sew along both edges to secure the folds (picture 9c).
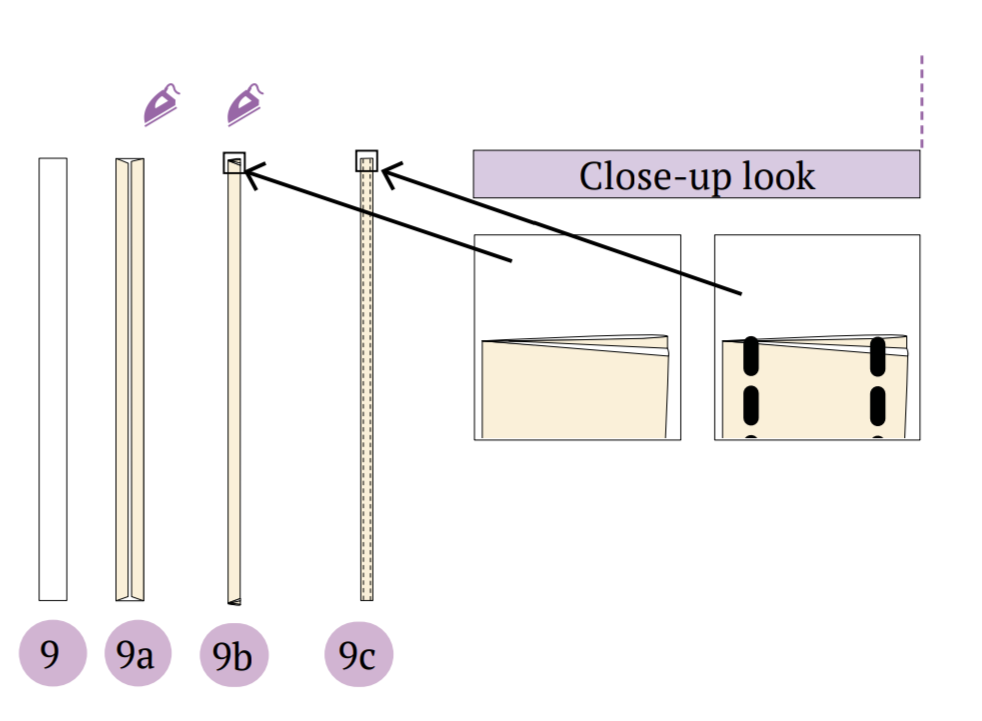
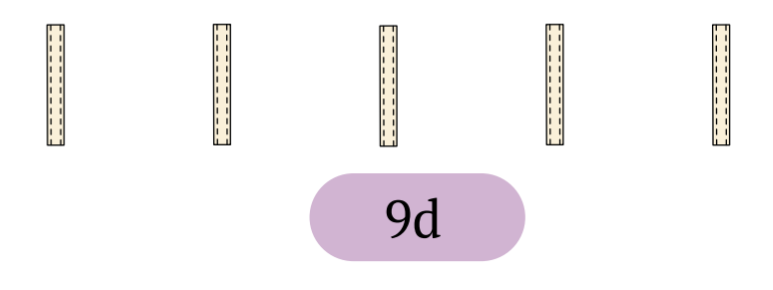
Finally, cut five belt loops, each measuring 7.5 cm in length (picture 9d).
Step 10: Making the Waistband with Belt Loops
Pin the 5 belt loops at the mid-back, both sides, and mid-front legs on the waistline. Place the waistband on the waist of the pants with the right sides together.
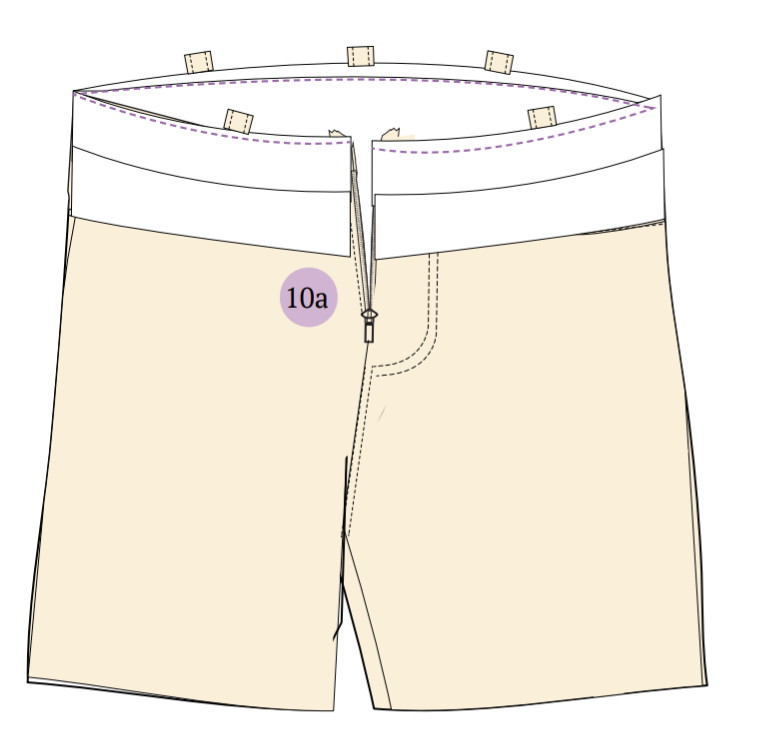
Pin them at equal intervals and sew along the seamline of the waistline.
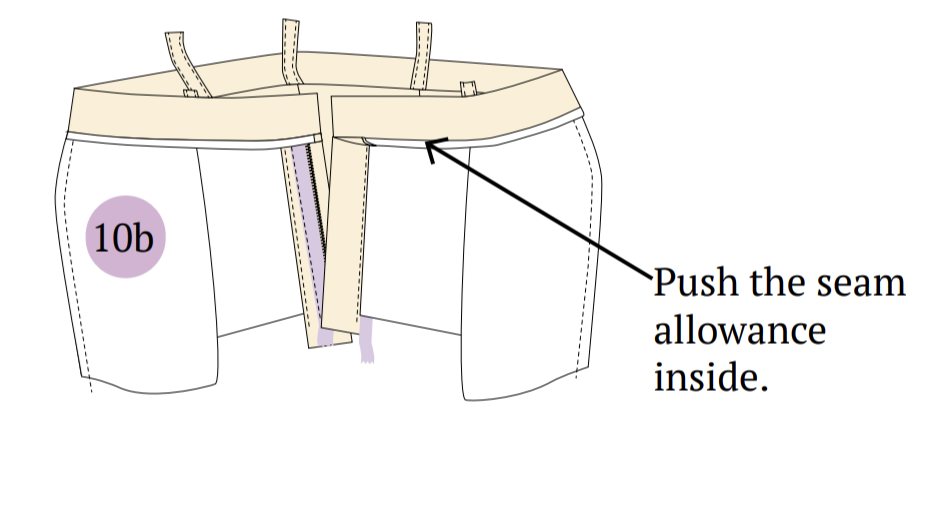
Next, close the waistband by tucking the seam allowance inside.
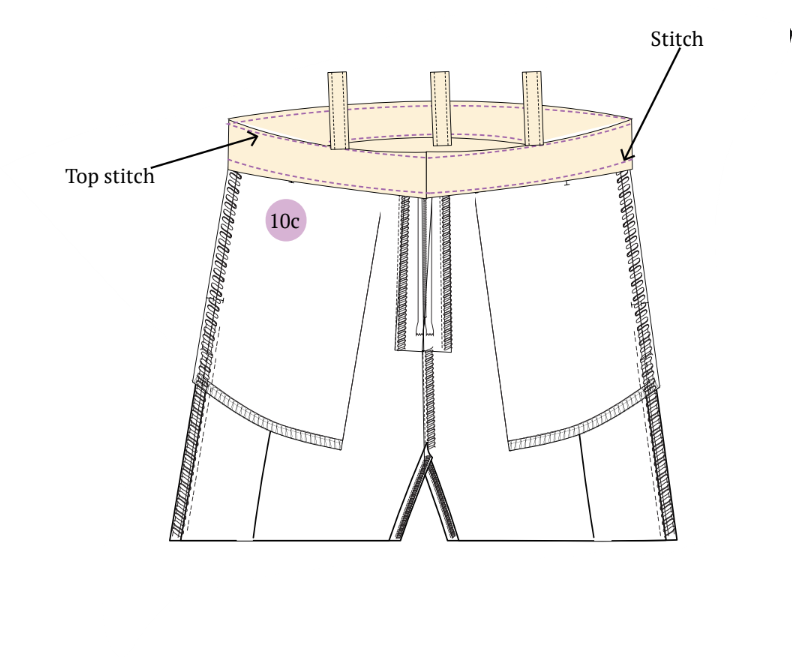
Sew along the edges to secure the waistband closed. Additionally, topstitch around the top edge of the waistband.
Fold the belt loop at 1 cm.
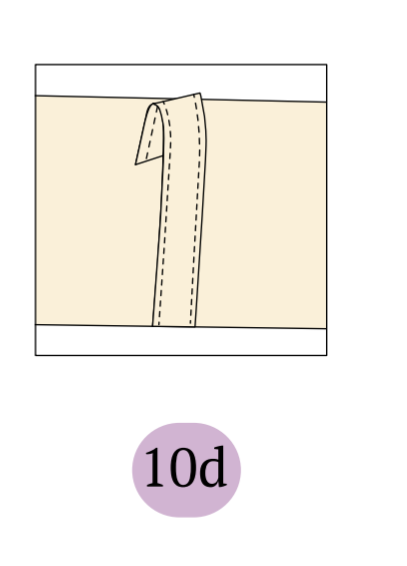
Sew it at the end to close the belt loop.
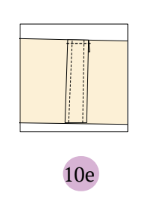
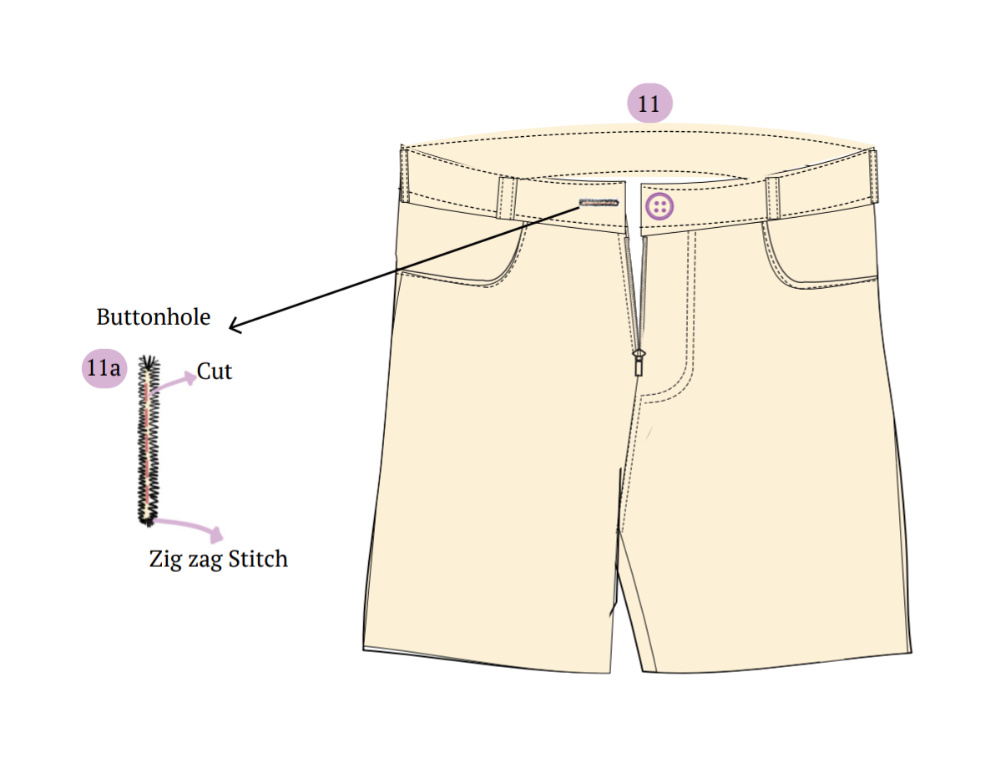
Repeat this process for the other five belt loops to achieve picture 11.
Step 11: Attaching Buttons and Creating Buttonholes
Employ the button presser to stitch buttonholes around 1.5 cm from the waistband. Proceed by sewing the buttons onto the right side of the waistband to align with the buttonholes.
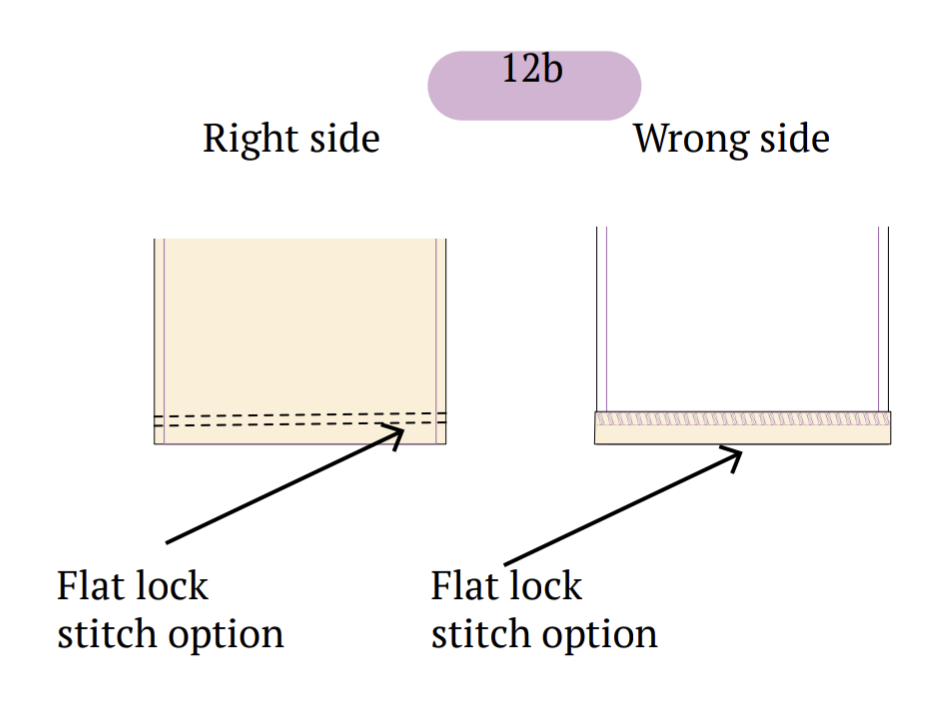
Step 12: Finishing the Hem
Fold the hem towards the wrong side.
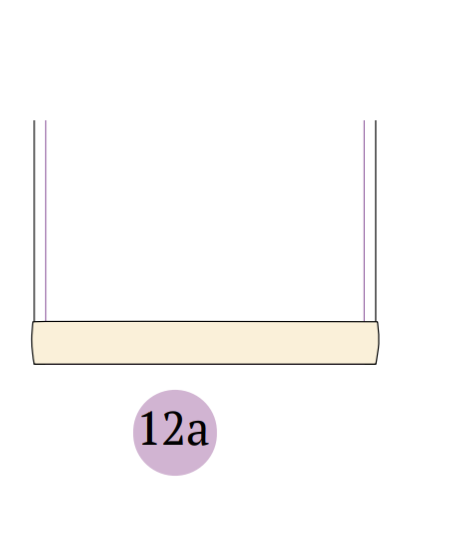
Sew the hem around.
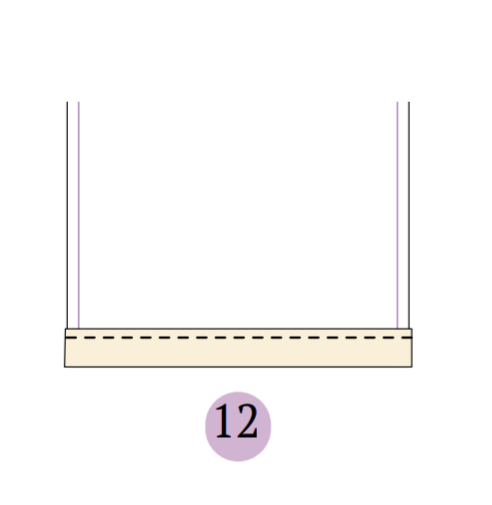
Alternatively, you can opt for a flatlock stitch.
Summary
Cargo pants are the ultimate combo of style and functionality! Originally designed for the military, now perfect for outdoor adventures or casual outings. With plenty of pockets, they’re great for stashing essentials while keeping your hands free. Plus, they’re super comfy, made from durable, breathable fabrics. And now you have your own!
Check out some final images of these adorable cargo pants created with the Winslet’s RAINA Cargo Pants Pattern:

How do you feel about cargo pants? Will you be making this cargo pant for yourself? Let me know in the comments below! And if you’re looking for more sewing projects check these out
Join the Winslet sewing community by sharing your masterpiece with the hashtag #madewithwinslets!


