How to Sew Joggers?
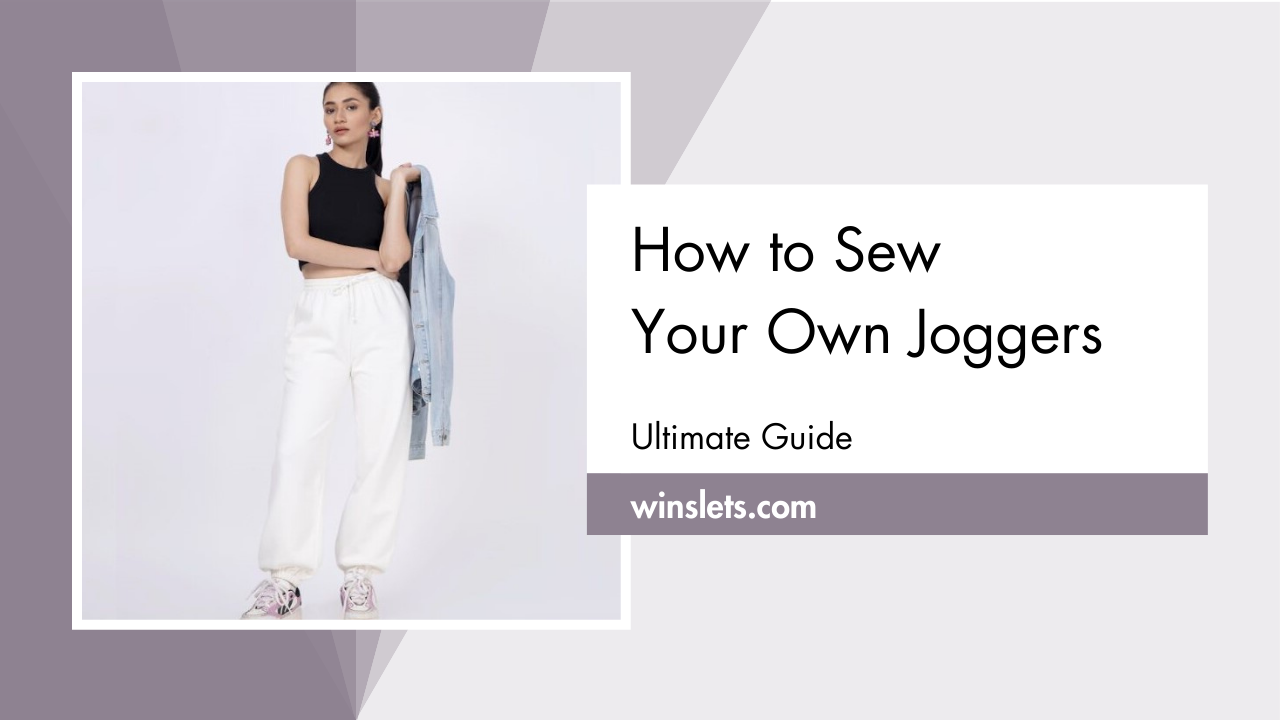
Have you wondered how to sew Joggers? I recently used the Winslet’s CHARLI Joggers Pattern and made myself a pair of joggers. It’s versatile, comfortable and classic! I really liked how these joggers turned out, and I can’t stress enough how comfy they are.
So, follow the step-by-step sewing guide to make your own joggers and enjoy both style and comfort!
What sewing supplies do you need to sew joggers?
The basic supplies you need to sew joggers are Sewing Pattern (I used Winslet’s CHARLI Joggers Pattern for my project), Sewing Machine, Tape Measure, Chalk, Shears, Pins, Iron, Needles, Thread (preferably 3-ply polyester), a Thread Cutter, Elastic Band, Drawstring, and a Buttonhole Presser Foot.
Fabric Recommendation
For sewing joggers, opt for lightweight to moderate knitted fabric like fleece, jersey, cotton, polyester, poly-cotton blends, rayon, terry, and wool as the primary fabric.

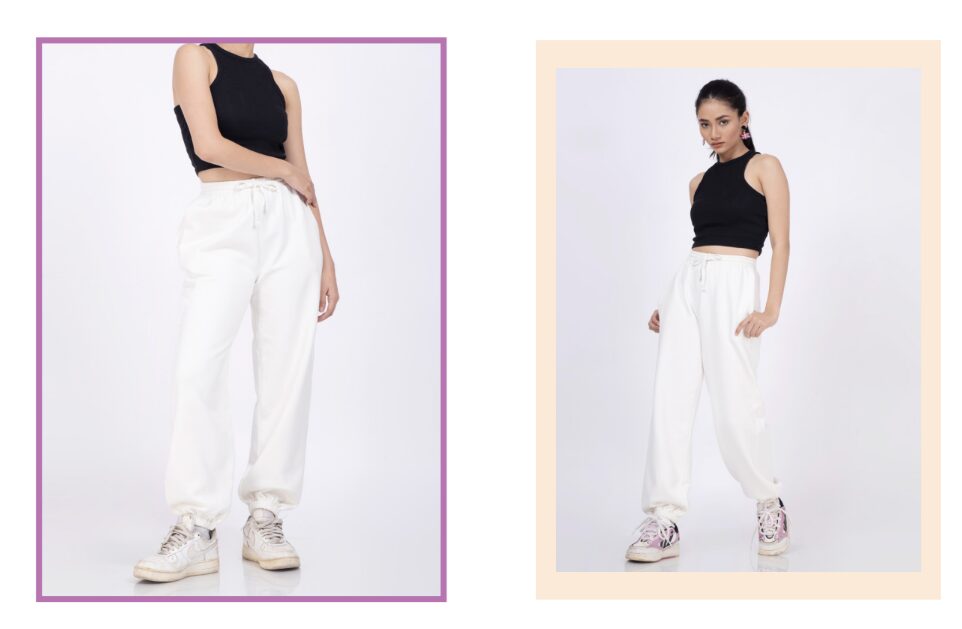
The model above features a jogger made with the Winslet’s CHARLI Joggers Pattern. The fabric used is breathable and durable fleece, that offers moisture-wicking, deep pile texture with no fraying, warmth when wet, and is lighter than wool. And the best part? Most fleece won’t shrink at all!
Size Charts
The joggers’ sewing pattern measurements for sizes (XS, S, M, L, XL, 2XL, or 3XL) are detailed below. Choose a size that corresponds most closely to your body measurements.
It’s worth noting that if your exact measurements are not listed in the table, you may want to consider ordering a size larger.
The size chart includes measurements in both inches and centimeters for your reference.
Body Measurements
| XS (inches) | XS (cm) | S (inches) | S (cm) | M (inches) | M (cm) | L (inches) | L (cm) | XL (inches) | XL (cm) | 2XL (inches) | 2XL (cm) | 3XL (inches) | 3XL (cm) | |
| Bust | 32 | 81.3 | 34 | 86.4 | 36 | 91.4 | 38 | 96.5 | 40 | 101.6 | 42 | 106.7 | 44 | 111.8 |
| Waist | 26 | 66.0 | 28 | 71.1 | 30 | 76.2 | 32 | 81.3 | 34 | 86.4 | 36 | 91.4 | 38 | 96.5 |
Final Garment Measurements
| XS (inches) | XS (cm) | S (inches) | S (cm) | M (inches) | M (cm) | L (inches) | L (cm) | XL (inches) | XL (cm) | 2XL (inches) | 2XL (cm) | 3XL (inches) | 3XL (cm) | |
| Waist Round (Stretched) | 34.5 | 87.63 | 35.5 | 90.17 | 36.5 | 92.71 | 37.5 | 95.25 | 38.5 | 97.79 | 39.5 | 100.33 | 40.5 | 102.87 |
| Hip Round | 38 | 96.52 | 40 | 101.6 | 42 | 106.68 | 44 | 111.76 | 46 | 116.84 | 48 | 121.92 | 50 | 127 |
| Full Length (Without Band) | 41 | 104.14 | 41.5 | 105.41 | 42 | 106.68 | 42.5 | 107.95 | 43 | 109.22 | 43.5 | 110.49 | 44 | 111.76 |
Fabric Yield
| Width of the Fabric | XS (yards) | XS (meters) | S (yards) | S (meters) | M (yards) | M (meters) | L (yards) | L (meters) | XL (yards) | XL (meters) | 2XL (yards) | 2XL (meters) | 3XL (yards) | 3XL (meters) |
| 45” | 1.87 | 1.71 | 2.20 | 2.01 | 2.59 | 2.37 | 2.98 | 2.72 | 3.43 | 3.13 | 3.94 | 3.60 | 4.53 | 4.14 |
| 60” | 1.16 | 1.06 | 1.36 | 1.25 | 1.60 | 1.47 | 1.85 | 1.69 | 2.12 | 1.94 | 2.44 | 2.23 | 2.81 | 2.57 |
Steps To Follow For Sewing Joggers
Let’s dive into the steps for sewing your very own unique joggers:
Pattern Marking and Inventory
The fabric needs to be cut into following pieces:
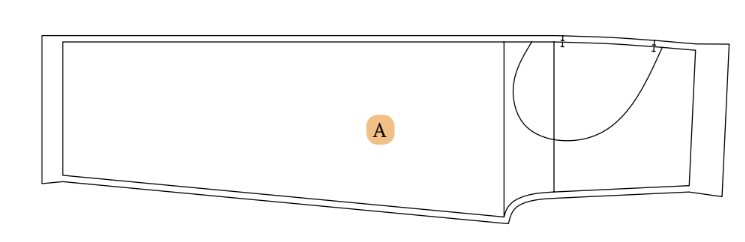
A. Front – cut x2 fabric
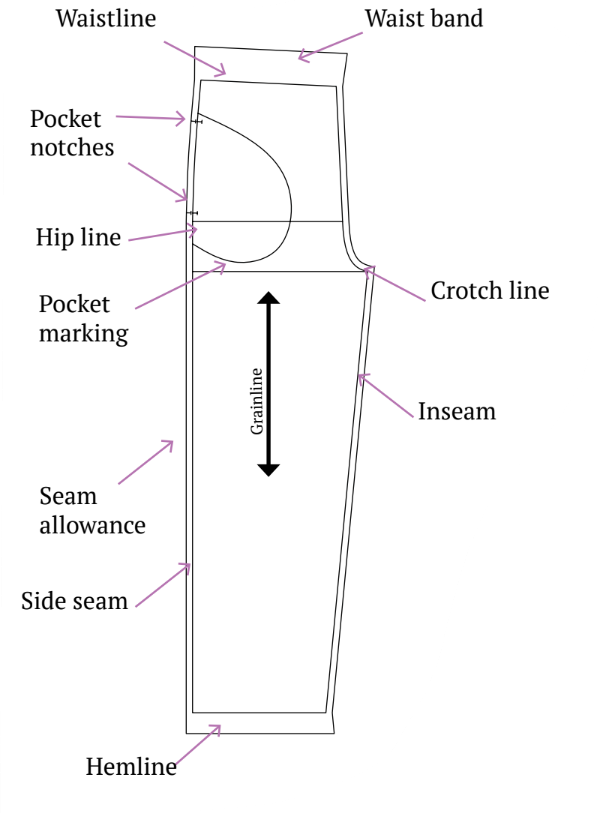
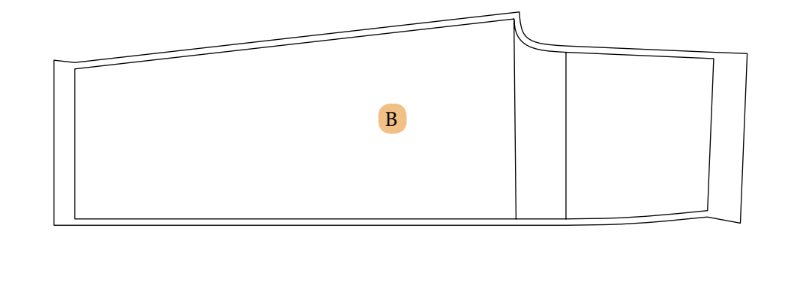
B. Back – cut x2 fabric
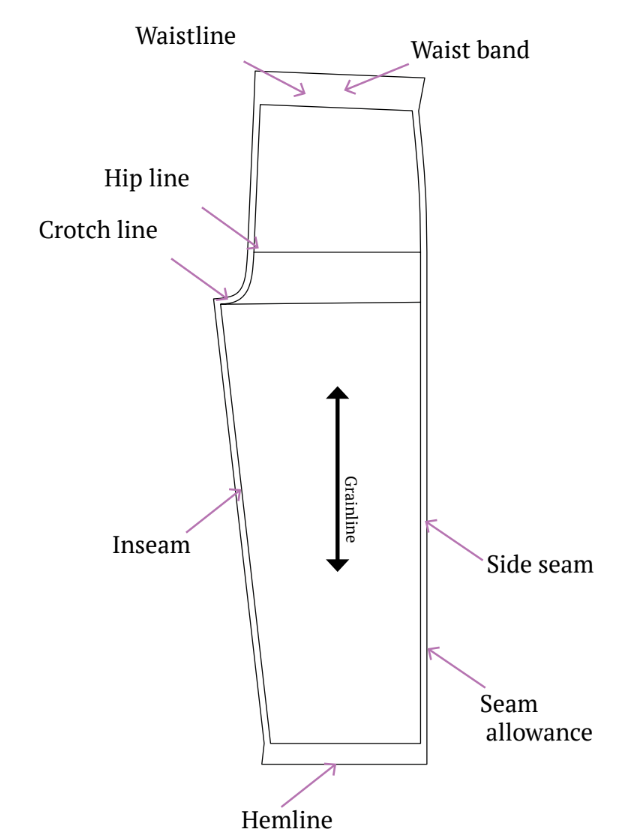
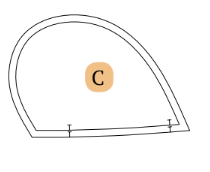
C. Pocket – cut x4 fabric
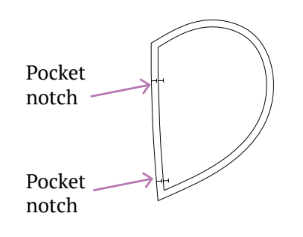
Be sure to indicate all notches and design elements like darts and pleats on your fabric using the pattern pieces. When stitching the garment, carefully align the notches to ensure a proper match.
Cutting Layout
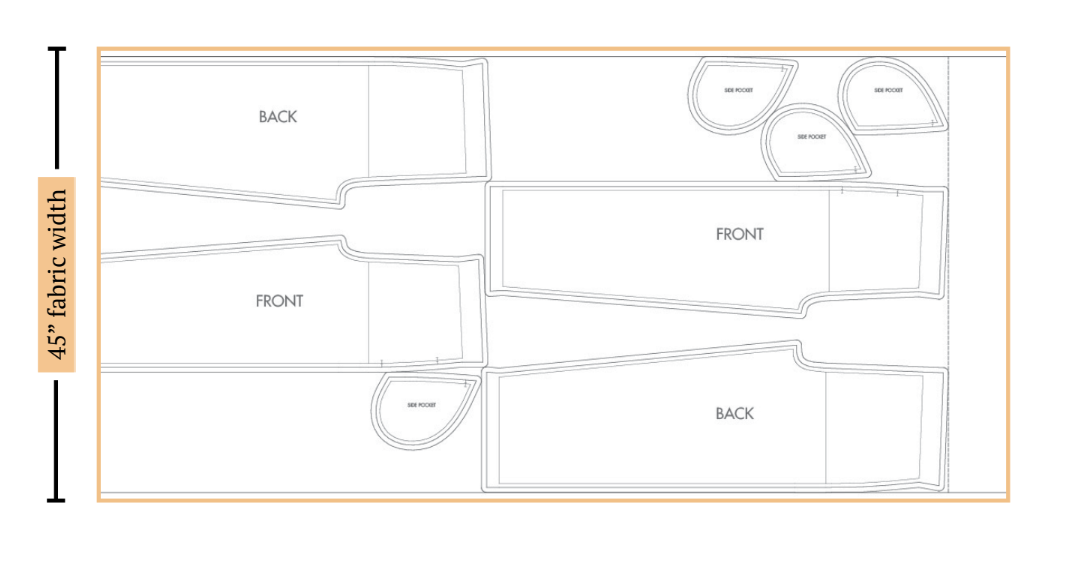
- Ensure the pattern layout is on-grain for fabric alignment.
- Use pins to secure fabric, aiding accurate cutting.
- If using fabric with nap or prints, purchase additional length.
Sewing Steps
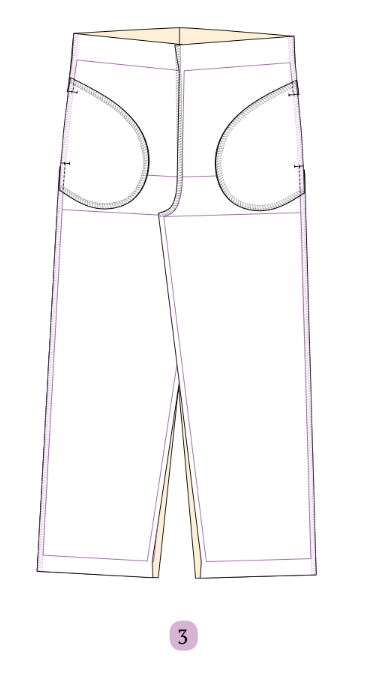
Step 1: Creating a Side Pocket Attachment
Put the front and pocket pieces together with the correct sides facing each other.
Stitch along the line between the notches.
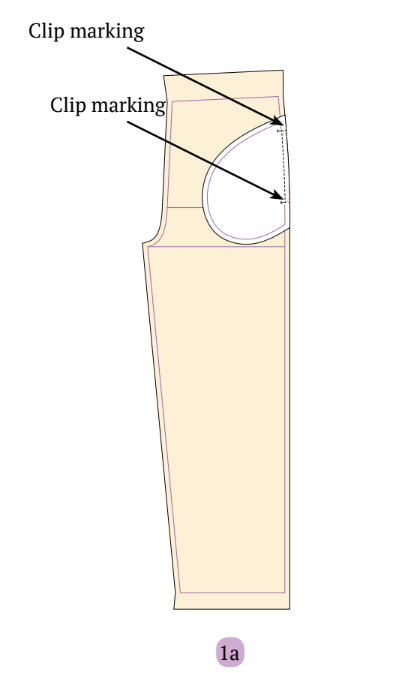
Clip both corners, turn the pieces so the wrong sides are facing, press them down, forming an open rectangular shape.
Sew along the rectangular edge.
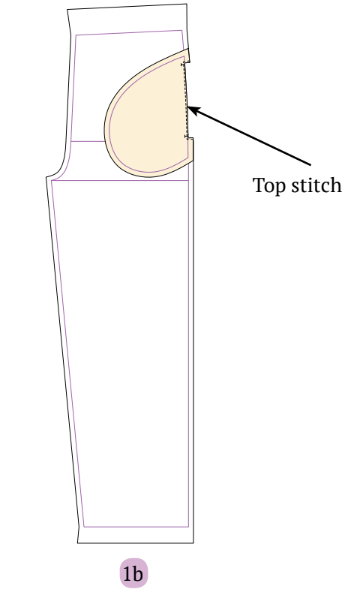
Align another pocket piece with the right sides together, matching edges and notches.
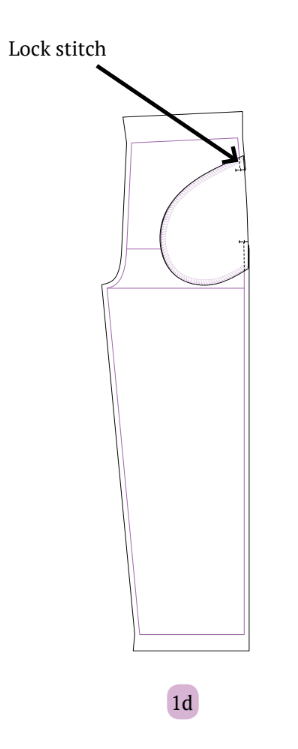
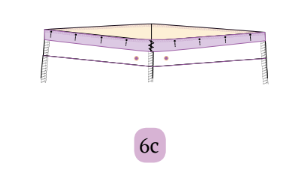
Overlock along the curved edge of the pocket pieces.
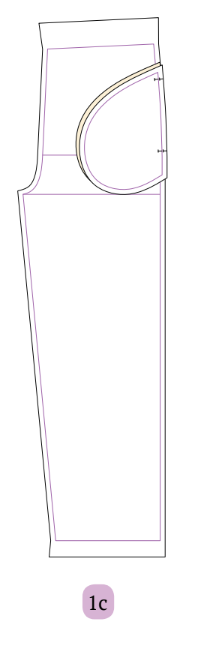
Use a lock stitch to sew the remaining seamline of the front piece and pockets, leaving the rectangular part open.
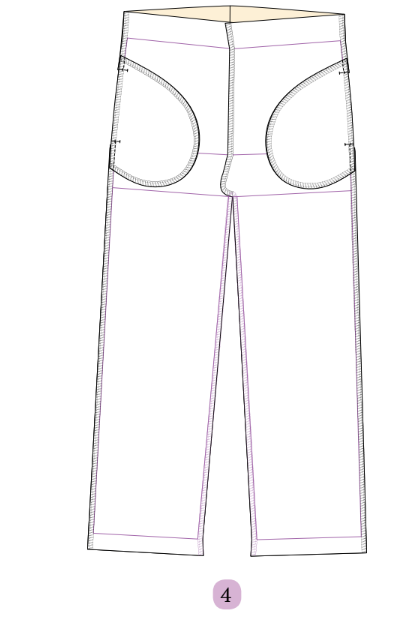
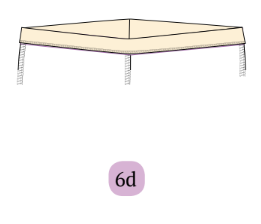
Step 2: Assembling the Back and Front Pieces
Match both back pieces with the right sides together.
Sew along the crotch line.
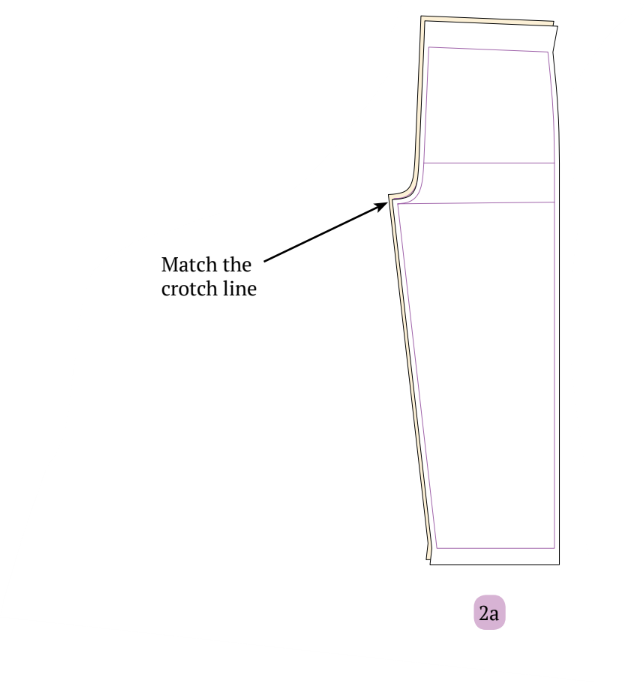
Overlock along the crotch line of both pieces together.
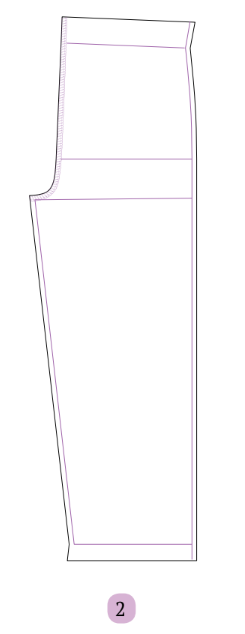
Repeat the same process for the front pieces.
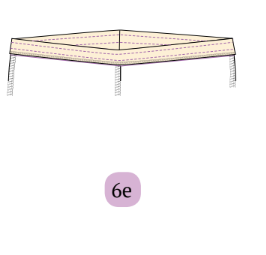
Step 3: Joining Front and Back Pant
Align the front pant and back pant with their right sides together.
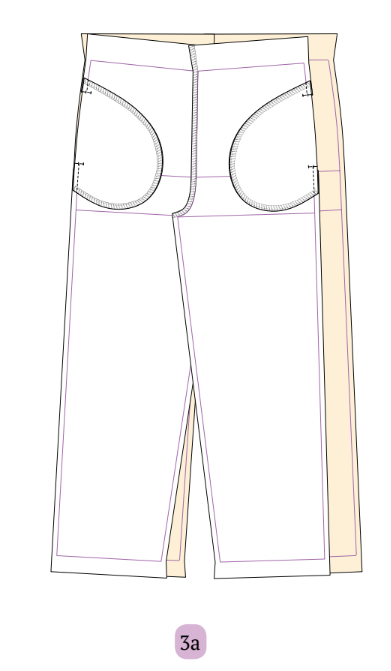
Sew both side seams together.
Step 4: Connecting Pants Inseam
Align the crotch lines of the pants with the right side facing each other, and use pins if necessary.
Sew the inseam from the hem to the crotch, connecting it to the hem of the other pant.
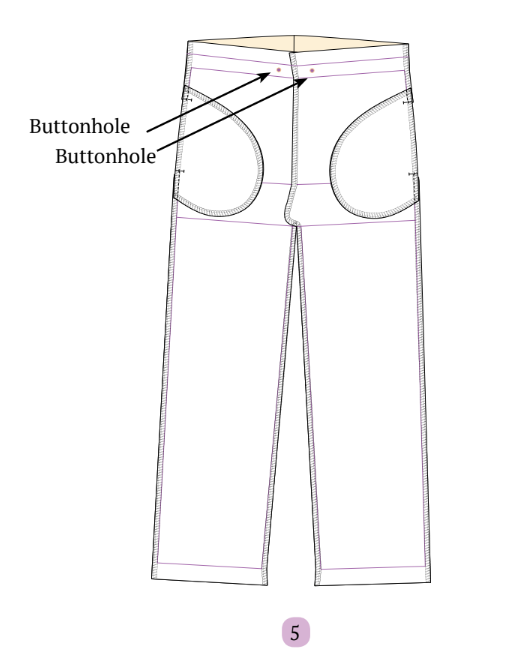
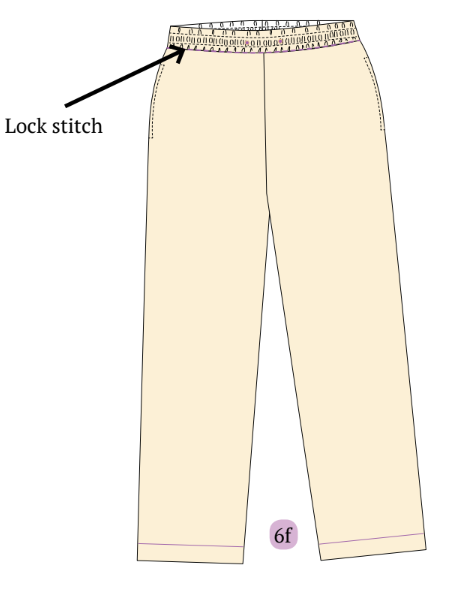
Step 5: Adding Buttonholes to the Waistband
Mark the midpoint of the waistband using chalk.
Use buttonhole stitches to create stitches on the waistline.
Make two buttonholes, each 3 cm away from the center front, positioned between the waistbands on the pants.
Step 6: Attaching and Finishing the Waistband
1. Measure and Prepare Elastic
Take an elastic band with a length 2-4 inches less than your waist measurement for desired tightness.
Example: If your waist is 28 inches, use a 26 inches long elastic for a regular fit.

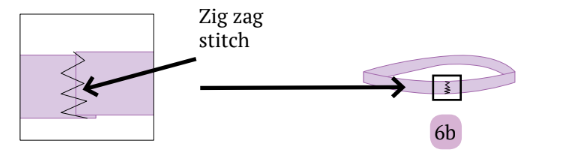
2. Attach Elastic Ends
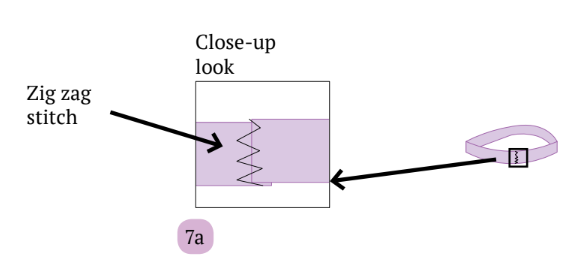
Option i: Take a 1.5-inch muslin piece, place it under the edges where the elastic joins, and use zig-zag stitches to conceal the edges.
Option ii: Add a 1 cm seam allowance to both sides of the elastic edges, place them together, and use zig-zag stitches to conceal.
Note: This might make the band thicker with thick elastic.
3. Attach Elastic to Pants
Place the elastic on the waistband edge, aligning it with the wrong side of the pants.
Pin it at four equal lengths around the waistline (side seams, center front, and back).
Sew the edges with an overlock stitch.
Note: You need to stretch the elastic to match the fabric length while sewing so the fabric doesn’t crease.
4. Fold and Sew Waistband
Fold the waistband from the middle chalk mark towards the wrong side.
Sew two lines, leaving enough space for the drawstring casing in between.
5. Finalize Waistband
Sew along the seamline of the waistline, enclosing the waistband, either from the right or wrong side.
Step 7: Attaching Ankle Cuffs
Take an elastic band matching your ankle size and reduce it by 2/3 to 3/4 inches for your preferred tightness.
Use a zig-zag stitch to close the elastic ends.
Repeat the same process for the ankle cuff of the joggers.
However, no need to sew two lines for the drawstring. Just fold it after sewing the elastic and stitch along the seamline of the ankle cuff.
Step 8: Inserting and Securing the Drawstring
Use a safety pin or any clipper to pin the drawstring.
Insert it into one of the buttonholes.
Slide the pin or clipper around the waistband to bring out the drawstring from the other buttonhole.
And that’s it! Your DIY joggers are done and ready to be worn!
Summary
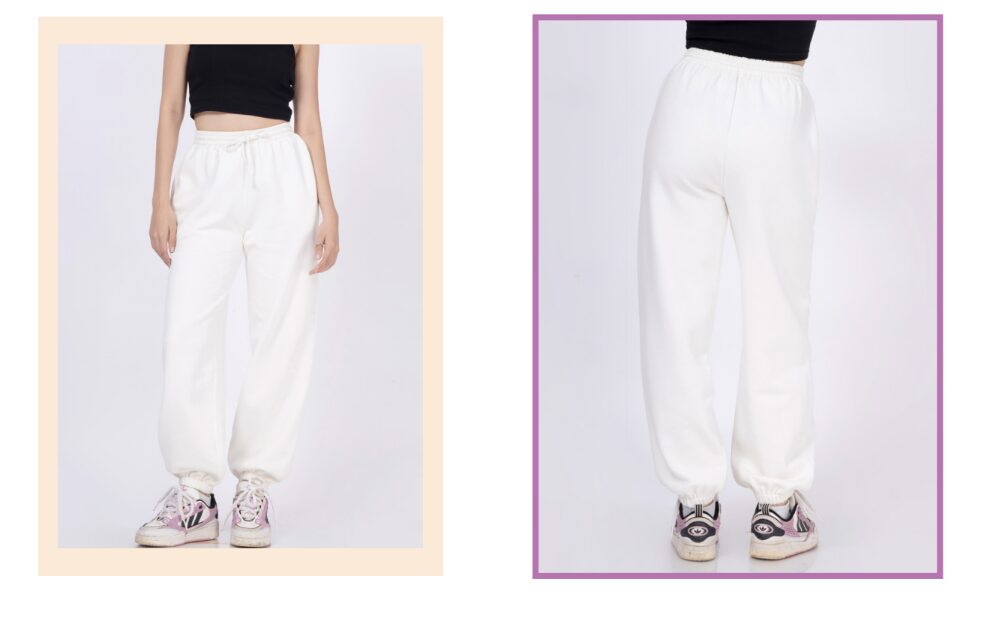
These joggers are really comfy and fit great. The fabric lets you move easily during workouts, and the stretchy waistband keeps them in place. They’re perfect for casual stuff or exercise, and they come in cool colors. Check out some final images of this adorable joggers created with the Winslet’s CHARLI Joggers Pattern:
If you enjoyed the process of making these homemade jogger pants using Winslet’s CHARLI Joggers Pattern, be sure to save it to your preferred Pinterest board or share it on social media with friends. Additionally, capture a photo of your finished product and tag us on social media—I genuinely enjoy seeing what my readers have crafted. If you’re looking for more projects, check these out and join the Winslet’s sewing community by sharing your masterpiece with the hashtag #madewithwinslets!


